FoneDog Screen Recorder
FoneDog Screen Recorder
Special Offer
Special Offer


Step 1. Download, install, and launch FoneDog iOS Data Backup & Restore, then you will find a pop-up window. You can click "Free Trial" to try the product first.
Step 2. To enjoy all functions, click "Buy Now" to get a registration code. After purchase, you will receive an email with your registration code. Then, go back and click "Register". After that, you will see several products and you need to click the "Register" button next to "iOS Data Backup & Restore" to activate the software.
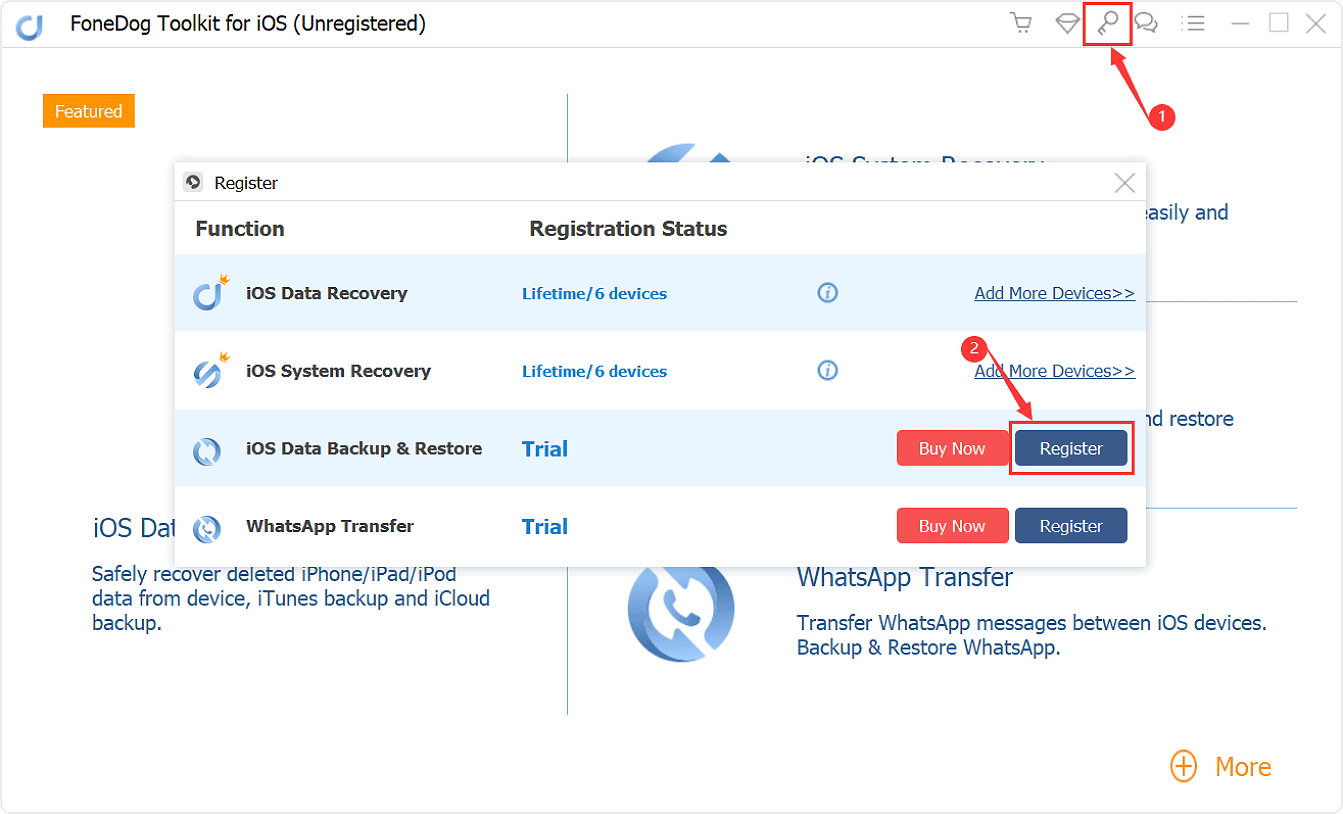
Tip: You can also tap the key icon on the top side of the interface to register.
Step 3. Fill in the "Email Address" and "Registration Code" columns, and click "OK" to finish registration.
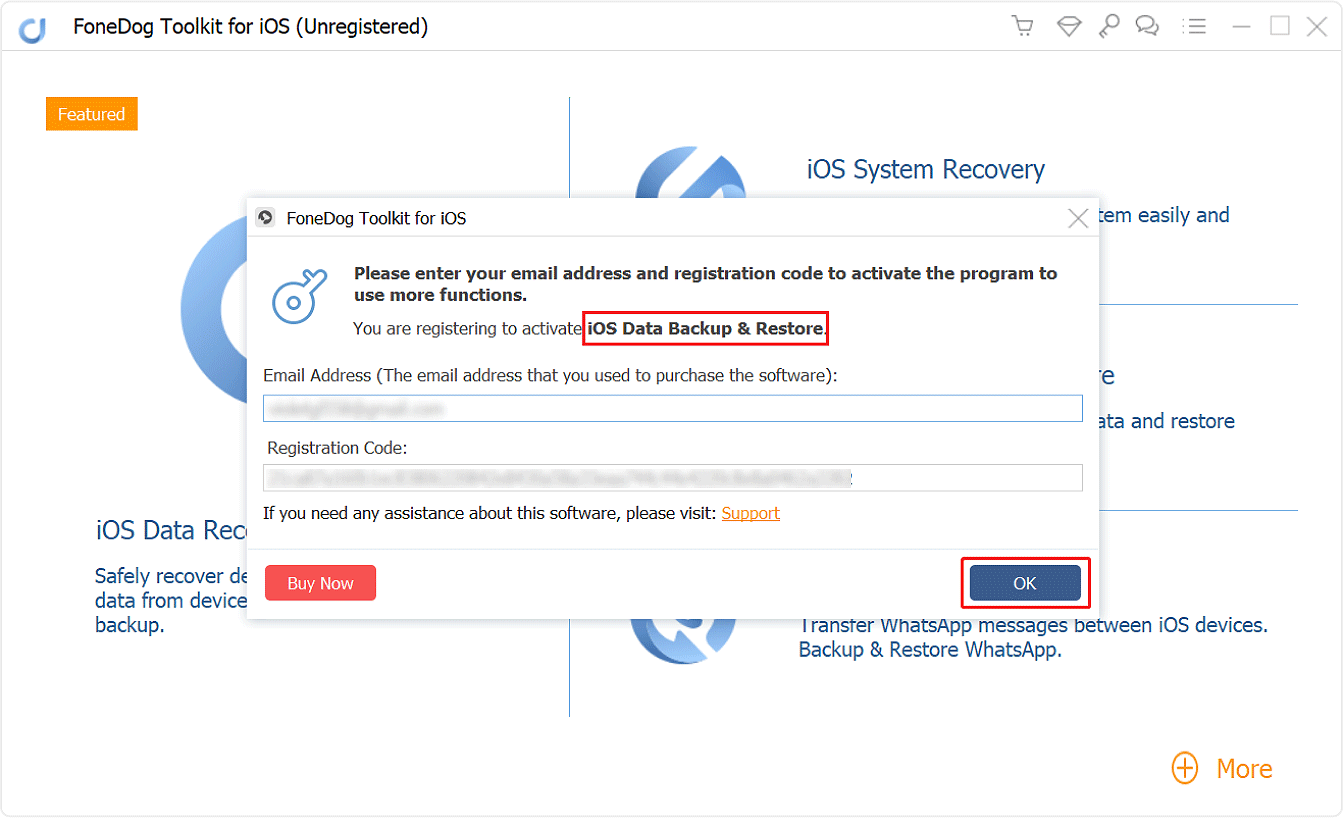
Now all functions are unlocked and you can start to back up and restore your data. If the registration is rejected, you are supposed to confirm whether you have filled in the correct email address and registration code.
Part 1. How to Backup iPhone/iPad Data.
Step 1: Launch Software and Connect iOS Device.
Install and open the FoneDog Toolkit - iOS Toolkit on your computer, and it will recognize the connected iOS devices.Choose iOS Data Backup & Restore from the main interface. Click iOS Data Backup. Then go continue the next step.
Step 2. Select Data Backup Mode.
In this step, you can select the backup mode you want. There is tow mode for you. One is "Standard backup", and another is "Encrypted backup". For the Encrypted backup, you can backup files with one password to protect your private information. After select backup mode, click the "Start" button to continue.

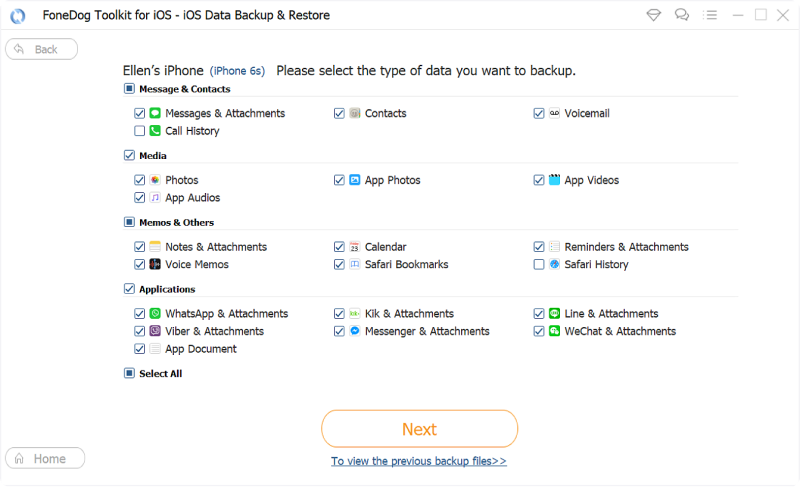
Step 3: Select Type of Data you want to Backup.
After you click the "Start" button, the software will show you the file type that you can back up. Such as Photos, Messages, Videos, Contacts, Call History, WhatsApp and so on. You can selectively choose the type of data you want to backup.
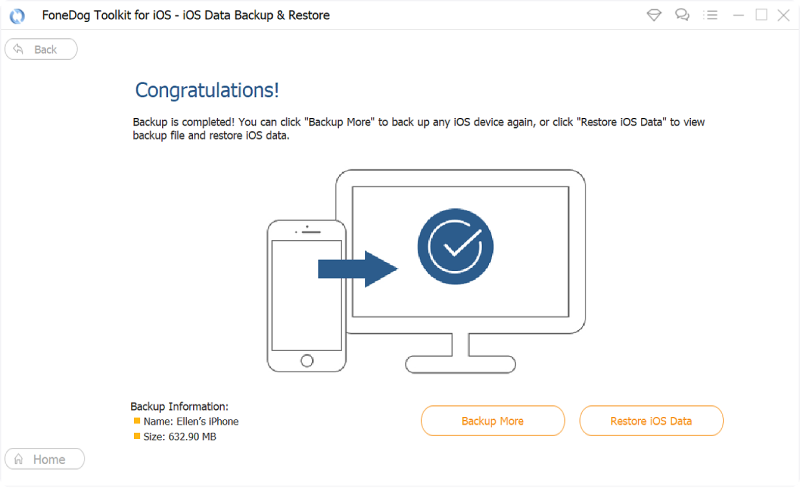
Step 4: Wait For FoneDog Toolkit to Finish Backup your Data.
FoneDog Toolkit - iOS Data Backup & Restore will start back up your iOS data. When the backup is done, FoneDog Toolkit will display the name and the size of the backup file.
You can click "Backup More" to backup more items or click "Restore iOS Data" to transfer the data to PC or another iPhone/iPad.
Part 2. How to Selectively Restore Data from Backups.
Step 1. Move to iOS Data Restore.
Make sure your iPhone or iPad has connected to your PC. Then select iOS Data Restore from iOS Data Backup & Restore.

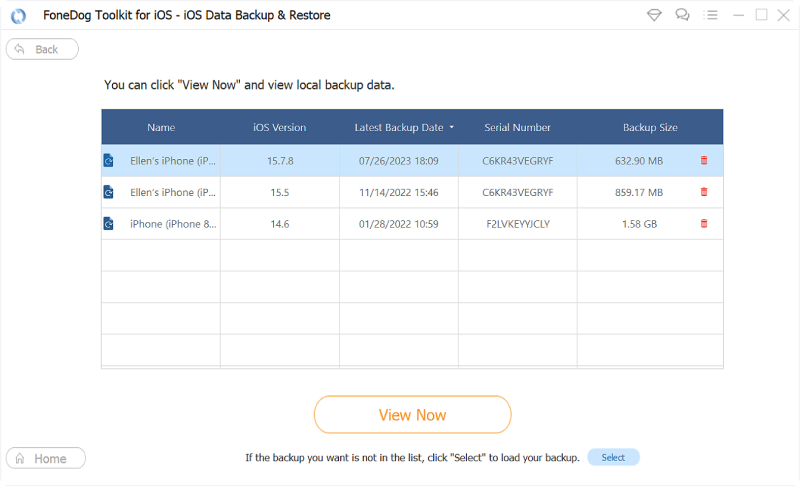
Step 2. Select Your Backup File.
After you click iOS Data Restore, FoneDog toolkit will show you all your backups. You can see the backup date and your file size. Choose the one you want to backup from, then click the "View Now" button.
Step 3. Scanning Backup Files.
FoneDog toolkit will begin scanning your backup files. You can see the progress on the windows and you can click "Pause" to pause or "Stop" to finish the process.

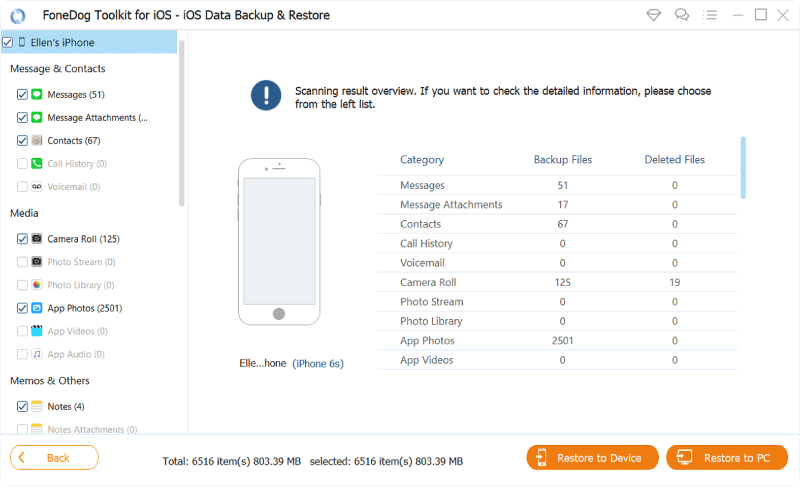
Step 4. Restore Your Files to iDevice or PC.
When the scanning is done, you can preview the backup data. You are able to preview each item from the left of the windows.Then selectively select which data you want to restore. Restore to Device or Restore to PC are both supported.