FoneDog Screen Recorder
FoneDog Screen Recorder
Special Offer
Special Offer


Step 1. Download, install, and launch FoneDog Data Recovery on your computer, then you will find a pop-up window on the home page. You can try the software first by clicking "Order Later".
Step 2. To enjoy all features without limitation, click "Purchase" to get a registration code. After purchase, you will receive an email with your registration code.
Step 3. Go back to the software. Fill in the "Email Address" and the "Registration Code" columns. You can copy and paste the code in the column to avoid unnecessary mistakes. Then, click "Register" to complete the registration.
Tip: You can also click the key icon in the upper right corner of the interface to register.
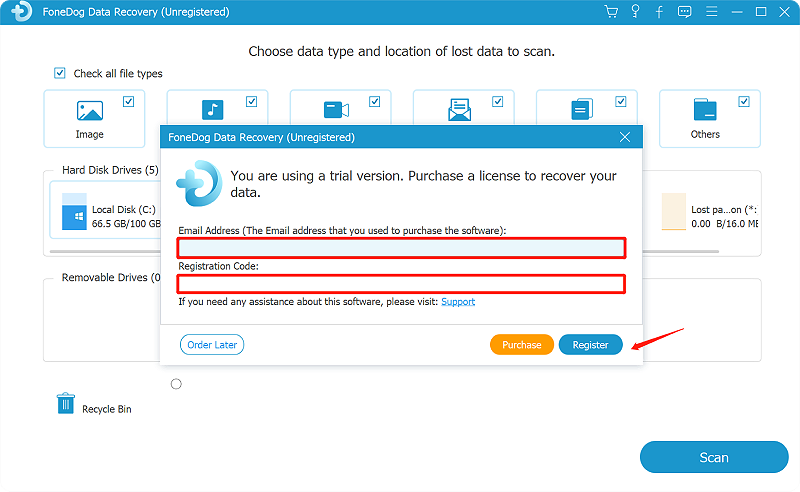
Now all functions are unlocked and you can start recovering your data. If the registration is rejected, you need to confirm whether you have filled in the correct email address and registration code.
How to Recover Deleted/Lost Data
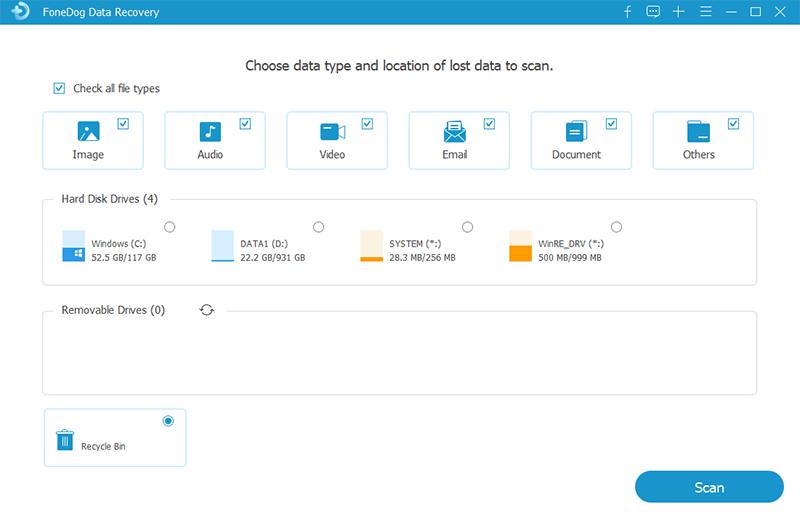
Step 1: Select Data Type & Storage Device
Run FoneDog Data Recovery on your PC after the downloading and installation. On the main page of the software, you will have an alternative to select the device where you want to retrieve your specific deleted data back from. For example, if you want to recover the lost images from Recycle Bin, you are supposed to tick the options on this page, “Image” and “Recycle Bin”. Note: You’d better keep a stable connection between your computer and the removable drives while recovering the deleted data from a removable drive.
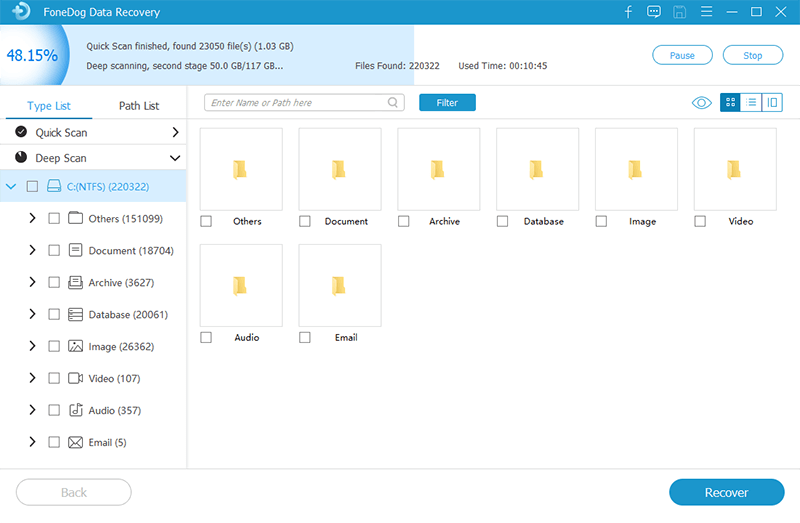
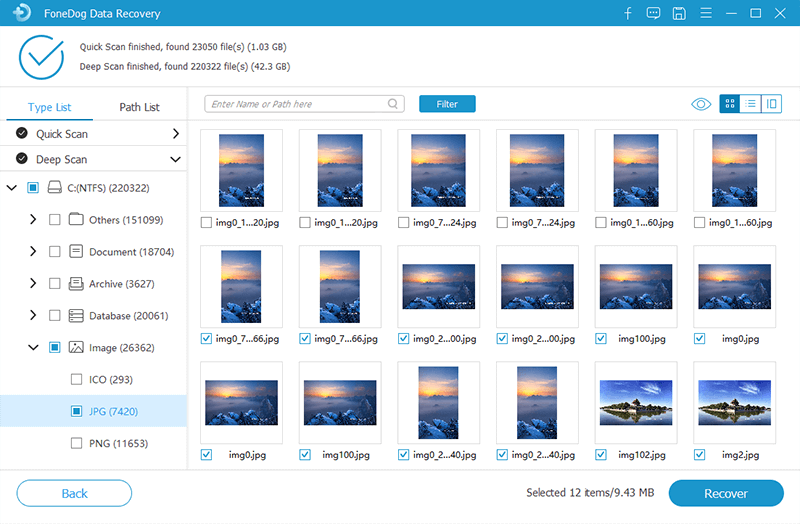
Step 2: Wait for The Data Scanning
Then FoneDog Data Recovery will scan and show your the data result based on the options you tick in the first step. Two scanning modes are provided: Quick Scan and Deep Scan. In addition, the data will be more clear to you as they are classified into Type List and Path List.

Incidentally, Quick Scan will quickly find and show you data while Deep Scan spends a longer time in scanning the data but it will show more contents. Thus, please be patient if you choose Deep Scan for more data scanning.
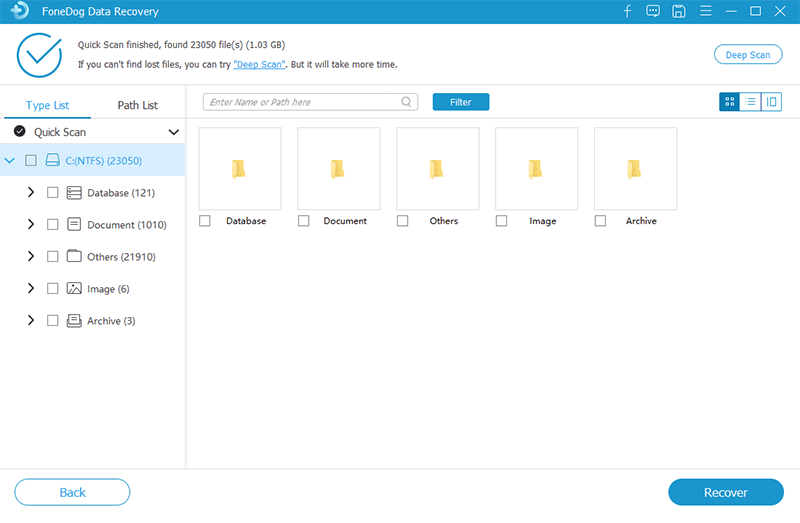
Setp 3: Preview and Choose Data to Recover
When the data scanning is done, select the data you want to recover. The data will be listed in types or paths under Quick Sacn or Deep Scan. Or you could locate the particular file by using the search bar. Click Filter to strat the locating.
You are no need to worried about computer brands because FoneDog Data Recovery supports most of the computer brands, such as Acer, ASUS, Lenovo, LG, Toshiba, and so on. You may also have a free trial to confirm whether FoneDog Data Recovery is a helpful tool you are looking for.
