FoneDog Screen Recorder
FoneDog Screen Recorder
Special Offer
Special Offer


An Overview of PowerMyMac - Cleaner
Unlike the majority of applications in market for Mac users, the first characteristic of PowerMyMac is that it is not designed to be unique and specialized in solving users' one or two particular problems. PowerMyMac is a powerful and comprehensive software for Mac users as it contains and provides you the Mac users with all the functions you may need in its sole application.
There are three main modules in PowerMyMac: Status, Cleaner and Toolkit.
Status
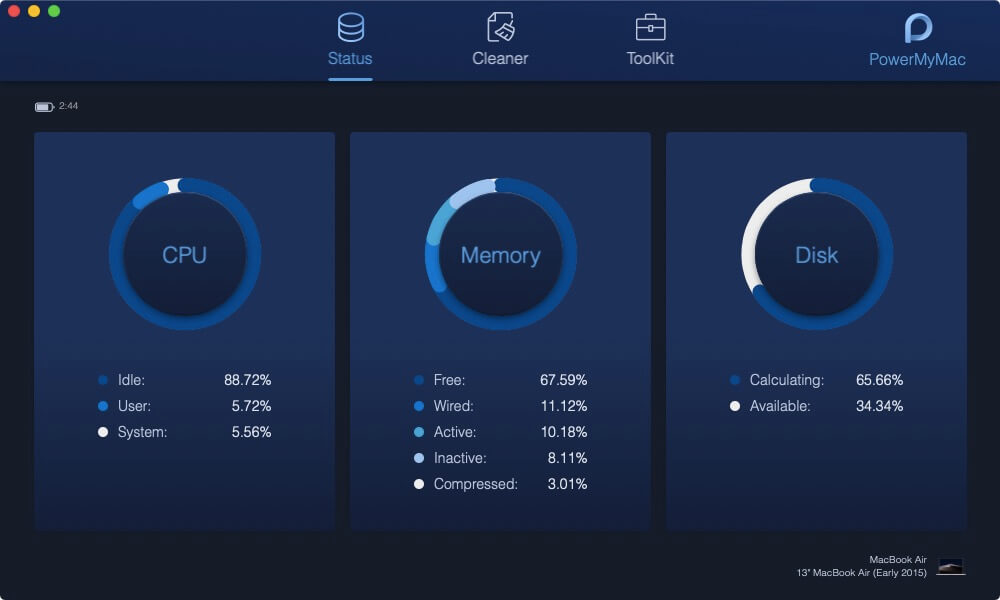
When you launch PowerMyMac on your Mac, the first module you can see is Status. As the name suggests, Status is used to detect the status while the Mac is running. In the module Status, it has three parts: CPU, Memory and Disk. It will automatically refresh and show you the running status every time you enter this page. Each circle stands for the occupation in the corresponding part so that you can clearly observe that which part takes up the majority of your CPU, Memory and Disk along with the statistics listed below.
Cleaner
Then, continue and click the icon Cleaner on the top.
Welcome to the Cleaner kingdom!
Here, you can selectively choose the junks or unnecessary files or folders to clean. As for the second characteristic of PowerMyMac, Cleaner not only provides you the cleaning function for your Mac, but give you more alternatives to decide remove which kinds of files and folders on your Mac as well. In this way, you are less worried about mistakenly deleting other files in need. Besides, compared with other tools for Mac cleaning which will usually scan all the files and folders before you tick items to clean, you can greatly save your time if you choose PowerMyMac to help your Mac clean. That is because PowerMyMac gives you the choice and needs you to select one particular field to clean on your Mac first; then, it will start to scan. Therefore, you could get rid of the unnecessary and time-consuming waiting for the scanning process.
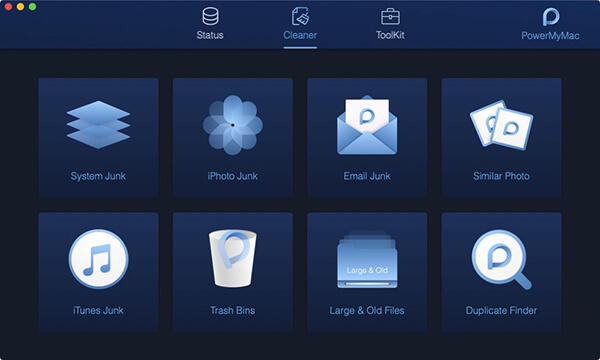
Eight cleaning options are listed: System Junk, iPhoto Junk, Email Junk, Similar Photo, iTunes Junk, Trash Bins, Large & Old Files and Duplicate Finder.
Select one of them to begin your cleaning on your Mac now!
ToolKit
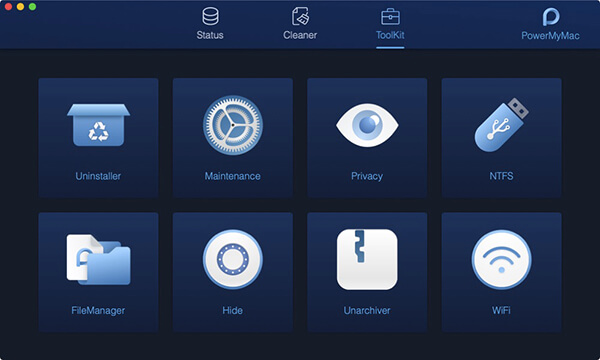
ToolKit is the third characteristic of PowerMyMac. You may find more useful help in this module.
ToolKit also provides you with eight options: Uninstaller, Maintenance, Privacy, NTFS, Filemanager, Hide, Unarchiver and WiFi. However, the eight tools are not serving for the same issue in different fields. Toolkit is the tool box for you. You can easily and simply manage your Mac. For instance, you can quickly uninstall the software on your Mac with simple clicks with the tool Uninstaller. Also, you have access to editing, copying or deleting the files from HDD on your Mac with the tool NTFS. ToolKit provides the functions not built in Mac like Maintenance, and general functions like Uninstaller for you. No matter the extra or general functions in ToolKit, they are dedicated to giving you a better use experience on your Mac.
After finishing reading the brief introduction to PowerMyMac, if you are interested in the functions above, please go to FoneDog' s official website and learn more. There would be a detailed user guide on each function.
An Overview of PowerMyMac - Cleaner
PowerMyMac - Cleaner not only provides you the cleaning function for your Mac, but give you eight options: System Junk, iPhoto Junk, Email Junk, Similar Photo, iTunes Junk, Trash Bins, Large & Old Files and Duplicate Finder, to decide remove which kinds of files and folders on your Mac as well. In this way, it makes you less worried about mistakenly deleting other files in need as well as greatly saves your scanning time before cleaning.
There is an overview of PowerMyMac - Cleaner. Please download and install PowerMyMac first and read the introductions below to know how to clean unnecessary files and folders on your Mac.
System Junk
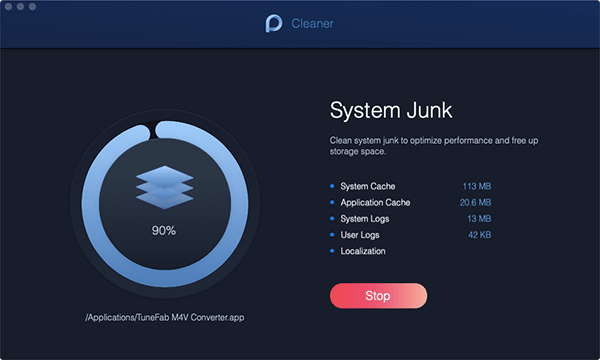
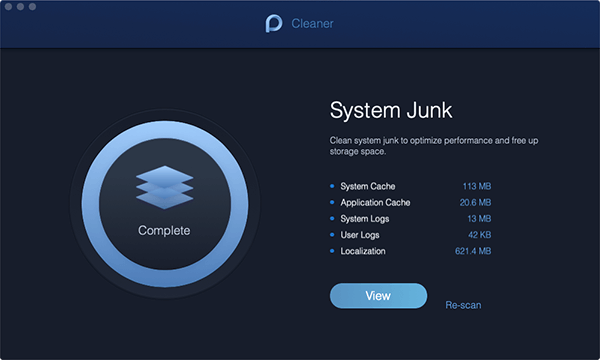
System Junk is designed to clean up your system junks like System Cache, Application Cache, System Logs, User Logs and Localization, so as to optimize performance and free up storage space on your Mac.
Step 1. Check Mac' s Status
Launch the program and check the system status on the main interface.
Step 2. Choose System Junk
Click the Cleaner button, then you will see System Junk .
Step 3. Scan System Junks
Click System Junk and start to scan System Cache, Application Cache and other system junks on your Mac. In the left circle, you can see the scanning course.
Step 4. View Results
View the items. If necessary, you also can go back to the previous page to Re-scan .
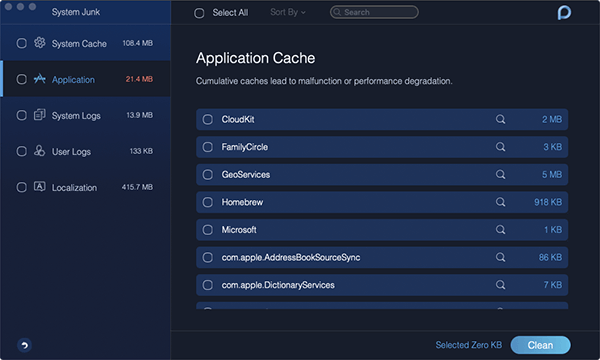
Step 5. Select Files
Select desired system files you want and delete them.
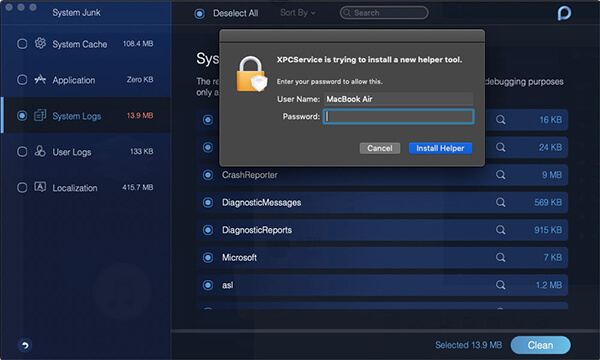
Step 6. Clean System Junks
Click the Clean button to delete system junk files on Mac. All unnecessary files will be deleted.
Note : If necessary, you may need to enter your password.
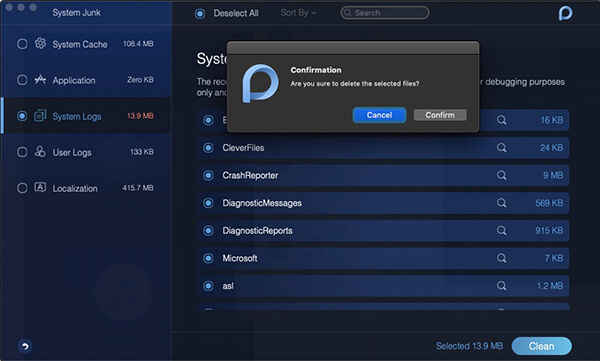
Step 7. Make A Confirm
Please press the Confirm button after you click Clean. Then, be patient and wait for the cleaning process.
iPhoto Junk
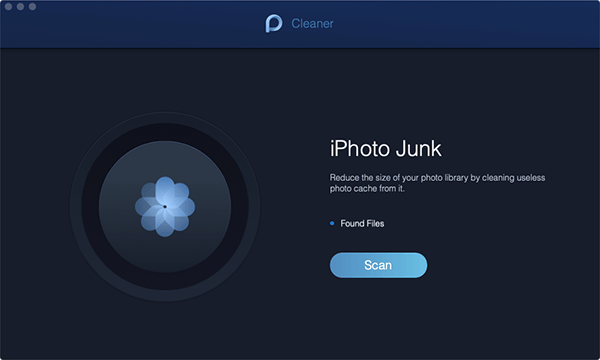
iPhoto Junk tends to reduce the size of your photo library on Mac by cleaning useless photo Cache.
Step 1. Click iPhoto Junk
Click iPhoto Junk in Cleaner .
Step 2. Scan Photos on Mac
Scan photos on your Mac first by pressing the Scan button on the home page of iPhoto Junk.
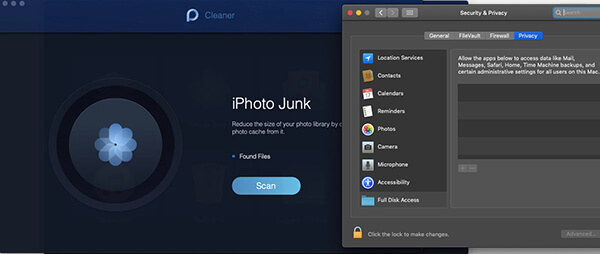
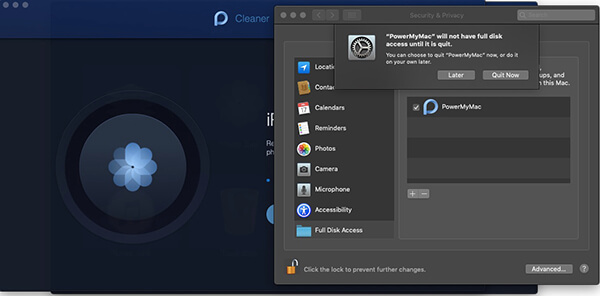
Note : If you are the first time in scanning photos on Mac, you are required to allow PowerMyMac to access data on your Mac.
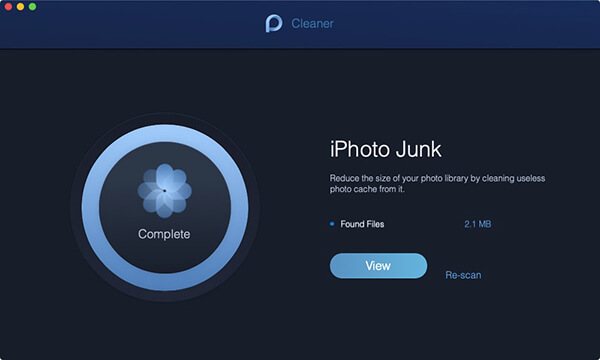
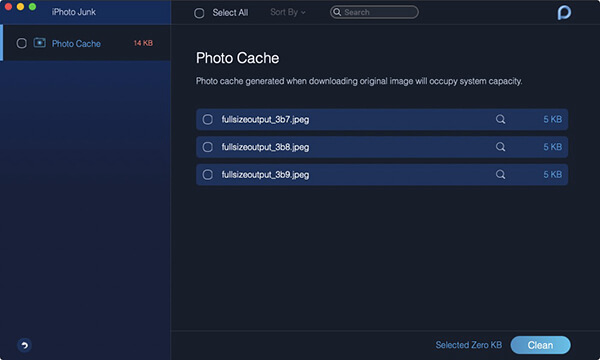
Step 3. View Photos
After the scanning, press the View button to review the scanning results.
Step 4. Choose Photo to Clean
Preview the photos and choose the photos you want to remove.
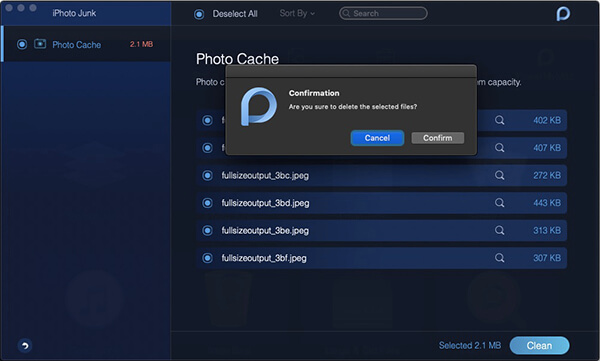
Step 5. Clean Photos
Press the Clean button to clean the selected photos.
Step 6. Confirm to Clean
Tap the Confirm button on the pop-up window and wait for the cleaning process later.
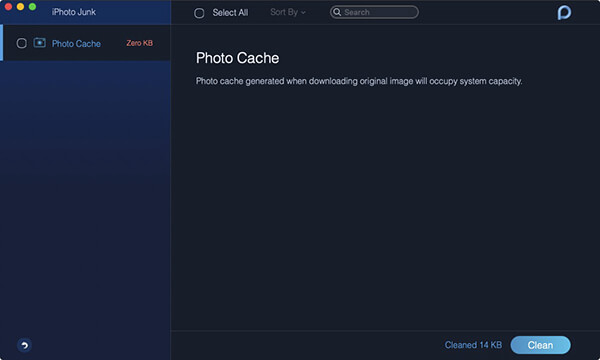
After the cleaning, the View page will not show the items you chose to remove just now.
Email Junk
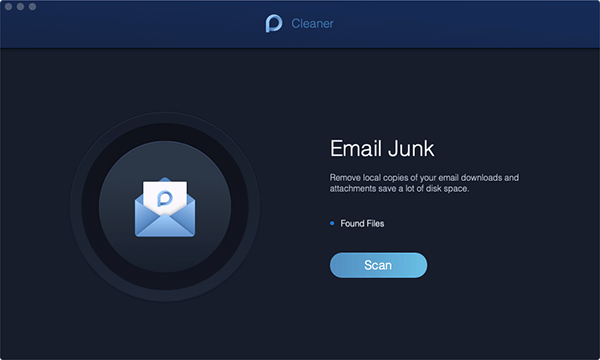
Email Junk is used to remove local copies of your email downloads and attachments saved in disk space.
Step 1. Select Email Junk
After checking status of your Mac, select Email Junk in Cleaner .
Step 2. Scan Email Junk
Press the Scan button, PowerMyMac will scan all the email junks on your Mac.
Step 3. View Results
When the circle is full drew in blue, the scanning completes. View the scanning results of email junks through the View button.

Step 4. Choose Email Files to Clean
Two categories in email will be shown on the left column: Email Cache and Email attachment.
Choose one of them and their files will be listed on the right.
Step 5. Clean Files
Press the Clean button at the right button after you choose files to remove.
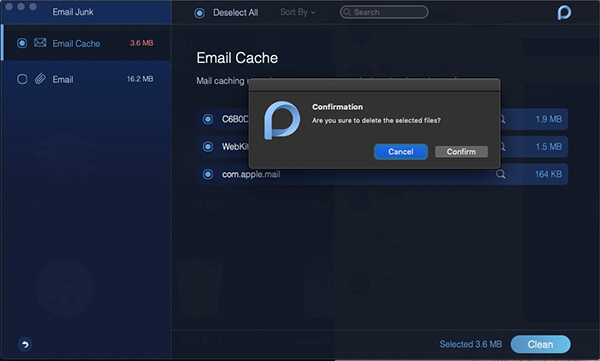
Step 6. Confirm
Tap the Confirm button if you are sure to delete the selected files.
Similar Photo
Similar Photo is a good photo manager to help you find and clean similar photos on your Mac. It is kind of having the function in Duplicate Finder. However, unlike Duplicate Finder which can detect duplicate documents, media and other kinds of files, Similar Photo are specialized in discovering similar photos.
Step 1. Choose Similar Photo
Click the Cleaner module and choose Similar Photo .
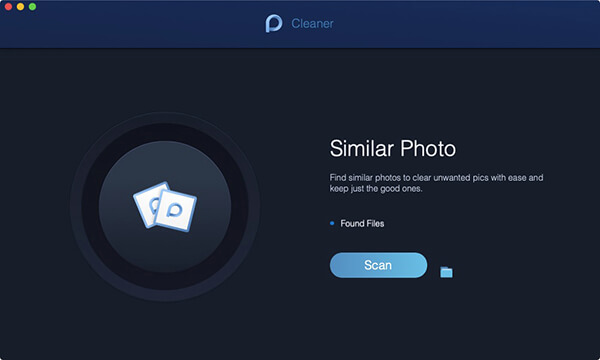
Step 2. Scan Photos on Mac
Press the Scan button on the screen. It begins to recognize and detect similar photos on your Mac.
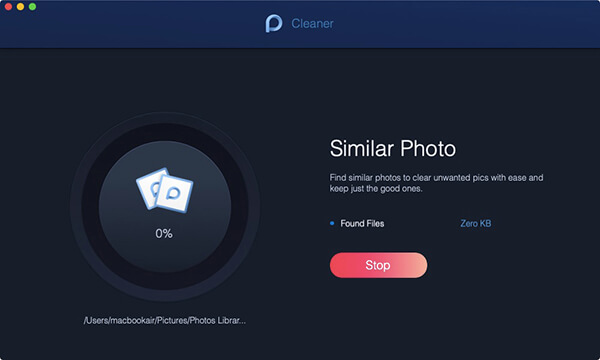
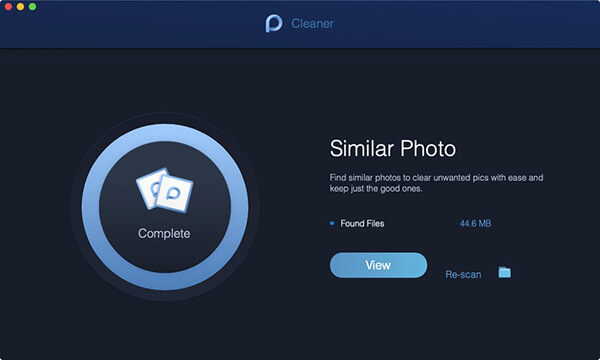
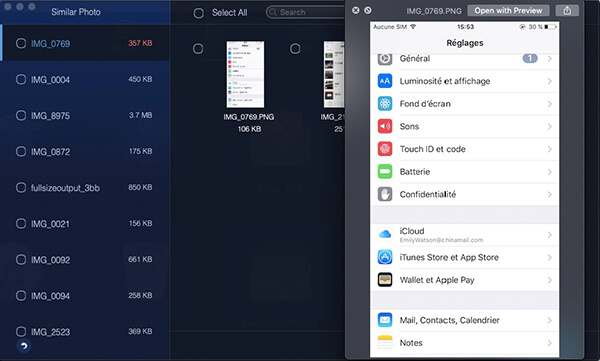
Step 3. View Scanning Results
After the scanning, you can view the similar photos on the left side. On the right, click photos and preview.
Step 4. Choose Similar Photos to Clean
Tick the similar photos to clean.
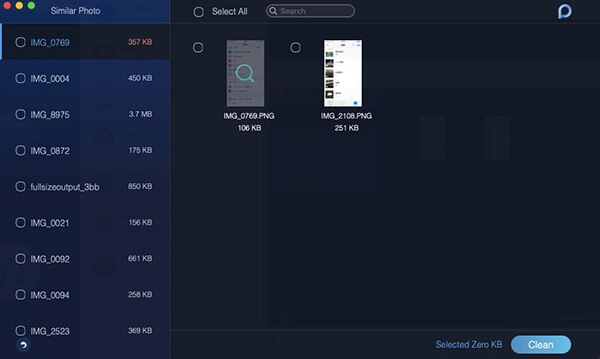
You can decide to reserve which one after previewing them.
Step 5. Clean Similar Photos
Tap the Clean button on the right-bottom corner to clean your similar photos.
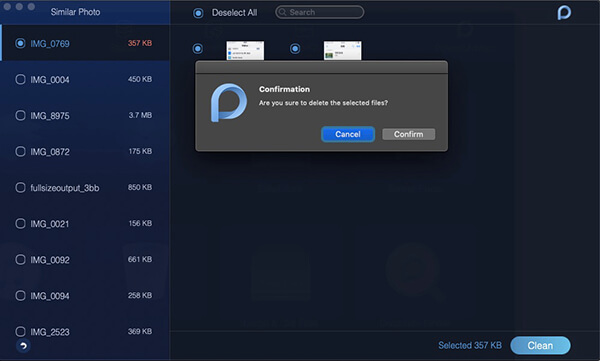
Step 6. Confirm to Clean
Confirm and be sure to clean those selected similar photos. The cleaning time will depend on the size of your similar photos.
iTunes Junk
iTunes Junk helps you clean up backups, installation packages out of data on iOS devices and remove corrupt downloads from iTunes.
Step 1. Launch Mac Cleaner
After downloading Mac Cleaner and launching it on your Mac, you can see three main modules on the home page: Status , Cleaner and ToolKit .
Step 2. Select Cleaner
Cleaner provides you with the cleaning function for the system, photo, email, apps and other files and folders on your Mac.
Step 3. Choose iTunes Junk
Choose iTunes Junk and learn about how to clean iTunes junks on your Mac to make your Mac run faster.
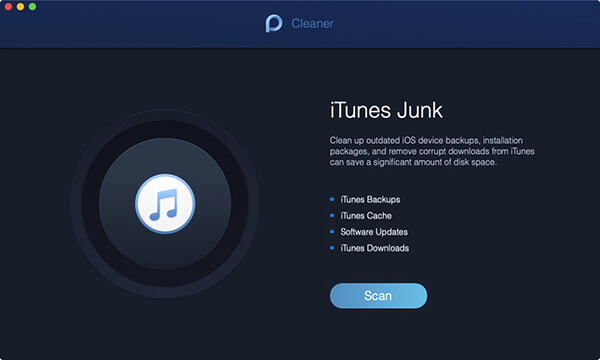
Step 4. Scan iTunes Junk
After clicking into the page of iTunes Junk, press the Scan button and start to scan all the iTunes backups, Cache, updates and downloads on your Mac.
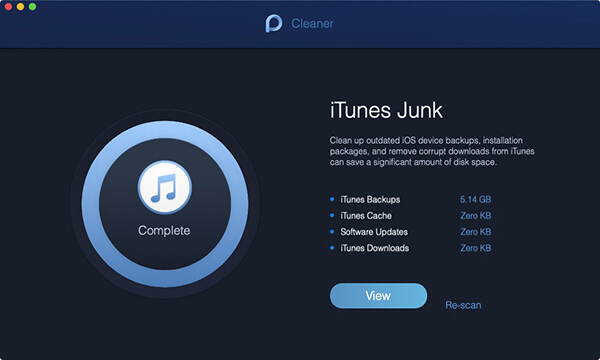
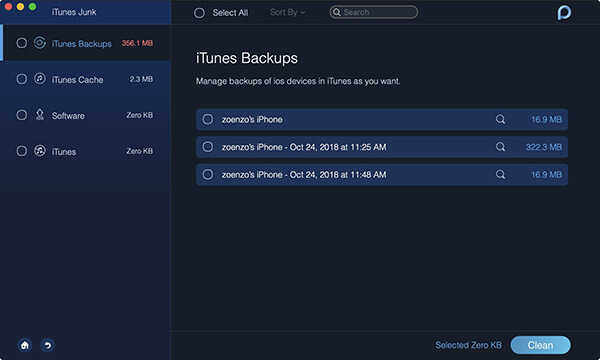
Step 5. Choose Files to Clean
When the scanning completes, please view the files in iTunes through the View button. On the left is the categories of iTunes files and their detailed files are on the right. Choose the files you want to clean.
Step 6. Click the Clean Button
Since you have chosen the files in iTunes, click the Clean button at the right bottom to implement the cleaning.
Step 7. Confirm Your Choice
There would be a pop-up window called Confirmation turning up. Please press the Confirm button if you are sure to delete the selected files; otherwise, please press the Cancel button and return to the previous page.
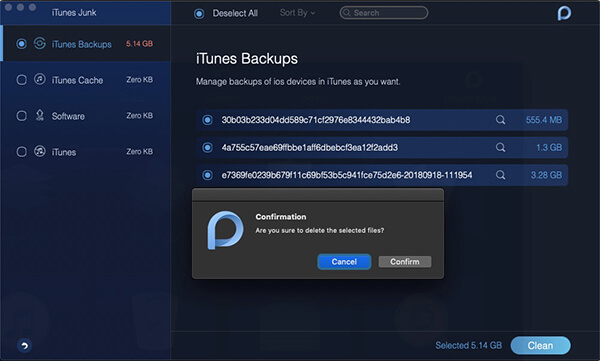
Your iTunes files are being removed. Please be patient and wait for the cleaning process.
Trash Bins
You have access to emptying the whole available trash bins on your Mac in order to free up space.
Step 1. Click Trash Bins
Click the Trash Bins icon in Cleaner .
Step 2. Scan Files in Trash Bins
Press the Scan button, PowerMyMac will further process to detect and recognize files in available trash bins on your Mac.
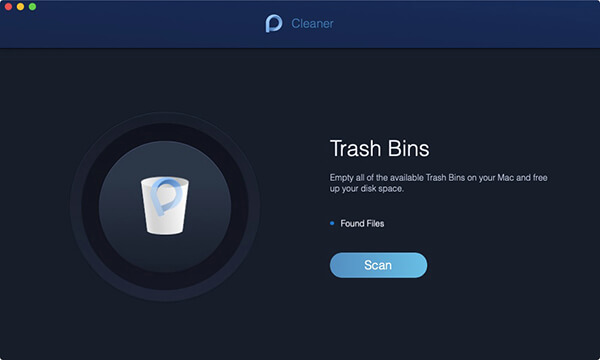
Step 3. View Resulted Files
If the word Complete turns up in the circle on the left, it means that the scanning accomplishes. You can press the View button and view the detected files on your Mac.
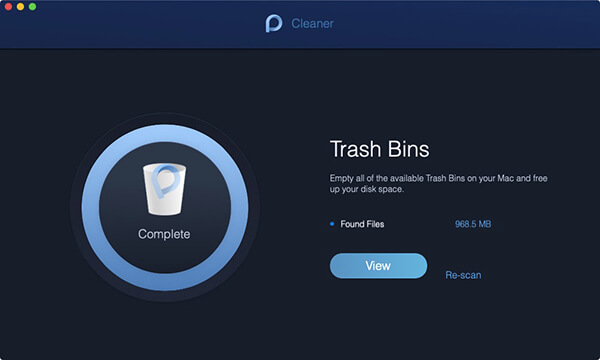
Tips : If necessary, you can also click Re-scan button to scan your Mac once more.
Step 4. Choose Files to Clean
Categories of Trash Bins are on the left side while their subordinating files are listed on the right. Choose corresponding categories and files to clean.
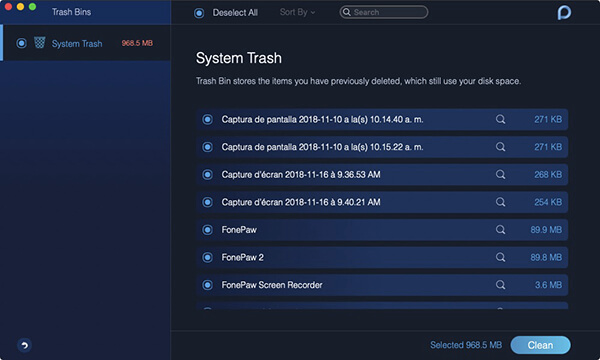
Step 5. Clean Files
Press the Clean button to clean those selected files.
Wait for the process to clean. The cleaning time depends on the size of your files.
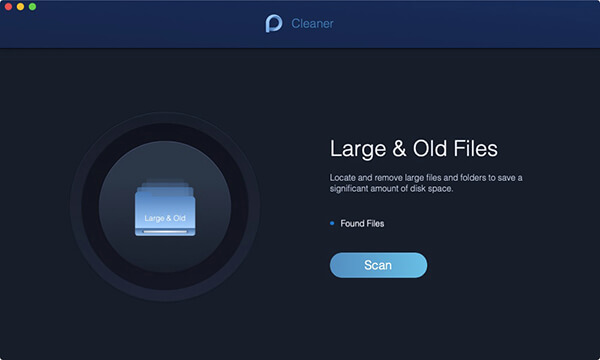
Large & Old Files
Large & Old Files is to discover those files occupying certain space of Disk or out of date and clean them to release more room on your Mac.
Step 1. Select Large & Old Files
Open PowerMyMac and then select Large & Old Files in Cleaner .
Step 2. Scan Large & Old Files
Press the Scan button to scan and discover large and old files on your Mac.
Step 3. View Large & Old Files
After scanning large and old files on your Mac, you can view the results via the View button.
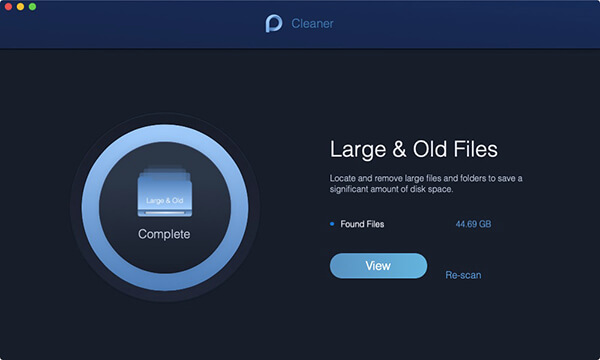
Note : If you fail to find out the large and old files you want to clean, please click Re-scan to have a second scanning.
Step 4. Choose Large & Old Files
Files classified in size are 5 MB to 100 MB and 100 MB plus , and in time, are more than 30 days and longer than one year . Choose the files on the right column from the corresponding category.
Step 5. Clean Large & Old Files
Later, hit the Clean button to clean the selected large and old files.
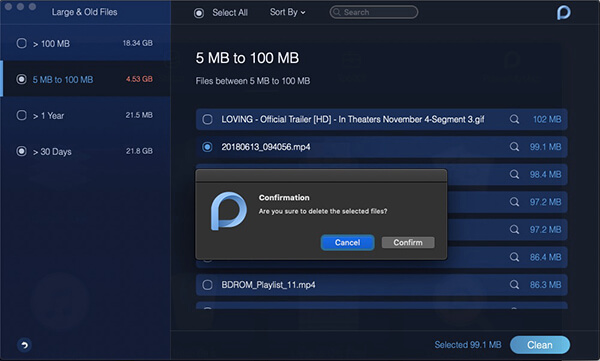
Step 6. Confirm to Clean
If you are sure to delete the selected files, confirm to clean them.
Duplicate Finder
Duplicate Finder will locate and remove the duplicate files on your Mac. Likewise, it is going to free up and speed up your Mac.
Step 1. Click Duplicate Finder
Click Duplicate Finder in Cleaner .
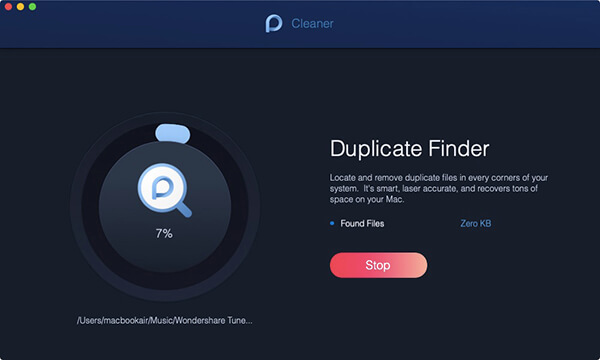
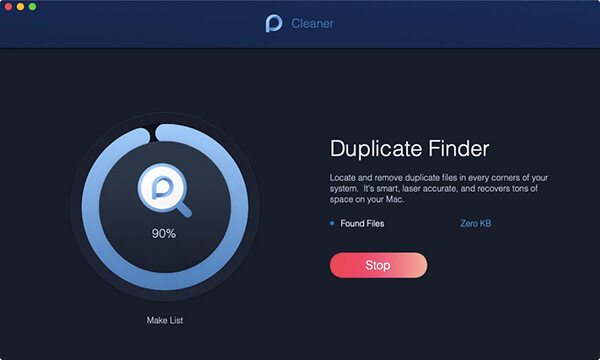
Step 2. Scan Files on Mac
Press the Scan button on the home page of Duplicate Finder to scan and discover the duplicate files.
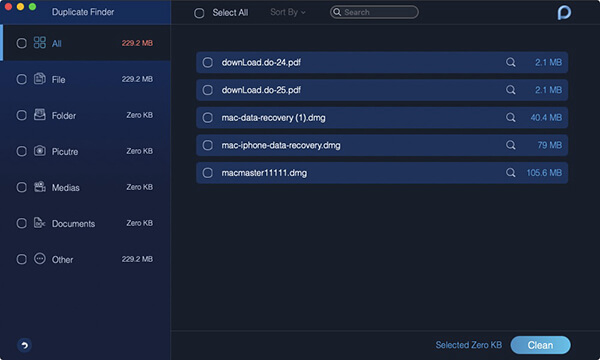
Step 3. View Files on Mac
You can later view files by clicking the View button until the scanning finishes. Click categories on the left and check files on the right column.
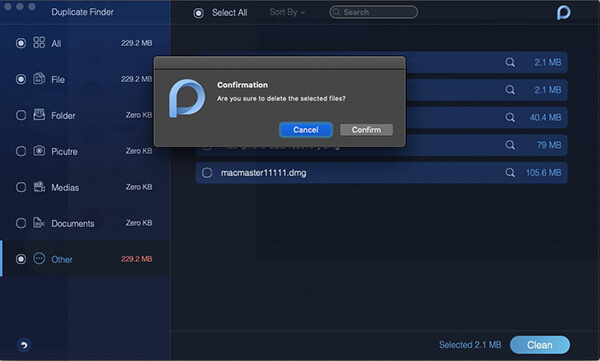
Step 4. Clean Duplicate Files
Select duplicate files to remove and hit the Clean button.
Step 5. Confirm Your Choice
Confirm to clean and wait for the cleaning process.
Note : Duplicate Finder is similar to the function in Similar Photo. However, it supports to recognize duplicate pictures, media, documents and other files at the same time.
How to Use PowerMyMac - ToolKit
Toolkit is the tool box for you. You can easily and simply manage your Mac. You can manage your Mac with functions in ToolKit module with simple clicks.
There are eight tools in total in this module: Uninstaller, Maintenance, Privacy, NTFS, Filemanager, Hide, Unarchiver and WiFi.
Now, download and launch PowerMyMac on your Mac first and then read the following introductions to the eight functions and learn about how to use PowerMyMac - ToolKit.
Tips: Images for PowerMyMac are under the dark mode on Mac.
Uninstaller: Remove Applications without Residual Files
Uninstaller is a useful tool to help you easily and simply remove entire applications on your Mac.
Step 01 - Select Uninstaller
Launch it within your Mac device. The main interface will show a variety of the device' system status. The tool Uninstaller is in the ToolKit module. Thus, please click the ToolKit icon and select Uninstaller .
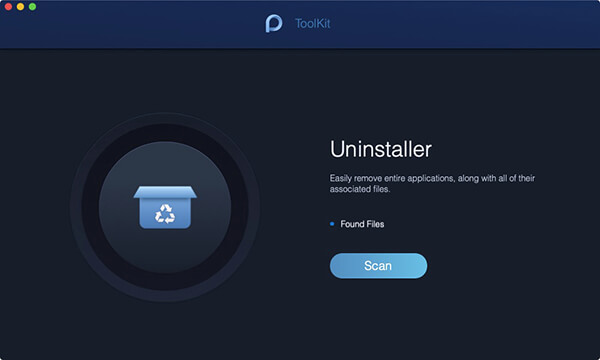
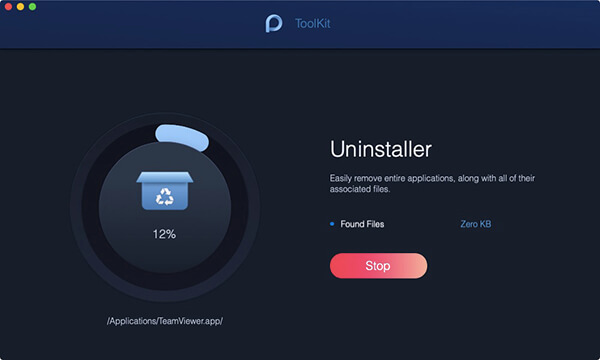
Step 02 - Scan Applications
Enter the Uninstaller, you will see the occupied storage of the apps on your Mac in the Found Files item after you press the Scan button. The circle on the left will show you the scanning course. If necessary, click Re-scan to scan the apps' information on your Mac again.
Step 03 - View Applications
Next, click the View button and go to the apps' page. The whole apps installed on your Mac are listed in the left column.
Step 04 - Locate Targeted App
Directly scroll the apps' list to find out the targeted app or type the app' s name in the search bar on the top. Click the app. Later, files or folders under the app would be expanded on the right screen.
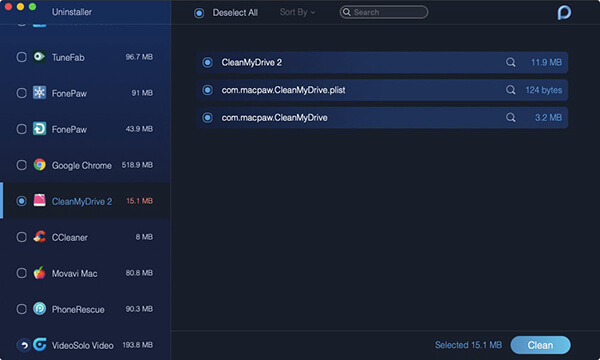
Step 05 - Choose File to Clean
Hit the files or folders you want to clean under the targeted app. If you want to clean up all the files under the app, you can also directly choose the option Select All . In addition, you can efficiently find out the files you want to delete through the Sort By besides Select All.
Step 06 - Clean Applications
Make sure again the files you chose in the last step. Then, press the Clean button at the right bottom to finish this step.
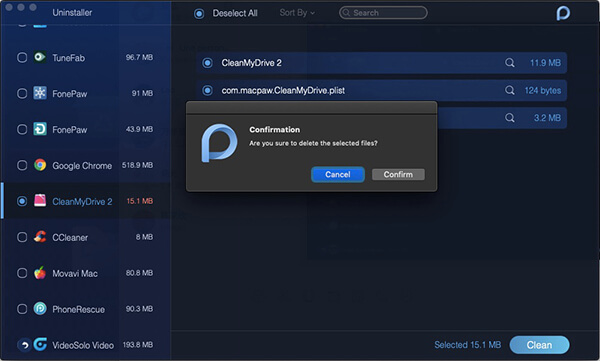
Step 07 - Clean Completion
Confirm to clean the applications you choose and be patient and wait for the cleaning process.
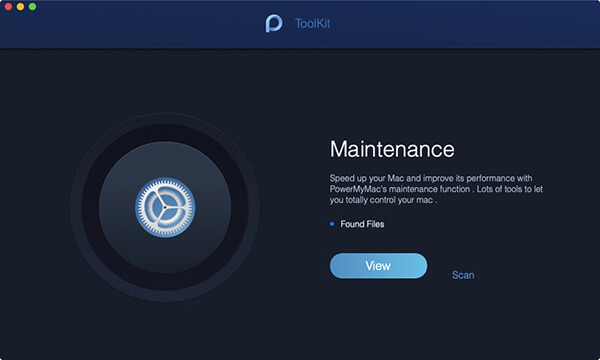
Maintenance: Optimize and Speed up Your Mac
Maintenance is where you can optimize some seldom-used settings on your Mac to help you speed up and improve the performance of your Mac.
Tip 1 : To avoid a long-time waiting for the scanning for a click on Scan , there would be a View button for your first entry instead of Scan. You will see nothing through pressing the View button unless you clicking the little Scan button on the right of View.
Tip 2 : There is a Clean button for you to delete some functions on Mac in this tool. Be careful for the cleaning here, for it may make your Mac down if you clean in QuickLook and Spotlight.
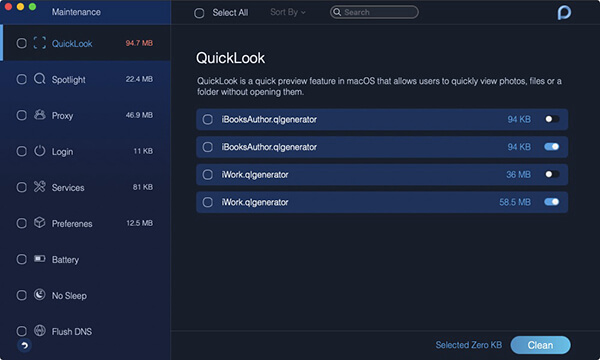
QuickLook - A Quick Switch ON/OFF for Preview Function
Usually, a preview will turn up on the right side on the screen for you to have a quick look when you select files in Finder. You can also disable the preview by creating a new folder and put the files you are not willing to have a preview in the new folder. You' d better name the new folder with its original name followed by "Display ". For instance, if the folder is called Note , the new folder are supposed to be called Note Display .
However, in QuickLook, you have no need to operate on those steps mentioned above to disable the preview function. You just need to turn the switch for each item on or off to decide whether preview the items or not.
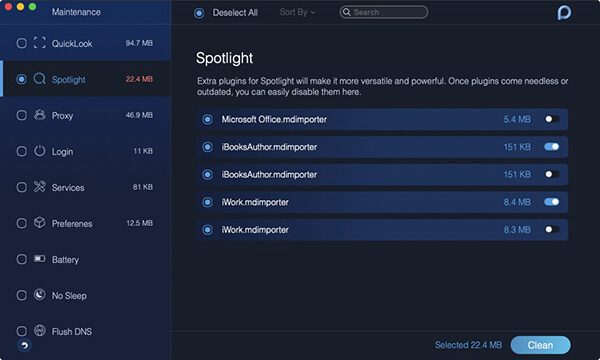
Spotlight
Extra plugins for Spotlight will make it more versatile and powerful. Once plugins come needless or outdated, you can easily disable them.
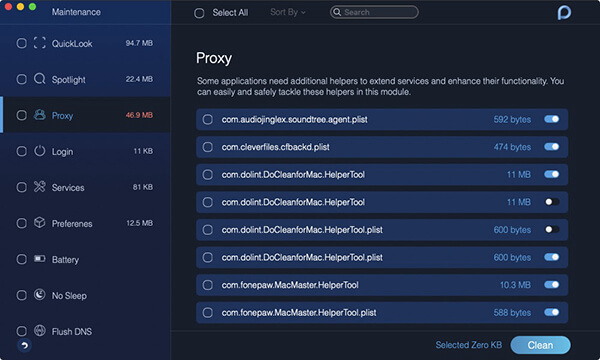
Proxy
Quite a few applications need additional helpers to extend their services on your Mac. You can selectively easily and safely disable those helpers in the showing list below.
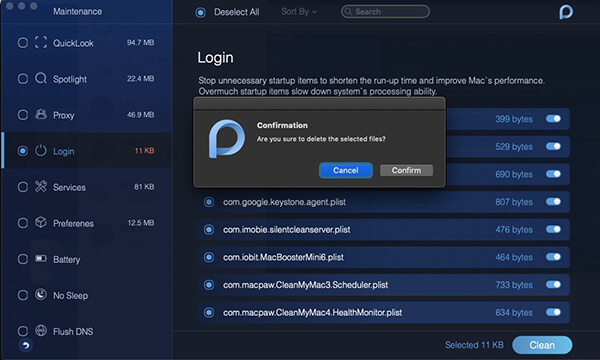
Login
Overmuch start-up items are likely to slow down system' s processing ability. Therefore, you can disable and stop some unnecessary start-up items in list in order to shorten the run-up time and improve Mac' s performance. Also, here you just need to turn the switch for each item on or off to implement the function.
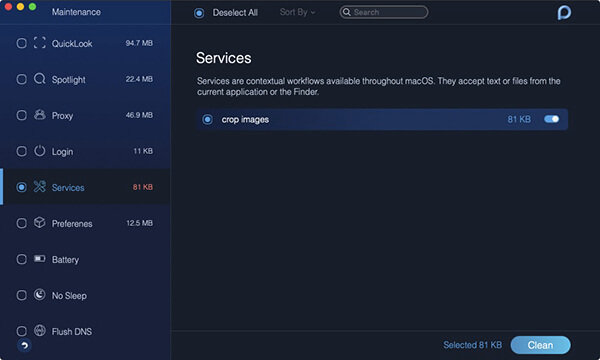
Services
Services are contextual workflows available throughout macOS. They accept text or files from the current application or Finder.
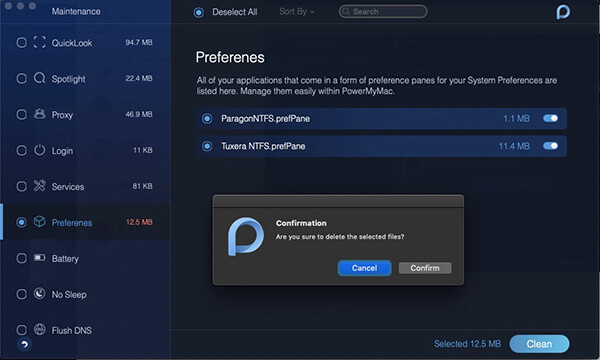
Preference
By turning the switch for each item ON/OFF in this function, here, you can realize to show or hide some applications in System Preferences on your Mac.
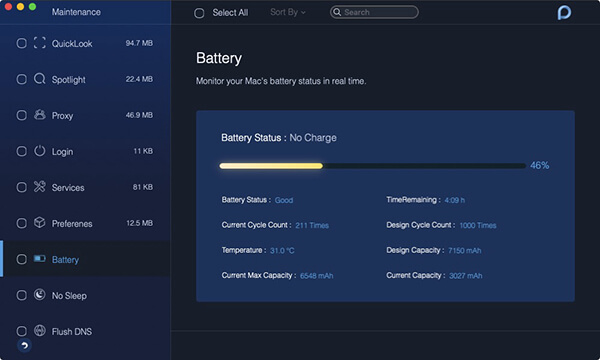
Battery
Battery is a Mac' s battery doctor. It monitors your Mac' s battery status in real time, consisting of battery status, time remaining, current cycle count, design cycle count, temperature, design capacity, current max capacity and current capacity.
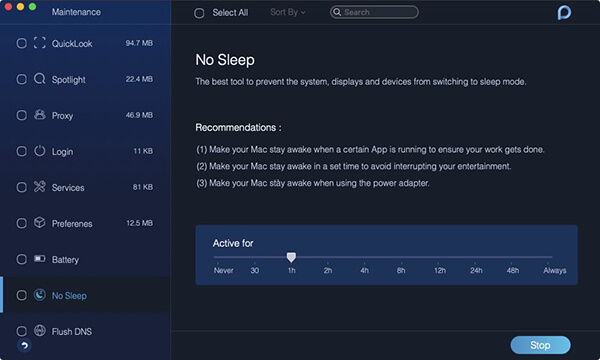
No Sleep
No Sleep aims to protect your Mac from switching to sleep mode so as to:
You can choose a suitable time at the bottom of the screen.
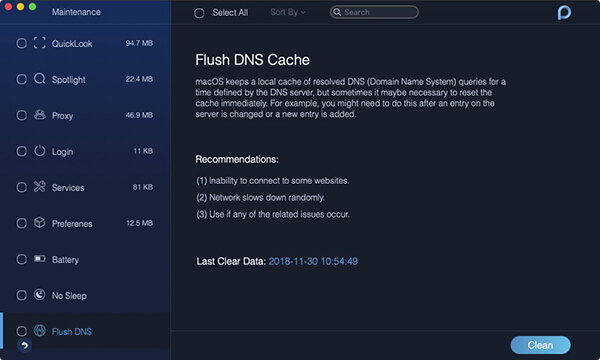
Flash DNS
Flash DNS helps to fix network problems if you encounter one of the three situations below:
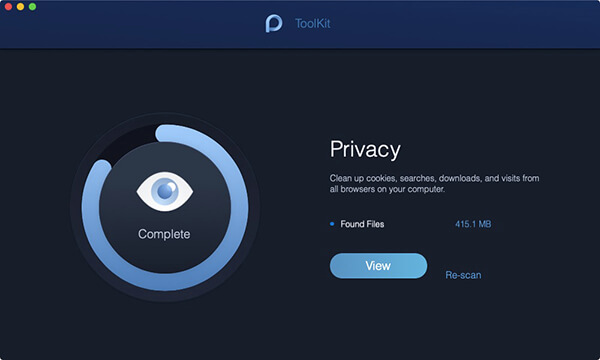
Privacy: Avoid Leaking Privacy from Browsers
Privacy cleans up cookies, searches, downloads, and visits from all browsers on your Mac.
Step 01 - Select Privacy
After downloading PowerMyMac, launch it on your Mac. Then, you can see three main modules on the home page: Status, Cleaner and ToolKit. The tool Privacy is under the ToolKit module.
Thus, please click the ToolKit icon and select Privacy.
Step 02 - Scan Files in Browsers
Press the Scan button and wait for the scanning process of the whole files in browsers on your Mac. When it finishes, it will show Complete in the left circle.
Step 03 - Select Browsers to Clean
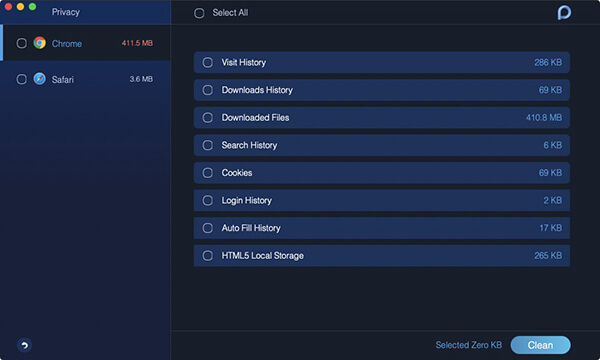
Press the View button to enter the page on which browsers on your Mac are listed on the left column. Select the browsers you want to clean.

Step 04. Select Files in Browsers
After choosing the browsers to clean, Visit History, Downloads History, Cookies and other files are shown on the right side. Select specific files or choose the Select All option on the top to confirm the files to clean.
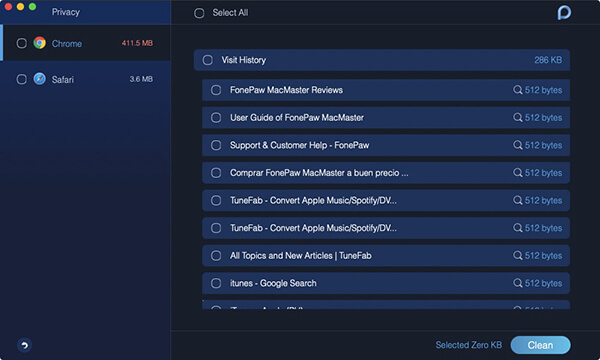
Note : Move your mouse to the right side of the files in browsers, you can view more detailed information by clicking the Show button in grey.
Step 05. Clean Files
Since you have chosen the files in browsers, click the Clean button at the right bottom to implement the cleaning.
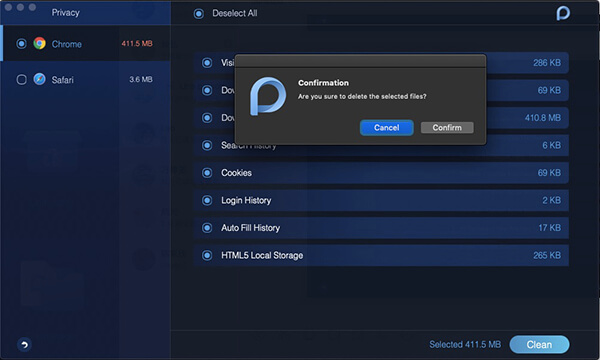
Step 06. Confirm Your Choice
There would be a pop-up window called Confirmation turning up. Please press the Confirm button if you are sure to delete the selected files; otherwise, please press the Cancel button and return to the previous page.
Your browser files are being removed. Please be patient and wait for the cleaning process.
NTFS: Realize to Write Files on Mac
Microsoft NTFS is a tool used to read and write files from HDD, SSD or a flash drive formatted under Windows.
Step 01 - Select NTFS
The tool NTFS is under the ToolKit module. Thus, please click the ToolKit icon and select NTFS .
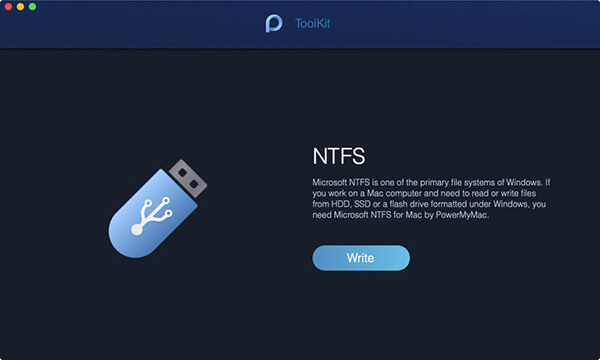
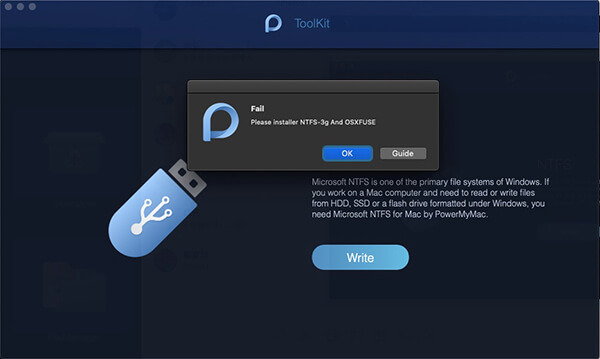
Step 02 - Write Your Files
After entering the home page of NTFS, press the Write button to begin to copy, edit, delete or implement other instructions on your files from HDD, SSD or a flash drive formatted under Windows on your Mac.
Note : If a pop-up windows called Fail presents on your screen, it is mainly because you have to install NTFS - 3g and Osxfuse before you use the NTFS tool. Please click the Guide button to get more help about these installation.
Step 03 - Drag Files to Write
You can see your USB information on the left and files and folders in the USB are listed on the right column. Now, you are supposed to drag one of your files from your USB to the top blank site.
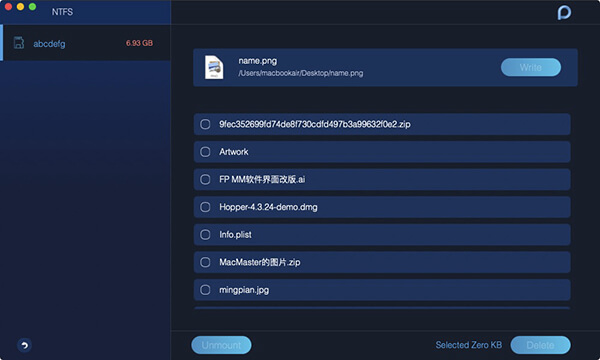
Step 04 - Write Your Files
Press the Write button and the file you drag in begins to be put in your USB. After the selected file disappears in the site or a completion message turns up, the process to write completes. In addition, you will find the icon of your USB different from the previous moment when you plug it into your Mac. It is also the signal to tell that you are successful in writing.

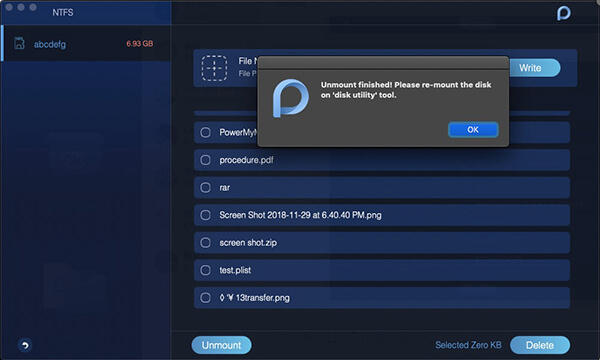
Step 05 - Unmount Your USB
If your wring is accomplished, click the Unmount button to remove your USB from the Mac.
FileManager: Unrecoverably Shred Files
FileManager enables you view the detailed information of your files and helps you remove your files completely from your Mac.
Step 01 - Select FileManager
The tool FileManager is under the ToolKit module. Thus, please click the ToolKit icon and select FileManager .
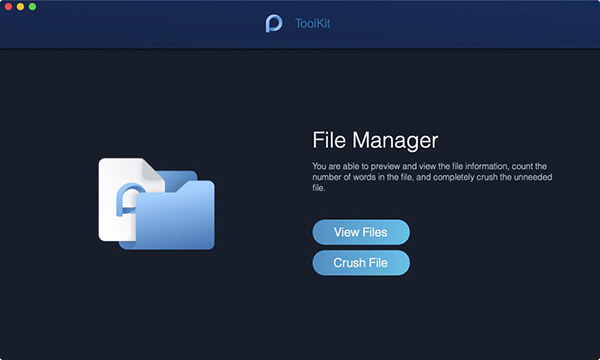
Step 02 - Choose View Files
Enter the FileManager, you will see the two major functions of FileManager: View Files and Crush File . Here, choose View Files.
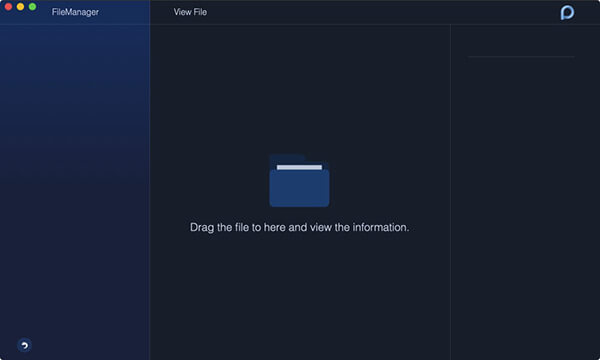
Step 03 - Drag A File to View
Directly drag the file whose information in details you want to know about on the screen. Later, the file' s name is on the left column and its detailed information shows you on the right column, including the path, size and the time to create and last modification.
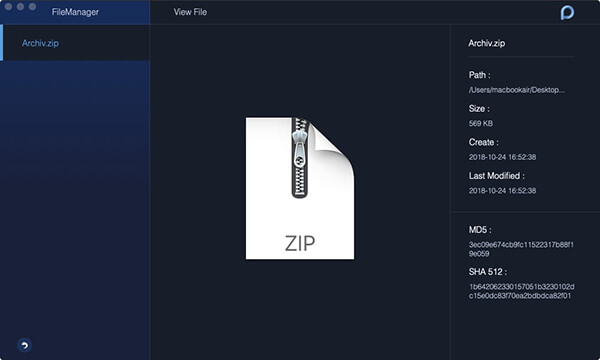
Tips : Directly continue to drag one other file to view its detailed information with no need to get back to the original page.
Step 04 - Choose Crush File
Click the arrow icon and go back to the home page of FileManager. Choose Crush File this time to go to the function to crush file.
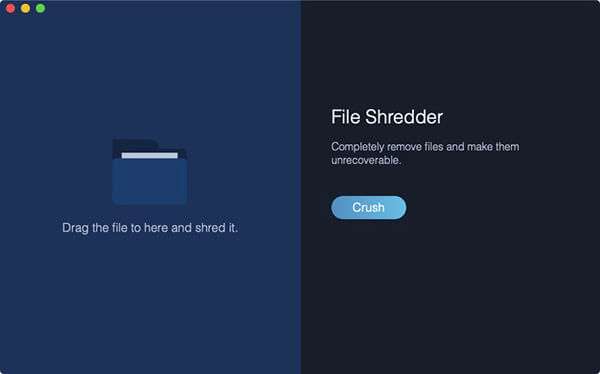
Step 05 - Drag A File to Crush
Also, you need to drag the file to the screen to carry out crushing.
Note : Ensure the file is the one you want to crush, because it would be unrecoverably removed on your Mac.
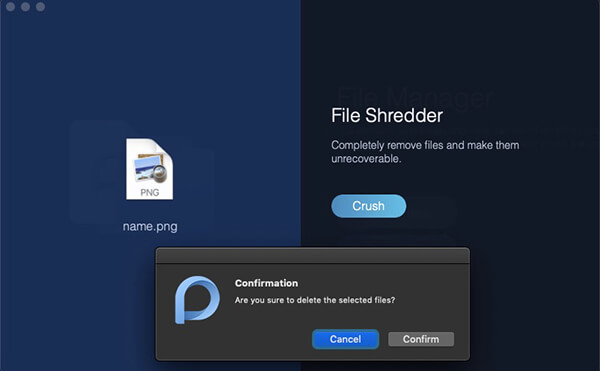
Step 06 - Shred Your File
After choosing and dragging the file you want to crush, double confirm with the Crush button the right side.
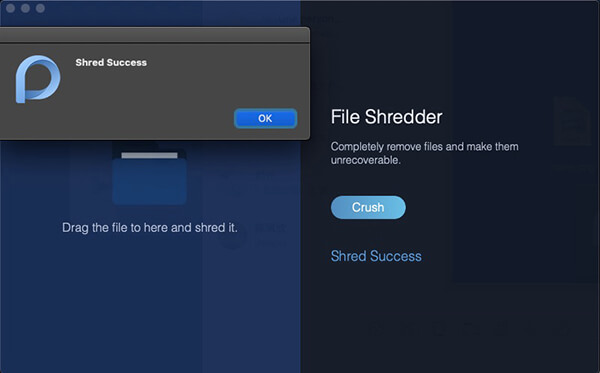
Later, a message "Shred Success" will show you that the crushing completes.
Hide: Hide and Encrypt Your Files
You may want to hide and encrypt your files on Mac but fail to find the correct ways to process.
Take it easy, go to PowerMyMac and find Hide tool to help you.
Step 01 - Click ToolKit
Launch PowerMyMac on your Mac device. The main interface will show you a variety of the device' system status. Then, click ToolKit on the top.
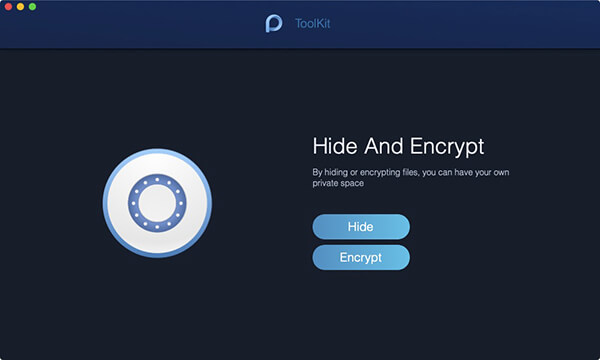
Step 02 - Select Hide
Select Hide tool in ToolKit.
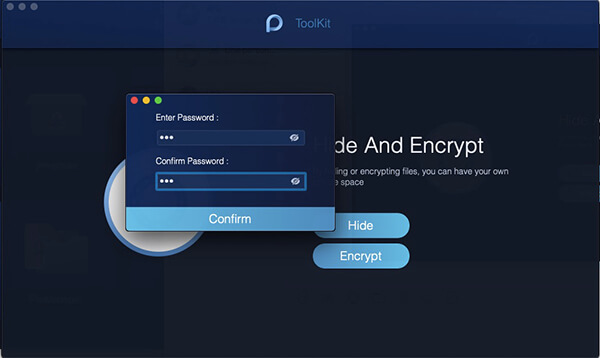
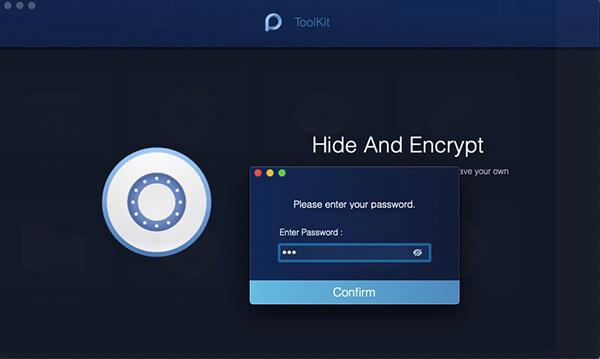
Tips : Set and confirm your password the first time you enter this page.
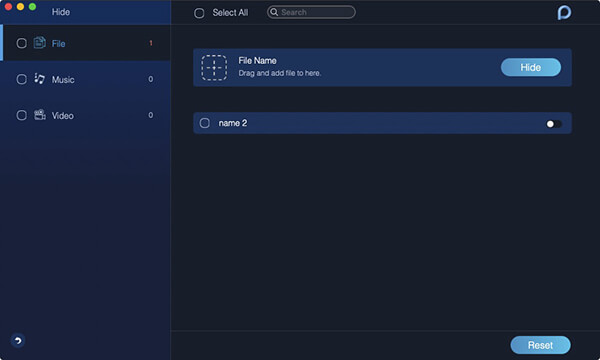
Step 03 - Hide Your File
Drag a file in the screen and hide it. Press the Hide button finish this step.
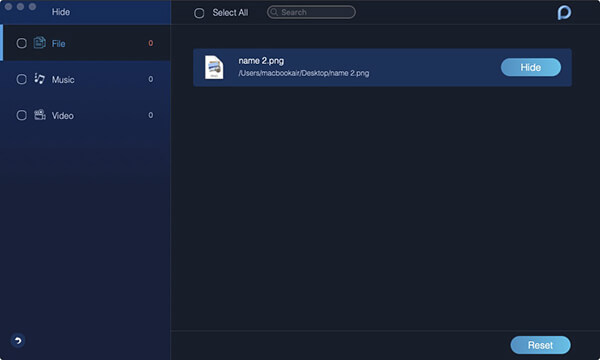
Note : There is a switch button below. Turn the button off, the file you dragged in this step could be shown on your Mac again.
Step 04 - Encrypt Your File
Back to the previous page, enter the password you set just now and choose the Encrypt button in Hide And Encrypt.
Also, drag a file and press the Encrypt button.
Now, the file cannot be read in the previous path. You can view it directly on the Encrypt page, however.
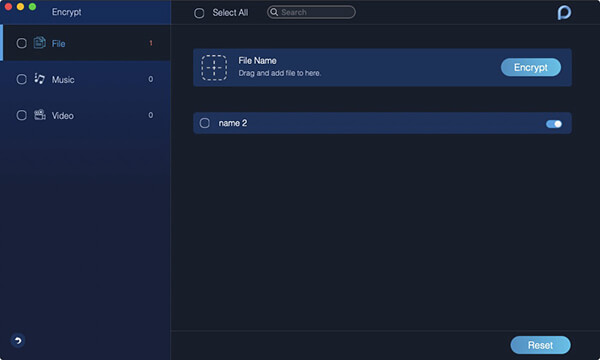
Note : If the file is shown in the list of Hide (you once hid it before), although it is not hidden now, it cannot be encrypted. If you need to encrypt this file, you need to remove the file out of the list first.

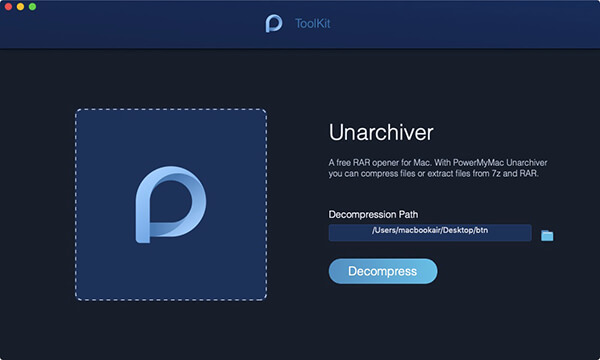
Unarchiver: Compress or Extract Your Files
Unarchiver is used to compress or extract your files like .rar and .7z on your Mac.
Step 01 - Choose Unarchiver
After checking the running status of your Mac in Status, choose Unarchiver in ToolKit .
Step 02 - Select Your Files
Directly drag your files in the blank site on the left or browse files in the Compression Path to select a file.
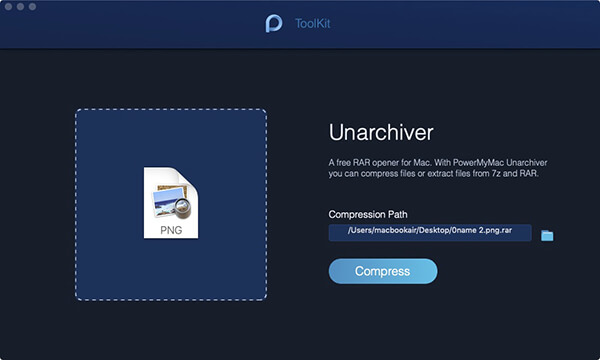
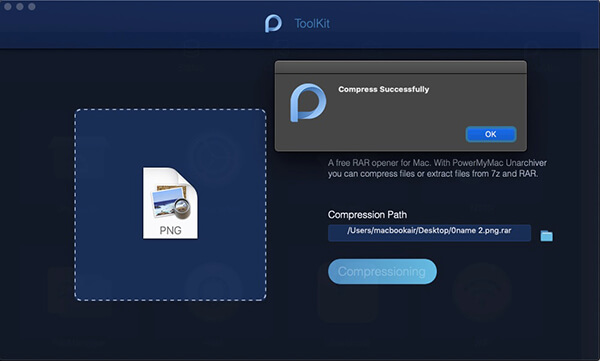
Step 03 - Compress Your Files
Press the Compress button to start to compress your file.
Step 04 - Decompress Your Files
Also, if you need to decompress your files, you can Directly drag your files in the blank site on the left or browse files in the Compression Path to select a file. Later, press the Decompress button to implement the command.
It would be a notification to tell you the completion.
HOWEVER , since you have installed PowerMyMac on your Mac device, you have no need to follow the steps above to compress rar. or 7z. files. When you save the rar. or 7z. files on your Mac, they would be shown with a blue "P" icon, the same as PowerMyMac. Double-click the files, they can be automatically transformed to a zip. file. Is it amazing? Yes! You can directly open and view the rar. and 7z. on your Mac now.
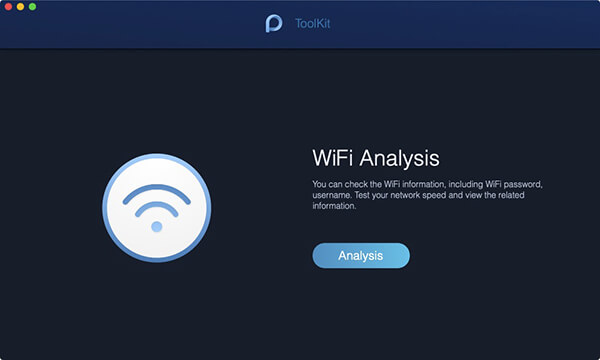
WiFi: WiFi Analysis
In WiFi analysis, you are available to check the WiFi information, such as WiFi password and username. Besides, you have access to testing your online speed and view more relevant information.
Step 01 - Choose WiFi in ToolKit
Launch PowerMyMac on your Mac and check the running status on the main interface. Next, choose WiFi in ToolKit.
Step 02 - Analyze Your Mac
Press the Analysis button to get the WiFi information on your Mac.
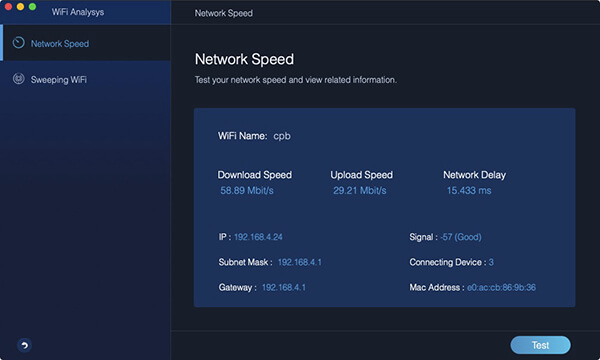
Step 03 - Test Your WiFi
Enter the page of WiFi information, two main categories are on the left column to tell you the detailed information of WiFi. Hit Network Speed , and press the Test button in the right-bottom corner to test your WiFi.
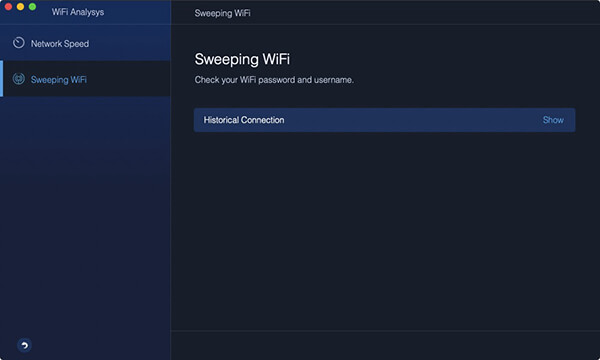
Step 04 - Show Your Historical WiFi
Then, tap the Sweeping WiFi . There is a Historical Connection for you to check your historical WiFi information. Click Show to continue.
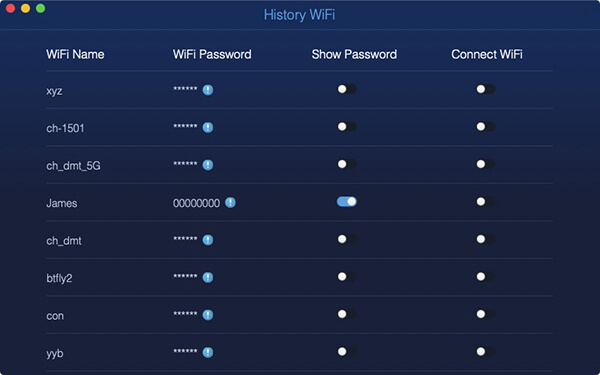
Step 05 - Show Passwords
A list of WiFi you have ever been in is present. If you want to show the WiFi passwords, turn the switch on and enter your password on the Mac to check.
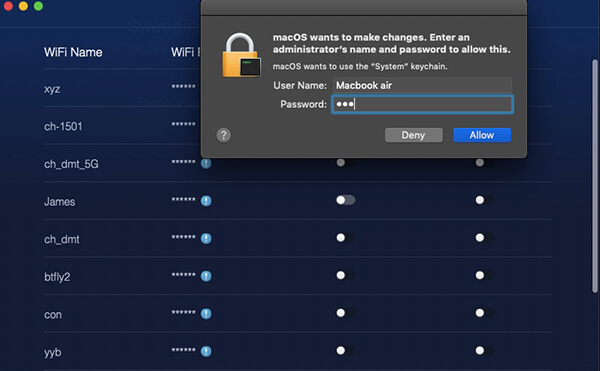
Tips : You can also turn the switch on to connect to another WiFi as well.
 System Junk
 iPhoto Junk
 Email Junk
 Similar Photo
 iTunes Junk
 Trash Bins
 Large & Old Files
 Duplicate Finder
 Uninstaller
 Maintenance
 Privacy
 NTFS
NTFS File Manager
 Hide
Hide Unarchiver
 WiFi
WiFi