FoneDog Screen Recorder
FoneDog Screen Recorder
Special Offer
Special Offer


Step 1. Download, install and launch FoneDog Video Converter on your computer. To use the free trial, click "Skip" from the pop-up window.
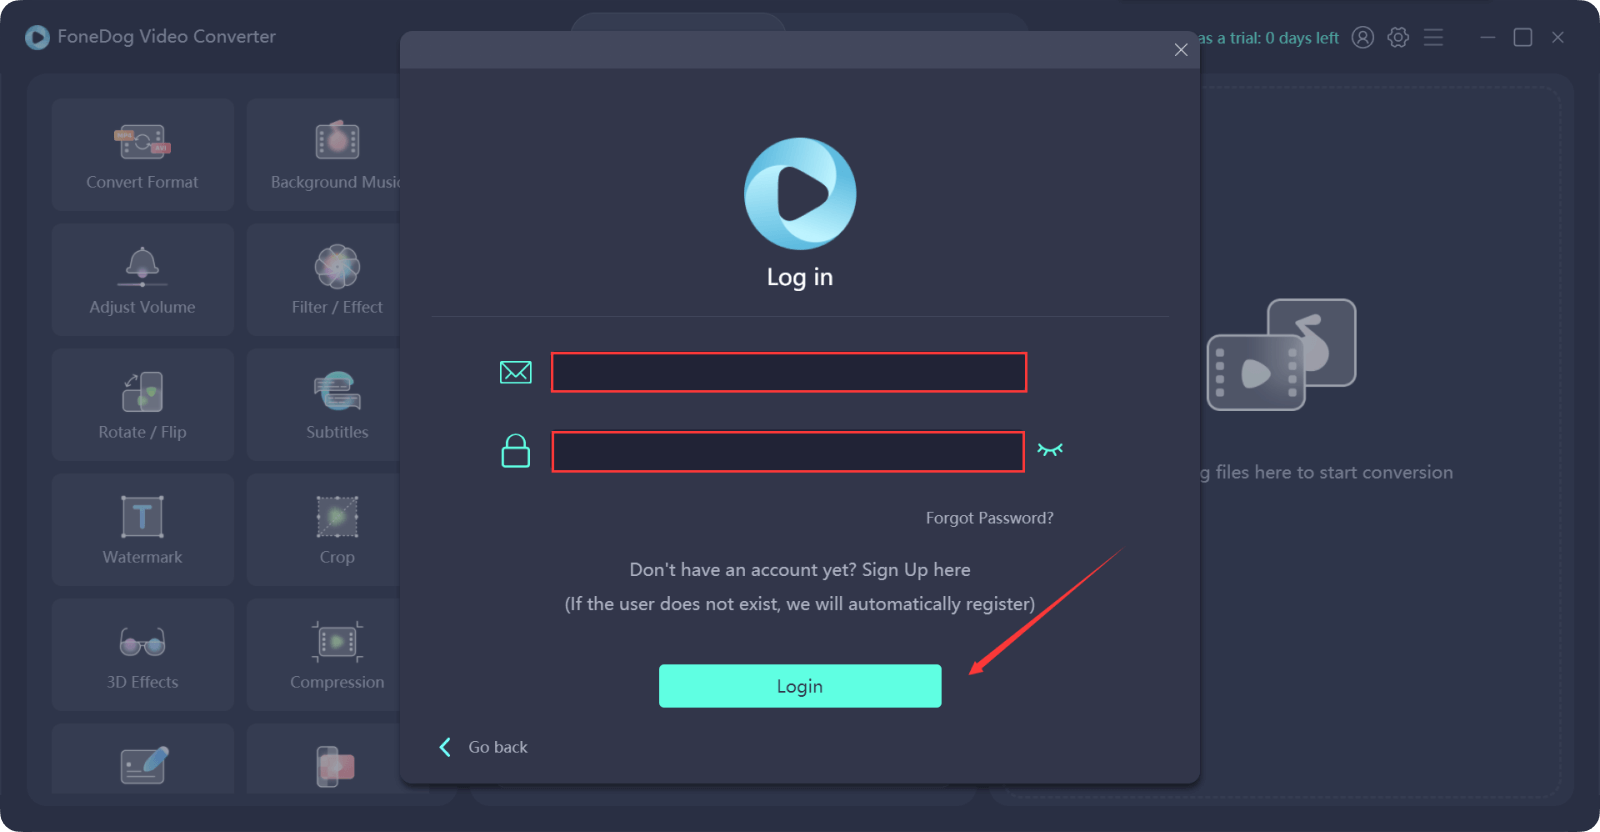
Step 2. You can also become a registered user to remove the usage time limits. Simply click "Log in", then press "Don't have an account yet? Sign Up here". Enter your Email Address and Password. Noted the Password should be 8 to 32 characters. After that, click "Sign Up". Now you have created an account and logged in.
Step 3. If you want to use all features of the software, press "Upgrade to FoneDog Video Converter Pro" from the window that pops up after you successfully logged in. Alternatively, tap the person circle icon from the top right corner of the main interface.
Step 4. Then, subscribe to the software by choosing between two different subscriptions, and then clicking "BUY".
Step 5. After purchasing the license, go back to the software and click "Log in" to log in using the purchase Email and Registration Code, no need to create a new account. Noted that the Registration Code is equal to the License Key. Then, click "Login".
Now, you can start using all features of FoneDog Video Converter.
Step 1. Add Video/ Audio Files
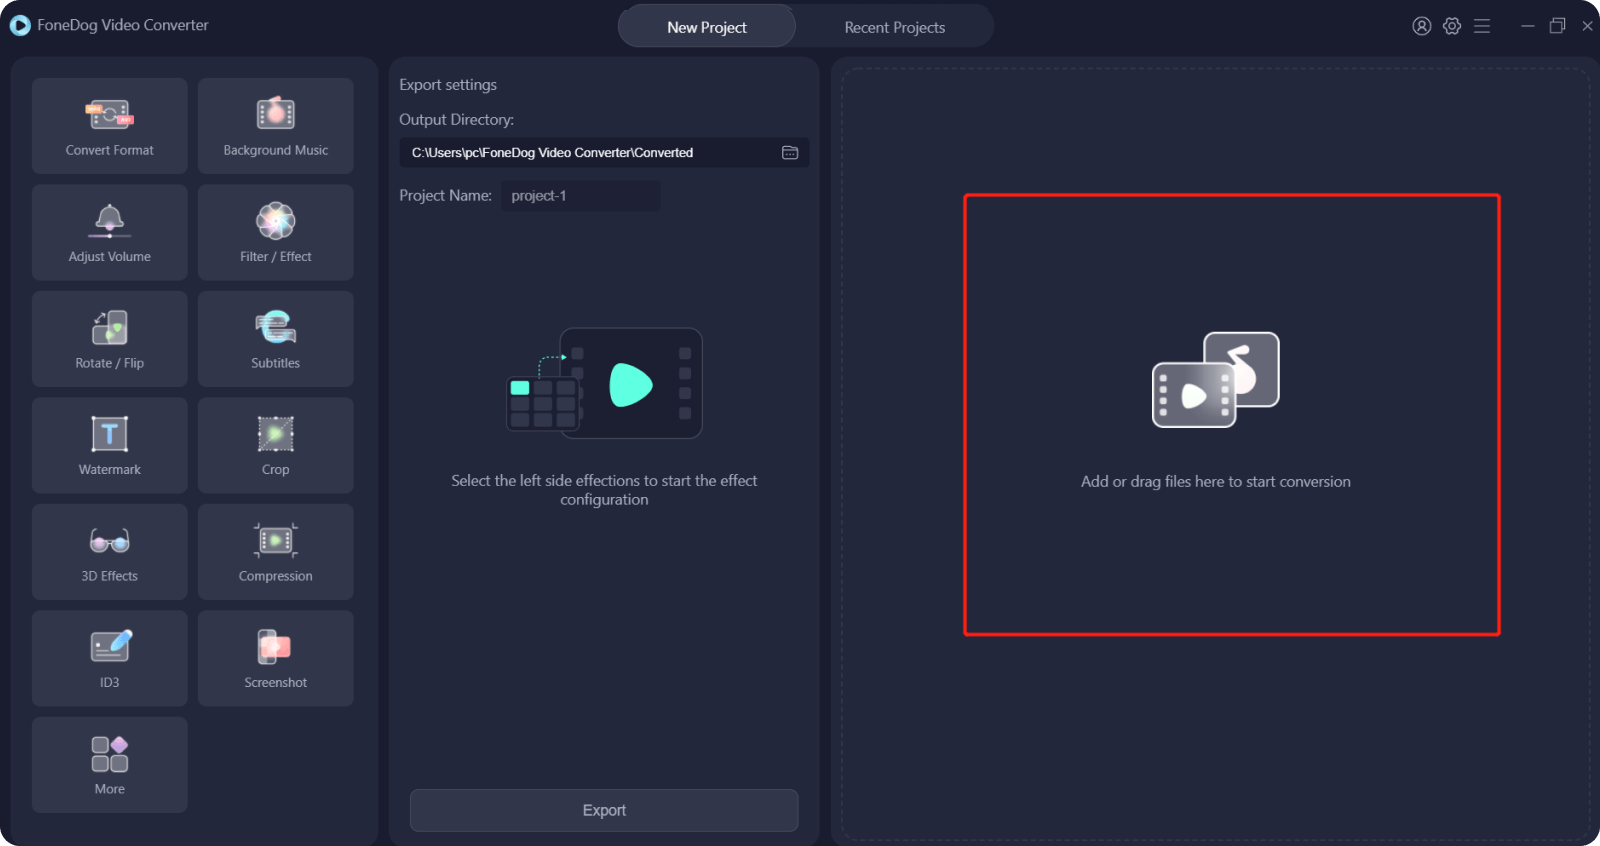
Click on the right side of the main interface that says "Add or drag files here to start conversion" or click on any button on the left side of the main interface, or simply drag the file there. Then choose the file in a pop-up window.
Step 2. Choose Output Format
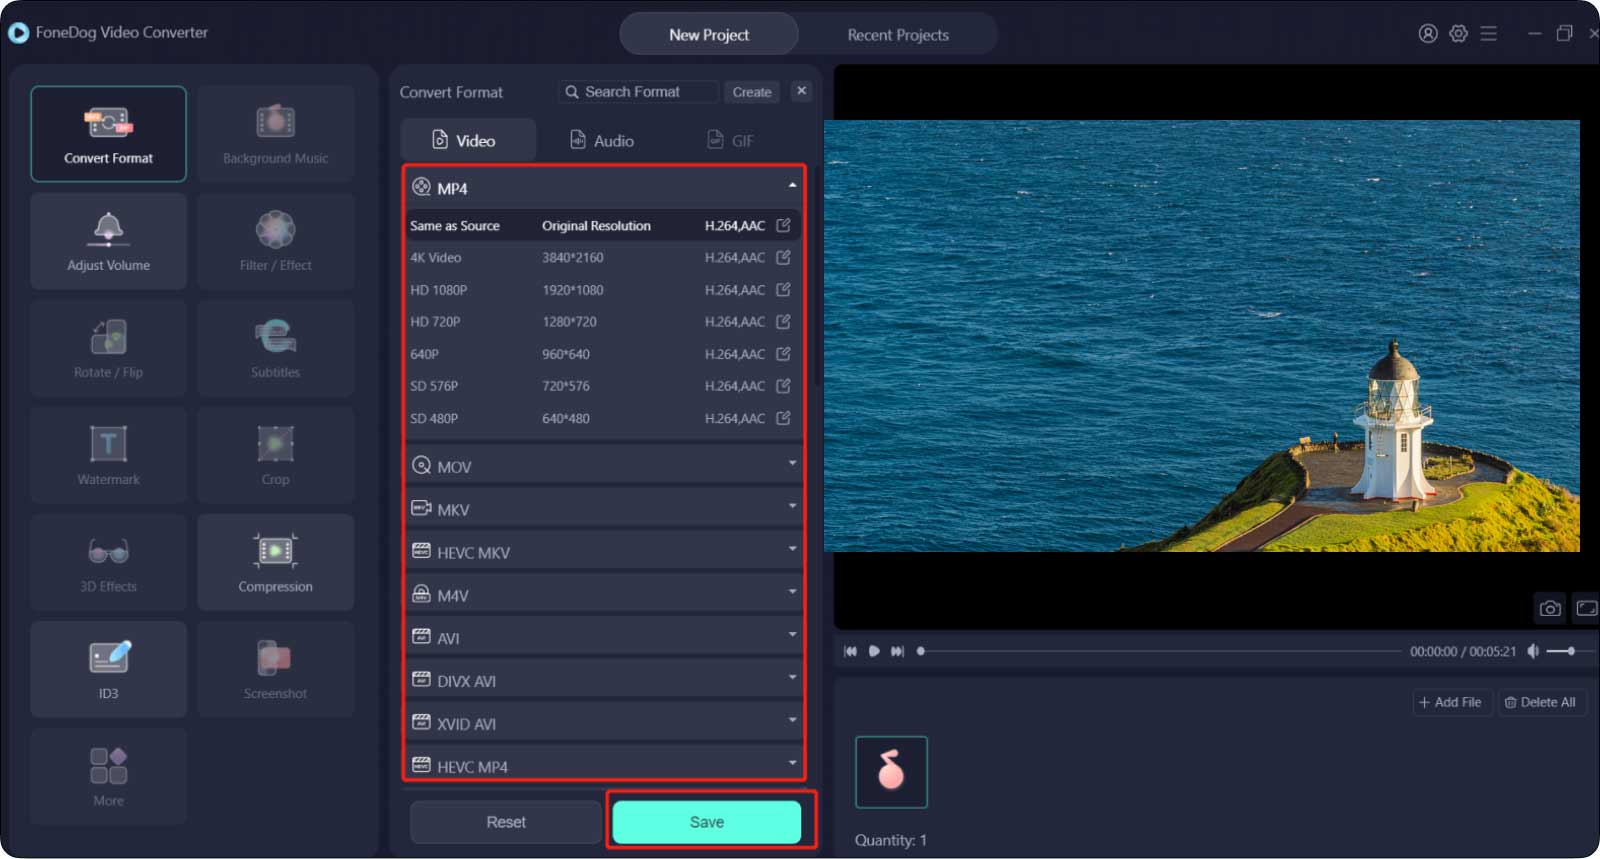
Click on the Convert Format button and choose your targeted output format in the middle of the main interface.
You can choose among 3 types of formats: Video, Audio, and GIF.
You can choose video resolution by clicking the down arrow button.
After everything is done, click on the Save button to save your settings.
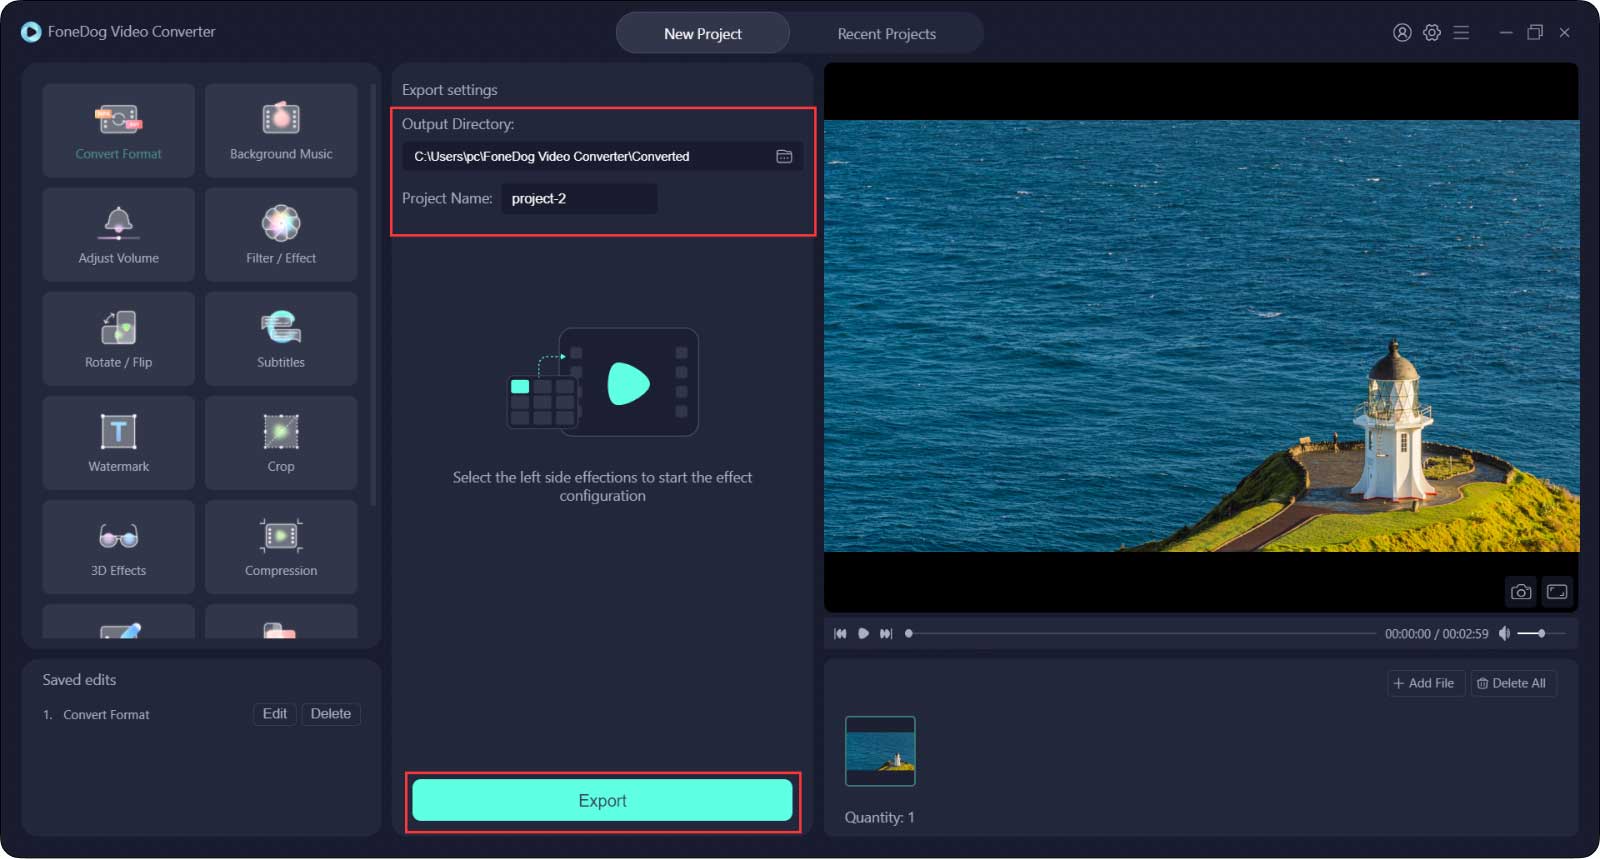
Step 3. Export Files
Choose your export location under "Output Directory" and give it a name in "Project Name". Then click on the Export button to start file conversion.
When it's done, you can view the converted files in the "Recent Projects".
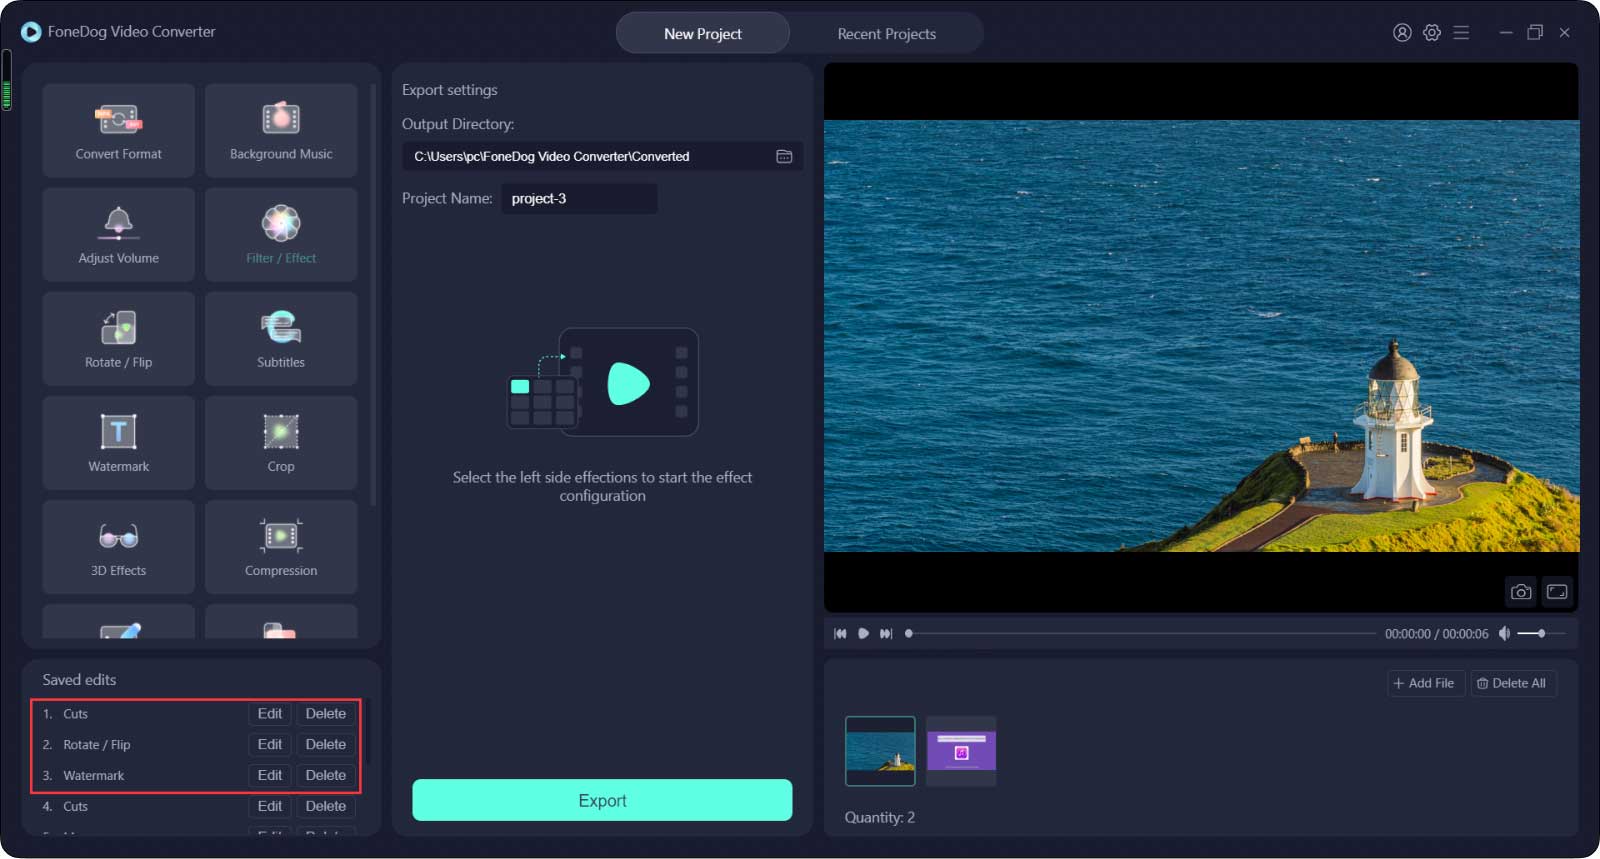
Note: You can click Save after completing a step or using a function to save the modification to the one you are editing and then click Export after all operations are completed.
If you are working on multiple videos at the same time, each modification can be added to every video by clicking "Apply to All".
If you are not satisfied with the exported video, you can click "Re-edit" to go back to the operation page and click the Edit on the one you want to change in the lower left bottom of the main interface.
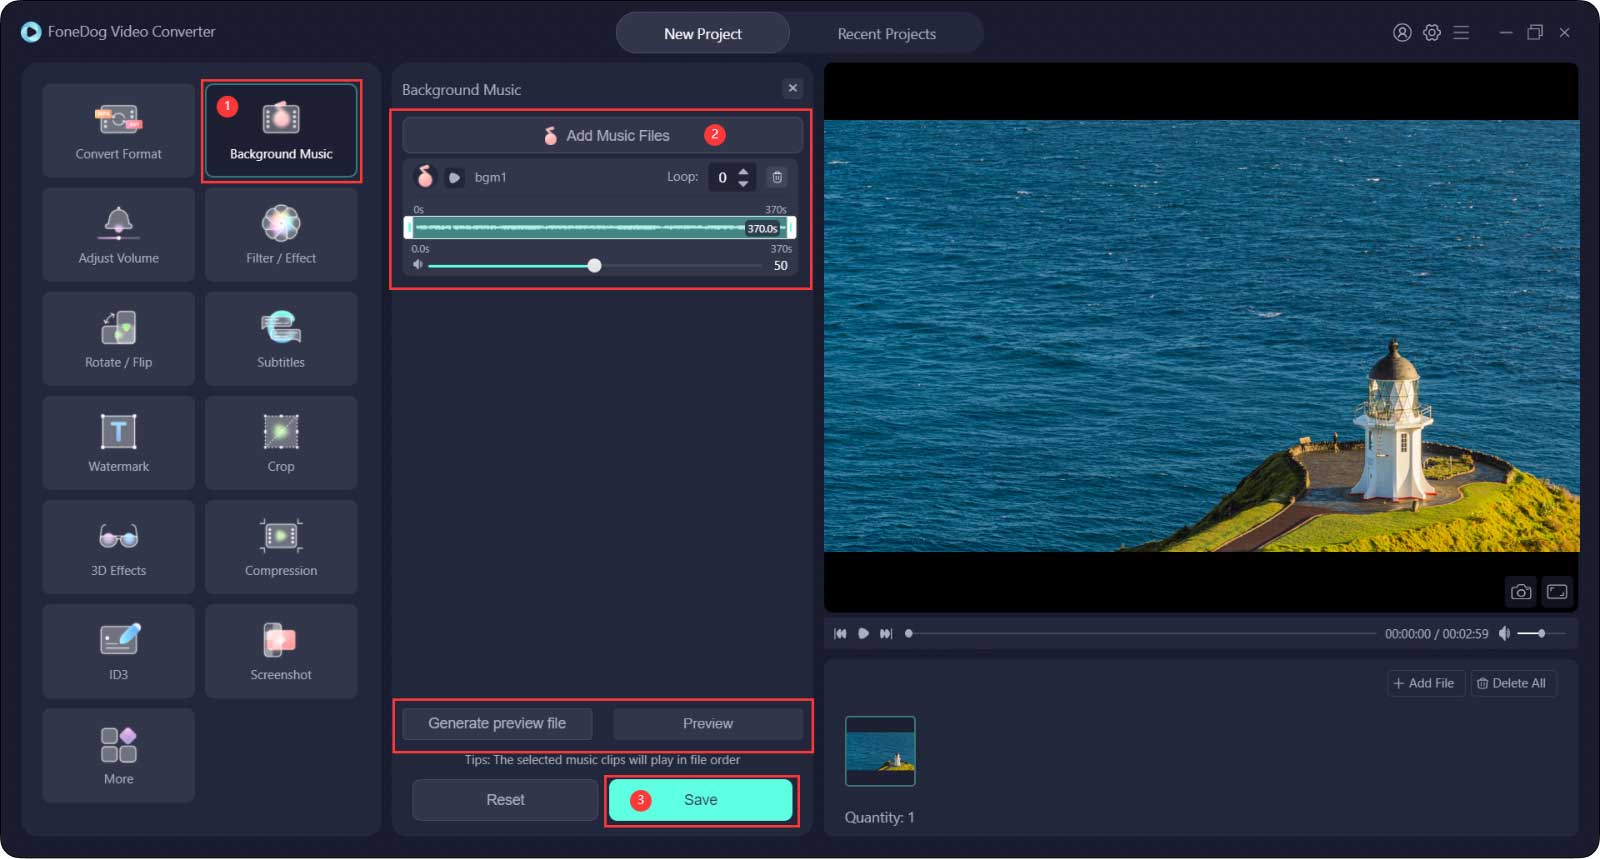
Step 1. Click "Background Music" and then click "Add Music Files" which is in the middle of the interface. You can add multiple music clips and they will play in order. You can also cut the music clips into shorter ones or adjust the volume of it by dragging the volume bar of it.
Step 2. After that, if you would like to preview the video file, you can click on the "Generate preview file" button, then the "Preview" button, and finally click the play icon below the video to preview. If it meets your satisfaction, you can click "Save".
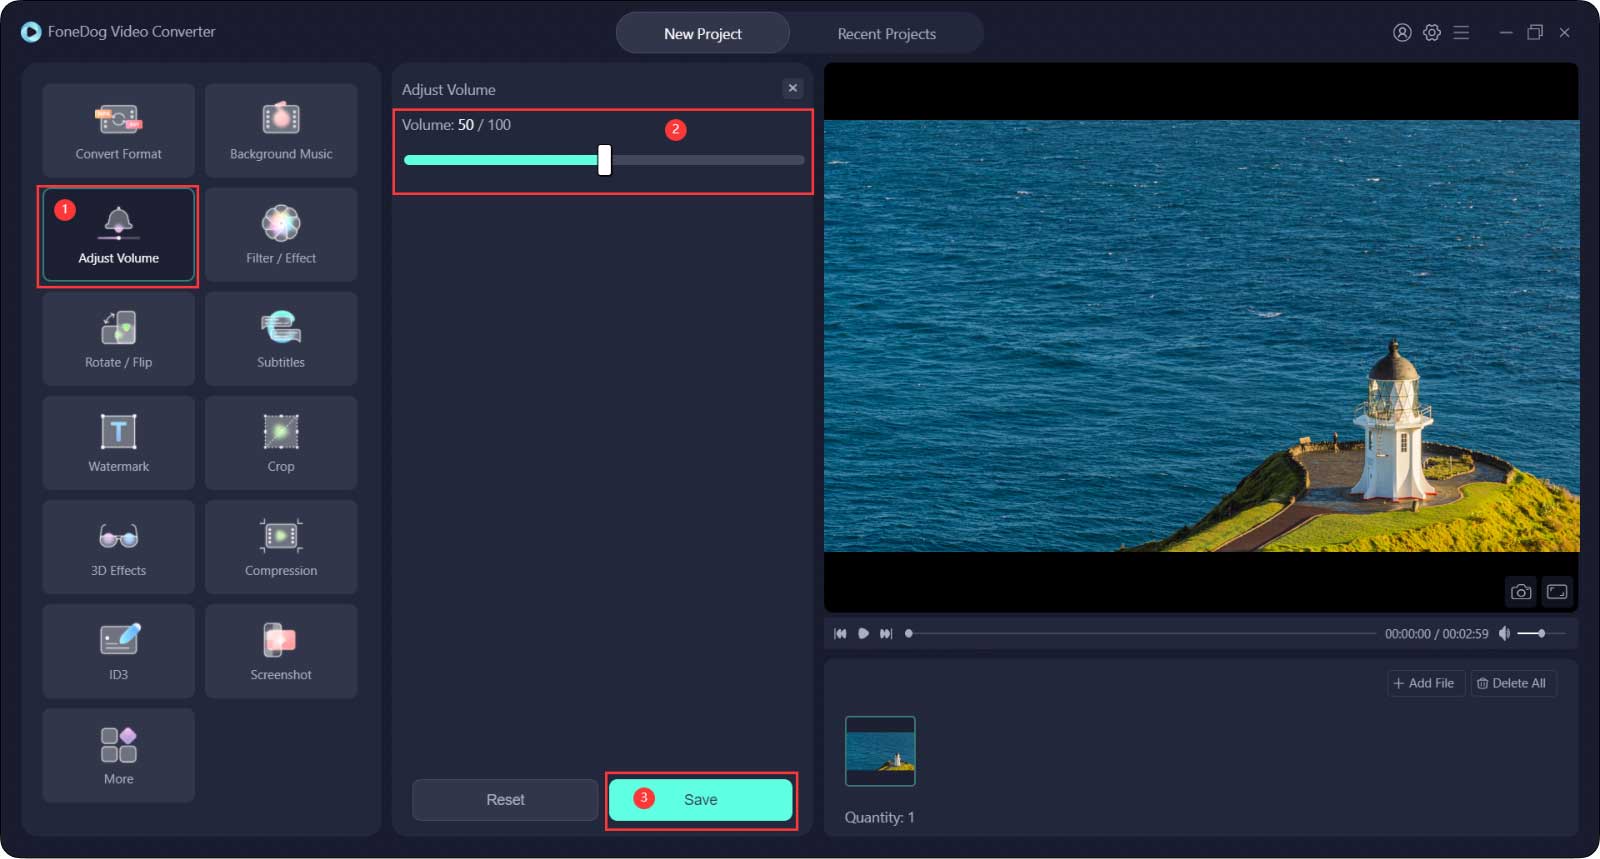
Step 1. Click on the "Adjust Volume" and you will see a Volume bar in the middle of the interface.
Step 2. Drag the volume bar to increase or decrease the video volume.
Step 3. Click Save.
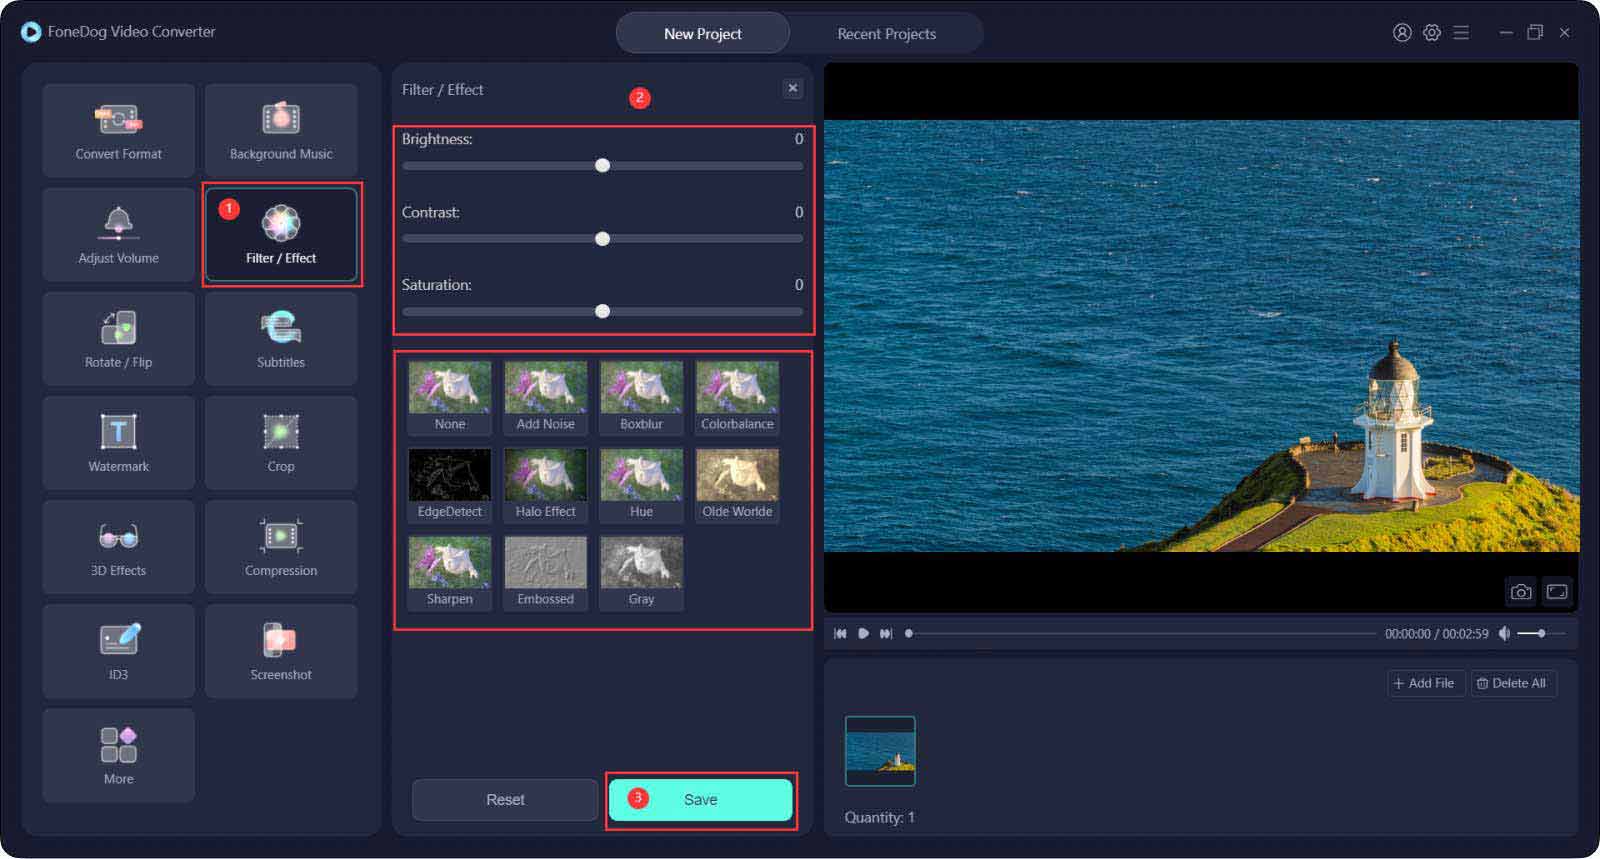
Step 1. Tap on the Filter/ Effect button.
Step 2. Make the adjustments by changing the brightness, contrast, and saturation; and choosing among filters. You can preview the adjustment in the video on the right side.
Step 3. Click Save.
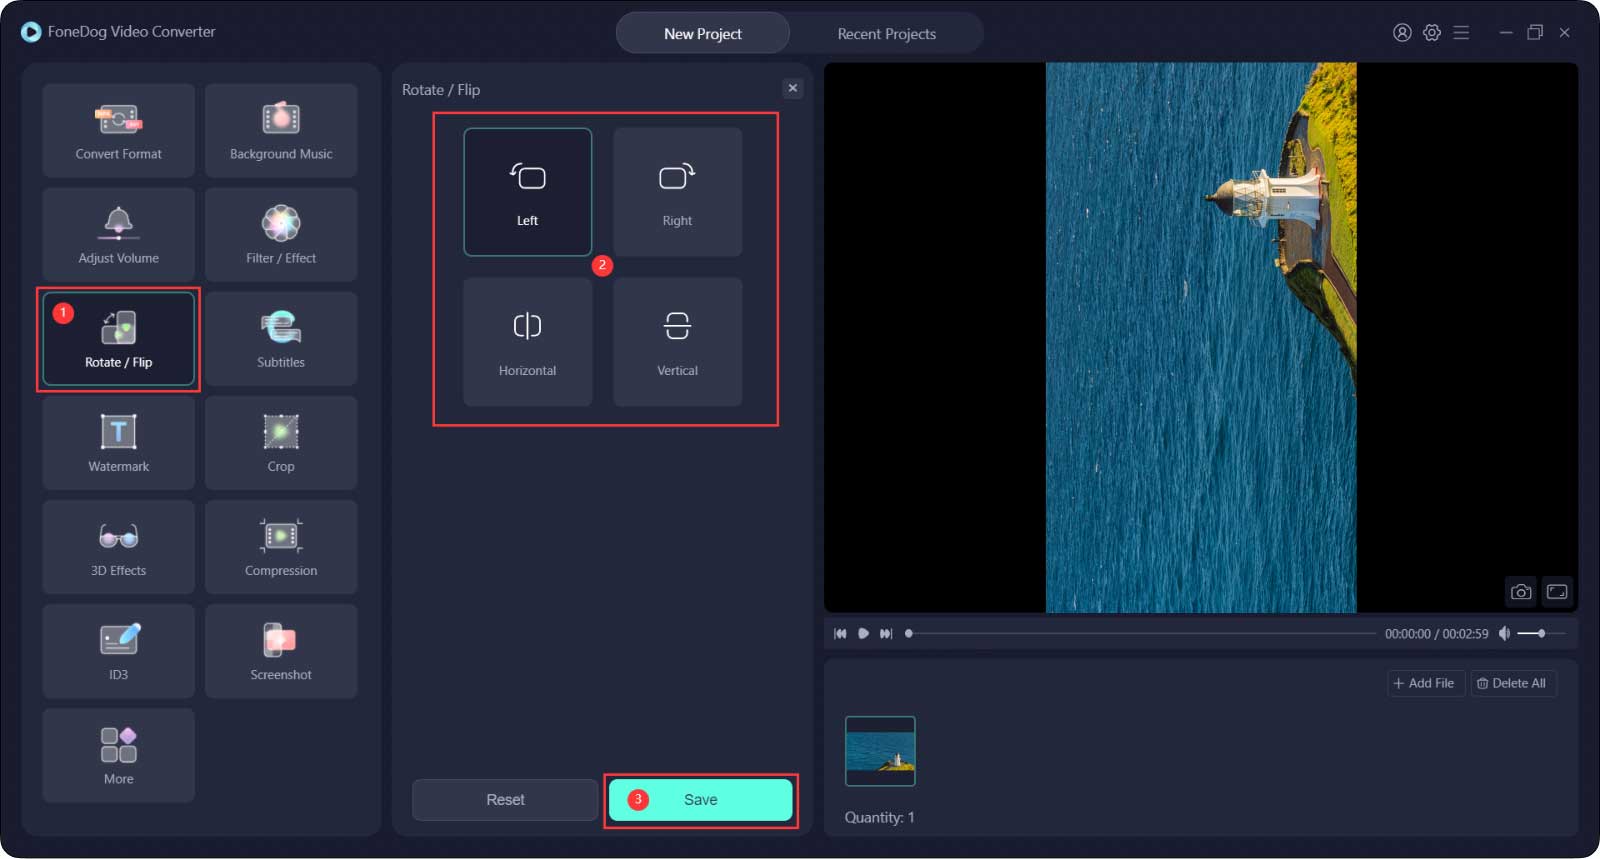
Step 1. Tap on the Rotate/ Flip button.
Step 2. Choose any direction you want to adjust and preview it on the right.
Step 3. Click Save.
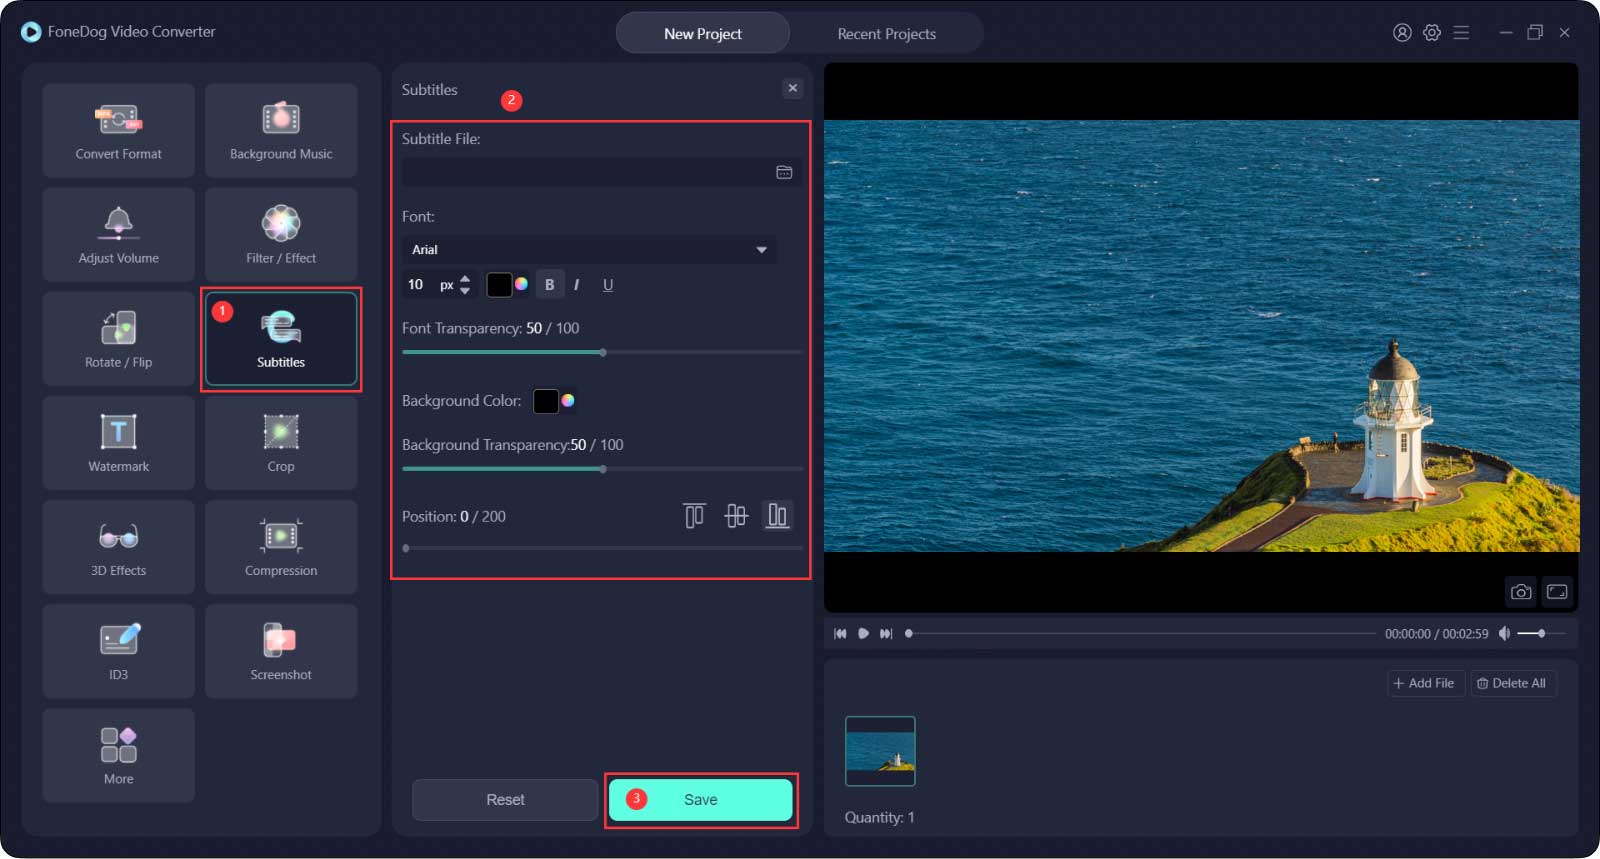
Step 1. Tap on the Subtitles button.
Step 2. Add a subtitle file by clicking the file icon. You can adjust the font style, format and transparency, background color and transparency, and subtitle position as well.
Step 3. Click Save.
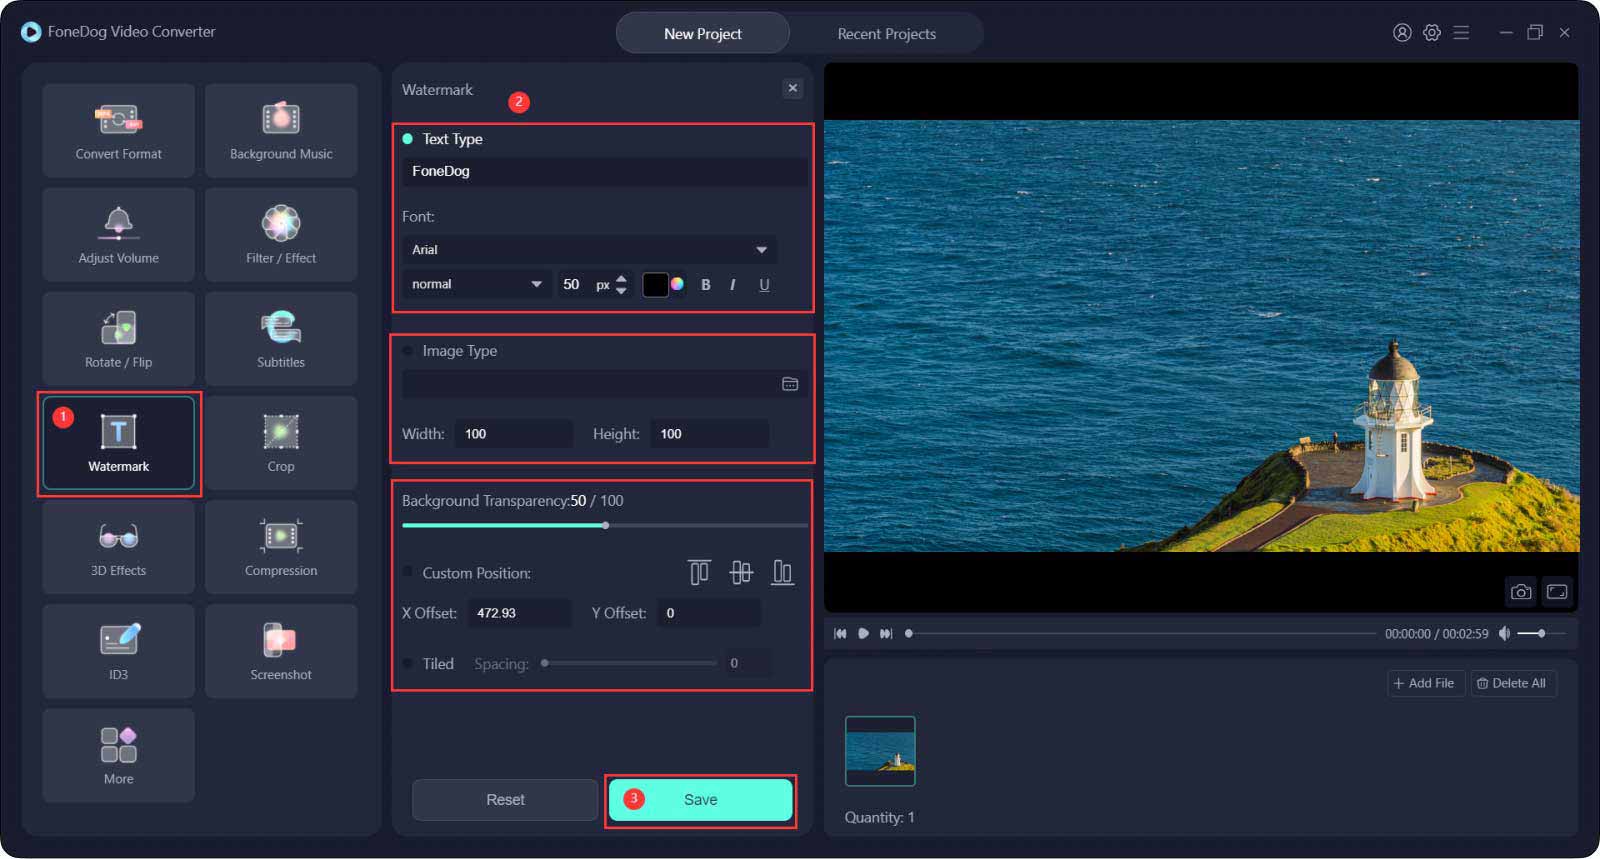
Step 1. Tap on the Watermark button. You can choose to add a text type or image type.
For text type, type in the text you want and adjust the "Font".
For image type, add an image file and adjust the size and transparency.
Step 2. You can choose "Custom Position" or "Tiled".
If you choose "Custom Position", you can select one of the position formats or choose the best position by setting the X and Y Offset.
If you choose "Tiled", drag the Bar to decide the spacing of your Watermark.
Step 3. Click Save.
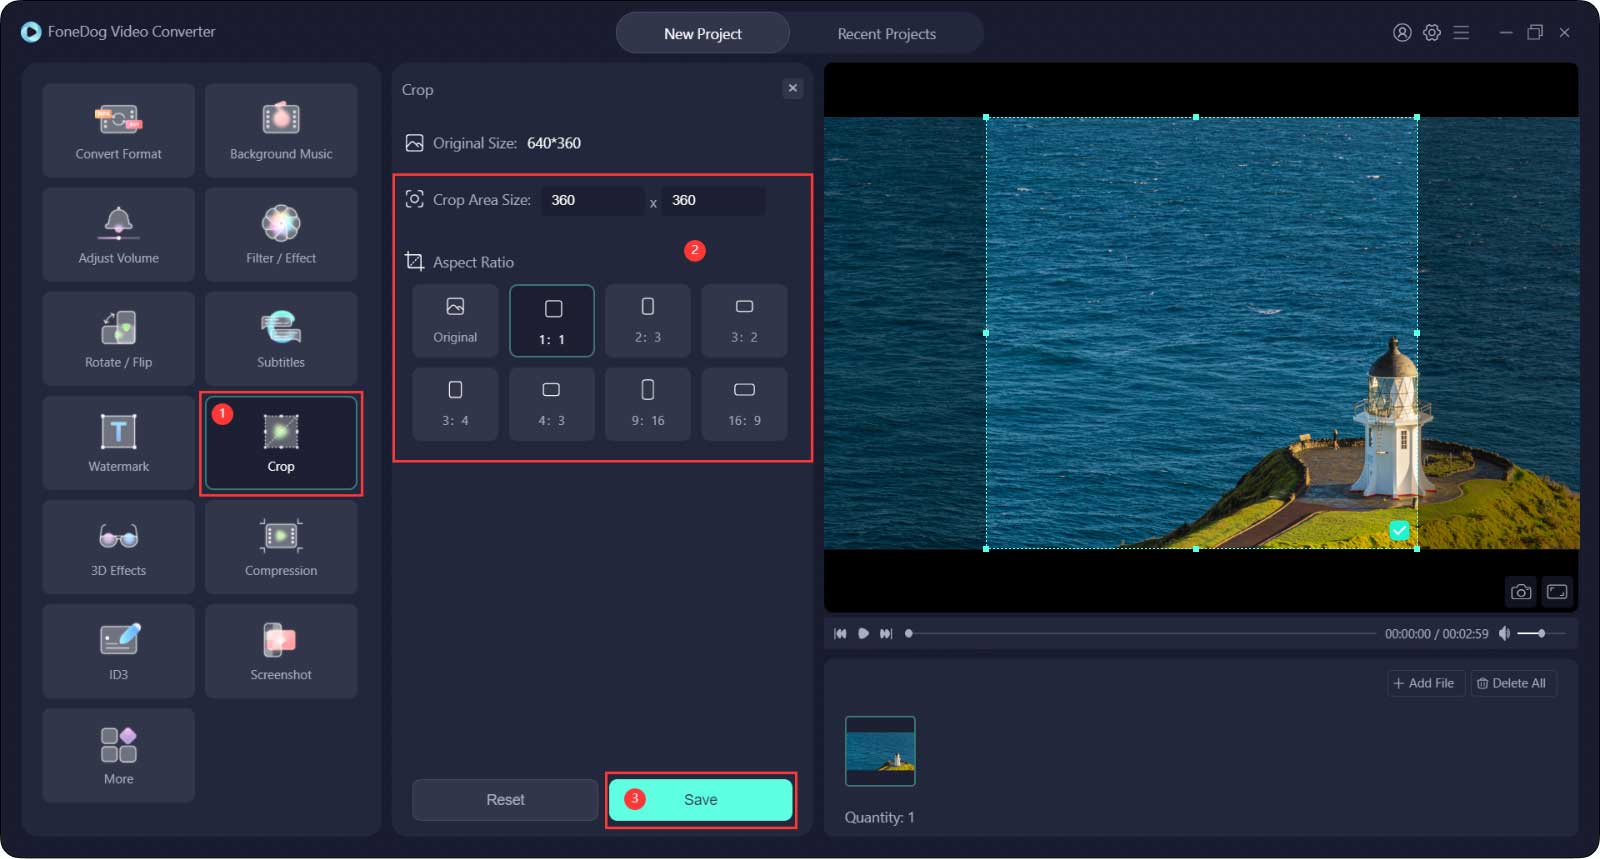
Step 1. Tap on the Crop button.
Step 2. Resize the video by clicking and holding the corner of the frame, and move the frame on the video to the area you want. Or simply select an "Aspect Ratio" below.
Step 3. Click Save.
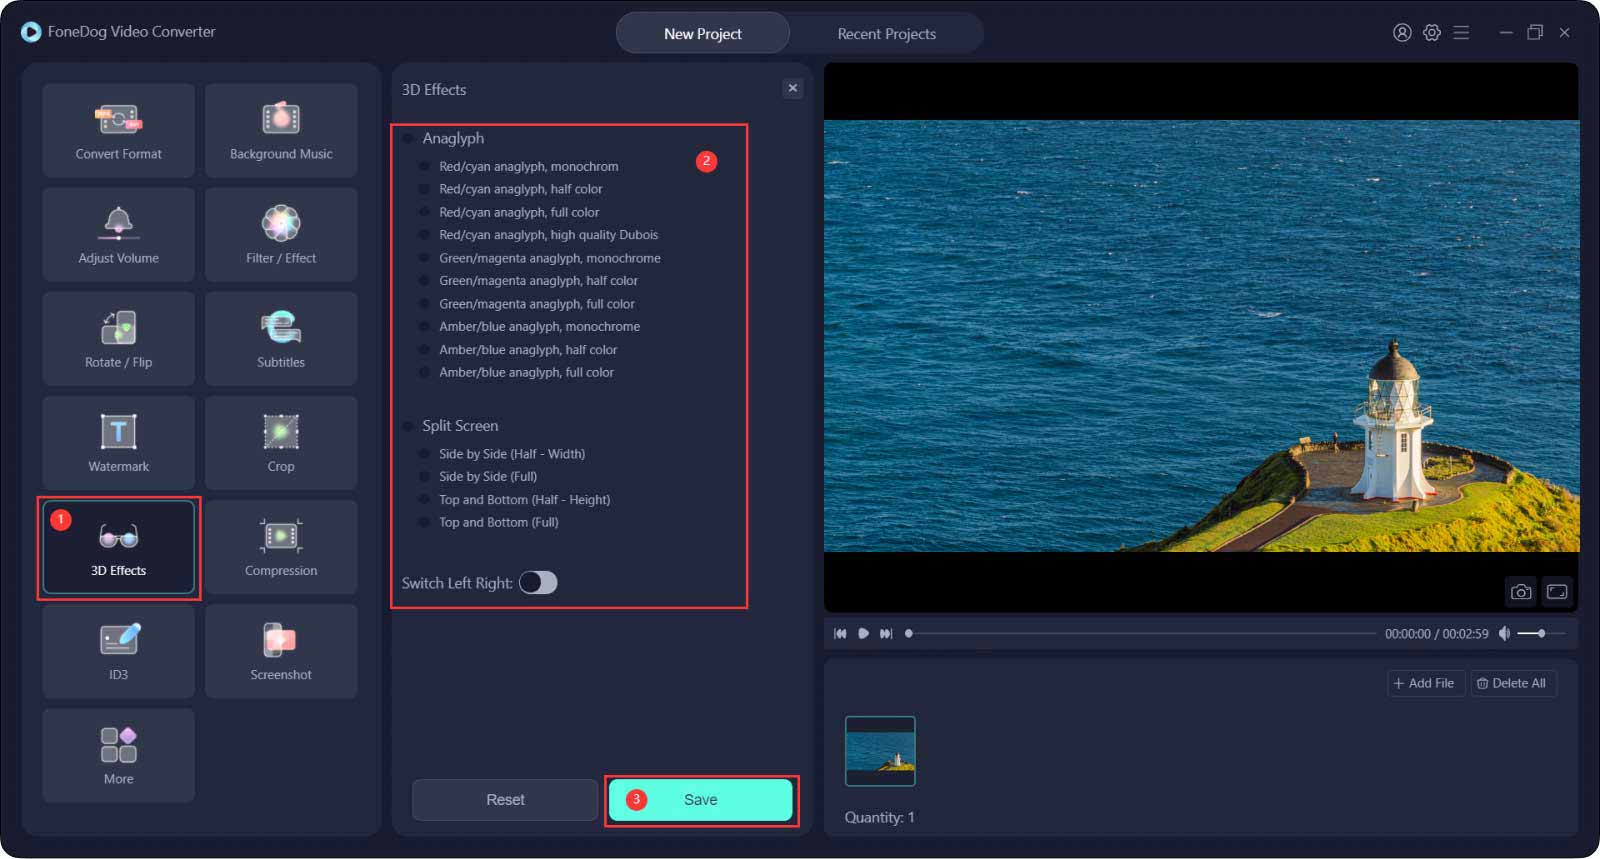
Step 1. Tap on the 3D Effect button.
Step 2. Choose between "Anaglyph" and "Split Screen", and select the effect you want below all by simply clicking the little round spot next to it.
You can also turn on "Switch Left Right" to swap the images seen respectively by the left and right eyes.
Step 3. Click Save.
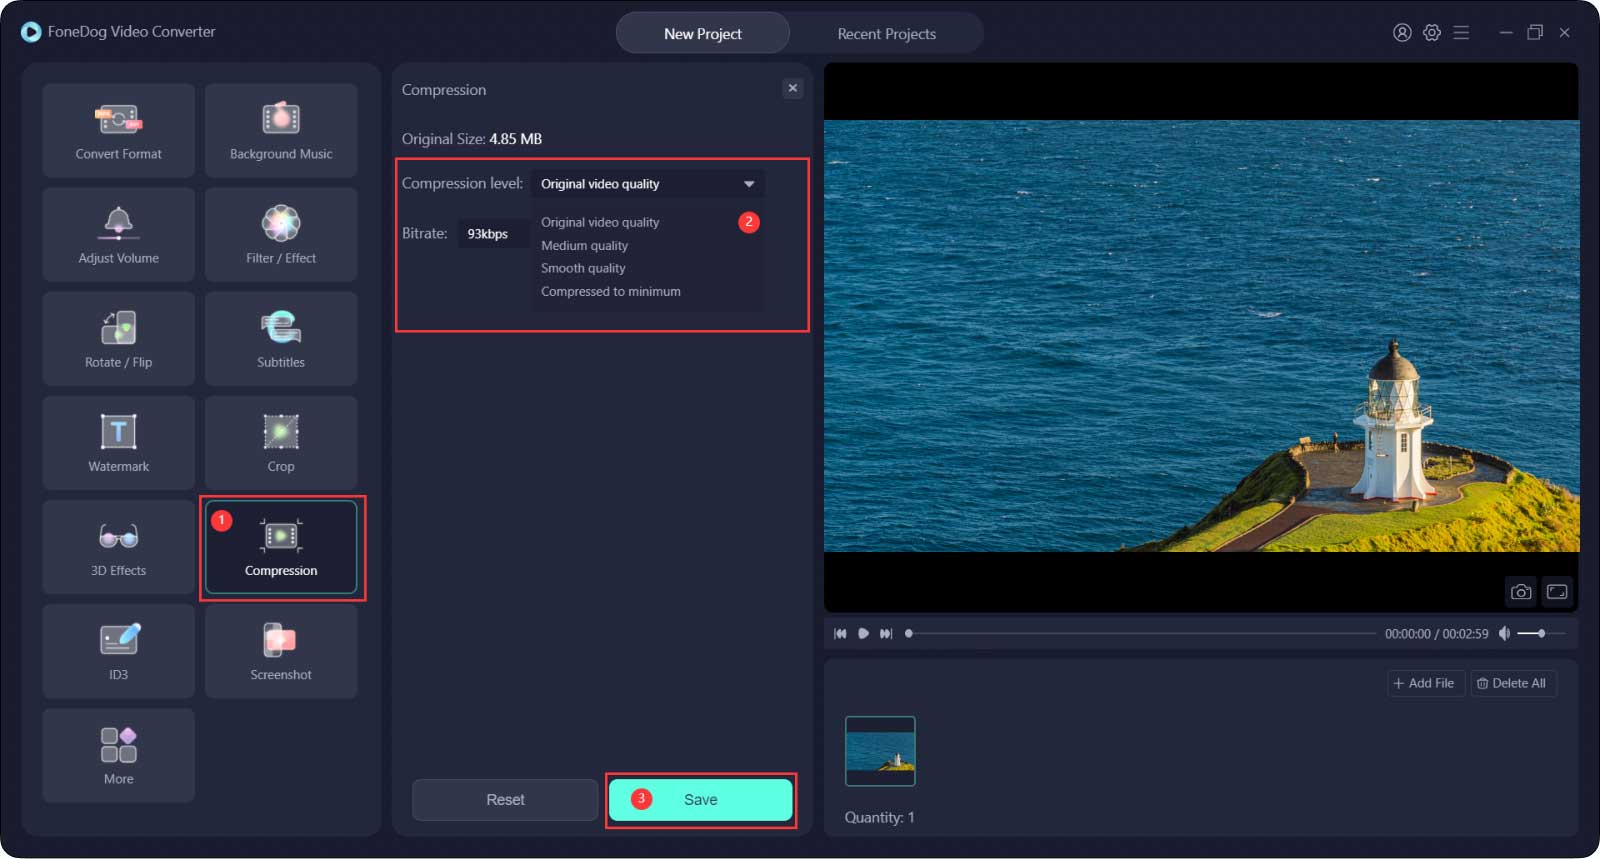
Step 1. Tap on the Compression button.
Step 2. Choose "Compression levels" and "Bitrate".
Step 3. Click Save.
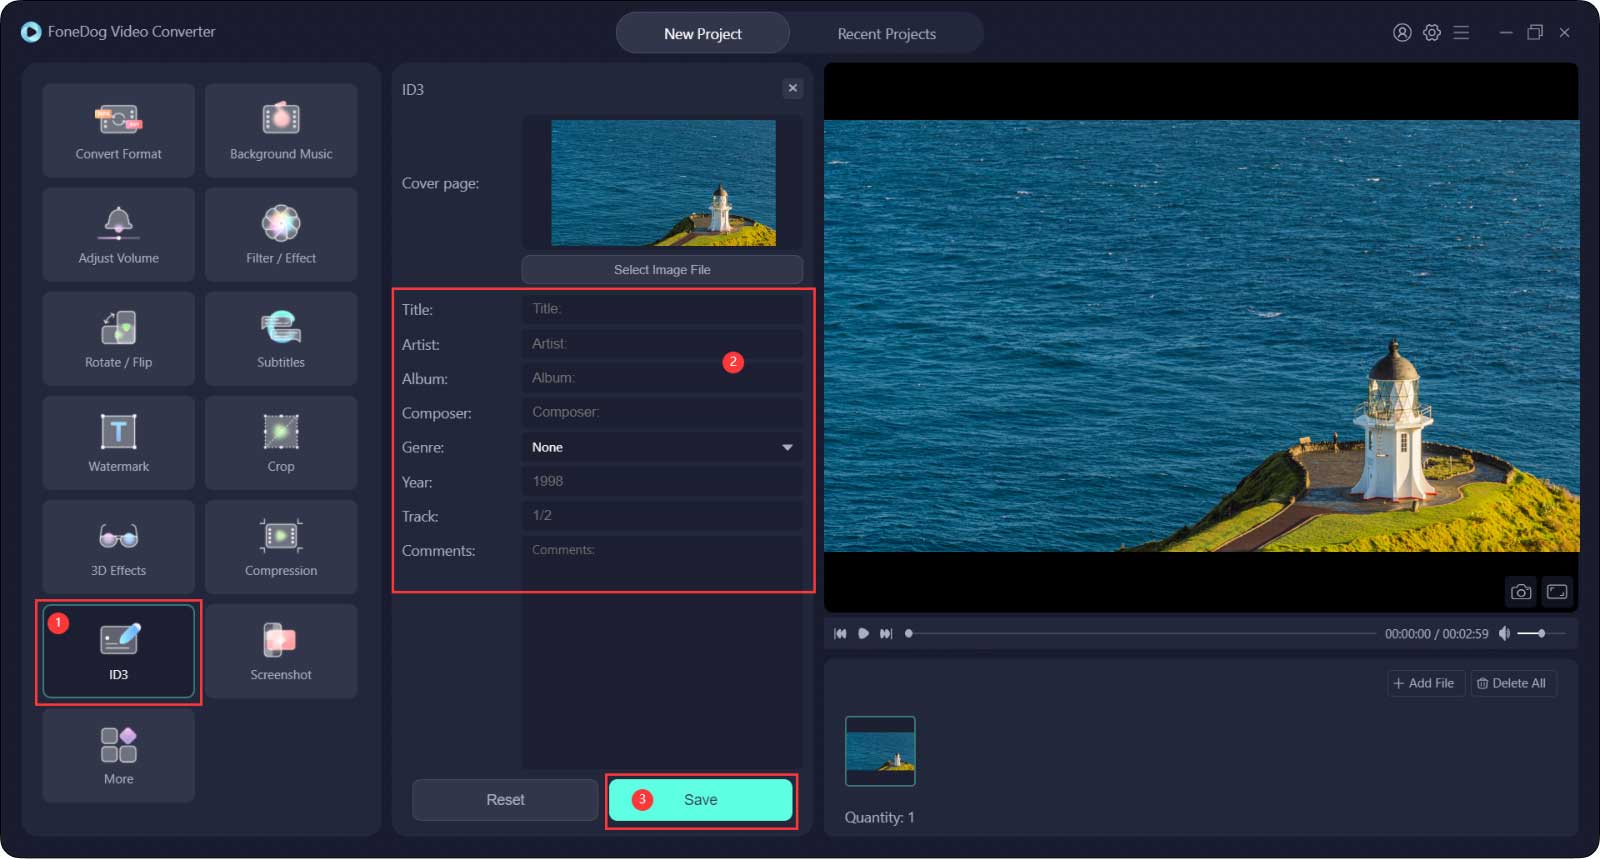
Step 1. Tap on the ID3 button.
Step 2. Click "Select Image File" to add an image as the "Cover Page".
Fill in the "Title", "Artist", "Album", "Composer", "Year", "Track" and "Comments"; and choose the "Genre".
Step 3. Click Save.
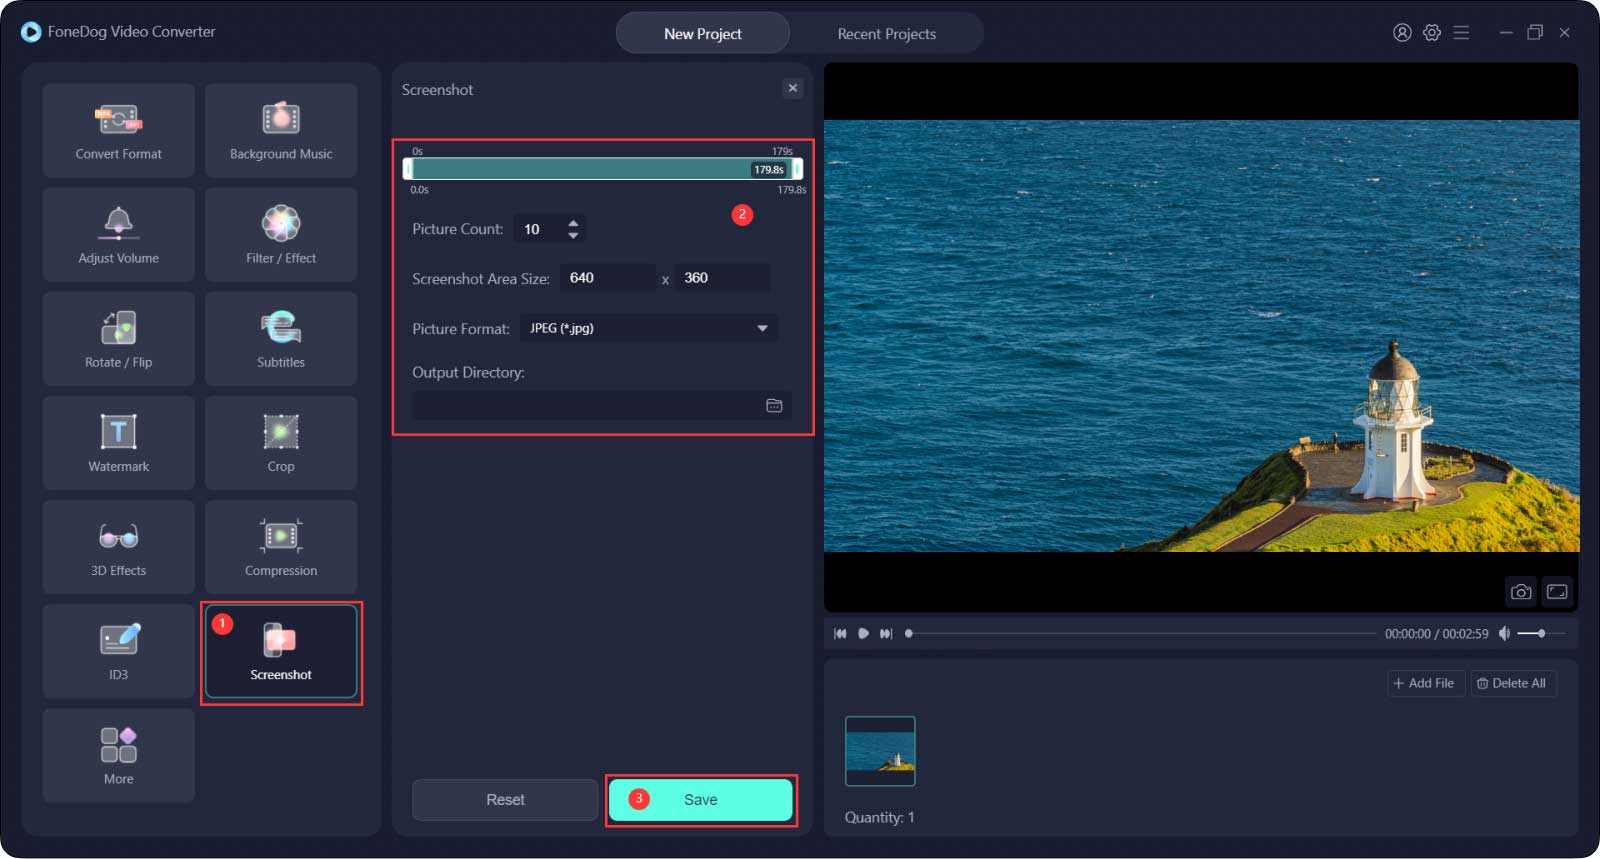
Step 1. Tap on the Screenshot button.
Step 2. Choose which clip (like from 2.0s to 7.0s) you want the screenshots. Then fill in a number that how many screenshots you want in the "Picture Count".
You can customize the "Screenshot Area Size" by resizing and moving the frame on the video, and selecting "Picture Format"
Step 3. Choose "Output Directory" and click Save.
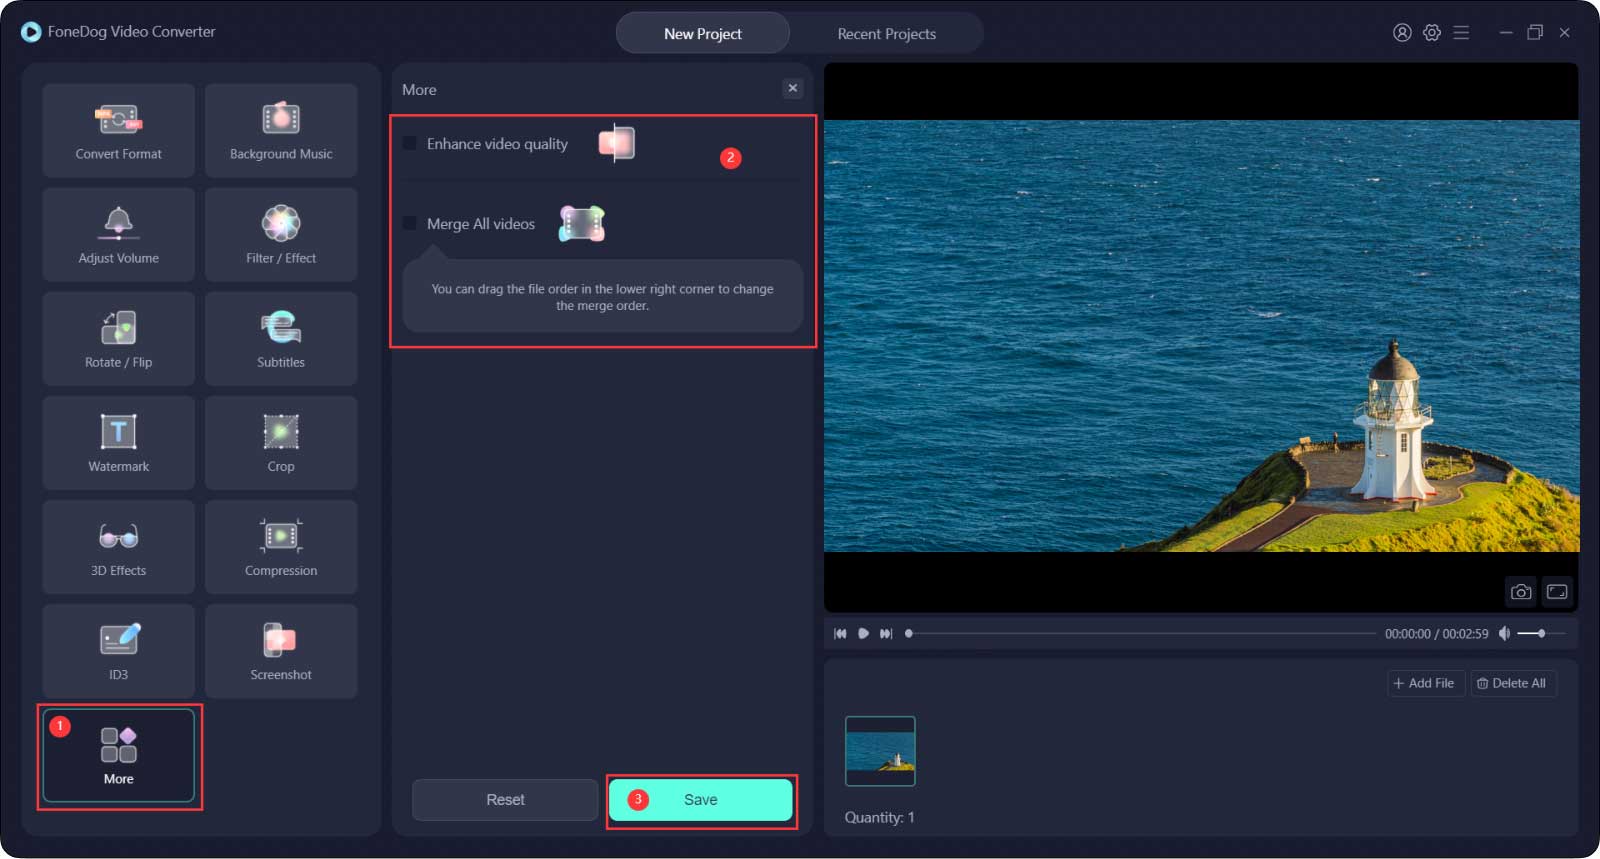
Check on the corresponding box under the "More" section.
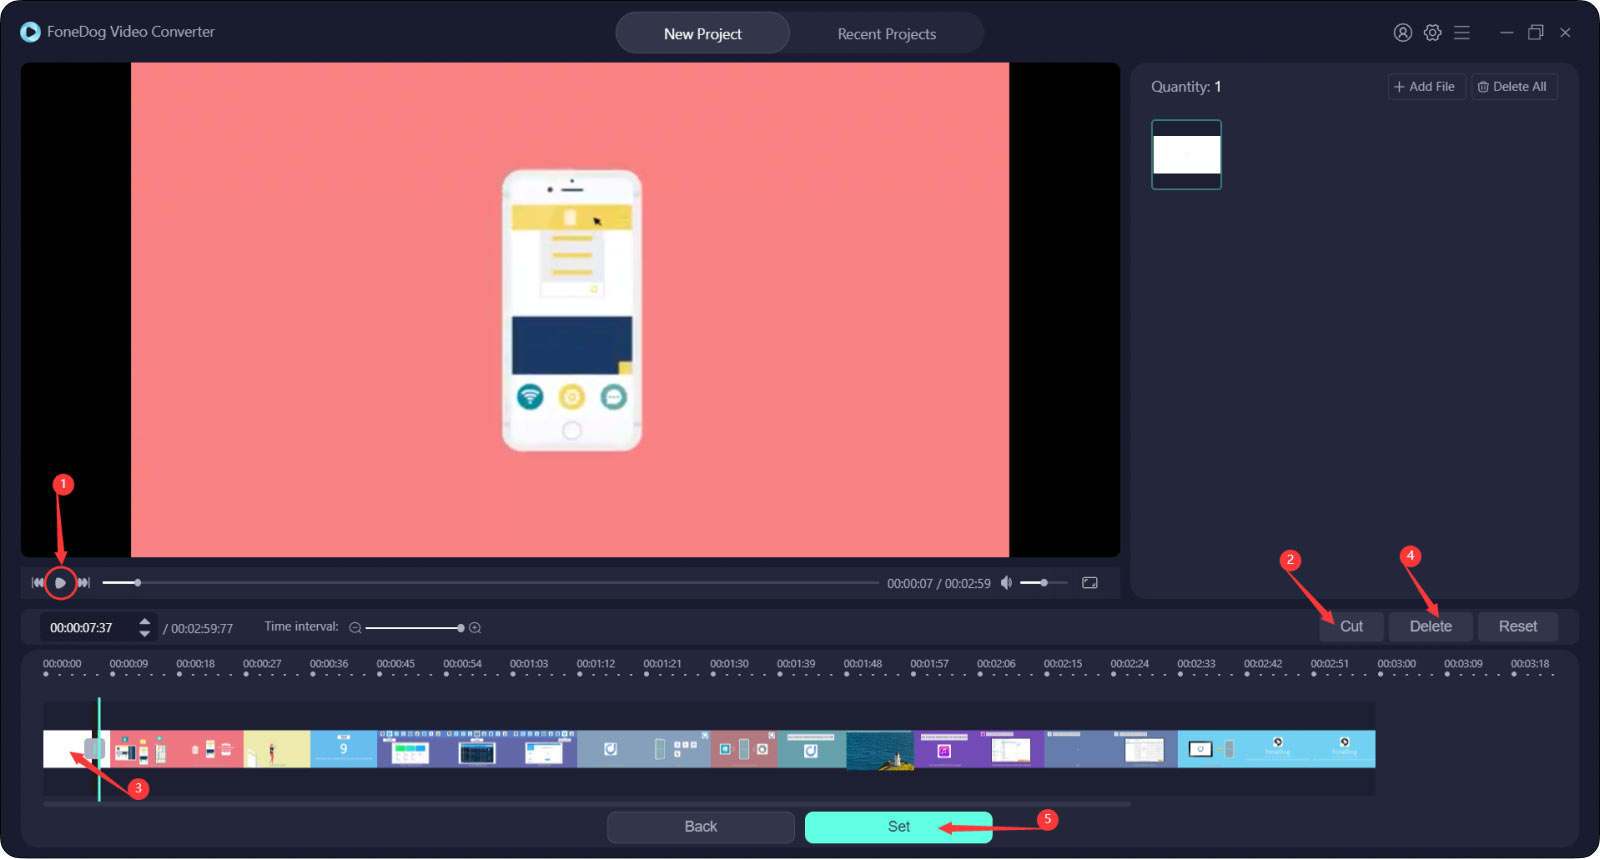
Step 1. After inputting, place your mouse on the video or audio from the bottom left part of the interface. When you see a scissors icon shows up, press it.
Step 2. Click the play key to locate the position you want. Click the pause button and then the Cut button to cut the video into two parts.
Step 3. After that, select the unwanted part and press "Delete", then click "Yes" on the "Are you sure to delete these items" pop-up window.
Or you can simply drag the Sliders on both sides of the Timeline to cut from the beginning or the end of the video, then press "Set".
You can also locate the cutting position by holding and dragging the Process Bar.
If you want to re-edit the clip, click "Reset" to restart the cutting.
Besides, "Time interval" comes to help you locate the cutting position more accurately. You can drag the bar to zoom in or zoom out the "Time Interval".
Step 4. Click "Set" when the trimming is done.