FoneDog Screen Recorder
FoneDog Screen Recorder
Special Offer
Special Offer


By Nathan E. Malpass, Last updated: August 27, 2019
You probably encounter the situation that your email rejects the instruction to upload your images as an attachment just because the images are lager than the limitation one email can accommodate. Or when you are signing up an account or filling up your personal information, you may find that you have to place your images sometimes. At all time, those images are limited and they have their own requirements. You have no alternative but to upload the images to meet such limitations and requirements.
Under those circumstances, you may need to know something about how to resize your images to make them suitable for the limitations and requirements. For instance, the image is oversize. Therefore, you may need to shrink down its size. Adding images into a zipped file seems to work here. Then, do you have any other workable ideas of how to resize images? Continue to read this article. There are 4 ways to resize images you probably don’t know about. It is a complete guide for you of how to resize images on Mac.
I. Resize An Image Using PreviewII. Make An Image Smaller III. Crop An Image in PreviewIV. Batch Resize
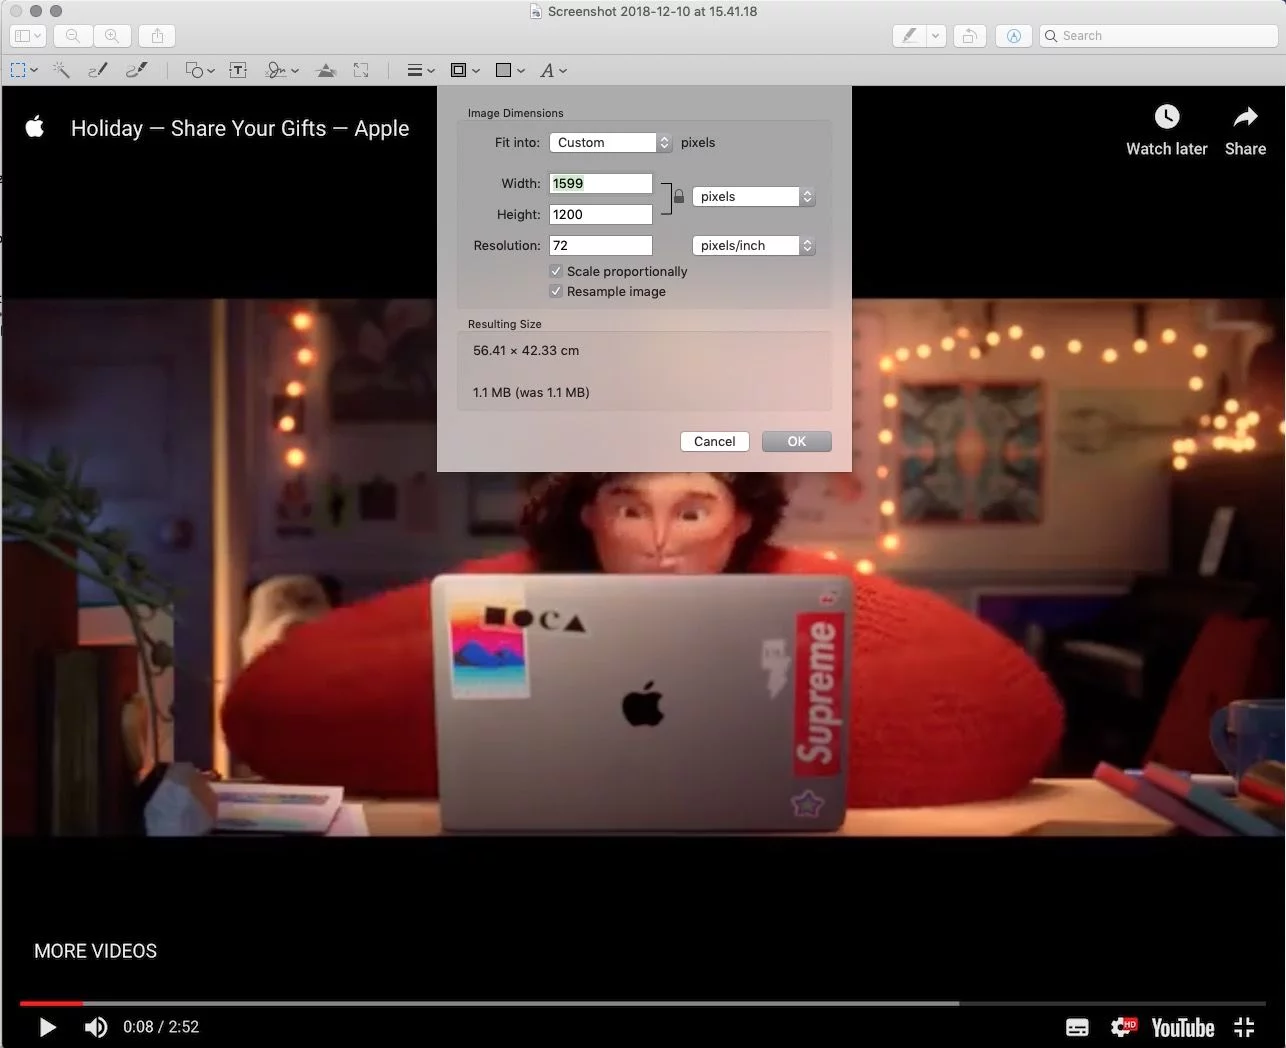
Change one dimension on the mini window and other dimensions will be adjusted proportionally if you have ticked Scale proportionally. If not, you can set a particular dimension for your image. For example, the size 600 x 300.
Based on Part I, you can also make your image smaller. As you change the dimensions, the size of the image change meanwhile. And you can preview the changing size shown with MB or KB. This is the first way to make your images smaller.
The second method to make an image smaller is to set the quality of images when exporting.
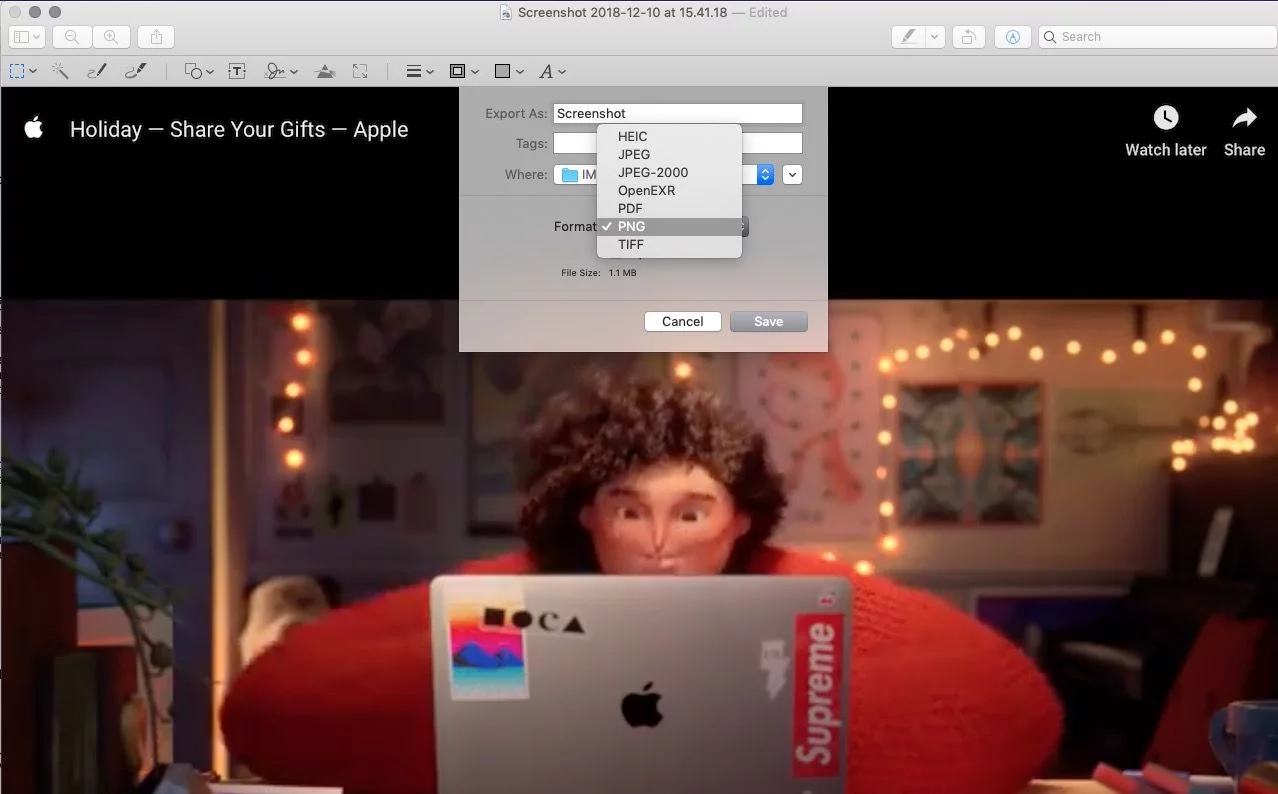
Resize without losing quality: Talking of the file format, if you want to make your image smaller but maintain its quality, you can choose HEIC, standing for High Efficiency Image Format. JPEG is double-size as HEIC but with the same quality.

The third method to make your images smaller is to use the FoneDog’s free online photo compressor. Using this tool, you have no need to download and install third-party software on your Mac, as it is a free online tool to compress JPEG and PNG files. At one time, you can compress up to 20 images and the maximum for each image is 5 MB. You can get this tool directly go to the FoneDog’ s official website.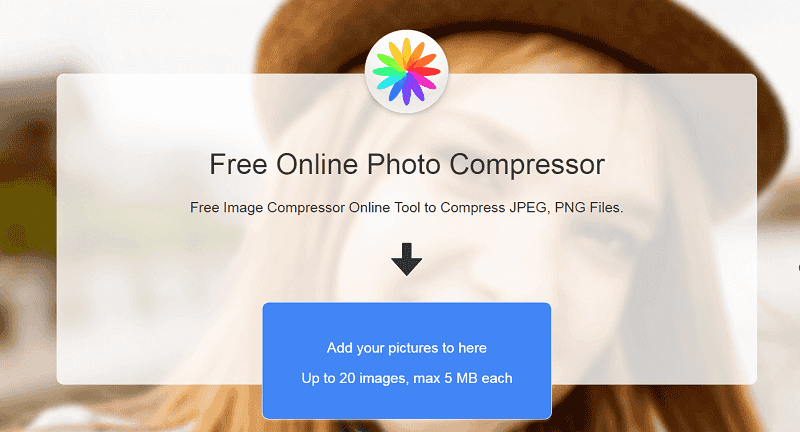
Choose Preview as the tool to view your photos on your Mac.
Now you can view the pictures in Preview.
Tips: Via the steps above, you can also view PDF files on your Mac.
If you have plenty of images to resize, you can choose to batch resize.
Change one dimension on the mini window and other dimensions will be adjusted proportionally if you have ticked Scale proportionally.
The size of the images in total will be shown in Resulting Size below.
Click File> Save or press Command + S to save the adjustment of the images.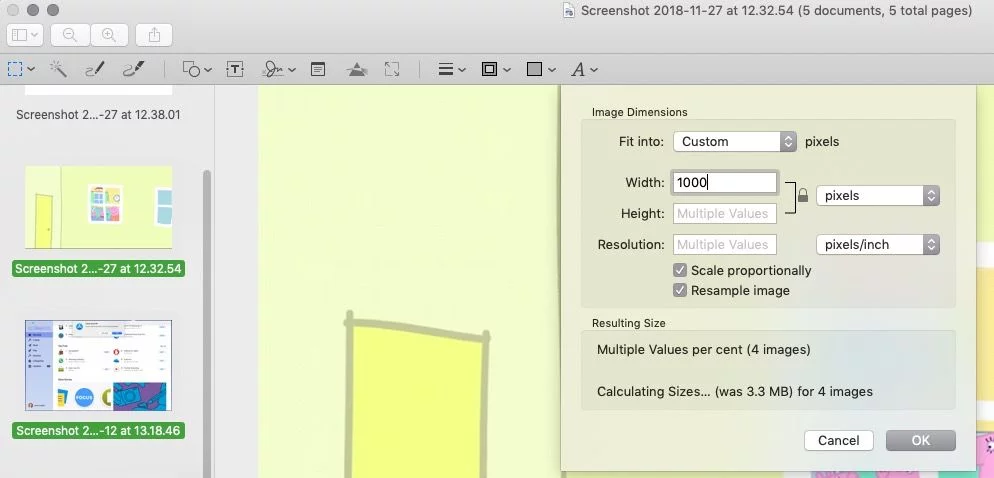
As what has been mentioned above, there are quite a few useful methods for you to resize your images on Mac. 4 main methods are provided for you above, you can choose one or more favorable means along with the corresponding steps to resize your images on Mac. For example, you can choose to change the file format or make your images smaller to resize your images.
If you just want to make your images smaller with no other requirements, you are better to have a trial on FoneDog free online photo compressor. It is far more convenient and much quicker than any other methods introduced to you. At last, hope you would resize your images in the needs you want with the methods above.
Leave a Comment
Comment

iPhone/Android Devices’ Maintenance Expert
Staying home, listening to music, writing tech articles
Many people asked me to repair their mobile phones so I have a lot of experience in mobile phone repair, and I know a lot about Android or Apple phones.
 /
/
INTERESTINGDULL
/
SIMPLEDIFFICULT
Thank you! Here' re your choices:
Excellent
Rating: 4.6 / 5 (based on 64 ratings)
