FoneDog Screen Recorder
FoneDog Screen Recorder
Special Offer
Special Offer


By Adela D. Louie, Last updated: January 29, 2023
When you try to upgrade your Mac device to the macOS 10.13 High Sierra, you will be able to notice that there is an “Other Volume in Container” in your Storage section and an “Other Volume” category as well which is located in your Disk Utility on your Mac device.
Now, many of us are very fond of using our Mac. This goes especially if we are working and we needed some documents to be done for a certain presentation. Or you are still studying and you needed some paper works to be done for school.
And because of the way we use our Mac is our everyday life, it is more likely that you will get a notification that says “your disk is almost full”. This is because the other volume in the container is having a lot of gigabytes of the storage of your Mac. And we say “a lot” we mean hundreds of gigabytes that is occupied on your Mac device.
Some other users notice that the other volumes in the container are getting huge. And the downfall of which is that they do not know what are these other volumes in container means. Which is one reason as to why they do not know what to do or what are the things that they will be needing to remove from their Mac for them to get rid of this?
That is why in this article, we are going to show what is other volumes in container means and at the same time, how you can manage and get rid of this on your Mac.
After some years of writing programs for macOS, we have created an all-in-one tool that every MacBook user is able to use.
Here is a tip: Download FoneDog PowerMyMac to clean up your Mac in one click and prevent Other Volumes in Container from getting full easily. For you to do the cleaning all by yourself, we have gathered our best solutions below.
PowerMyMac
Scan your Mac quickly and clean junk files easily.
Check the primary status of your Mac including the disk usage, CPU status, memory usage, etc.
Speed up your Mac with simple clicks.
Free Download

Part 1: What Does it Mean by Other Volumes in Container?Part 2: Preventing Your Other Volumes in Container from Getting FullPart 3: Removing Other Volumes in Container on Mac’s StoragePart 4: Conclusion
People Also ReadHow to Fix iPhone Alarm Not Going Off How to Fix iPhone Alarm Not WorkingPower Button Is Not Working: How to Restart Your LG G5
As of the AFP, there is a new system of files that Apple had released to the new macOS High Sierra version. This is a container that is said to be just like the partition in the file system. A particular disk on your Mac comes with several containers and one container that comes with several volumes virtually. These are the ones that also occupies space in your storage.
Here is the answer to what are the "other volume in container".
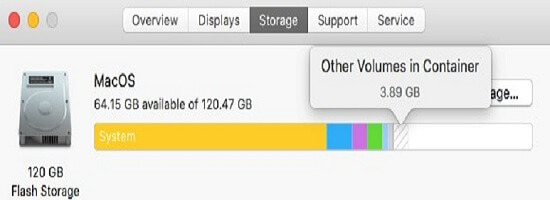
So the other volumes in a container is the Preboot, VM, and Recovery in APFS. They are additional invisible volumes that help MacOS function correctly.
Since that we now know the meaning of other volumes in the container, it still does not imply that we can have them removed on our Mac easily. There is no chance of getting rid of other volumes in a container on our Mac as these are files that are needed by our Mac to run.
But on the other hand, there is a way for us to prevent other volumes in the container from growing. This way, you will be able to decrease the space that is occupied by the other volumes.
As we have said earlier, we cannot get rid of the other volumes in a container on Mac completely. However, we can do something to prevent it from getting full and for you to clear out some space for your storage.
And with that, you can use the FoneDog PowerMyMac for you to be able to get rid of those system junk such as your caches, your iPhoto junk, similar photos, email junk, clean up your Trash Bin, your iTunes Junk, your Large and Old Files. You can also use this powerful application for you to find all of the duplicate files that you have such as photos, videos, and documents.
The FoneDog PowerMyMac will be able to help you in getting more space for your storage on your Mac and will prevent you from getting a warning of “your disk is almost full”. And for you to be able to do this, here is a quick example on how you can clean up your Mac and prevent your other volumes in the container from getting full.
After installing the FoneDog PowerMyMac on your Mac, go ahead and click on the app and have it run on your Mac. And once that you are on the main page of the application, you will be able to view the system status of your Mac by default.
Still, on the main page of the FoneDog PowerMyMac, you will see three different options that you can choose from. This is located at the top of your screen. From there, go ahead and simply click on the Cleaner for you to choose it.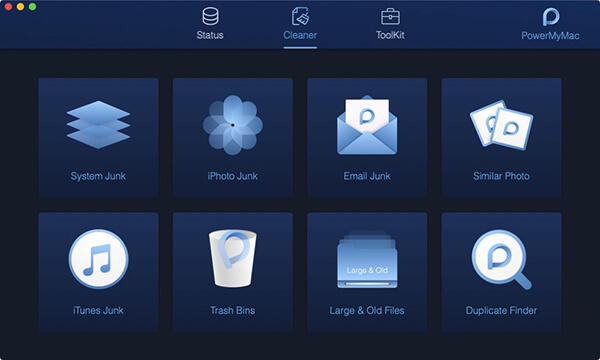
On the Cleaner page, there are several functionalities that the FoneDog PowerMyMac has to offer. You can choose any of those functionalities on your screen but if you want to clean up all of your caches on your Mac then you can start by clicking on System Junk.
After choosing a functionality, the application will then require you to have a scan on your Mac. And for you to do this, just go ahead and simply click on the Scan button and process will then start. So just wait for the scanning process to finish.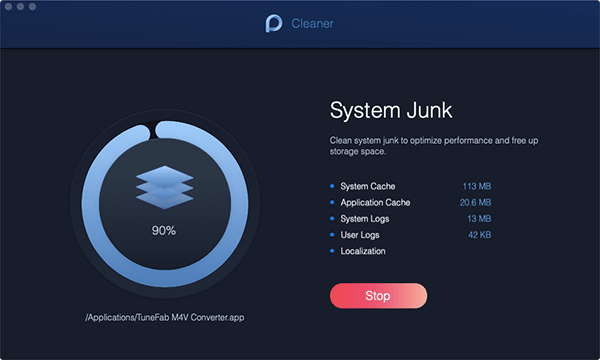
When the Scanning process is complete, all you need to do now is to hit on the View button. This way, you will be able to see the result of the scanning process. Then on the left side of your screen, there are categories of caches that you can clean up.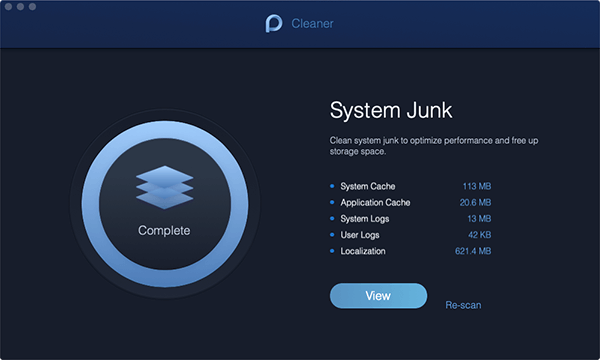
On the list of categories located at the left side of your screen, go ahead and choose the ones that you would like to clean. You can choose from System Cache, Application, Localization, User Logs, and System Logs.
And if you click on one of those categories, files that it contains will then show up on the right hand of your screen. From those files that you see, go ahead and mark down the ones that you want to remove by clicking on them.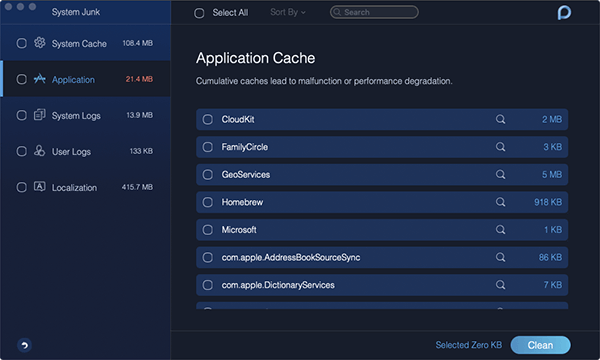
After choosing all of the files that you want to remove from your Mac, go ahead and simply click on the Clean button which is located at the lower right-hand corner of your screen. Then a confirmation message will show up on your screen as well. From that message, go ahead and hit on the Confirm button and the cleaning process will then start.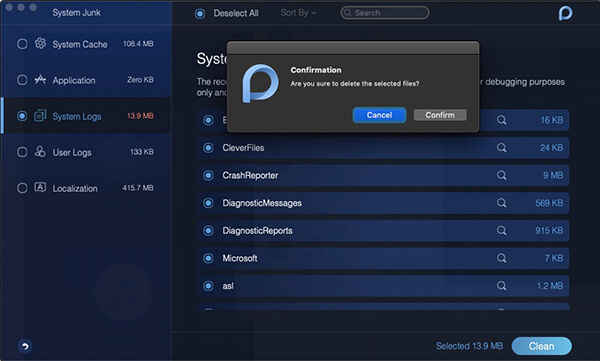
So that is it! You were able to remove all of the caches that you have on your Mac. And aside from that, you can also choose the other functions that in under the Cleaner module. This way, you will be able to prevent your other volumes in the container from getting full.
Some users said that they were able to regain space for their storage from their other volumes in container. And we hope that one of these solutions will work on your part.
There might be some suspicious apps that you have on your Mac that is eating up space on your Mac. So in that case, you need to get rid of those suspicious apps that you have on your Mac.
So the very first thing that you need to do is to proceed to your Activity Monitor and then go to the Memory tab. From there, you will be able to see any processes that you might find an application that is eating up a huge space on your storage. So once that you see a huge process that is eating up the storage space of your Mac, then you have to end that certain process.
After that, you can go ahead and simply check on the other volume in the container were able to give you the space for your storage. And then, go ahead and simply uninstall the application eating up more space on your Mac device. But you have to remember, when you try to uninstall a certain application on your Mac, you have to make sure that you were also able to delete all of the files that are associated with the said app.
Aside from uninstalling the app that is eating up a huge space on your Mac, you can also try to make a new account. And once that you are done doing this, you can go ahead and use that new account to sign in to your Mac device This process had been said that once you have created a new account, then the other volumes in the container will reduce the space that it is taking up.
So, for you to be able to make a new account for your Mac, here are the steps that you will be needing to follow.

And once that you are done with the method that we have shown you above, go ahead and log in your new account on your Mac. And after that, simply check on the other volumes in container.
As you can see, other volumes in Mac is very much easy to find. Now that you were able to know how to see the other volumes in the container, it is then time for you to be able to do something for you to prevent your Mac’s disk from getting fool.
And with that, we have already given you the best ways for you to prevent the other volumes in the container from getting full. You can make use of the FoneDog PowerMyMac to make your life easier as cleaning up all the files that you no longer need is only a one-click away.
And with the help of the FoneDog PowerMyMac, you were able to clean up your Mac. And because of this, you will be able to prevent the other volumes in the container from getting full since there is no way that you can remove the other volumes in the container completely from your Mac. So this is one way for you to keep your Mac running better and at the same time, gain some more space for storage.
Leave a Comment
Comment

Tech Website Writing /Content Optimization
Singing, smiling, surprising every day!
So as a technical writer, it is my duty to gather effective and reliable solutions to answer questions on how to deal with the issues they are having with their devices.
 /
/
INTERESTINGDULL
/
SIMPLEDIFFICULT
Thank you! Here' re your choices:
Excellent
Rating: 4.7 / 5 (based on 83 ratings)
