FoneDog Screen Recorder
FoneDog Screen Recorder
Special Offer
Special Offer


By Adela D. Louie, Last updated: May 13, 2022
It can happen that you sometimes struggle to delete system storage on iPhone even when you try so hard. You get notifications like, “iPhone you don’t have permission to delete this item”, and this can really be so frustrating especially if you elicit the file immediately.
Here, you will be able to know the possible reason for this, as well as the methods that you can try to fix the said issue, and never received the same notification again while you are in the middle of deleting a file. We will also share with you a tool that you can make use of in case you think that the initial recommendations and methods will not suffice to solve the dilemma.
At the end of the article, you will find answers and solutions in case you have received the “iPhone you don’t have permission to delete this item” notification before or in case you will get to receive one in the future. Let us first answer some of the most asked questions regarding this topic so some of you might also be enlightened as well.
Part #1: Some of The Basic Facts to Know When You Don't Have the Permission to Delete A FilePart #2: How to Delete An Item When You Do Not Have The Permission to Do So?Part #3: To Summarize It All
Before we head into the solutions, let us first identify what is behind the notification “iPhone you don’t have permission to delete this item”. There can be a lot of reasons why you have received this notification, your iTunes or iCloud accounts may be having some issues, and there can be also bugs on the app causing the said notification. It can also be because you are using an old version of iOS, or the file that you wanted to delete is corrupted. You can also have problems with the recycle bin or recycle folder of your device that’s why.
The said situations discussed above are some of the things that you should consider. You could also make use of these things to be able to know which is the best method that you can use.
For the second part of the article, we will now talk about some of the fixes that you can use to solve the dilemma of encountering the notification, “iPhone you don’t have permission to delete this item”. You can choose which methods you are going to try to know which can solve the issue, or you can try everything to see which one best works.
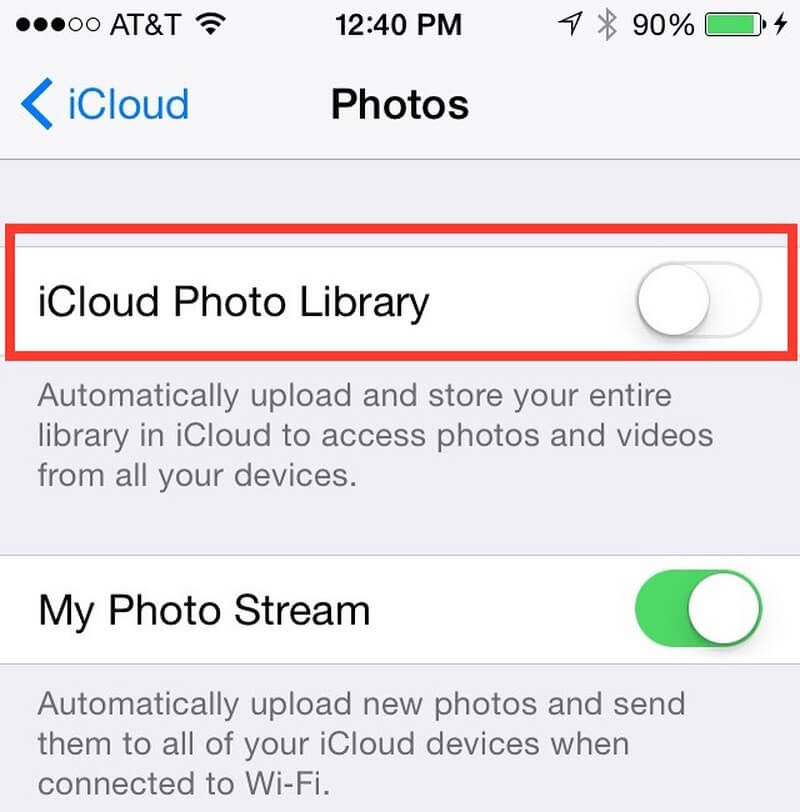
The first method that you can try is to disable your iCloud photo album since one of the possible reasons could be the feature of iCloud which is picture management. You have to disable this feature to be able to delete files on your computer, particularly the photos. You also have to be reminded that there is no need for you to disable the whole iCloud, only the iCloud Photo Album is advised to be disabled. You have to follow the steps that will be listed below to solve the notification “iPhone you don’t have permission to delete this item”.
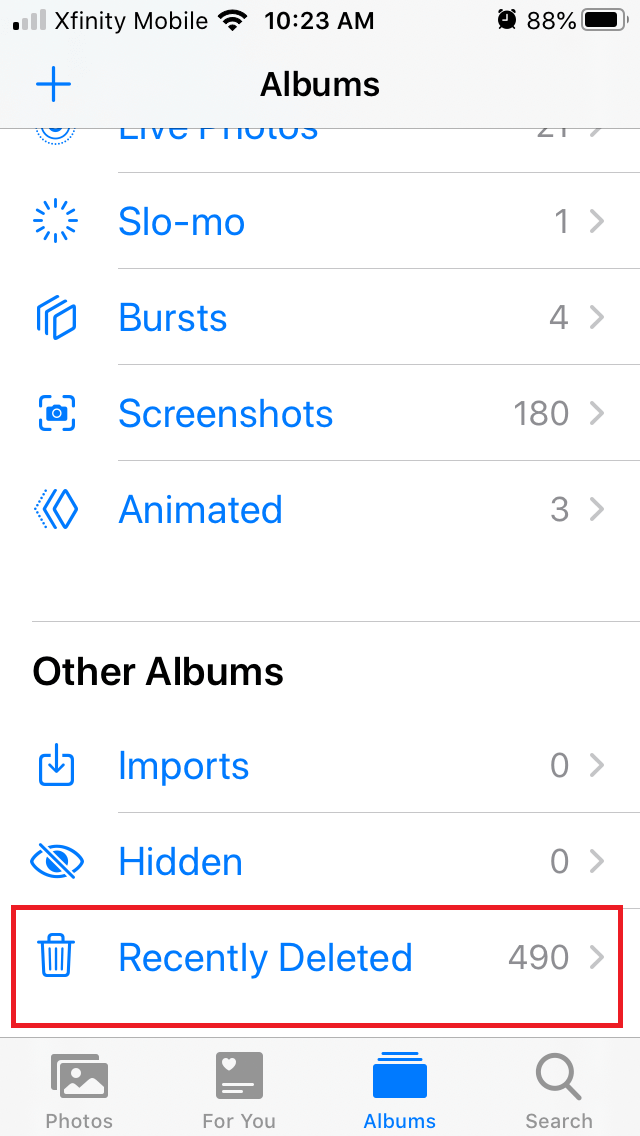
Another convenient fix that you can try is to use the “Photos” app on your device. You can try to delete the photos one after the other one, and see what happens next. Here’s how you do it:
If you opted to choose this method to solve the dilemma, you will still find all the deleted photos on your device in the “Recently Deleted” folder. So, in case the purpose of deleting the photos is to save the storage of your device, you still have to empty out your “Recently Deleted” folder.
You can also try one of the easiest ways to fix the notification, “iPhone you don’t have permission to delete this item”. This one is to try restarting your device or iPhone. The way you restart your device varies depending on the type of iPhone or device that you have. Let us have a look at how you do it based on these types of iPhones.
For the last method, we will be talking about the best one that you can use. In case you do not think that the initial methods that were discussed are enough to solve the notification “iPhone you don’t have permission to delete this item”, this tool is the best iPhone cleaner app that you can use and you will ever know, FoneDog iPhone Cleaner.
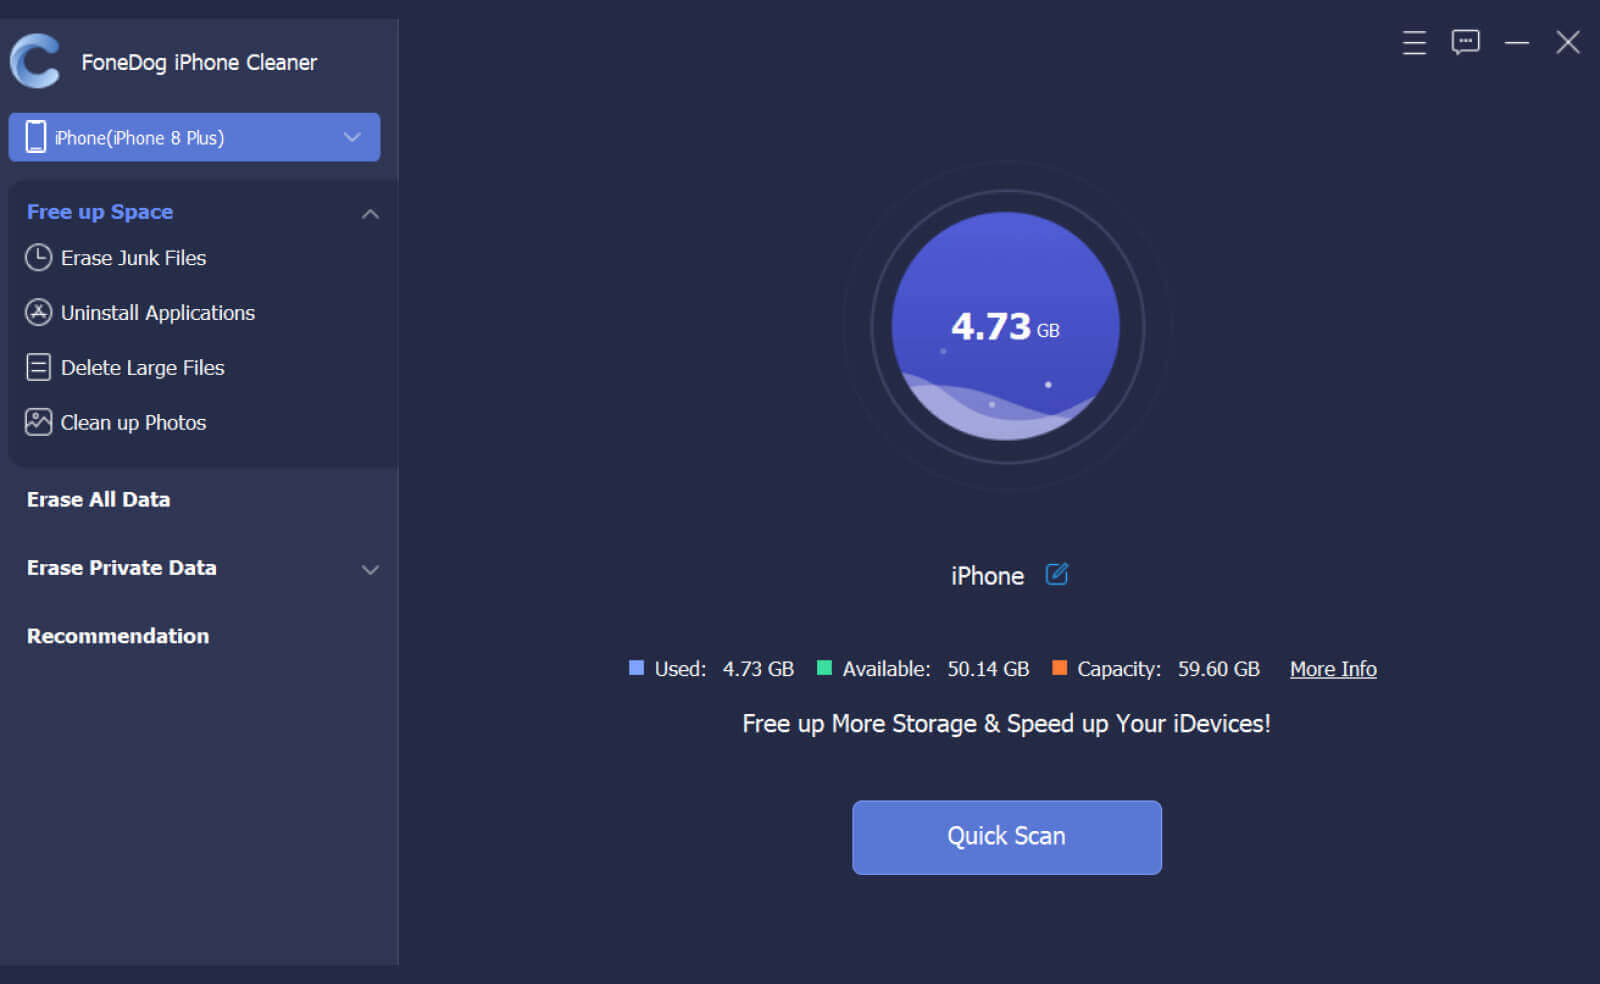
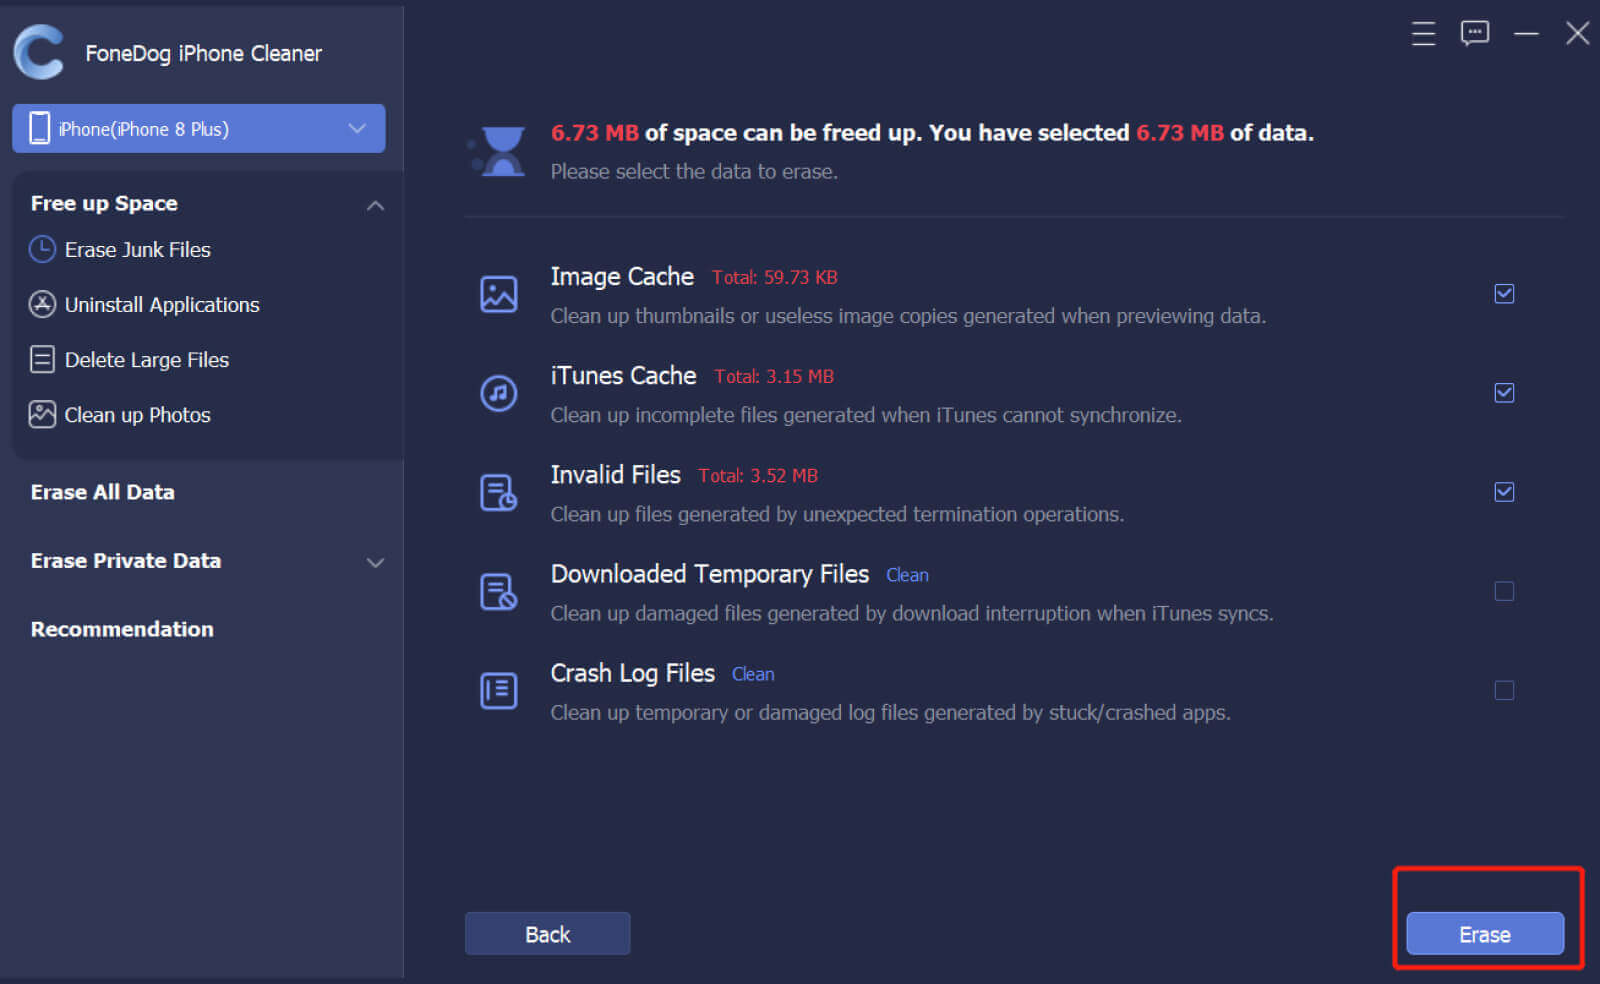
FoneDog iPhone Cleaner is compatible with all Apple devices like iPad, iPhone, and iPod Touch, and you can also use it on your Windows computer and Mac computer. There are a lot of things that this iPhone Cleaner can do, it has an “Erase All Data” feature that lets you erase all the data on your device in one tap only. You can also choose some files that you wanted to delete in case you do not want to delete everything. And aside from these great features, you can also use FoneDog iPhone Cleaner to restore your data, create a backup, and transfer the data from one device going into another one.
You have to initially download the iPhone Cleaner, and then install it on your personal computer. Then, using a cable to create a connection between your device and the personal computer, be sure to tap “Trust”. And then click “Quick Scan” to see details of your device, and then “More Info” to see more data. Now, let us go into the steps on how to use FoneDog iPhone Cleaner.
People Also ReadTop 7 Best Junk File Cleaner for iPhone/iPadThe Best iPad Cleaner Free to Smartly Clean up iPad in 2023
It is really frustrating to receive such notifications like “iPhone you don’t have permission to delete this item”, especially if you have the means to do so. For example, you want to delete the files or photos to have some more space that you can use to save other files that are important and also necessary to you.
We are hoping that you have learned all the things that you can use as your references in the future. With all the methods that you can use we are sure that you can be able to find the solution to the dilemma of being able not to erase files or photos that you need to. And if you also wanted to be sure about the files that you are about to delete, you always have to create a backup of your files.
Leave a Comment
Comment

Tech Website Writing /Content Optimization
Singing, smiling, surprising every day!
So as a technical writer, it is my duty to gather effective and reliable solutions to answer questions on how to deal with the issues they are having with their devices.
Hot Articles
 /
/
INTERESTINGDULL
/
SIMPLEDIFFICULT
Thank you! Here' re your choices:
Excellent
Rating: 4.8 / 5 (based on 108 ratings)
