FoneDog Screen Recorder
FoneDog Screen Recorder
Special Offer
Special Offer


By Vernon Roderick, Last updated: August 21, 2020
At the present time, people are using mobile devices for convenience and portability. A popular and one of the leading mobile devices is iPhone developed by Apple which allows a user to do various multiple tasks just like on a computer. One can send and receive messages, calls, take photos, videos, play music, work with apps, and many more. And with the modern technology that we have, a device may fail or experience issues may it be hardware or software. This article tackles how to resolve the iTunes could not connect to this iPhone you do not have permission error providing different methods. Another convenient to use and a reliable tool called FoneDog iOS System Recovery is also introduced in this article that will help you repair your iPhone device.
Part 1: Recover System with FoneDog iOS System RecoveryPart 2: Ways to Resolve iTunes Could Not Connect To This iPhone You Do Not Have PermissionPart 3: In Summary
Experiencing an error on your iPhone or iPad devices? Here is a solution that works wonders on your iOS devices. FoneDog iOS System Recovery is a reliable tool that will help you repair your iOS devices and restore it to a normal status without any loss of data. Issues such as error codes, stuck in recovery mode or iTunes could not connect to this iPhone you do not have permission error can be fixed with this convenient to use the tool. It can fix many common iOS problems on your device and supports different versions and models of the iPhone, iPad, and iPod. FoneDog iOS System Recovery will automatically detect if your iOS device is having a problem. It fixes in two modes such as Standard and Advanced. The first mode will fix without any loss of data while the Advanced mode can be done when the first mode fails and involves erasing all your data. You can download a free version of the tool on its website which is available for both Windows and Mac OS.
Open the FoneDog iOS System Recovery program by going to the desktop, taskbar, or Start menu after you have downloaded and installed it on your computer. Connect your iOS device such as iPhone to your computer using a USB cable connection.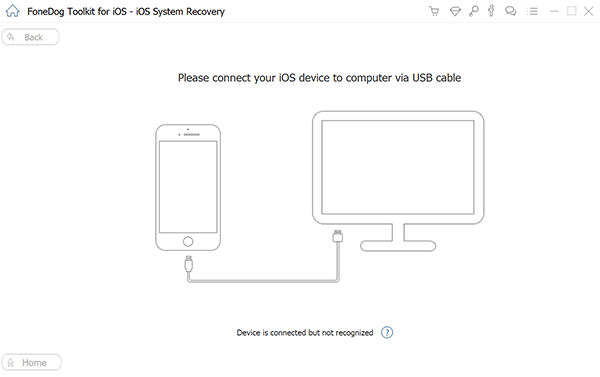
When your iOS device is connected properly to the computer, click on the Start button. Then select the device model, type, and category and click Get. Select the iOS version to download.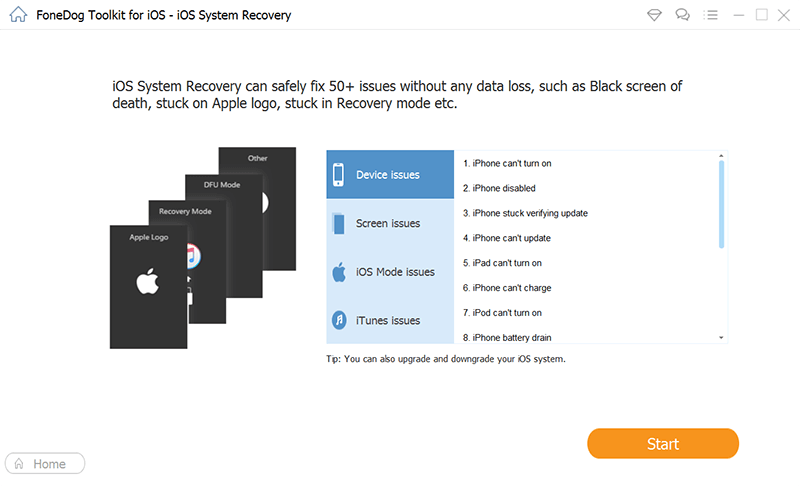
Next, download the firmware according to your iPhone’s iOS version. Click on the Download button to start downloading the firmware. Then click, Next.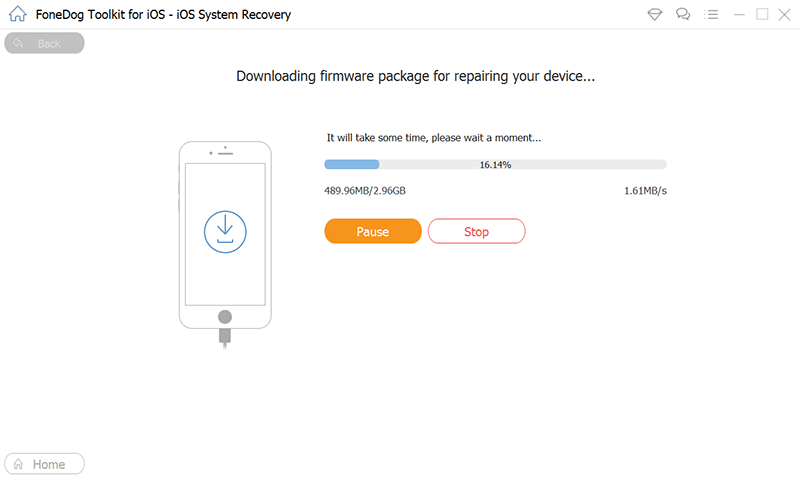
After the download, your iPhone device will automatically undergo a repair. Wait until the repair process is completed ensuring there is no disruption during the process and wait until your device will reboot so you can disconnect your device after.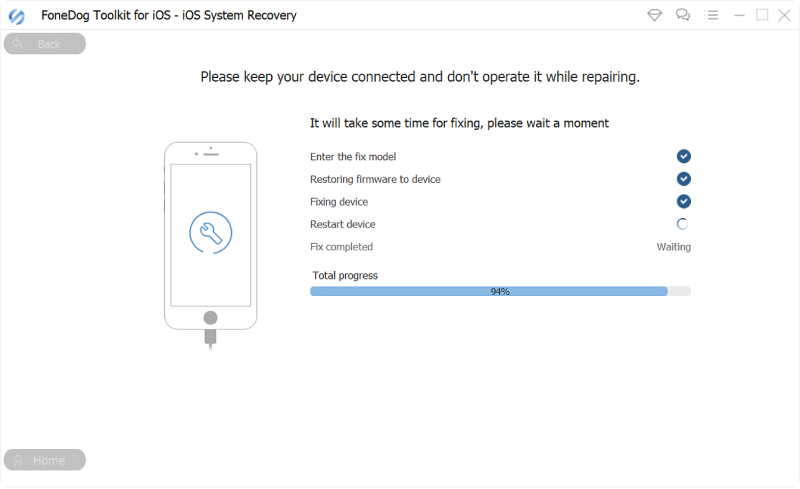
This section presents multiple ways or methods with step by step instructions on how to resolve an issue on your iPhone device specifically the iTunes could not connect to this iPhone you do not have permission error. The method steps will vary depending on your iPhone device model, version, and issue situation.
In any kind of issue that you will encounter, it is best to perform a simple restart first of your iPhone device and check if the issue will be resolved.
How to perform iPhone restart:
The issue on iTunes could not connect to this iPhone you do not have permission error may be due to a faulty USB cable. Try to use another faultless Apple USB cable specific to your iPhone device. Disconnect your iPhone and reconnect it to the computer using the new Apple USB cable to the computer.
If you have access to another computer with the latest iTunes installed, you can also try connecting your iPhone device to it and see if your mobile device can now successfully connect to iTunes. The iTunes app must be updated to the latest version. If there is no iTunes installed yet on the other computer, download the most recent version from the Apple website.
An outdated version of the app may cause the issue on iTunes could not connect to this iPhone you do not have permission error. To resolve this, make sure that you have installed the latest version of iTunes on your system and you have updated your system.
On Windows, click on Help from the menu then select Check for Updates.
At times, when you open the app, it will automatically tell you that there are new updates and ask you to install the latest version. Confirm to download and install the latest updates to your computer.
Make sure that your internet connection is stable enough to establish a good connection between your iPhone and iTunes. You can restart your modem router, or turn off and turn on again the internet connection setting on your computer. You can also try connecting to another internet connection such as Wi-Fi, cellular data, etc. and see if the error no longer occurs.
When you connect your iPhone device to the computer, a prompt window will appear confirming you to “Trust This Computer? Your settings and data will be accessible from this computer when connected wirelessly or using a cable”. Click Trust to continue.
When you have enabled the parental controls or restriction settings on your device, it is possible to encounter this kind of issue. Remove or disable this kind of settings in order to establish a connection and permission on your iPhone to iTunes.
Another check is to confirm that your iPhone device is running on the most recent iOS version to prevent the issue on iTunes could not connect to this iPhone you do not have permission error.
The iTunes version installed on your computer must be compatible with the iPhone iOS version to avoid the error on iTunes could not connect to this iPhone you do not have permission. Verify the iTunes version that is compatible with your iPhone device and iOS version by going to the Apple website.
Update also the Apple USB driver and see if the connection permission no longer persists. Disconnect your iPhone device from the computer and close the iTunes app.
Another check is to confirm that your iPhone device is running on the most recent iOS version to prevent the issue on iTunes could not connect to this iPhone you do not have permission error.
Step 01: On your iPhone device, head on to Settings.
Step 02: Select General.
Step 03: Next, tap on Software Update.
Step 04: Tap on Download and Install if updates are available.
Step 05: Wait until the download and install are finished, and then restart your iPhone device.
Step 06: After the restart, connect your iPhone device to the computer and open iTunes. Check if it now works successfully.
Step 08: Disconnect your iPhone device from the computer and do a restart.
Step 09: Reconnect your iPhone device to the computer and verify if you can connect your iPhone to iTunes successfully.
Try resetting the network settings on your iPhone device and see if the issue is resolved. When you reset the network settings, it will not delete your data but only the network, saved passwords, APN, cellular settings, and the like.
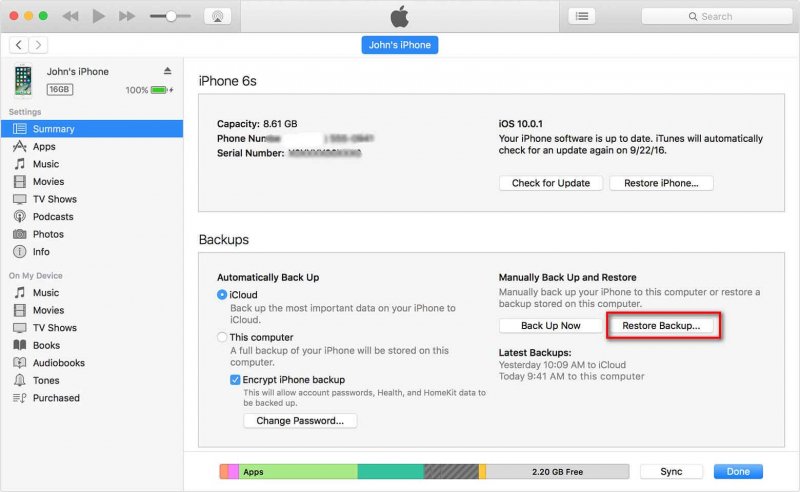
This method will guide you on how to reset your iPhone device to its factory settings. Take note that all of your data in your device will be erased so you must create a backup first of your important data from your device. You can use iCloud or iTunes to do the backup. After the reset, you have an option do restore your backed up data to your device.
An iPhone is a mobile device that is handy and useful for multiple tasks. Over the course of time, there are however problems that may occur on your iPhone device. You may encounter any issue on your iPhone or from any iOS device such as error codes, unresponsiveness, or stuck in recovery mode and other problems. An example of an error is the iTunes could not connect to this iPhone you do not have permission which will affect your use of your iPhone. This tutorial guide provides several ways that you can follow to fix the issue which will depend on your situation and your phone model and version. Also, a trusted tool called FoneDog iOS System Recovery can help you to repair your iPhone device in case of a problem.
Leave a Comment
Comment

Technical Expertise for PC/Website Optimization
One of my passion is to develop software of my own
I write articles to share knowledge about IT technology and some experience in developing my own software, and developing my own software is one of my passions for work.
iOS System Recovery
Repair various iOS system errors back to normal status.
Free Download Free DownloadHot Articles
 /
/
INTERESTINGDULL
/
SIMPLEDIFFICULT
Thank you! Here' re your choices:
Excellent
Rating: 4.8 / 5 (based on 60 ratings)
