FoneDog Screen Recorder
FoneDog Screen Recorder
Special Offer
Special Offer


By Vernon Roderick, Last updated: February 9, 2017
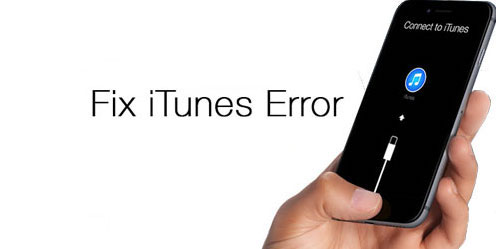
When you use iTunes to update or restore your iPhone, iPad, or iPod and you see an error code or alert. This usually called iTunes Error!
What to do when you meet iTunes could not restore the iPhone because an error occurred?
iPhone is one of the most popular brands of gadgets can’t even escape the different errors. Some will just say, “Have you tried turning it off and on again?”. This may work or may not. Errors seem to be part of every gadget and device isn’t it and you get a mini heart attack every time they pop up in your device.
There are a lot of errors in iOS these days, either caused by updates, restoring, internal connections, and hard drive issues. Some of them are easy to maneuver and fix.
In this article, we are going to show you how to fix different iTunes error.
After some years of writing programs for iOS devices, we have created a recovery tool to fix iOS system errors in a short period of time.
Here is a tip for you: Download FoneDog iOS System Recovery to fix iTunes errors when restoring or updating iPhone or most of the iOS system issues in the quickest and safest way. if you want to try your best to repair it manually, we have gathered some great solutions below.
iOS System Recovery
Fix with various iOS system issues like recovery mode, DFU mode, white screen looping on start, etc.
Fix your iOS device to normal from white Apple logo, black screen, blue screen, red screen.
Only fix your iOS to normal, no data loss at all.
Fix iTunes Error 3600, Error 9, Error 14 and various iPhone Error codes
Unfrozen your iPhone, iPad and iPod touch.
Free Download
Free Download

Part 1: Different iTunes Error Happened During Restoring or Updating Your iDevice.Part 2: Common Solutions to Solve iTunes Error Problem while Restoring iPhonePart 3. Fix iTunes Error by Setting Your Phone in DFU ModePart 4: Use FoneDog Toolkit to Fix the iTunes ErrorPart 5: Video Guide: How to Fix iTunes Error or System Problem on iPhone.
You may have encountered different errors during restoring and updating your device. You may have seen “This device cannot be restored Error XXX” message from iTunes before and wondering what just happened. A common error usually exists because of just simple things. And so there are things you need to consider first when you’re updating or restoring your iDevice. Here are some of those:
Indeed, simple things cause an error to everyone’s device. That’s why precautions are very important. Now let’s move onto simple ways on how to fix some common errors.
Lots of the iTunes Error can be fixed easily without any professional knowledge. The follows are common and simple way to fix the error code in iTunes.
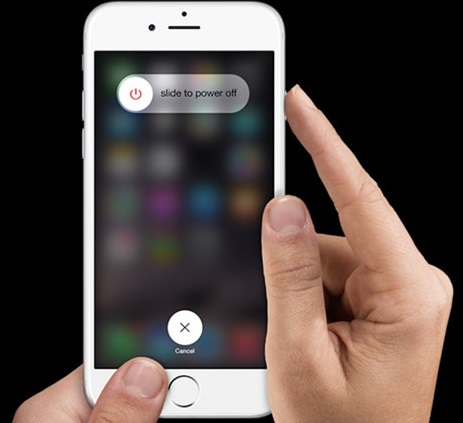
Disconnect your iPhone first from the computer and reboot it. To do it, just press and hold the Home button and sleep or wake button at once for at least ten seconds. While on 7 and 7 plus, press and hold the volume down button and sleep or wake at once. Once your iPhone has restarted, connect it to the computer again and try to Update/Restore it as usual.
As stated above, replace the USB cable you are using or use another USB port. Bad USB cable really causes errors.
The error may appear because your phone can’t accommodate the data being transferred to it due to lack of free space so clean it up. Want to clean up some memory without losing your photos and videos? Here’s a quick tip. To free some space, get rid of some data like cache, cookies, logs, browser history.
To do this, go to Settings, then General. Under General choose the Storage and iCloud Usage. Go to Manage Storage, after that, you can choose any application you want. Moving on to the next solution we have-
To reset your phone, all you need to do is go to Setting, choose General, Reset and Reset All Settings.
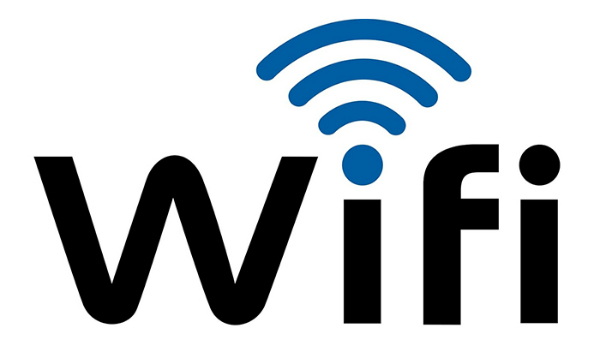
Your connection might be weak that it causes some errors. You can try connecting to more stable Wi-Fi or restarting your router.
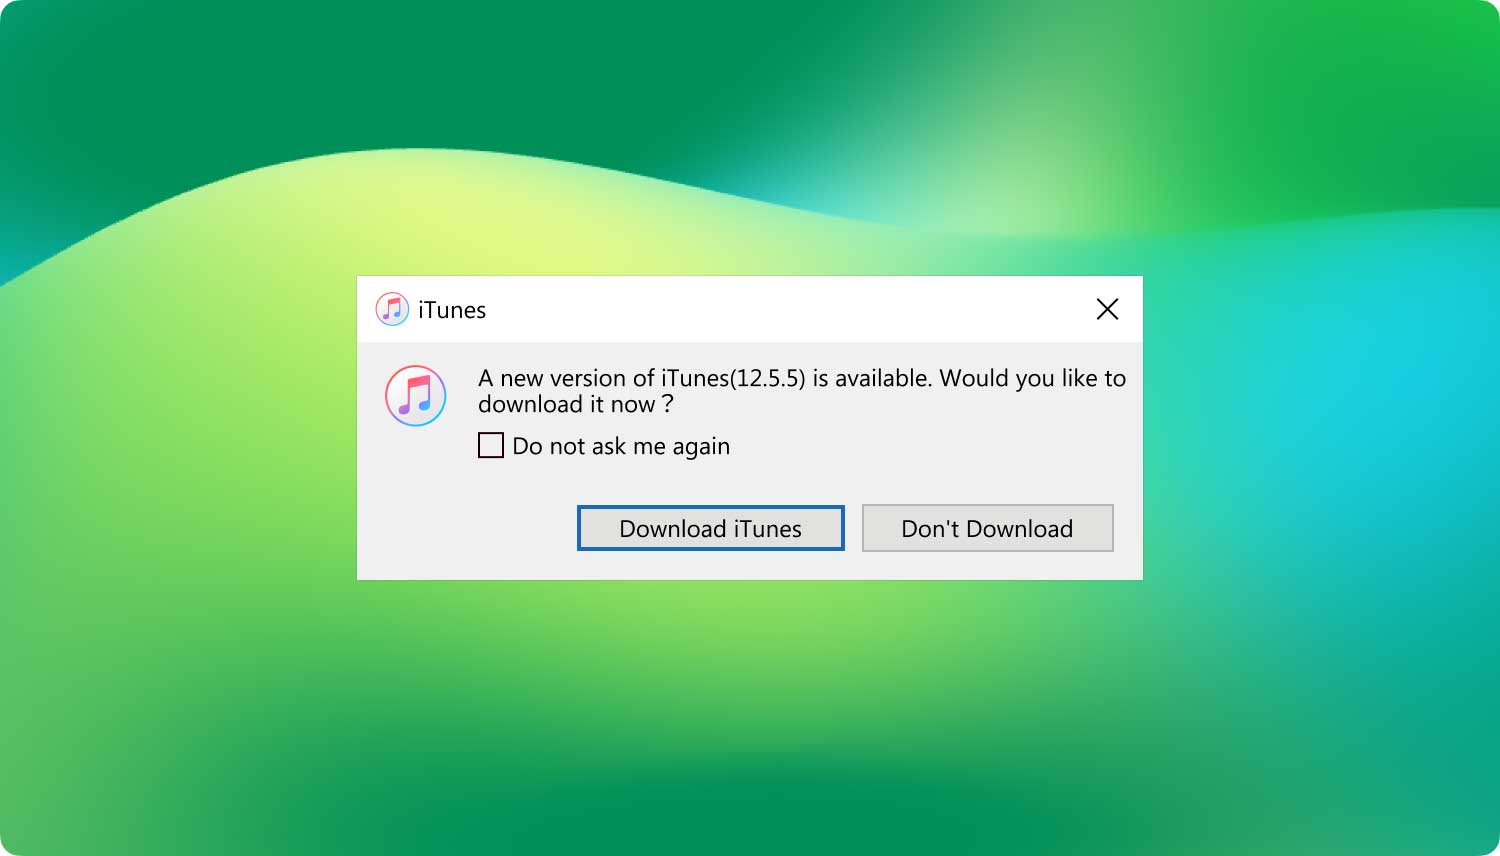
iTunes being outdated also causes some errors. To fix this, you need to update. How? Just simply check for updates. You can see this under the help section of iTunes.
Once the update is detected, download it and wait until it was completed. Once it is, access your iTunes on your device and see if there’s still any error.
Sometimes, a misunderstanding between your software and hard drive causes the error. Better yet, disable first your antivirus and firewall. Also, check if there’s any that blocks the authentication. The said solution above may not likely not to work.
And If you would try those steps, be careful since it may lead to a more serious issue on your device. But don’t lose hope yet, there’s one more thing you can try to keep your device working properly for you.
Setting your phone in DFU Mode also known as Device Firmware Upgrade Mode. It will allow your device to be restored in any state. And here’s how to do it.
Make sure the device screen is blank and no logos are present
Hold the Home and Power buttons until the Apple Logo appears.
Hold down the "Menu" and "Down" buttons. The Apple TV will reboot.
Use FoneDog toolkit may be the easy way to fix the iTunes error. Its iOS system recovery module can fix errors in a short period of time and you don’t need to worry about the safety of your gadget.
You can go to the product page to download the tool. Or you can just download it by clicking the link for the different version. Mac or Windows
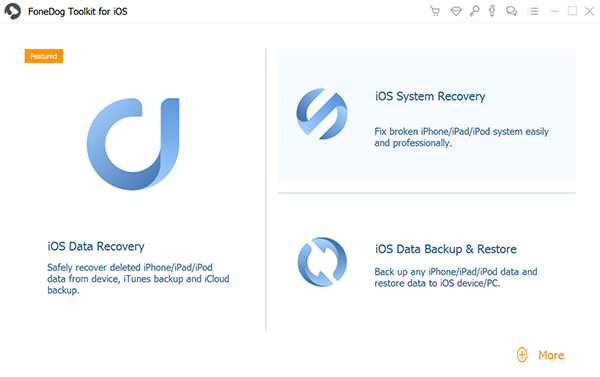
Once you have launched or run FoneDog, in its toolkit interface choose “iOS System Recovery” option to begin with.
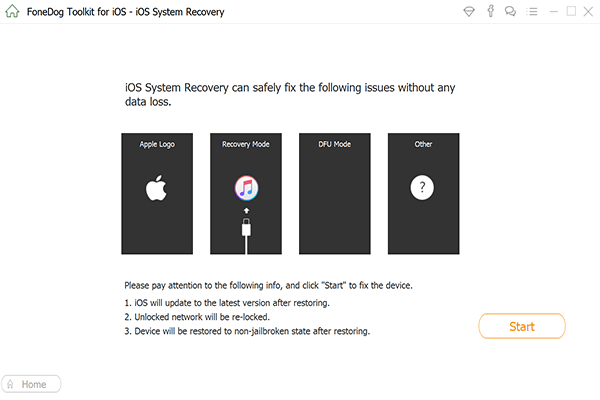
Once you are in the iOS System Recovery, connect your iDevice to your computer using USB cable. Note that FoneDog toolkit should detect your device automatically. Once your device has been detected, click on the “Start” button.
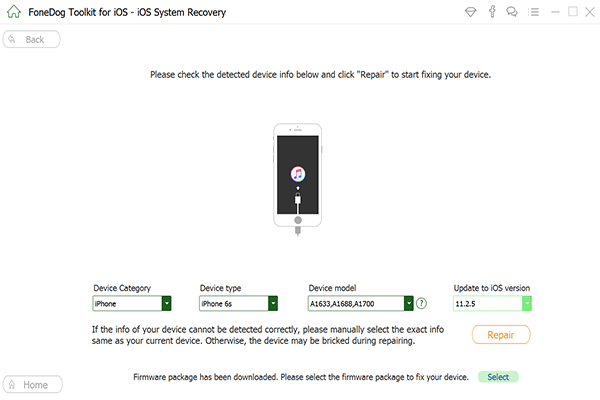
Download firmware. In order for the toolkit to fix the abnormalities in your operating system you will be asked to download the firmware, and it is a must. FoneDog will provide the latest iOS version to download. All you have to do is click the “Repair” button and wait for it to finish downloading.
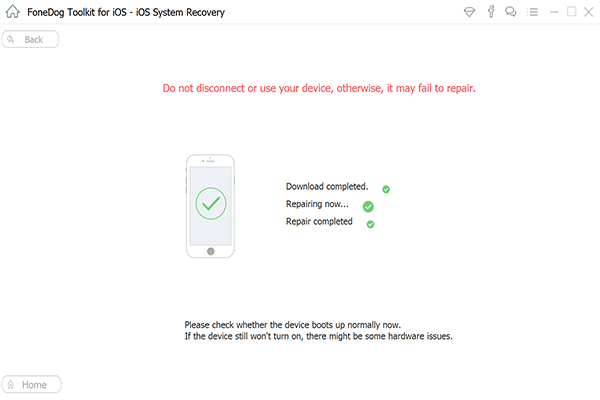
Once the download is completed, the tool will automatically start repairing your iOS. You are not allowed to use your device during this step. And if you do your device might be at risk of becoming bricked.
Repairing may take some minutes. Once the repair is completed, the software will notify you, you can’t unplug your device just like that. Wait for your device to reboot first until then you can remove or unplug your device.

The FoneDog iOS System Recovery also provides solutions to fix black out screen, boot loop, widescreen issues and etc. And it’s not that it just fixes but it fixes your iDevice without any memory or data loss. At the same time, your iPhone or other device is updated to the latest non-jail broken version even in an unlocked device, brilliant, isn’t it?
If the said solutions can’t still fix your device, you better contact your local supplier for the service warranty.
There’s a lot of errors in any device, some are the minor issue some are not. Some are caused by simple things and can be fixed easily and some just cannot be in any way.
Once you have encountered any error again, though we really wish you would not encounter any again, don’t panic and just follow the different solutions presented to you.
Until you’ve tried everything but it all fails, you may need a professional help. We really hope that this article helps you to fix the error issue in your devices.
Leave a Comment
Comment

Technical Expertise for PC/Website Optimization
One of my passion is to develop software of my own
I write articles to share knowledge about IT technology and some experience in developing my own software, and developing my own software is one of my passions for work.
iOS System Recovery
Repair various iOS system errors back to normal status.
Free Download Free DownloadHot Articles
 /
/
INTERESTINGDULL
/
SIMPLEDIFFICULT
Thank you! Here' re your choices:
Excellent
Rating: 4.7 / 5 (based on 71 ratings)
