FoneDog Screen Recorder
FoneDog Screen Recorder
Special Offer
Special Offer


By Vernon Roderick, Last updated: March 9, 2021
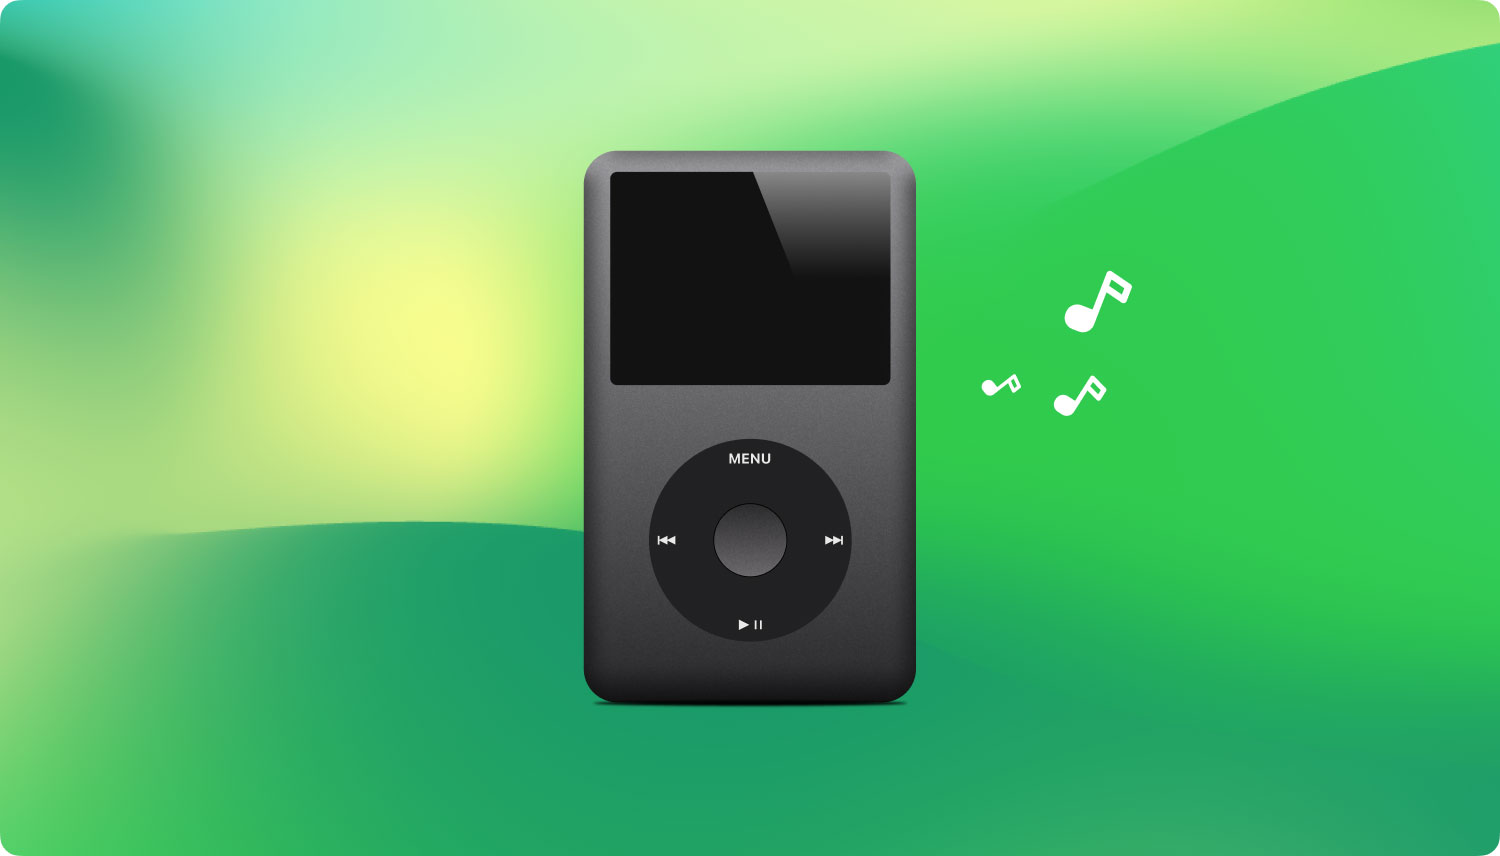
iPod is the ideal music player, and all of us know that. That’s precisely why even with all the musical gadgets showing up from here and there, we still stick to using iPod. Unfortunately, downloading MP3 files isn’t very easy if you’re using an iPod.
Fortunately, it is easy if you use other devices such as computers and such. The only problem now is how you can use the download MP3 files on your iPod. This article will show you everything you need to know to transfer MP3 to iPod. By the way, here is a similar article that about transferring mp3 to iphone, you can click on it if you are interested.
Part 1. Everything You Need to Transfer MP3 to iPodPart 2. Transfer MP3 to iPod without iTunesPart 3. Conclusion
There are some things that you should make sure of first before you actually try to transfer MP3 to iPod. To start with, you will have to ensure that your iPod falls in one of these categories:
These are the iPod versions supported by the method that we will be using today. Unfortunately, if your iPod isn’t one of these, then you won’t be able to transfer MP3 to iPod with this guide.
If you do meet the requirements, then perhaps you are ready to fulfill your main goal. With that said, let’s proceed with the steps required for our method.
You may have already heard of iTunes, the multimedia player that is offered by Apple Inc. Although I say that it is a player, it became a file management utility tool over time. Simply put, it is capable of tasks that involve files such as duplication, compression, storage, and most importantly, file transfer.
However, as it was originally a multimedia player, it won’t be easy to use iTunes to transfer MP3 to iPod. With that said, follow these steps carefully if you don’t want to make any unnecessary mistakes:
Note: iTunes will show you the remaining storage space of your iPhone so that you can determine whether file transfer would still be possible or not.

With this, you will have successfully established a connection between your iPod and the computer where the MP3 files are found. Now all you have to do is transfer MP3 to iPod.
There are two methods to transfer your MP3 files to the iPod device. The first one would be the automatic method, while the second one would be the manual method. Let’s start with the automatic method since it is easier.
As usual with every task that we do, doing it automatically would be far easier than doing it manually. The same goes for when you try to transfer MP3 to iPod.
The only difference between the automatic and manual methods is that there are additional prerequisites if you want to do it automatically. Perhaps it is their way to ensure that you at least put effort into doing it. Here’s a checklist of what you should fulfill first:
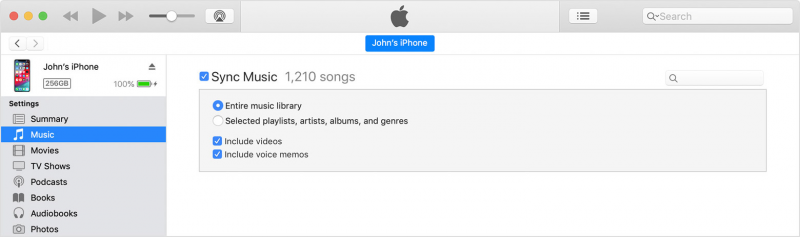
Once you’ve fulfilled the two of these, you should now be ready to transfer MP3 to iPod using the automatic method. With that said, here are the steps that you will need to follow:
Note: Enable the Entire music library if you want to include all MP3 files. If you want to be selective when transferring music, enable Selected playlists, artists, albums, and genres. It is up to you whether you will enable the additional features for memos and videos.
This should be enough to set up the automatic method to transfer MP3 to iPod. Now as we have said, the best thing about this is that you will minimize the effort that you’d have to exert. On the other hand, there is a higher probability to encounter issues.
In an event where you encounter such problems, I suggest reinstalling iTunes on your computer. This should solve most minor issues of iTunes. But if you insist on trying out other issues not vulnerable to issues, let’s proceed to the manual method.
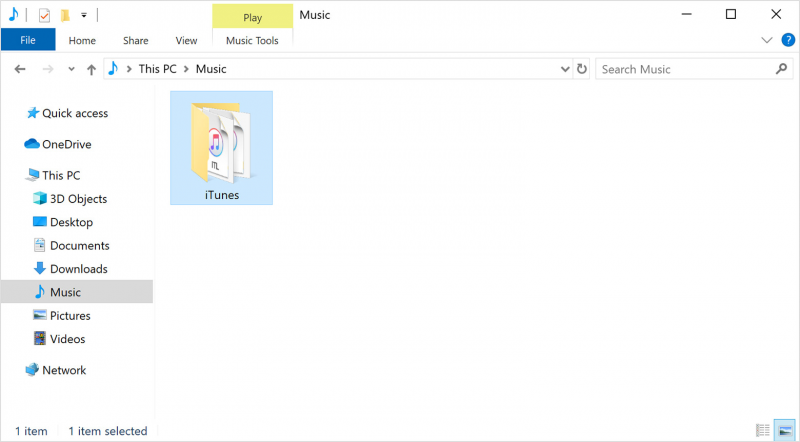
If you choose to use the manual method, then you have to be ready to do a lot of repetitive steps. With that said, follow these steps if you have decided to use this method:
Note: To transfer multiple MP3 files at once, select one file, hold down the Ctrl key, then select all the files that you’d want to include. This will enable you to highlight multiple files at once, then just drag and drop them all into the iTunes Library.
You can enjoy a smoother experience since there won’t be any issue whatsoever with this method unless you do something that is very unreasonable.
However, the fact that you have to do it repeatedly every time you want to transfer MP3 to iPod is pretty much the main downside of the manual method. If you want to avoid any issues, but at the same time make it easier for you, then our next method might be more suitable.
Up until now, we have relied solely on iTunes. While I am not saying that iTunes is unreliable, you should be versatile and able to adapt according to your situation. With that said, when it comes to effectiveness, I suggest using a third-party tool named FoneDog Phone Transfer to transfer MP3 to iPod.
FoneDog Phone Transfer can be considered to be the best tool for the job for many reasons. One, it supports the transfer of Music files. Two, you can use it pretty much on most platforms including the Mac and Windows. Three, it is compatible with the latest versions of iOS 12. So without further ado, here are the steps to use this tool.
Phone Transfer
Transfer files among iOS, Android and Windows PC.
Transfer and backup text messages, contacts, photos, video, music on computer easily.
Fully compatible with iOS 13 and Android 9.0.
Free Download

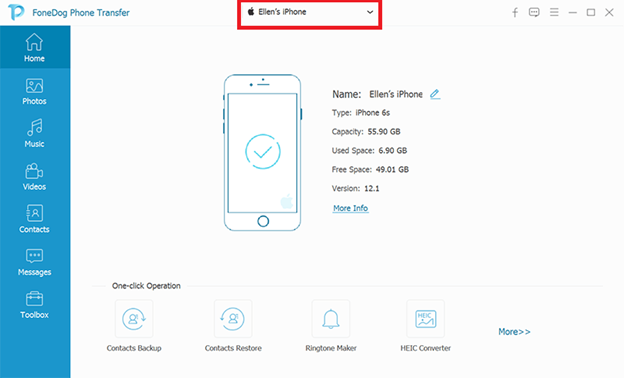
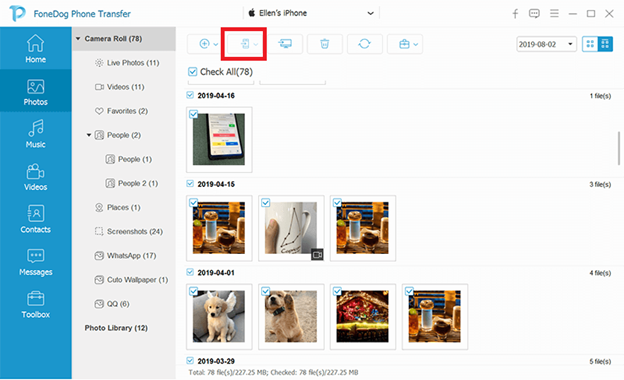
Connect your iPod to the computer using the cable that came along with it. Make sure FoneDog Phone Transfer is already open before you do this. The software should now recognize your device automatically and show its basic information on the main interface. Now at the top of the interface, click the menu and make sure your computer is selected and not the iPod.
From the left side of the window, there will be a selection of file types. Simply select Music from the list of options since we are trying to transfer MP3 to iPod. Once you select a file type, the software will scan for files that belong to the selected file type.
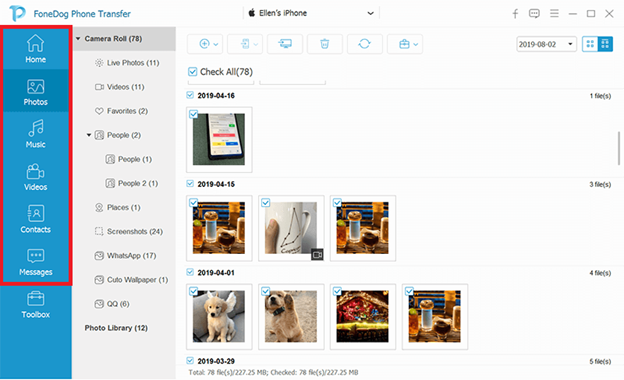
Now you have to select the files that you want to transfer. To do this, click on the corresponding boxes of the item. Once the selection is finished, click the button highlighted below to Import the MP3 files into your iPod.
Once you’ve done all of these, it should now do its job as software and transfer MP3 to iPod automatically. This method offers the advantage of being automatic as well as encountering minimal issues. The only downside is that you must be brave enough to take the risk of downloading a third-party tool. Overall, it’s not such a bad method.
People Also ReadHow to Transfer Music from iPod to ComputerHow to Transfer Videos from PC to iPad
There are a lot of things we can do with our iPod. Unfortunately, acquiring MP3 files isn’t one of those things. That is why we rely on downloading MP3 files from other gadgets, then simply transfer MP3 to iPod.
With that being said, hopefully, this helped you with ensuring that you can enjoy the music experience to the fullest.
Leave a Comment
Comment

Technical Expertise for PC/Website Optimization
One of my passion is to develop software of my own
I write articles to share knowledge about IT technology and some experience in developing my own software, and developing my own software is one of my passions for work.
Phone Transfer
Transfer data from iPhone, Android, iOS, and Computer to Anywhere without any loss with FoneDog Phone Transfer. Such as photo, messages, contacts, music, etc.
Free DownloadHot Articles
 /
/
INTERESTINGDULL
/
SIMPLEDIFFICULT
Thank you! Here' re your choices:
Excellent
Rating: 4.6 / 5 (based on 103 ratings)
