FoneDog Screen Recorder
FoneDog Screen Recorder
Special Offer
Special Offer


By Gina Barrow, Last updated: August 24, 2019
We all got that urge to listen to our favorite songs anywhere we go and whatever we do. If you are looking for options on how to transfer music from iPod to your computer, then you have come to the right page. Let’s altogether learn how to easily spread our favorite beats!
Part 1. How to Easily Transfer Music from iPod to Computer- FREE DownloadPart 2. Manually Transfer Music from iPod to Computer (iPod Touch Not Included)Part 3. Sync Music Files to iTunes - Bonus TipPart 4. Summary
Apple is extremely strict when it comes to copying music from your iPod down to your computer. If you have songs saved on the iPod that was ripped from your old CDs, then you might have a hard time transferring these tunes.
However, I found a versatile program that can allow you to transfer music from an iPod to a computer without any worries and restrictions. It’s called FoneDog Phone Transfer, the easiest program to transfer any type of file from any mobile device like iPhone to Android (vice versa), and iPod or iPad to another device like Android, and even from mobile to computer.
This software also supports all kinds of iPhones, iPad, and iPod touch including the latest iOS 12. All Android devices running on 2.3 and up are also supported.
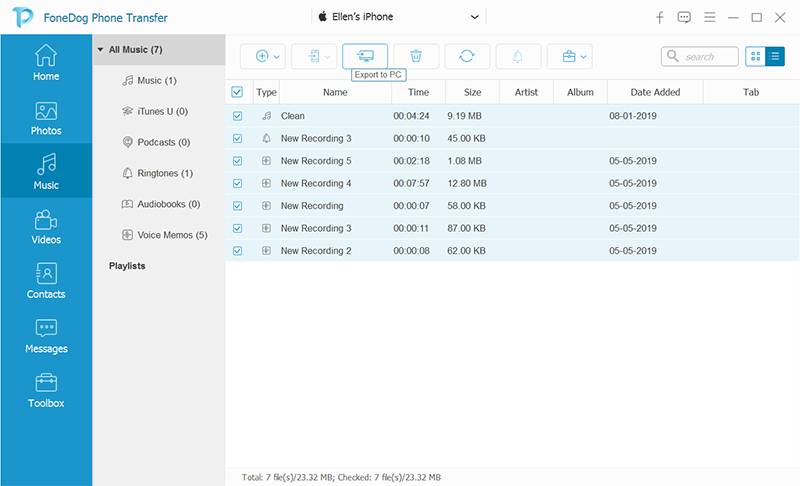
That’s it! It’s pretty simple to transfer your favorite music from iPod to the computer.
If you are like me who owns an iPod legacy then we have more serious issues because our devices are no longer supported by iOS, especially the iPod Nano and Shuffle. And when you connect your iPod to iTunes, it automatically uploads the music to your device and replaces the music in your iPod library. You don’t want iTunes to overwrite your music, right? So what do you need to do?
We can, however, transfer music manually from the iPod to a computer but might test a little of your patience. Don’t worry; I’ll make sure you’ll get the steps easily!
After you have copied your desired music from the iPod to the computer, don’t forget to safely eject the iPod by right-clicking on the iPod drive and click Eject.
Now that you have successfully transferred your favorite music to the computer, you can have the option to add these songs to your iTunes library.
To do this, simply follow this guide:
You can also drag and drop the songs from the Windows Explorer to your iTunes. Since you got all your music files into the iTunes library, you can now sync it with your other iOS devices like your iPhone.
If you have more room in your hard drive, it’s best to set the music files into one location only which is the iTunes Music Folder, so it will be easy to back up in the future.

Tips: How to Backup Music to iCloud?How to Fix on Android File Transfer Not Working on Mac
If music is a part of your daily routine and you got a new iPod to set your mood every day, you can turn on and sync your music files to iTunes. There is no need for you to do anything manually, you can just turn on the sync options from the iTunes.

There you have it guys, we've all learned different methods of music transfer today. Transferring music from the iPod to the computer is simple when you apply any of the methods we recommended above. You no longer have to spend a lot of time reading and watching tutorials just to get it right, you have everything you need at one page. Do you have other suggested methods on how to transfer music from iPod to computer? Let us know in the comments!
Leave a Comment
Comment

Technical/Creative Writer
Kitchen, my safe space; black, my favorite color
Was a Technical Specialist for a while, troubleshooting Smartphone and Software-related issues until a writing stint caught my attention.
Phone Transfer
Transfer data from iPhone, Android, iOS, and Computer to Anywhere without any loss with FoneDog Phone Transfer. Such as photo, messages, contacts, music, etc.
Free DownloadHot Articles
 /
/
INTERESTINGDULL
/
SIMPLEDIFFICULT
Thank you! Here' re your choices:
Excellent
Rating: 4.7 / 5 (based on 65 ratings)
