FoneDog Screen Recorder
FoneDog Screen Recorder
Special Offer
Special Offer


By Nathan E. Malpass, Last updated: October 29, 2019
Listening to tracks on your iPhone? Then, you might want to transfer it to your computer. It just makes sense, while you’re on-the-go, you use a mobile device. But when you’re at home using your computer, you’ll prefer to listen to the desktop or laptop device.
That’s why you might want to transfer music from iPhone to computer (free). The tracks you listen to on your iPhone are the same tracks you might want to hear on your laptop. Thus, you might have to move the songs from one device to another.
With that being said, this guide gives you the knowledge you need in order to move music tracks from your iPhone to your computer or even back up photos from iPhone to external hard drive. Various methods will be given to help you transfer these songs that you enjoy listening to. Hop in to learn about the methods we will be teaching you!
Part 1: Transfer Music from iPhone to Computer Using Phone TransferPart 2: How to Transfer Music from iPhone to Computer Free - 2 More MethodsPart 3: To Wrap It All Up
The best way to transfer music from iPhone to computer is through FoneDog Phone Transfer. It gives you the ability to transfer not only music, but a wide array of file types among iOS, computer, and Android devices.
FoneDog Phone Transfer has additional features such as the ability to back up your contacts and restore them to any device you want. Scanning and management of your contacts are also possible -- enabling you to remove duplicate information from your device. With it, you are able to transfer files from a PC to an iPhone or from an iPhone to a PC.
Here are the steps you should follow in order to transfer your music tracks from the iPhone to your computer using FoneDog Phone Transfer.
Download, install and launch the software on your computer. Connect the iPhone to the laptop or desktop using the USB cable. The software will recognize your iPhone automatically.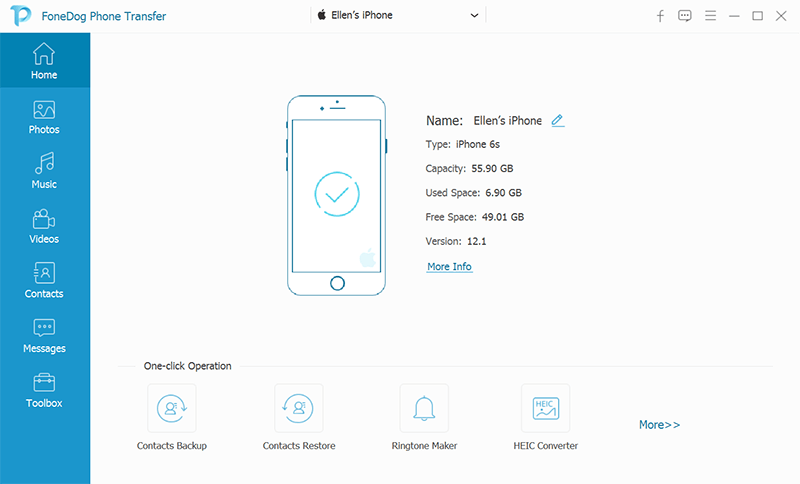
Select the type of data you wish to transfer. In this case, we will select “Music".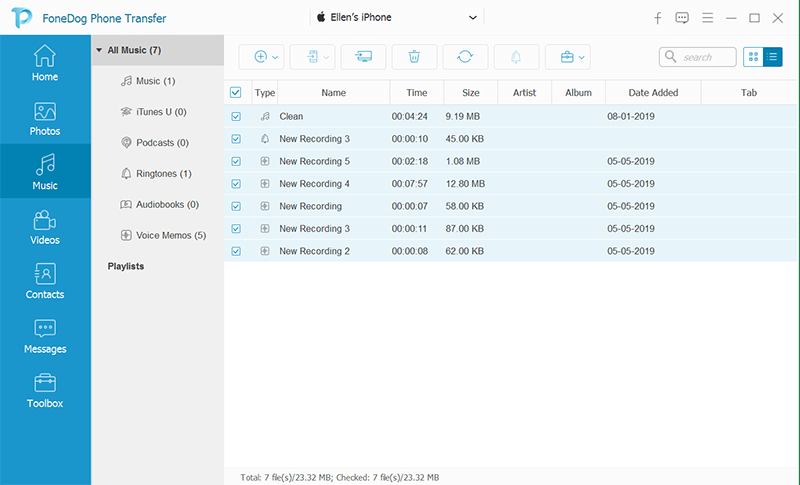
Now, select the specific music tracks you wish to move to the computer. Click “Export To PC” located at the top of the interface. It looks like a computer monitor with an arrow pointing towards the right-hand side.

Wait until the export is complete. Then, you can safely eject the iPhone from the computer.
Here are the steps you should follow in order to transfer music tracks from the iPhone to that of the computer:
Step 01 - Ensure that you have purchased the music tracks you wish to transfer from the iPhone to the computer. The song should be downloaded completely within your iPhone’s iTunes library.
Step 02 - Connect the iPhone to the desktop or laptop computer using the USB cable that comes with it upon purchase.
Step 03 - Launch iTunes. The icon looks like a music note that is surrounded by a circle. Once you open iTunes, it might prompt you to update the software. To do this, press the Download button. Wait until the iTunes software is completely updated. After this, you have to restart your computer for the software to work properly.
Step 04 - Press File. This is located in the top left part of the iTunes interface on Windows. On Mac computers, it is located at the upper menu bar of the interface.
Step 05 - Choose “Devices.” This is located near the lower end of the drop-down menu for File.
Step 06 - Press “Transfer Purchases From [Your Name]. The “Your Name” part will be replaced by the name of the iPhone itself. Once you press this option, the software will begin to transfer music from iPhone to computer (free).
Step 07 - Wait until the files are transferred from the iPhone to that of the computer. The duration of the entire process will depend on the number of music tracks you wish to move.
Step 08 - Press “Recently Added.” The said tab can be found on the left part of the iTunes interface. This will display a list of various tracks you have recently added.
Step 09 - Locate the music track you want to transfer. Scroll up and scroll down through the entire list to find the track that you want to transfer.
Step 10 - Press Download. This is located to the right side of the album or track you want to transfer. If you notice that a Download icon is not present, this means the track is already on your computer. 
Step 01 - Launch iTunes. The icon looks like a music note that is surrounded by a circle.
Step 02 - Sign in to the account you used to purchase the music. Press Account located at the top part of the interface and then check which account is actually signed into iTunes. The said account should be the one you have on your iPhone as well.
Step 03 - Press Account one more time. A drop-down menu will be displayed.
Step 04 - Press “Purchased” located at the lower part of the drop-down menu. This will direct you towards the tab for iTunes Store.
Step 05 - Press the tab for Music. This is located in the top right part of your iTunes window interface.
Step 06 - Click the option that says “Not In My Library.” This is located at the iTunes page top part. Once you click this option, it will display a list of various songs you have purchased but are not in your iTunes library.
Step 07 - Press Download in order to transfer music from iPhone to the computer (free) indirectly. The Download button can be found in the upper right part of the album (or song) you wish to re-download. Once you have clicked it, the album or song will be transferred back to your computer.
It is important to note that in order to find the music on your computer device, you should click a track to select it. After this, press File. And then, on Windows, click “Show In Windows Explorer.” On Mac computers, click “Show In Finder.”
In this guide, we’ve told you how to transfer music from iPhone to a computer (free). The first method involves using FoneDog Phone Transfer. The said software can be used in order to transfer songs from one device to another. In addition, we used iTunes to transfer music files again. This is another method you can opt for if you want.
How about you? How did you transfer your music tracks from your iOS device to your Mac or Windows computer? Let us know in the comments section below.
Leave a Comment
Comment

iPhone/Android Devices’ Maintenance Expert
Staying home, listening to music, writing tech articles
Many people asked me to repair their mobile phones so I have a lot of experience in mobile phone repair, and I know a lot about Android or Apple phones.
Phone Transfer
Transfer data from iPhone, Android, iOS, and Computer to Anywhere without any loss with FoneDog Phone Transfer. Such as photo, messages, contacts, music, etc.
Free DownloadHot Articles
 /
/
INTERESTINGDULL
/
SIMPLEDIFFICULT
Thank you! Here' re your choices:
Excellent
Rating: 4.6 / 5 (based on 103 ratings)
