FoneDog Screen Recorder
FoneDog Screen Recorder
Special Offer
Special Offer


By Adela D. Louie, Last updated: January 5, 2023
Odin mode can only be experienced if you are using a Samsung device. This is the reason as to why it is also called the Samsung Odin Mode. Odin is known to be as a software that is used by the Samsung device for it to have a new and a custom ROM and as well as firmware. And with that, some Samsung users get into Odin mode for them to have it flashed.
However, some other Samsung users accidentally get into Odin mode and are looking for a solution on how to get out of Odin mode. The fact is that, when you are in Odin mode screen, you can exit from it easily. However, there are chances that you might face some issue with it and an example of which is an Odin fail.
So, if you would like to know about how to get out of Odin mode, then this post is definitely for you. But before we proceed with how you can get out of Odin mode, you have to know more about Odin first. And because of that, we are going to give you important information on what Odin mode is and what it can do on your Android mobile device.
Part 1: All About the Odin ModePart 2: How to Get Out of Odin ModePart 3: How to Get Out of Odin Mode – “Downloading, Do not Turn Off Target”Part 4: How to Out of Odin Mode with A Flash Stock Failed ErrorPart 5: Recover Data After Getting Out of Odin ModePart 6: Conclusion
People Also ReadHow to Recover Data from Samsung Galaxy S7 with Broken ScreenSamsung Broken Screen, How to Recover Data
The Samsung Odin Mode or also known as the Download Mode can be seen on your screen when you try to press and hold the Volume down + Power button + Home button all at the same time. And once that you get into the Odin mode, there are two options that you will see. One option is the Continue option and you can access this by pressing the Volume up button. The next is an option is the Cancel option and can be selected when you press on the Volume down button.
Once that you choose on the Cancel option, then you will be able to exit the Odin mode and then your device will then reboot. However, if you choose option Continue, then your device will then start to flash and be in the new firmware.
But, the real issue that you might get when you are in Odin mode is when you try to choose the Cancel button but then you are not able to exit the Odin mode. That only means that you are having an error which is called the Odin fail issue. Having this situation will not allow your Android device to reboot and you will be stuck on Odin Mode.
Being able to exit the Odin mode is quite an easy thing to do. And with that, there are three ways on how you can do this.
Method #1: Once that you are in Odin Mode, all you have to do is to press on the volume down button for you to be able to cancel on the downloading process. This will also reboot your Android device.
Method #2: Another thing that you can do if you are having the Odin fail issue is by pressing and holding the volume down button and the power button at the same time for a couple of minutes before your Android device reboot.
Method #3: Another way for you to get out of Odin mode is by taking out the battery of your Android device if it is possible. Then wait for a couple of minutes and then put the battery back in.
But in some cases, there are chances that the methods that we have shown to you above do not help you to get out of Odin mode and you still having the Odin mode fail issue. If this is also your case, then there are other things that you should do and that we are also going to show you in this article.
Getting out of Odin mode is very easy as what we have mentioned earlier, however, this does not apply once that you see a message on your screen that says “downloading, do not turn off-target”. This type of error when you are in Odin mode can be solved in two ways.
This method is one simple solution. And this is by removing the battery of your Android device if possible and putting it back again after a couple of minutes. After which, simply turn on your device normally. Then once you are done, go ahead and connect your Android device to your computer and check if your computer can detect your device.
This method is a bit different than the first method above. And with that, here is a quick guide that you need to follow.
Step 1: Simply download the firmware, Odin flashing tool, and driver software that you need for your Android device. After completing the download process, right-click on the file and then choose on “Run as Administrator”.
Step 2: After that, have your Samsung device be in Download mode. To do that, all you need to do is to press the Power button + volume down + home button at the same time. And then, let go of the power button once that your device vibrates.
Step 3: After that, go ahead and press the volume up button and then you will be able to go to the Download Mode.
Step 4: Then, have your Android device connected to your computer using your USB cable. And once you did, the Odin mode will then recognize your Android device and you will see a message on your screen that says “Added”.
Step 5: And from there, go ahead and look for the firmware that you downloaded by choosing on the PDA or AP from the Odin mode window and then hit on the Start button.
When you are having the Odin software for you to flash your Android device. However, the process has been interrupted or is not successful. So if this is the case, here is what you need to do.
Step 1: On your Android device, go ahead and go to your Settings and then choose Security.
Step 2: From there, look for Reactivate Lock and unmark it.
Step 3: Then lastly, return to Odin mode and then try to flash the Stock ROM or the firmware once more.
After doing all of the solutions above for you to get out of Odin mode, there are chances that all of your data from your Android device might be wiped out. So because of that, you will be needing to have an Android device recovery software that you can use for you to get those data back.
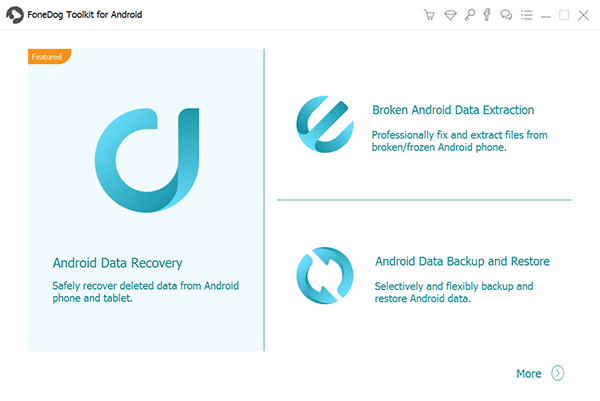
And with that, we one the most recommended and most suitable Android data recovery tool that you can use for you to recover all of your lost data from your Android device. And that is by using the FoneDog Android Data Recovery tool.
The FoneDog Android Data Recovery tool is one effective software that you can use for you to be able to recover any lost data from your Android device such as your contacts, messages, call history, photos, videos, WhatsApp, and so much more. Also, it is very easy to use because of its user-friendly interface and at the same time safe to use that no other data will be lost during the recovery process.
And with that, we have here a quick guide on how to use the FoneDog Android Data Recovery tool.
First of is that you need to download the FoneDog Android Data Recovery tool from the official website of FoneDog and then install it on your computer.
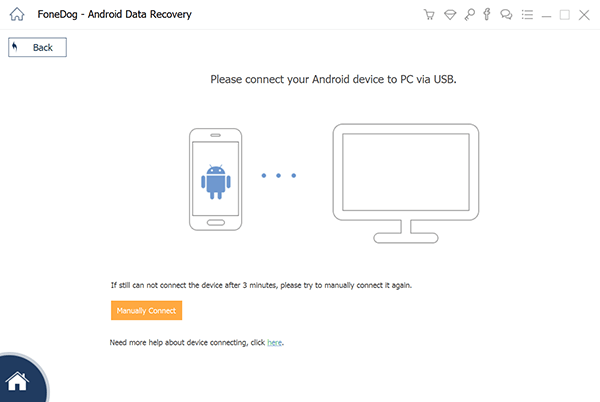
Once done with the installation process, run the program on your computer and connect your Android device with the use of your USB cable. Wait for the program to fully detect your Android device.
Then, you will be needing to turn on the USB Debugging on your Android device. And with that, here is how to do it depending on the version of your Android device.
NOTE: You do not have to worry about anything when turning on USB debugging on your Android device. This is because it is only away so that the program will be able to fully detect your device and as well as the data that you have and lost.
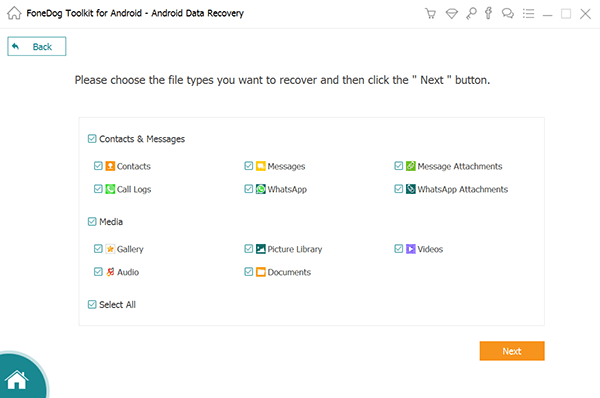
Once that you have already turned on USB debugging on your Android device, the FoneDog Android Data Recovery tool will then be able to show you all of the files that it can support to recover. From there, you can simply choose which of those files would you want to get your data to recover. And once that you are done, simply hit on the Next button to begin the process of scanning your data.
After the complete scanning process, you will then be able to see on your screen all the data that you have on your Android device which includes those that are lost. So from there, all you have to do is to select all of the data that you want to recover and preview them for you to be sure that you have the right item to recover.
Once that you are done selecting all of the lost data that you would like to recover from your Android device, go ahead and simply click on the Recover button. Doing this will then leaves the program on getting all of the lost data that you would like to recover. All recovered data will be saved on a specific folder on your computer. So with that, you will be able to have them restored on your Android device.
The FoneDog Android Data Recovery tool can work with any computer that you have and as well as on any Android devices because this tool can support them all.
If you are going to notice, being able to get out of Odin mode on your Samsung device is very easy. However, this comes differently when you face on a certain error when you are trying to get out of Odin mode. But do not worry, because there are ways on how you can fix this type of error. All you need to do is to follow them carefully for you to get out of Odin mode once that you are done with all of the process needed.
And if you have lost your important data from your Android device, then using the FoneDog Android Data Recovery tool is the best solution that you can get. It can support any data that you wish to recover and the great part is that you can freely choose which just the data or files that you want to recover from your Android device.
Leave a Comment
Comment

Tech Website Writing /Content Optimization
Singing, smiling, surprising every day!
So as a technical writer, it is my duty to gather effective and reliable solutions to answer questions on how to deal with the issues they are having with their devices.
Android Toolkit
Recover deleted files from your Android phone and tablet.
Free Download Free DownloadHot Articles
 /
/
INTERESTINGDULL
/
SIMPLEDIFFICULT
Thank you! Here' re your choices:
Excellent
Rating: 4.7 / 5 (based on 82 ratings)
