FoneDog Screen Recorder
FoneDog Screen Recorder
Special Offer
Special Offer


By Adela D. Louie, Last updated: August 26, 2020
If you get the error unmountable boot volume Windows 10 PC, then that means you are having trouble getting into your Windows, and this error considered as one of the most annoying ones. But do not worry, because, in this post, we are going to show you different ways on how you can fix the unmountable boot volume windows 10 error that you are getting.
Part 1: What Does The Unmountable Boot Volume Windows 10 Error Mean?Part 2: How to Fix Unmounted Boot Volume Windows 10 ErrorPart 3: What To Do When Files Are Deleted Because of Unmounted Boot Volume Windows 10 ErrorPart 4: Conclusion
Boot volume is considered to be a partition on the hard drive of your computer which is responsible for holding your Windows. This type of error usually shows up when your computer is not able to load Windows which can be a result of getting the blue screen which is also known as the stop code.
The unmountable boot volume happens because there is a file that is damaged or is corrupted on your Windows computer. This also commonly shows up when you have updated your Windows computer. However, this type of error does not always indicate that your hard drive is giving up.
Since that the unmounted boot volume Windows 10 error is again not a hopeless case. That is why we have here certain fixes that you can apply for you to get this error fixed.
Just like any other cause of the blue screen, the unmountable boot volume windows 10 error is not that of a big deal if it only happens once. Though there are times that your Windows computer comes with a slight error.
Now, if you have seen the unmountable boot volume windows 10 error on your computer, then all you have to do is to restart your computer. And once that your computer is back up and you were not able to encounter the blue screen again, then you are okay.
However, there are instances that you will the unmountable boot volume windows 10 error when you are loading your computer. So if this happens, you can try to do another solution that we have below.
Now, since you are not able to boot your computer because of the error you are getting, then another way for you to solve this is by making a Windows installer using a USB drive or using a DVD. Through this, you will be able to have access to your Windows and you will be able to troubleshoot this using another device. And once that you have made the installation needed, all you have to do is to plug it in on your computer and then boot it from the USB drive or the DVD that you have used.
Another solution that you can apply when getting this type of error on your computer is by having your Windows start from a USB until such time that it can load up. And to further do this, here are the steps that you need to follow.
The MRB or the Master Boot Record is the one that is responsible for holding the information on the location of your Windows lives from your hard drive and that it helps you to load your system properly once that you are turning on your computer.
So once that this is corrupted, then it can cause you to have the unmountable boot volume Windows 10 error. So for you to fix this, here are the things that you need to do.
If in any case that the Master Reboot Record and the automatic repair did not fix the problem, then you can go ahead and check out your Chkdsk. This tool will be able to help you in checking for any hard drive error on your computer that is causing you to have the unmountable boot volume Windows 10 error.
So for you to check on your Chkdsk, here are the steps that you need to do.
After doing the proper solution on your Windows computer for you to fix the unmounted boot volume Windows 10 error, there is a possibility that your files or your data might get lost due to the processes that you have to do. And by then, you might wonder how you can possibly get them back.
That is why we have the FoneDog Data Recovery software. This software will be able to help you in recovering those deleted files or data from your Windows 10 computer. It can help you recover your deleted photos, videos, email, and more. Also, this software is very easy to use and safe as well.
Not only that it can recover lost or deleted data from the hard drive of your computer, but it can also recover your lost files on your memory card, flash drive, and even from your Mac computer. So to start recovering your files, here are the things that need to be done using the FoneDog Data Recovery software.
The very first thing that you need to do is to get the FoneDog Data Recovery and install it on your Windows 10 PC. And after doing so, launch the program. And on the main page of the program, you will be able to choose the location where you want to recover your data. Also, you can choose the type of data that you wish to recover.
After choosing the type of data and as well as the location of the file, simply click on the Scan button at the lower-right part of your window screen. After clicking on that, the FoneDog Data Recovery will show you two types of the scanning process. One is the Quick Scan, and the other one is the Deep Scan which takes a longer period of time to scan your computer.
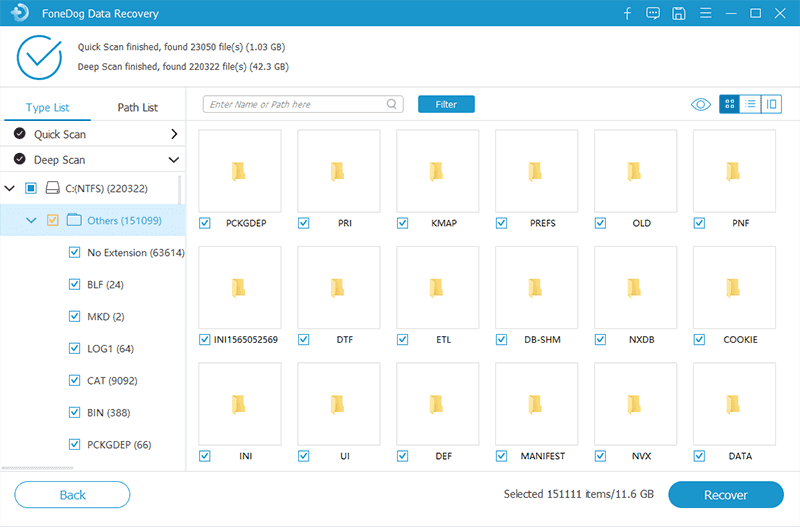
After the scanning process is done, the FoneDog Data Recovery will show you all of the items that the folder contains. So from there, simply click on the data that you want one by one. Or you can make use of the Search Bar for you to find your data quickly.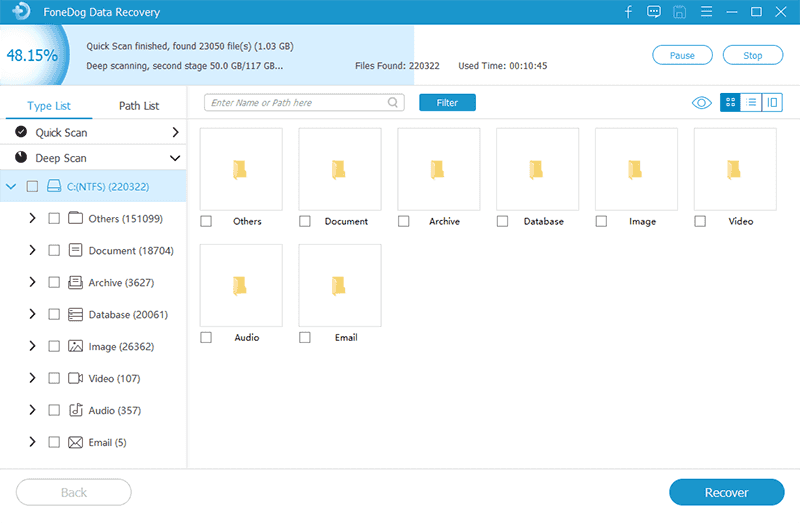
And once that you were able to find out all of the data that you want to recover, now you can go ahead and click on the Recover button. The FoneDog Data Recovery will then start to recover those data that you have chosen earlier, so just wait for the process to complete.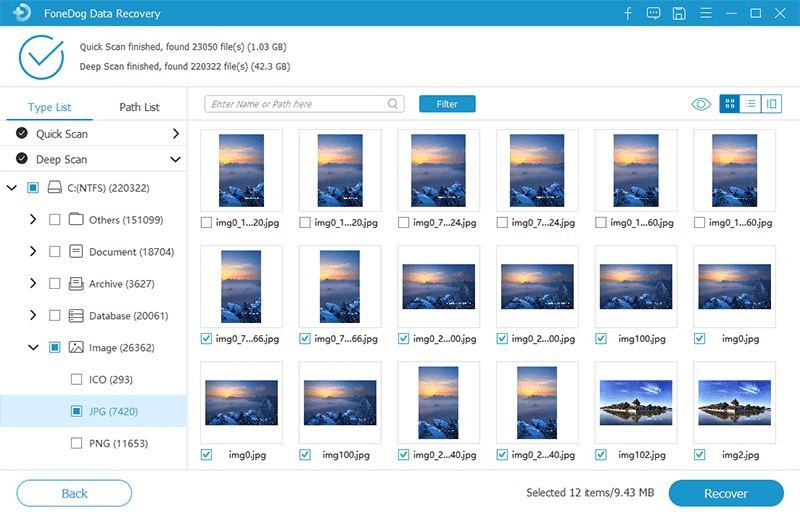
If in any case that you have applied all of the solutions that we have provided you above and none of them was able to fix the problem then that is a different story. There could be something seriously wrong on your computer. It could be because of an issue on your hard drive or there could be a problem with your RAM so you can ask help from an expert.
Leave a Comment
Comment

Tech Website Writing /Content Optimization
Singing, smiling, surprising every day!
So as a technical writer, it is my duty to gather effective and reliable solutions to answer questions on how to deal with the issues they are having with their devices.
Data Recovery
FoneDog Data Recovery recovers the deleted photos, videos, audios, emails, and more from your Windows, Mac, hard drive, memory card, flash drive, etc.
Free Download Free DownloadHot Articles
 /
/
INTERESTINGDULL
/
SIMPLEDIFFICULT
Thank you! Here' re your choices:
Excellent
Rating: 4.7 / 5 (based on 59 ratings)
