FoneDog Screen Recorder
FoneDog Screen Recorder
Special Offer
Special Offer


By Nathan E. Malpass, Last updated: March 13, 2018
Howcan I enable and turn off Two-factor authentication for Apple ID?
“I have iCloud syncing turned on for my iPhone and iPad, so I want to make sure that my Apple account stays secure. I heard that Apple has made security improvements for iOS 11 called the two-factor authentication. What is that and how do you activate that feature?”
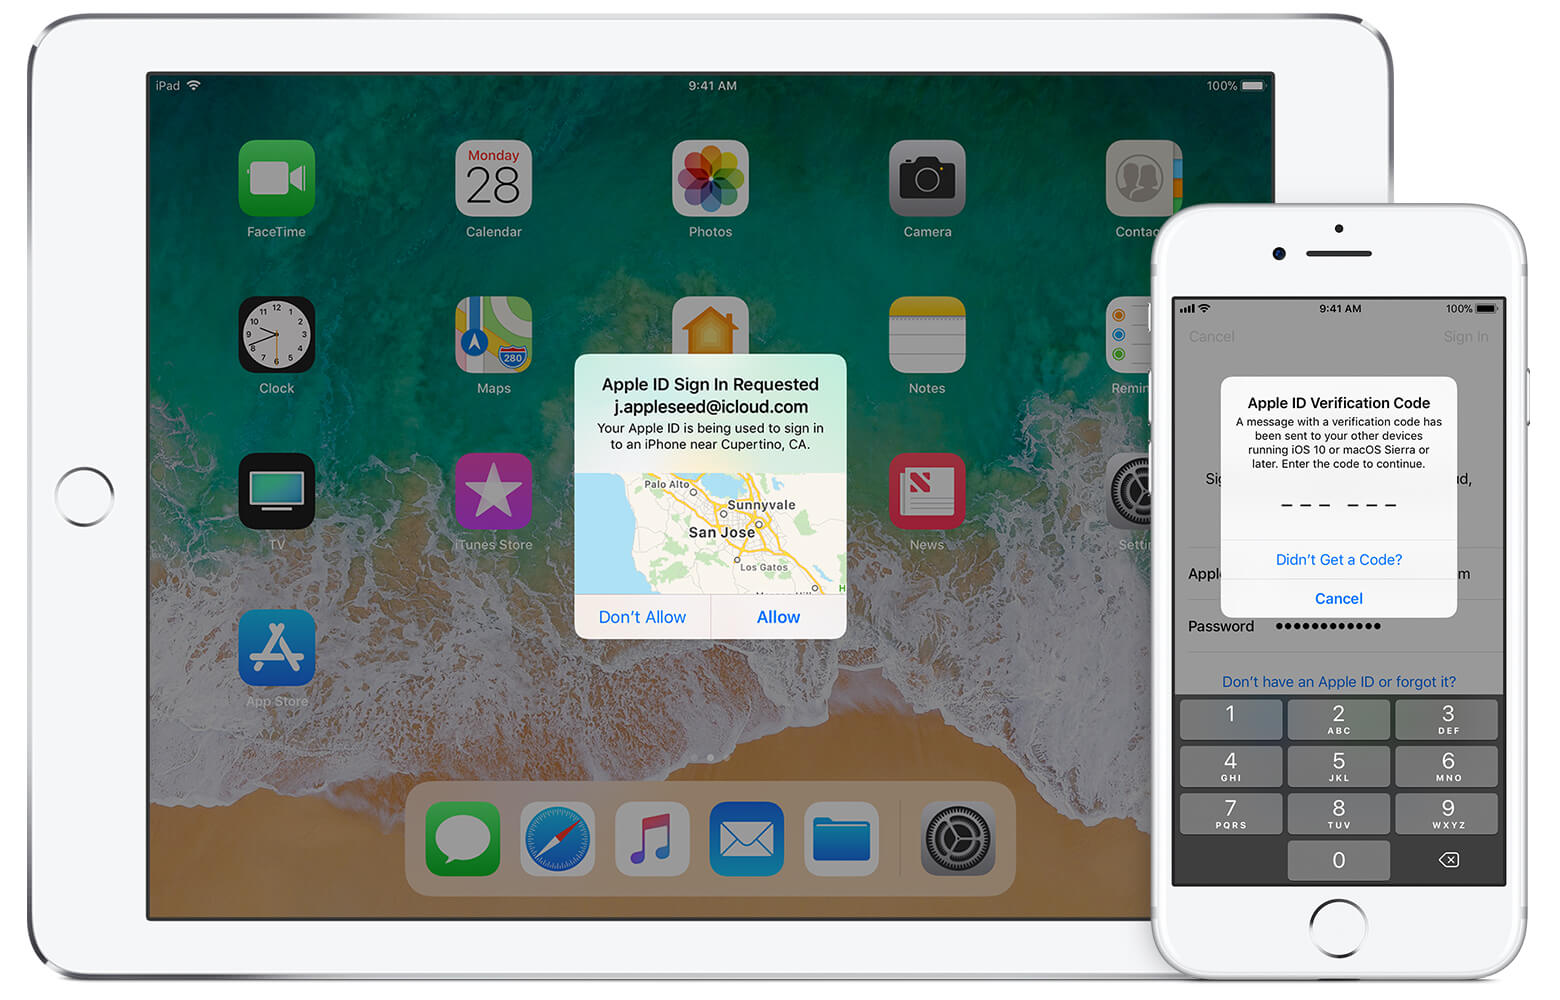
Apple ID two factor authentication
Part 1. How Does Two-Factor Authentication Work?Part 2. How to Enable Two-Factor Authentication for Apple IDPart 3. How to Disable Two-Factor Authentication for Apple IDPart 4. SummaryVideo Guide: How to Recover Data from iOS Device Via FoneDog Toolkit
Two-factor authentication, also known as 2FA, is a security feature that keeps your Apple devices and data protected. It takes your security to another level, so only you and you alone can sign into your account. Even if someone found out your password, they won’t be able to access your account. Sounds interesting? It is.
This feature ensures that your Apple account gets accessed only on iOS devices that you trust. If it’s your first time to log in with your Apple ID on an iOS device, you will automatically be asked to enter a six-digit code. This code is sent to a registered phone number. To proceed with the login, you should provide this code alongside your Apple ID and password. When you enter the code on a particular device, you are confirming that you trust that device. The next time you sign in with it, you will no longer be asked to enter a code.
By sending a code to your devices and asking you to enter it, Apple confirms that it is indeed you who has prompted the login. This works best for users who own multiple iOS devices. You can also trust a browser by logging your Apple ID on the web in a particular computer.
With the feature on, you’ ll also know where the login attempt occurred. This notification will alert you of any unscrupulous attempt on your account.
This is similar to Apple’s earlier two-step verification, which was released alongside iOS 10. When Apple released iOS11 to the public, the feature was automatically upgraded to 2FA – a better way to protect your account.
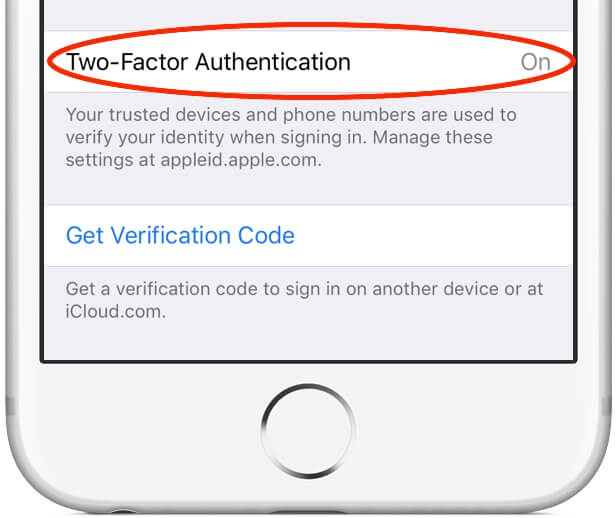
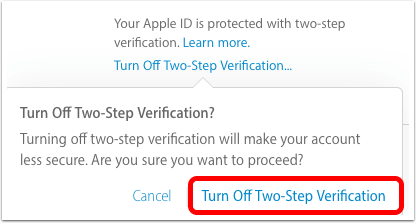
If you haven’t upgraded to iOS 11 or macOS High Sierra yet, you will have to manually switch from two-step verification to its more advanced counterpart. To confirm which feature you are using, do the following steps.
Manually Switch from Two-Step Verification on the iOS
2FA works on devices running on iOS 9 or later. For Mac, the feature is available on OS X El Capitan and later. Turning it on is pretty straightforward. Take note that you need to register at least one phone number to activate the feature.
Turn On Two-Factor Authentication on iOS Device
Turn On Two-Factor Authentication on a Mac Phone
While many users find the two-factor authentication feature useful, others think that it makes signing in time-consuming. We don’t recommend disabling the feature though. You should be able to understand the risks involved.
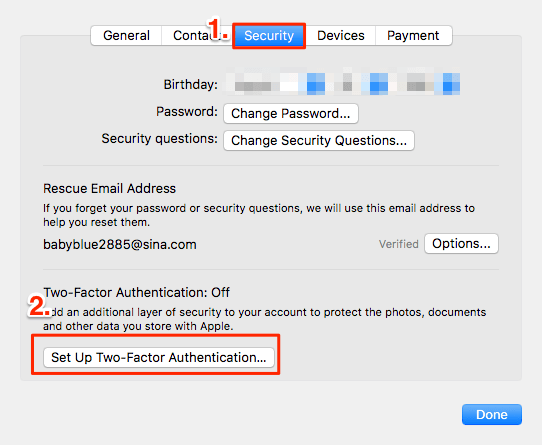
For security reasons, it is more difficult to disable the feature. You can’t simply turn it off straight from your iPhone or iPad. Instead, you have to use your computer to do it.
Disable Two-Factor Authentication for Apple ID Account
Now that you know how to enable two-factor authentication for Apple ID, you’re a step closer to protecting your data. To take it a leap further, here are things that we suggest you do too.
You can check the enrolled phone number by heading to your Apple ID account page. You will see the list under Security. You can also enroll another phone number by clicking Add a Trusted Phone Number. Again, you will be asked to verify this number so you will receive a code. You can also delete a phone number if you’re no longer using it.
To make sure that no one else is signing in with your Apple ID, you can check out your list of trusted devices. You can see it on your Apple ID account page under Devices. You can view pertinent information about the device by clicking on it. Remove unauthorized devices, if any. If you’re giving away or selling your device, you should remove it from the list too.
You may like:
How to Extract Deleted Facebook Messages on iOS
If you want to better manage your device and data, you can use FoneDog iOS Data Recovery for iOS Device. It can retrieve lost and deleted files from your iPhone, iPad, or iPod Touch. You can access your iTunes and iCloud backup with the software too!
Leave a Comment
Comment

iPhone/Android Devices’ Maintenance Expert
Staying home, listening to music, writing tech articles
Many people asked me to repair their mobile phones so I have a lot of experience in mobile phone repair, and I know a lot about Android or Apple phones.
Hot Articles
 /
/
INTERESTINGDULL
/
SIMPLEDIFFICULT
Thank you! Here' re your choices:
Excellent
Rating: 4.5 / 5 (based on 101 ratings)
