FoneDog Screen Recorder
FoneDog Screen Recorder
Special Offer
Special Offer


By Adela D. Louie, Last updated: November 10, 2019
Samsung Galaxy S8 device is one of the most high-end devices that Samsung had made. And with all its cool features, its camera is one of the best assets that this mobile device had. And if you are one of the users of this amazing device, then probably by now you have taken a lot of photos.
However, you want to make sure that the photos you have taken will be kept safe and transferring them to your computer is one way that you can think of. Not only that you can keep your photos safe, but you can also free up some space on your Samsung Galaxy S8 device which will allow you to take more photos.
But the thing is, you do not know how you can transfer them over to your PC. But do not worry because, in this article, we are going to show you how to transfer photos from Samsung Galaxy S8 to computer most easily and conveniently possible.
Part 1: How to Transfer Photos from Samsung Galaxy S8 to Computer - The Best WayPart 2: Other Ways On How to Transfer Photos from Samsung Galaxy S8 to ComputerPart 3: Let’s Wrap It Up
How do I transfer pictures from my Samsung phone to my computer? This method is considered to be the best and the most convenient way for you to transfer photos from your Samsung Galaxy S8 device to your computer, S7, S10 and other devices are also allowed. And this method includes having data transfer software on your computer. And with that, the best one that you should use is no other than the FoneDog Phone Transfer.
It is because the FoneDog Phone Transfer is one easy tool you can use for you to transfer your photos among any other devices such as to your computer, to another Android device, or an iOS device. Not only that, but the FoneDog Phone Transfer can also transfer other data aside from your photos which includes your messages, contacts, videos, and as well as your music.
So with that, you can easily transfer your photos from your Samsung Galaxy S8 to your computer or export messages from Android using the FoneDog Phone Transfer. Also, you can get to enjoy its other features such as its free ringtone maker and its HEIC converter for your photos which can help you in converting them to a JPG format and PNG format.
And to know how to transfer photos from Samsung Galaxy S8 to computer use the FoneDog Phone Transfer, here is a quick step by step method that you can easily follow.
Go to the FoneDog website and then download the Phone Transfer. Then install it on your computer. Once done, proceed with the next step.
After installing the FoneDog Phone Transfer on your computer, go ahead and open the program. Then have your Samsung Galaxy S8 connected to your computer using your USB cable. The FoneDog Phone Transfer will then be able to recognize your device and will show you details about it.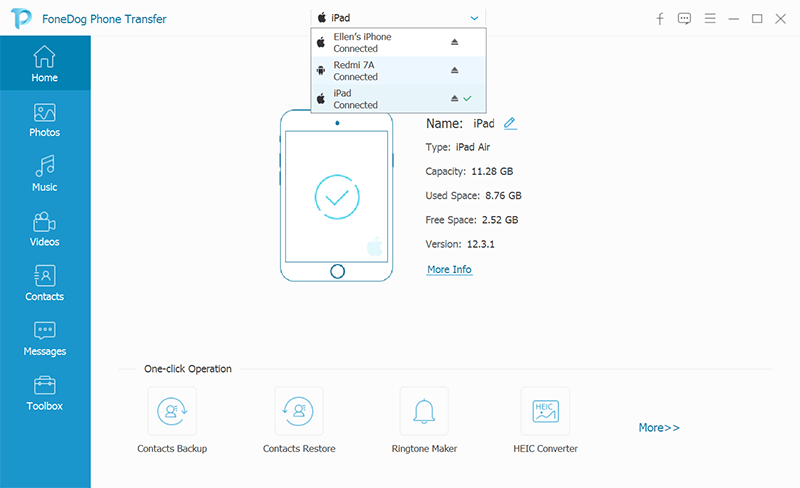
Then, on the left side of your screen, there is a list of file types that the FoneDog Phone Transfer supports. And from that list, this includes your photos. So just simply click on Photos from the list and proceed with the next step.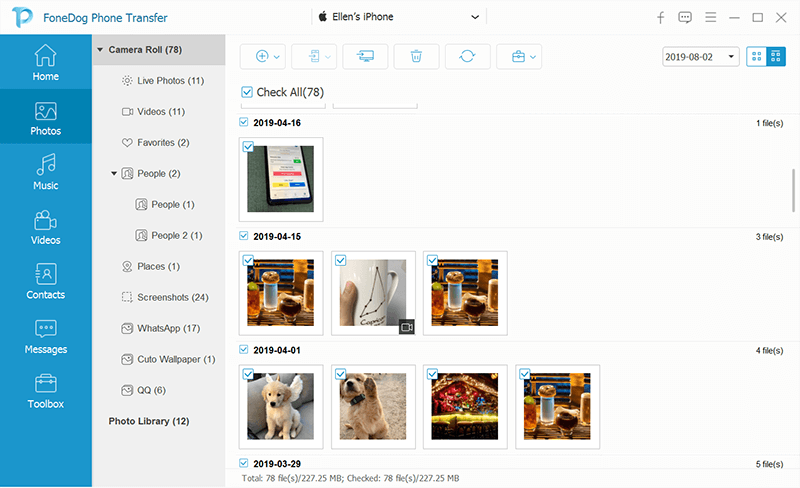
Then once you click on the Photos category, all the items that it contains will then be shown on the right side of your screen. From there, you can choose which photos you like to transfer from your Samsung Galaxy S8 device to your computer. All you have to do is to click on each photo that you choose.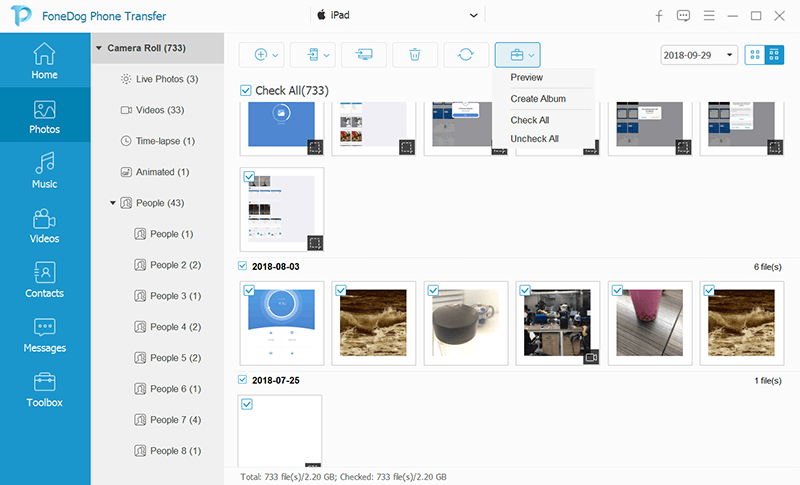
And once that you are done choosing all the photos that you would like to transfer to your computer from your Samsung Galaxy S8 device, then it is time for you to complete the whole process. All you need to do now is to click on the Export to PC button from the menu bar at the top of your screen. Then all the photos that you have chosen will be transferred over to your computer.

NOTE: You can make use of the HEIC converter that comes with the FoneDog Phone Transfer if you wish to convert your photos to JPG or PNG format.
People Also ReadHow to Recover Deleted Photos from Android Gallery [2023 Update]Solved! Solutions on How to Backup Photos to iCloud
There are also some other ways on how to transfer photos from Samsung Galaxy S8 to computer that you can make use of. And here are some of them.
Using your USB cable is considered to be one of the easiest ways for you to transfer your photos from your Samsung Galaxy S8 to the computer. So with that, here are the steps that you will be needing to follow.
Step 1: First is that you have to connect your Samsung Galaxy S8 to your computer using your USB cable.
Step 2: If this is the first time that you are connecting your Samsung Galaxy S8 to your computer, then it will automatically download and install the driver that it needs.
Step 3: Then a pop-up message will show up on your Samsung device. And with that, all you have to do is to tap on Allow access to device data for you to grant the access.
Step 4: And then, go ahead and launch the File Explorer on your computer and then you will be able to see your Samsung Galaxy S8 connected. From here, you can now make use of the File Explorer for you to have access to the content of your device which includes your photos. And those photos can be found under your DCIM folder.

If your Samsung Galaxy S8 device happens to have an external SD or a micro SD card, then using this method is one way for you to transfer photos from your Samsung Galaxy S8 to an external hard drive without USB. There are also some laptops wherein they have a built-in SD card but most of the computers don’t have it. So with that, you will be needing an adapter for you to connect your SD card to your computer.
So if you have an adapter that you can use, then all you need to do is to insert your SD card to the adapter and connect it to your computer. Then from there, you will be able to see your external hard drive and once you click on it, you will be able to see your photos.
From there, you can choose the photos that you want to transfer from your Samsung Galaxy S8 device to your computer. It is as simple as that.
Since your Samsung Galaxy S8 device comes with a Bluetooth feature that you can use to transfer any data from one device to another including your computer. However, what you will be needing here is a computer that has Bluetooth features as well for you to use this method in transferring your photos from your Samsung device. So if you have a computer that has a Bluetooth feature, then this method is for you.
So the very first thing that you need to do is to open the Bluetooth connection on your Samsung Galaxy S8 device. You can turn on the Bluetooth connection on your Samsung device by using the notification panel or you can go to the Settings app and turn on the Bluetooth feature of your Samsung device. And once that you are done with this, here are the next steps you need to follow.
Step 1: On your computer, go ahead and launch the Action Center panel. You can press both the Windows key + A for you to open it.
Step 2: Then, from the Action Center, go ahead and turn on your Bluetooth feature.
Step 3: And then, go ahead and launch the Start Menu and then look for your Bluetooth settings.
Step 4: Then, you will be able to see a list of Bluetooth connections. So from there, go ahead and choose your Samsung device and Pair with it.
Step 5: After that, you will be able to see several codes that will appear on your Samsung device and your computer. Check if those codes are the same. And if they are, go ahead and simply tap on the Yes button on your Samsung device and click OK on your Samsung device.
Step 6: And once that you have paired both devices, go ahead and click on the Send or receive files using Bluetooth and then click on Receive files.
Step 7: And on your Samsung Galaxy S8 device, go to the My Files and then choose all of the photos that you would like to transfer from your Samsung Galaxy S8 device to your computer. Then go ahead and click on the Share button and then select Bluetooth as a mean of the transfer. After that, go ahead and choose your computer as the receiver of your photos.
Step 8: And then once that the transferring of your files is done, simply go ahead and click on the Finish button.
The FTP or the File Transfer Protocol is one of the simplest ways for you to transfer any files using your internet through the server which is your Samsung Galaxy S8, and the client which is your computer as the receiver. And for you to be able to do this, you will be needing to get an application that will allow your device to become your server and the FTP software that will let you connect your PC to your device.
And once that you were able to set up both your Samsung Galaxy S8 device and your computer, then you can begin transferring your photos. And with that, here is what you will be needing to do next.
Step 1: Go ahead and launch the Wi-Fi FTP server and then choose the Start button. And then let the permission if it will ask you.
Step 2: Check your Server URL, Password, and your UserID and then make use of them for you to connect the details on your FTP client.
Step 3: Once that you were able to connect both devices, you can then browse whatever the content of your Samsung Galaxy S8 device is using the FTP client. And from there, go to your DCIM folder and then look for your photos.
Step 4: After that, go ahead and make use of your FTP client for you to be able to download the photos that you want to your computer from your Samsung Galaxy S8.
Cloud storage is one method that you can use for you to move any files that you have on your Samsung device to your computer. However, this method only offers you a limited amount of space and you may find a difficult time when transferring your huge size of albums. Nevertheless, you can still use it for you to do the process.
So the first thing that you will be needing to do is to for you to set up a free account on one cloud storage tool. And with that, your Google Drive is one of the best options that you can use. Then, you have to install the Google Drive app on both of your Samsung Galaxy S8 devices and your computer. And once you are done, follow the steps given below.
Step 1: On your Samsung Galaxy S8 device, go ahead and launch your Gallery application.
Step 2: After that, go ahead and simply choose all of the images that you want to transfer.
Step 3: And once you have chosen all the photos you like, tap on the Share button and then choose Save to Drive.
Step 4: And then from there, go ahead and choose on Google Drive account that you have set up and then choose the destination folder you want and then tap on Save.
Step 5: From here, you have to wait until the syncing process is complete.
Step 6: Then go to your computer and then open the Google Drive application. From there, you will be able to see all of the photos that you have transferred from your Samsung Galaxy S8 device. Then you can have the option to download those photos to your computer.
As you can see, there are a lot of ways on how to transfer photos from Samsung Galaxy S8 to computer wirelessly. All you have to do now is to choose which of those methods will suit what you need and which of them is easier and convenient for you to use.
Leave a Comment
Comment

<natalino2023-10-22 06:25:13
Bom dia Foi muito útil Obrigada Natalino

Tech Website Writing /Content Optimization
Singing, smiling, surprising every day!
So as a technical writer, it is my duty to gather effective and reliable solutions to answer questions on how to deal with the issues they are having with their devices.
Phone Transfer
Transfer data from iPhone, Android, iOS, and Computer to Anywhere without any loss with FoneDog Phone Transfer. Such as photo, messages, contacts, music, etc.
Free DownloadHot Articles
 /
/
INTERESTINGDULL
/
SIMPLEDIFFICULT
Thank you! Here' re your choices:
Excellent
Rating: 4.5 / 5 (based on 93 ratings)
