FoneDog Screen Recorder
FoneDog Screen Recorder
Special Offer
Special Offer


By Nathan E. Malpass, Last updated: April 8, 2019
The devices that we use nowadays have evolved to a point where not only features are enhanced but also the ability to store important data. When we say ability it means the amount of information that can be stored have increased.
Now although it is quite normal to just leave it stored on your device it is nowadays imperative that users create backup copies of important information to avoid data loss.
There might be instances that your device gets stolen or broken due to normal wear and tear and usage. It is a complex task but we have gathered important tips for you on how you can keep your precious photos safe and secure and easily transfer photos from Android to Mac.
You wouldn't want to lose anything that is of value like photos of your wedding day or the picture of your kid on her first bicycle ride. So in this article, we discuss the manual way to do it and other alternatives that have been deemed highly recommended and thought as the best by tons of users out there.
Part 1: Manual transfer from an Android device to your MacPart 2: Using Image Capture to move photos from your Android Device to your MacPart 3: Dropbox app for Android transfer to MacPart 4: The ultimate app to use for photo transfer from your Android to Mac
This method poses a bit of concern since most of the time it will only allow you to transfer a few of your files and it takes up a lot of time. Also, you would need to have the Android File Transfer software installed on your Mac in order to proceed.
It is a free app that only allows you to transfer and delete files, there is no way for you to filter or even get an overview of your files. Either way, it is still commonly used. Here are the steps to safely copy your photos and videos to your Mac computer.
Step 1: Download the Android File Transfer app
Step 2: Once the installation is complete on your Mac plug your Android device using the original USB cable that came with it upon purchase.
Step 3: Launch the app and wait for it to recognize your device.
Step 4: Look for the folders where your photos are stored on the device. Typically you can find them under "Media", "DCIM, or "Pictures"
Step 5: You now can easily drag and drop to the transfer Window (it is advisable that you check all folders that contain the photos since app photos are stored in a separate folder you may want to copy from that one too)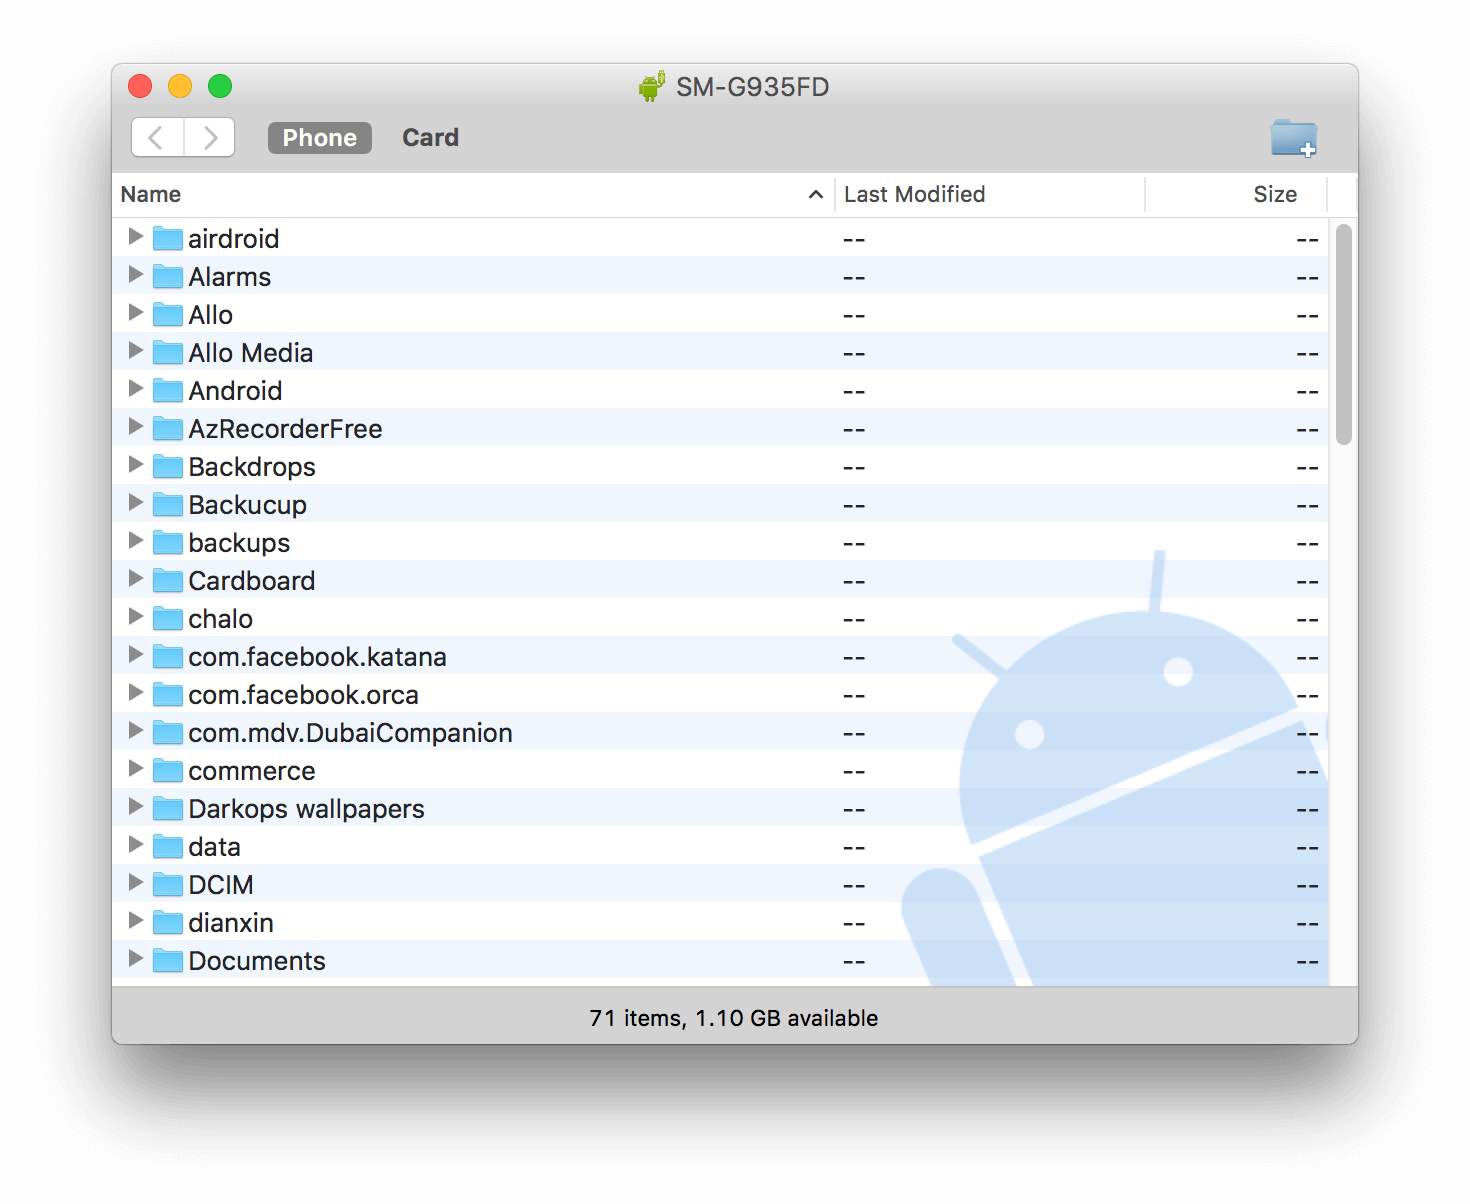
One other app that users often find convenient to use is "Image Capture". It allows you to have thumbnail previews of your photos and permits mass deletion and transfer. Below are the steps to use the app to copy your photos to your Mac from your Android device.
Step 1: Connect your USB cable to your Mac then plug in your Android device.
Step 2: Go to your Applications folder then launch the Image Capture app. (Easier if you have a shortcut for it)
Step 3: Once your device is detected it will be shown on the list displayed on the left side panel. Click on it to view the files available for transfer.
Step 4: You will be provided with two options for your transfer. If you prefer to have all your photos transferred just click on "Import All" if not then just select the ones you want then hit on "Import" after making your selection. 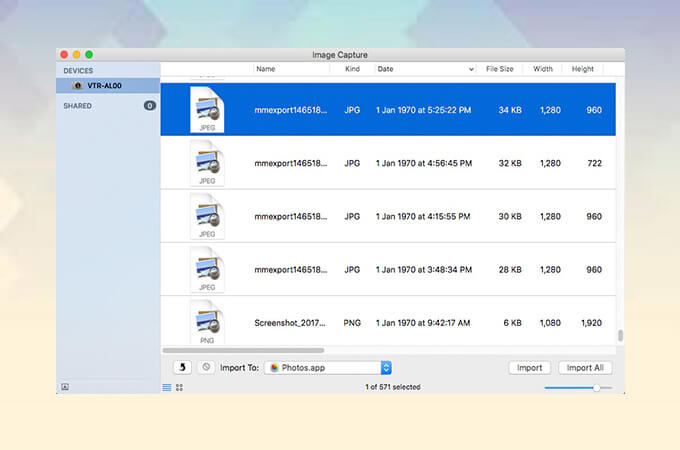
This option is very convenient for users who don't have the time to sit down in front of their computer to do the manual transfer via USB cable. Dropbox is a form of cloud storage that allows you to be able to move your files directly from your device and make it easily accessible via the app while connected to the internet.
This will give you the chance to not only sync and transfer your photos from Dropbox to your Mac but also to any iOS device. Also, makes it easy to free up storage on your device. Read on to find out how to move your photos automatically and manually from your Android Device to Dropbox then have it transferred to your Mac.
Step 1: Download the app on your Android device
Step 2: Complete Sign up then log in.
Step 3: To set up the feature that would allow direct camera upload from your Android device, go to the main menu panel of the app.
Step 4: Click on the settings icon.
Step 5: From the drop-down go to "Camera uploads" then make sure that you enable the selection that says "Turn on Camera uploads"
Important Note: You can choose when you would like to schedule the upload to Dropbox and select if you would prefer to just have photos transferred or include videos. Also whether you want the upload initiated when connected to Wi-fi or using your cellular data plan.
To do a manual upload to Dropbox just follow these steps:
Step 1: Launch the app from your device then continue to log in.
Step 2: Click on the "+" icon then select "Upload photos or videos".
Step 3: Carefully review your choices then tap on "Upload".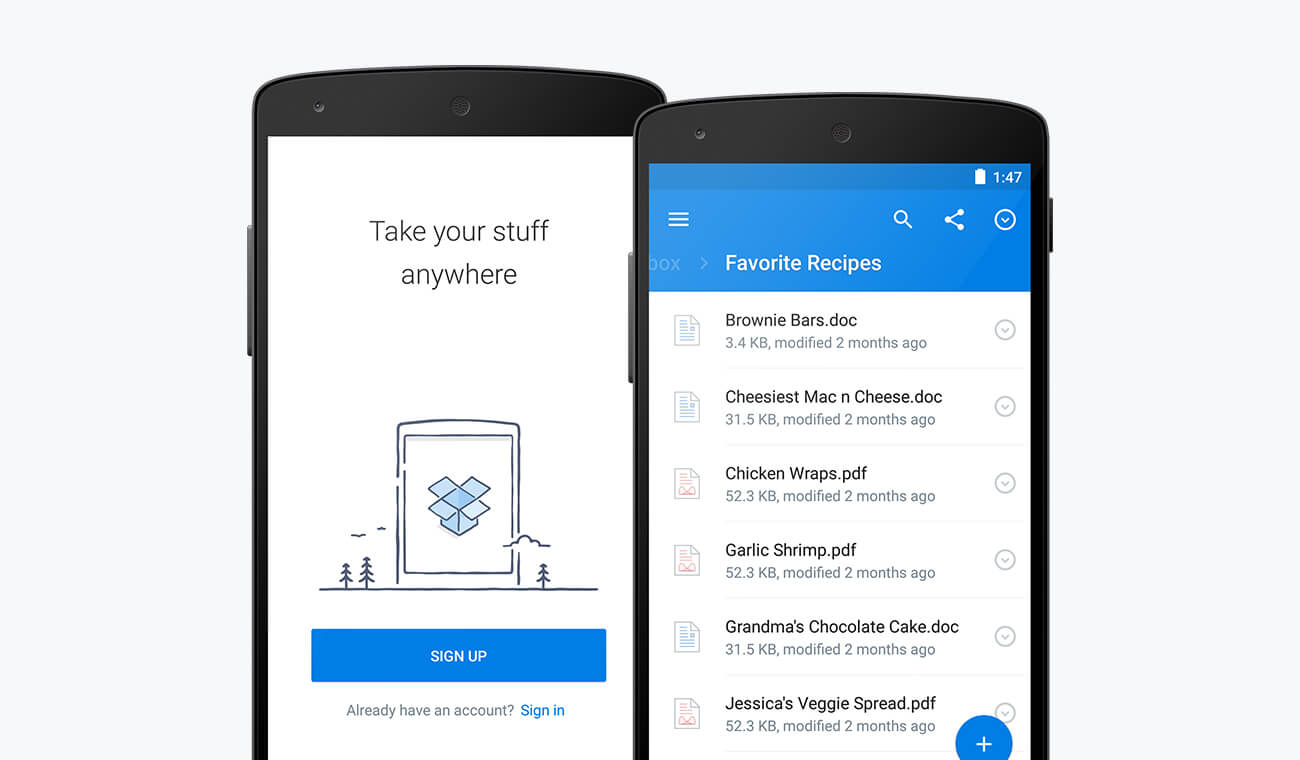
Transferring photos or videos from your device should be an easy and effortless process. That's why the FoneDog Toolkit has a feature that has been developed to give you that kind of experience.
It is best for users to seamlessly copy precious mementos from their devices and keep it secured if they prefer to have it stored on their Mac or other iOS devices. The Android Data Backup and Restore feature of the toolkit bridges the gap between Android and Mac to do just that.
Step 1: Download and Install the Toolkit
After completion of the FoneDog Toolkit installation, launch the software. (Make sure no other backup software is running while using the toolkit)
Step 2: Connect your Android device
Using the USB cable that came with your device plug it in then wait for it to be recognized. Then go to the Android Data Backup and Restore Section.
It is important to remember that for versions 4.0 and up that a prompt will appear asking you to enable USB debugging. This would allow your device to be readily accessible on your computer. 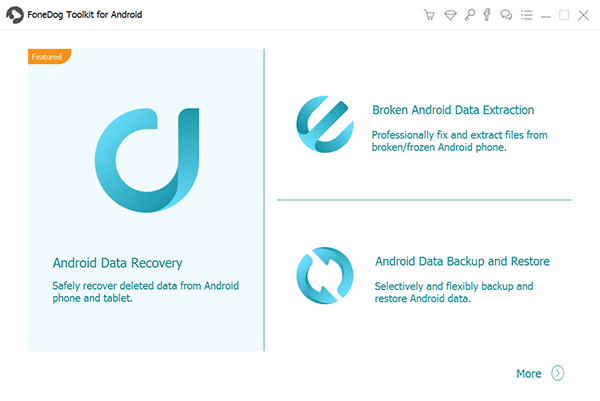
Step 3: Choose your backup option
Go to the sub-selection "Device Data Backup" once your device syncs. By default, all the files available for transfer will be selected.
You will have the option to review and select just a few if you wouldn't want to have everything copied to your Mac. This will also give you the opportunity to see which ones you would like to delete to free up some storage.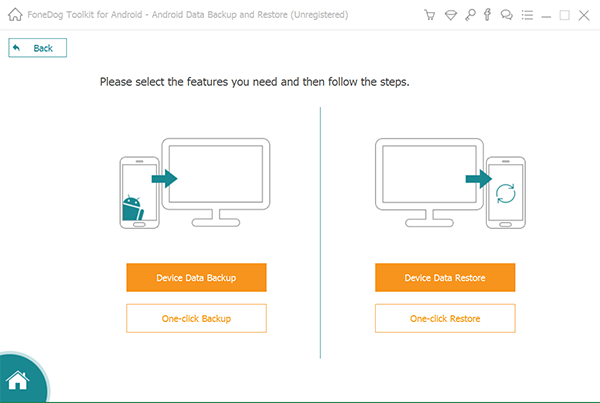
Step 4: Choose the data type for backup
Since the toolkit categorizes the data on your device based on the type it will be easier to navigate to the media files (photos and videos) that you wish to transfer. You won't have a hard time sifting through every folder for all your photos and videos.
Once you are sure of your choice click on "Start" to start the actual process. Usually, the wait time is longer depending on the number of files to be transferred but since the toolkit is the best out there you won't even notice that you have to wait for it to complete. 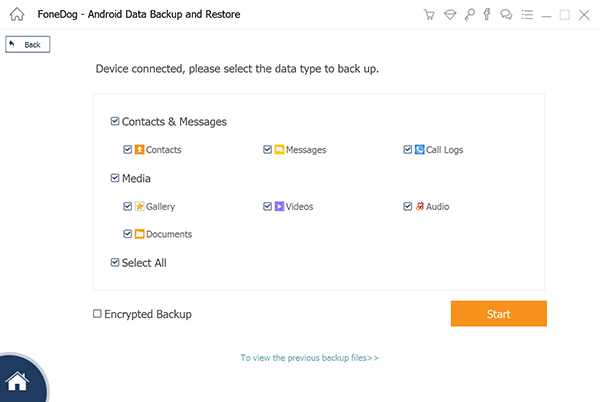
Step 5: Backup completion
After the process has completed you will be shown details of the files (i.e size, number of files included in the backup and date). Even the ones that somehow encountered an error and was not included in the backup will be shown (which never happens unless there is really something wrong with the actual file).
You can just click "Ok" if there is nothing else you would want to add or do a restore to another device if you wish to transfer whatever was backed up on your Mac. 
It just takes two easy steps to do a restore:
Step 1: On the page where it shows the result of the recently concluded backup process, Click on the option that says "Device Data Restore". By default, the most recent backup file created will be shown first. 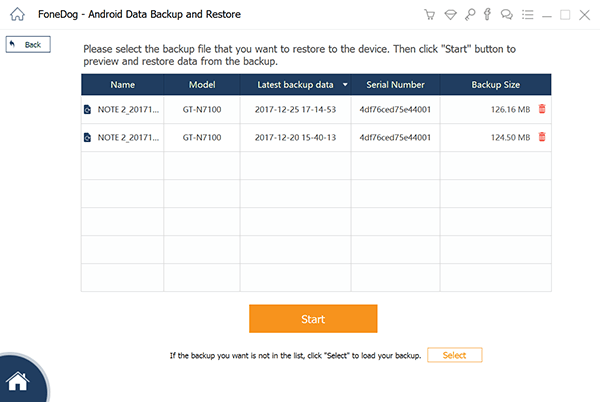
Step 2: Select the file and it will show you the contents in detail to allow a more thorough review before you proceed with hitting "Restore" to kick off the process to move the files to another device. To confirm your selection a prompt will pop-up where you will just need to click "Ok" to proceed.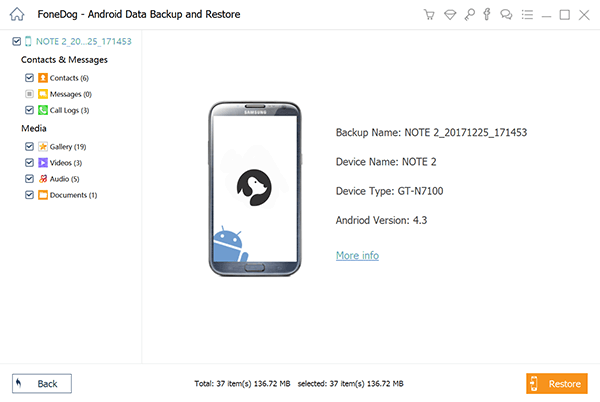
Important Note: Whether it is during the backup process or while completing a restore make sure that you do not disconnect your Android device or perform any other task to avoid any errors and complications.
People Also ReadWhat Is The Best Android Cloud Backup for You?Ways to Backup Text Messages from Android Devices
Long have the days of having to print your photos is needed just to have a keepsake of your cherished memories. Things are now a lot easier to capture and keep. Although, what we often fear is that technology tends to mess things up and we may end up losing all those precious photos and videos.
Sometimes with the different devices we own, we also worry if there is a way to connect them all together and have everything just fit and be easier to manage. Well, that is why the FoneDog Toolkit-Android Data Backup and Restore was created. No matter if you are an Android or iOS user you are guaranteed the easiest and most efficient way to have those photos and videos transferred and stored for long-term use and security.
It is not deemed the best if not for its awesome features. You will no longer need to worry about how to get your photos and videos synced amongst all your devices. You have several options which makes it a whole lot more convenient to do such a task at all times.
Leave a Comment
Comment

iPhone/Android Devices’ Maintenance Expert
Staying home, listening to music, writing tech articles
Many people asked me to repair their mobile phones so I have a lot of experience in mobile phone repair, and I know a lot about Android or Apple phones.
Android Data Backup & Restore
Back up your Android data and selectively restore to Android
Free Download Free DownloadHot Articles
 /
/
INTERESTINGDULL
/
SIMPLEDIFFICULT
Thank you! Here' re your choices:
Excellent
Rating: 4.5 / 5 (based on 106 ratings)
