FoneDog Screen Recorder
FoneDog Screen Recorder
Special Offer
Special Offer


By Nathan E. Malpass, Last updated: November 27, 2018
Help! I recently bought myself a Samsung cell phone because I love taking pictures and was told that Samsung was the best and had the best quality of photos that you would find on a cell phone. But much to my surprise, after only a few weeks of using it every day to take OOTD’s and my moments with friends eating, shopping, and going out, my camera just stopped working! Do I have to take this back to the store or is there something that I can do on my own before having to drive all the way back there? I really hope you can help me. Any advice would be very much appreciated. Thank you in advance and I am crossing my fingers that you write me back with some tips on what I can do to get this working again. Thank you!
- Sleepless in Texas
Quite simply put, we have all become shutterbugs. We all have mobile phones and we are all, for the most part, addicted to snapping photos. It doesn’t matter where we are or what we're doing, we always find a way to document our life experiences through our camera phones.
Whether it be a meal were having, a friend we are spending our day with, a child we are visiting, a sunset, and even catastrophes like floods or stormy weather.
But have you ever experienced your phone telling you that your camera has stopped working? Doesn’t that just drive you nuts? It doesn’t matter whether it is the front or the back camera, so long as one of our cameras stops working, it is an inconvenience that none of us want to live with.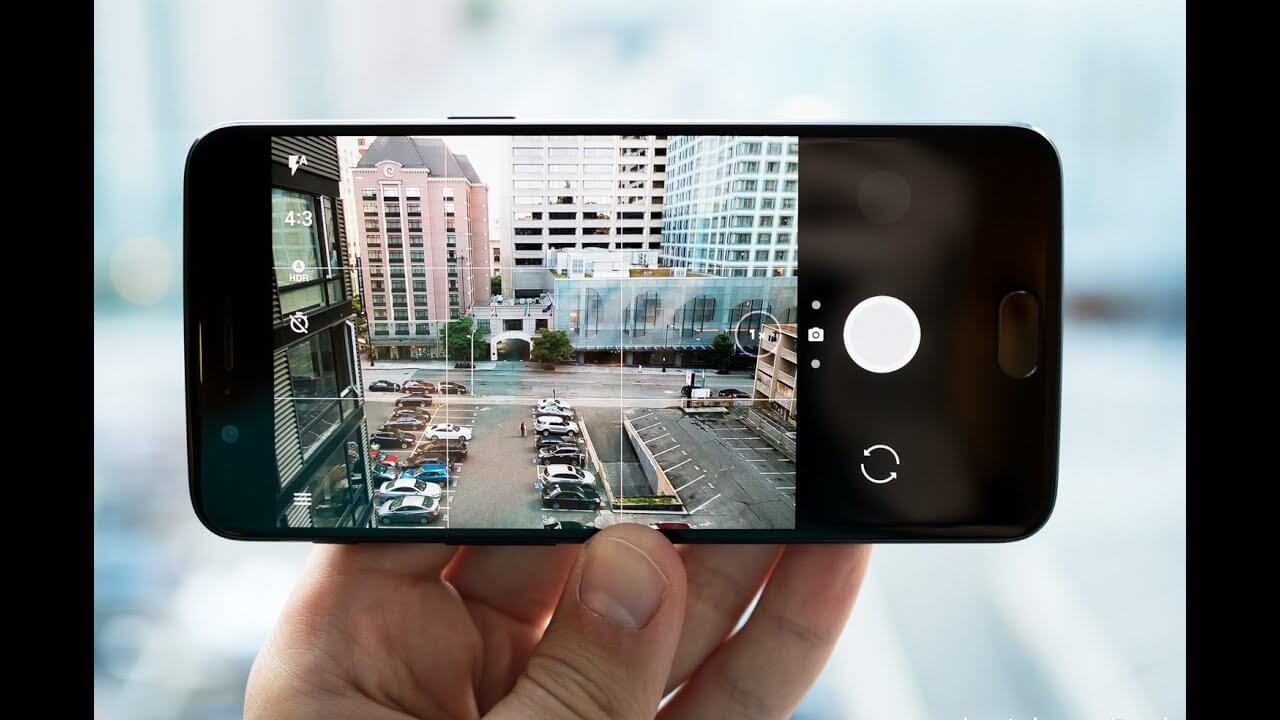
Android phones have failed on us and there are several reasons why this has happened. Sometimes we receive a prompt that says “can’t connect to camera on Android” or “camera stopped”.
If this has happened to you, we're sure that this has driven you crazy. But this article is here to help you fix this problem on your own without having the need to take your android phone to your nearest dealership in order to have it repaired.
If you have ever received an error message telling you that your camera has stopped working, this indicates that a problem has arisen with your Android smartphone that exists either because of the software or the hardware of your device. However, in a majority of the cases as to why this happens can be fixed without too much trouble.
The way this error happens is taken place when you attempt to start the camera through the camera application of your Android or could happen when trying to launch the camera app of a 3rd party application such as your instant messenger, Facebook Messenger, Viber, What’s App, and so forth.
It happens when you receive a blank screen saying that an error has occurred and that your Android was unable to connect to the camera.
There is no one specific reason why this happens. It could be one of many reasons and we are here to help you figure out what that problem is. Here is a short list of some of those possibilities:
Reason 1: Low storage on your android device.
Reason 2: Low random access memory or RAM.
Reason 3: The camera is incompatible with the application you are using.
Reason 4: Having a large number of applications installed has caused your camera to perform too slowly to even launch.
Reason 5: A technical or inbuilt software glitch.
Reason 6: 3rd party application obstruction.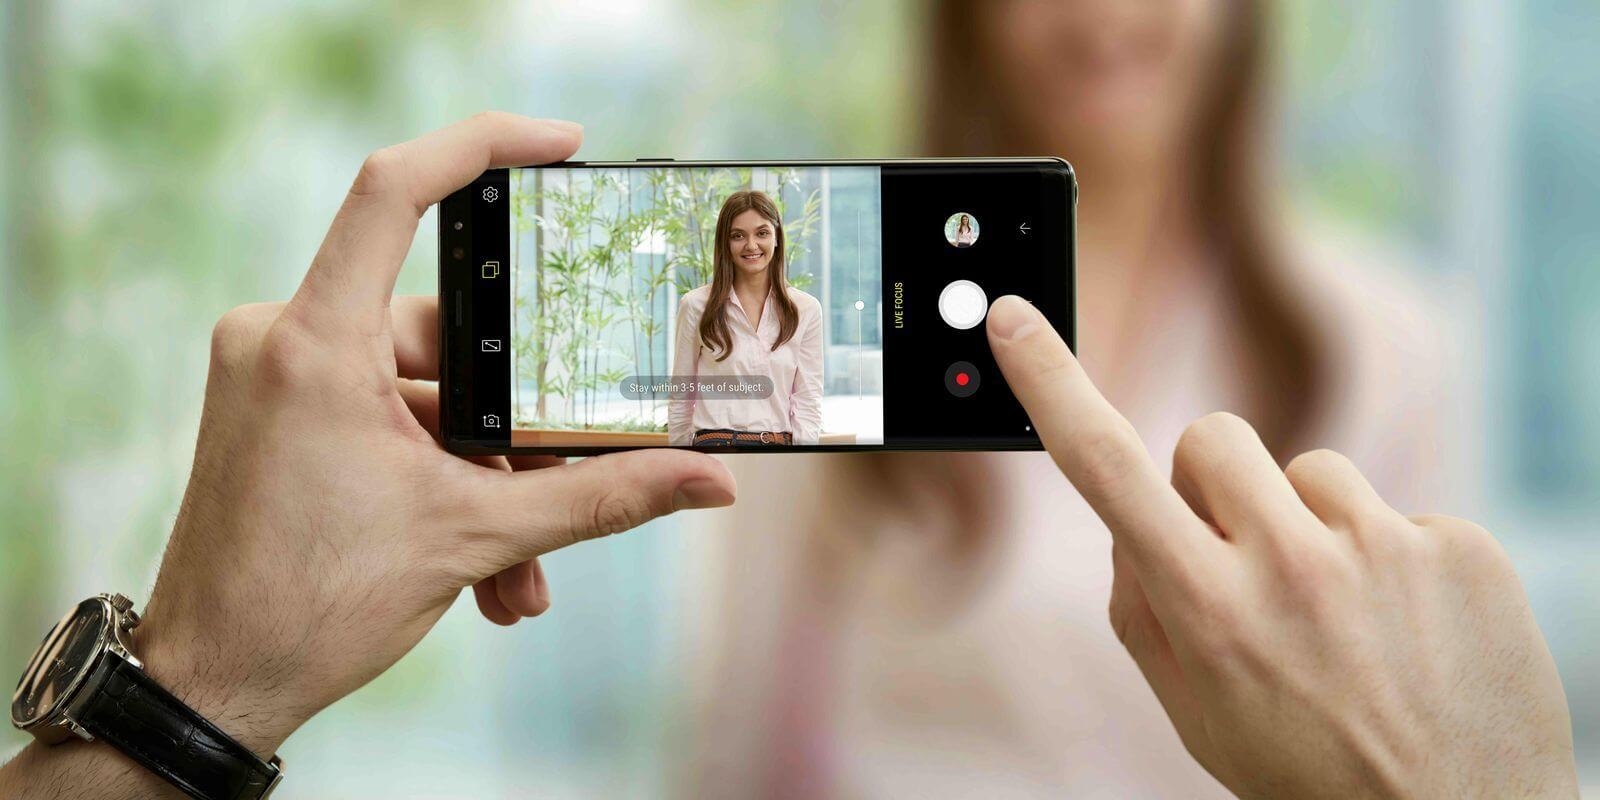
In this section, we will discuss some of the troubleshooting methods you can do in order to try to get your camera phone working properly again.
These methods are based on the possible steps you can take in order to find the solution yourself. So if you find that one method does not seem to solve the problem, remember that you can move on and try another method to see if that one works.
Like we said before, it could be any reason causing the problem, so it doesn’t hurt to try to find the problem in order for you to find the solution.
Before we begin, please keep in mind that it is highly recommended to check your storage to see if it is full, or even nearly full. Sometimes, freeing up some space in your Android phone is all it takes in order to get your camera working again.
If you have already cleared your memory and know that you have a lot of free space, then follow some of the steps below to move forward towards fixing your android phone camera.
Step 1: Restart your android phone.
This could and should be the first step you take towards finding the problem as doing so oftentimes solves the problem immediately and gets you snapping photos again in no time at all.
It is a simple non-technical method and may even fix what was causing the error in the first place. By restarting your android phone, you are already clearing some RAM as a result of turning off applications that are operating in the background.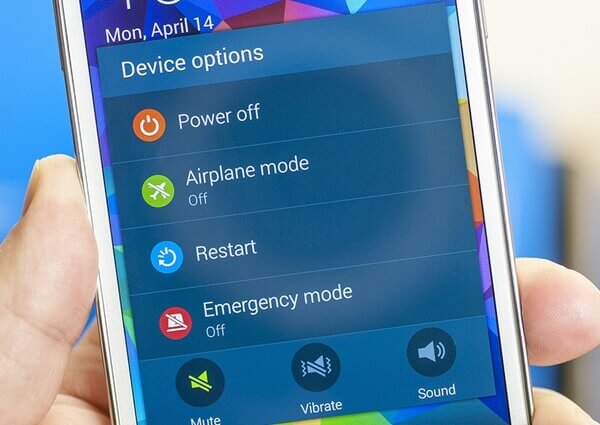
Step 2: Remove and replace your android mobile phone battery.
When you remove your battery while the phone is still on, you are in effect commanding a soft reset and this may get your camera working again.
However, please keep in mind that this method only works on units where you are able to remove the battery on your own considering that not all android phones give you the access or permission to remove the battery at all. But this does work on some occasions so it doesn’t hurt to try.
Step 3: Force to stop the camera application on your android device.
By force stopping your camera on your Android, you may be repairing a minor software glitch that your camera application was trying to deal with. In order to force stop your camera, simply follow these steps.
First, you open the application drawer or select your settings from your home screen.
Second, you locate and select Apps/Manage Apps.
Third, Scroll down and look for the camera app found within the all apps section.
Fourth, tap on the button that says “Force Stop” on the application itself.
Fifth, restart your android device.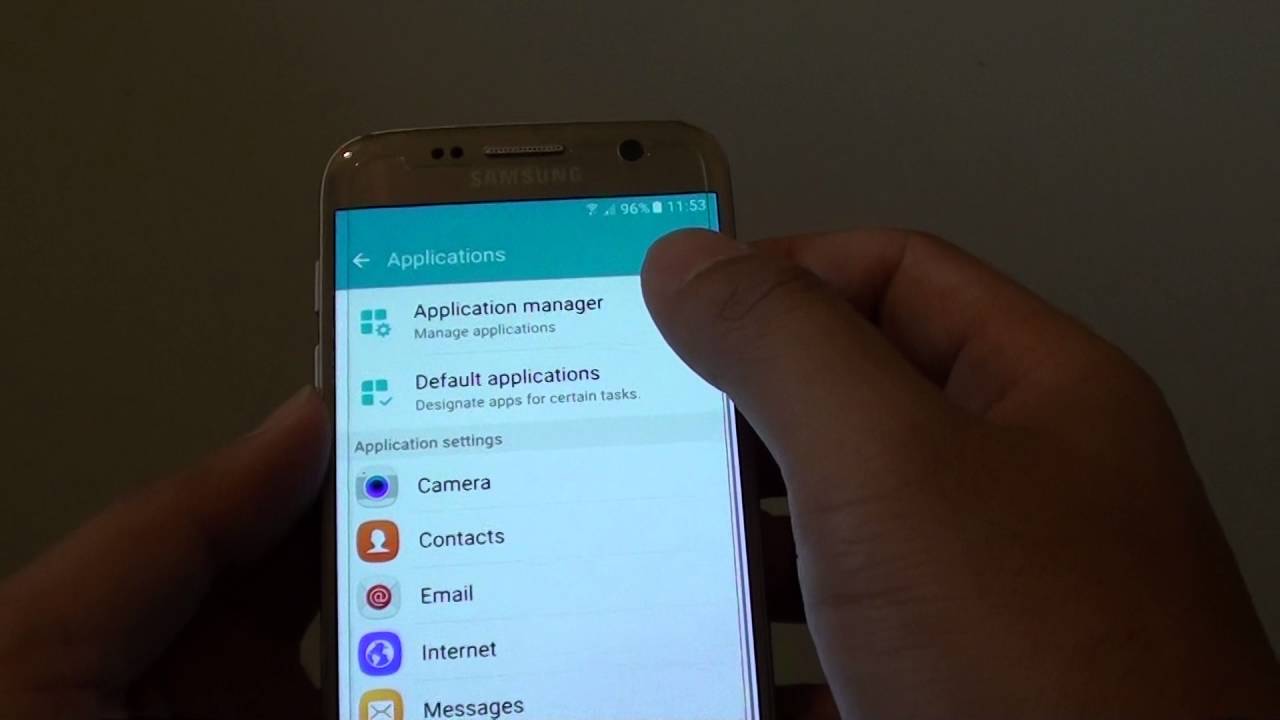
Step 4: Try to clear your application and cache data.
This is a common solution to a variety of problems, including trying to get your camera working again. Plus, it is relatively easy to do on your own and you won't have to ask help from anyone, even if you are the most non-techy person you know.
The steps are simple, please see below.
Step 1: Open the settings menu from your applications drawer on your Android device.
Step 2: Scroll down until you see the option named Apps or App Manager. Once found, select that option and open the folder.
Step 3: Scroll through that menu until you are able to locate the camera application and then click it.
Step 4: Click on the option that says allows you to clear your cached data
Step 5: Restart your Android device.
At this point, remember that you will also be deleting the preferences that you may have inputted and saved on your application options. If this is a non-negotiable for you and you don’t want this deleted, you can always backup your android device before doing so.
Step 5: Try to reset all of your application preferences.
This is quite a similar Step 4 but is a rather extended version of what you can do to further clear your data and reset your camera to its default preferences.
Number 1: Go to your settings from your application drawer on your Android device.
Number 2: Open your apps and/or apps manager.
Number 3: Look for the prompt that lets you view all the applications.
Number 4: Click on the menu icon at the top right side of your screen.
Number 5: Click the function that tells you that you can reset all of your application preferences.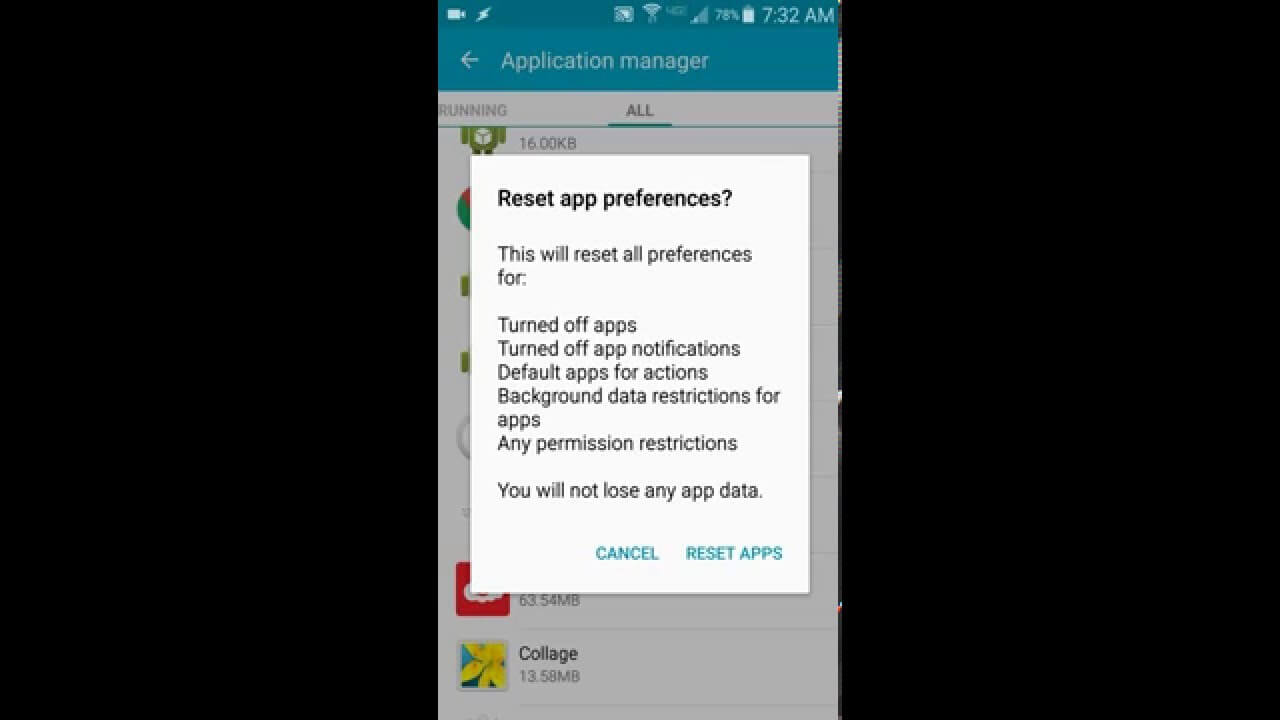
Step 6: Clear the Google Services Framework Cache
This may sound more intimidating to a user that operates his or her unit in its simplest form, but is still rather quite simple and can be done by anyone. To do so, simply go to your settings menu, there you will find that the Google Services Framework syncs all of your data and stores this data within your device.
From your settings menu, go to your application manager then select all. From there click on the Google Services Framework option then click on “Force Stop. After you have done this, clear your cache. Doing so may instantly get your android camera working again. But remember to restart your phone again before attempting to launch your camera.
Step 7: Go into safe mode.
I know what you’re thinking, why do I have to go into safe mode just to turn on my camera? Well, the answer is rather simple. Being on safe mode will disable all 3rd party applications, one of which may be causing your camera on your Android device to not work.
To enter safe mode, just hold down the power button on your android device for an extended period of time. From there, click the power off option. A prompt will appear where you will be able to click on safe mode as it attempts to restart.
If when on safe mode you notice that you are no longer having any problems, then it would be safe to say that was causing your issue is a 3rd party application. At this point, you can uninstall your 3rd party apps one at a time and check if your camera is working with each deletion. Just make sure that you are uninstalling the applications that have access to your camera such as WhatsApp, Viber, Facebook Messenger, etc.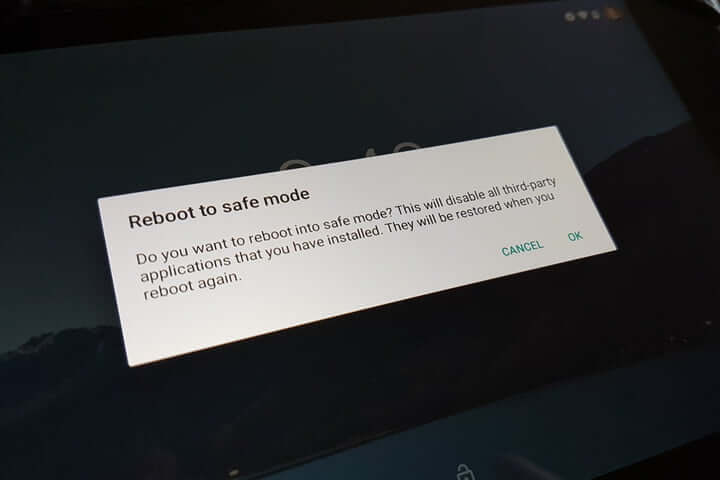
Step 8: Uninstall your third-party applications one by one.
Chances are you are one of the millions of users who has downloaded 3rd party applications to use for social media purposes and other forms of messaging and voice calls. Some of these 3rd party applications have access to your camera and that application is what could be causing your camera to stop working.
It is not an impossibility for your 3rd party application to have caused the error on your Android device. Food for thought, do not download 3rd party applications from unreliable sources and always stick to using the Google Play Store for downloading all types of applications for Android devices. Not doing so may cause you to download applications that may have a virus or spyware that may affect the functions of your Android device.
It may seem like a no-brainer that in order to use your android phone’s camera, is to simply turn it on and start clicking away. And you’re right!
But did you know that there are a few tips that could help you fully maximize the use of your camera? That’s right!
Simply turning on the camera application is not a bad idea and users are able to take excellent photos by doing just that, but if you add a couple of easy to manage steps when taking your photos, you could very well increase the chances of taking even better photos.
In this section, we are doing to list down 5 simple tricks to help you get the most out of your android phone’s camera. Please take note, these tricks work for non-photographers and non-techies alike and can be practiced by anyone old enough to carry your Android device and click the picture button.
Trick #1: Clean the camera lenses on your android device.
Absolutely. 100%. It may seem like the most simple suggestion ever and may even seem too obvious to list down, but many camera users fail to do so and as a result, end up with images that are not quite as perfect as they want it to be.
But keep in mind that our phones are with us everywhere we go. We put them in our pockets, on tables and chairs, in cars, in other people’s cars, and sometimes even in other people’s hands. It no longer has to be said that our camera lenses are susceptible to gathering all kinds of dust, lint, and even worse, fingerprints!
You might not notice a dirty lens while you are taking a photograph, what with all your excitement at capturing a certain image, but trust me, take a moment to wipe your lens with a clean cloth and you may actually see a world of difference.
Did you know that this little trick is even more important for the front facing camera? This is because the camera lens does not have any actual separation from the main glass that covers the screen of your phone.
Chances are, the front-facing camera actually has more dirt and fingerprints on it than that of the rear-facing camera. Besides that, the resolution of a front-facing camera is typically lower and so the quality in itself is not as good as that of its opposite counterpart.
Give your lenses a quick little rub down and you may be surprised to see a world of difference to something you didn’t even realize was a thing, to begin with.
Trick #2: Use the viewfinder grid lines on your camera.
As far as we can tell, most Android devices, particularly mobile phones have a grid line option on the camera application. Turn yours on and see how those simple lines can make all the difference when you are composing your photos.
Some users may find this function quite annoying as it gets in their way but once you get used to it, you will realize why it is there,to begin with, and how important those lines can be for visualization and proportioning your photos.
Most lines found on Android devices are the basic 3x3 grid which is there in relation to the rule of thirds method of framing an image. These flat lines are also there to assist you when taking horizontal photos like landscapes or skylines, whereas the vertical lines can truly assist you in completing your composition.
Trick #3: Only use your flash when you absolutely need to.
Wise men have been recording time and again as describing photography as mastery of light. This saying maybe even more realized when using Android smartphones to capture images as they have a more difficult time using the available light.
But with mastery or practice, people who enjoy taking photos with their phones will be able to capture the light that they need to suit the photo they are taking.
It is quite common for one to turn on the light or the flash of their camera when they find themselves in dark places or scenes, but however enticing that may seem, try to avoid doing so at all costs.
The built-in flashes on mobile phones are too bright and too direct for subjects that are not very far away from you. And they are annoying and disruptive to the person receiving that white light! Beyond that, the light will cause the photo to wash out everything in the image.
Rather than turning on your flash or flashlight, try moving your phone around your subject, of course only if possible, and the changes of the angles will cause the light to adjust accordingly and you will for sure end up with a better-finished product.
While you’re adjusting your light, it also does not hurt to tap the screen to focus on your subject in order to recalculate the exposure needed for the photo you are taking.
Trick #4: Perhaps you need a mini tripod
The first thing that needs to be noted here is that we are referring to tripods, not selfie sticks. For God’s sake man, have some respect!
Kidding aside, consider a mini tripod with a mobile phone clamp and you’ll be ready for any photo you want to take. Mini tripods no longer cost so much and the wide variety of choices now will help you find the one just right for you.
Tripods are typically best used when taking self-portraits but work best when taking photos in dark places or if you have the need to take a photo using a long exposure. Timelapse videos are also best shot with a tripod.
Trick #5: Make sure that you have a photo backup service
Remember, none of anything written in this article will do you any good if you do not have your photos backed up. Think of it this way, photographers of the olden days keep their negatives stocked carefully and treasure those files because those are the raw files of where those photos came from in the first place.
Keeping your photos backed up to an application allows you to always have a backup of your original photo, as opposed to keeping a copy of a photo that was already shared on social media and is no longer the actual size and form that it was when you first took the picture.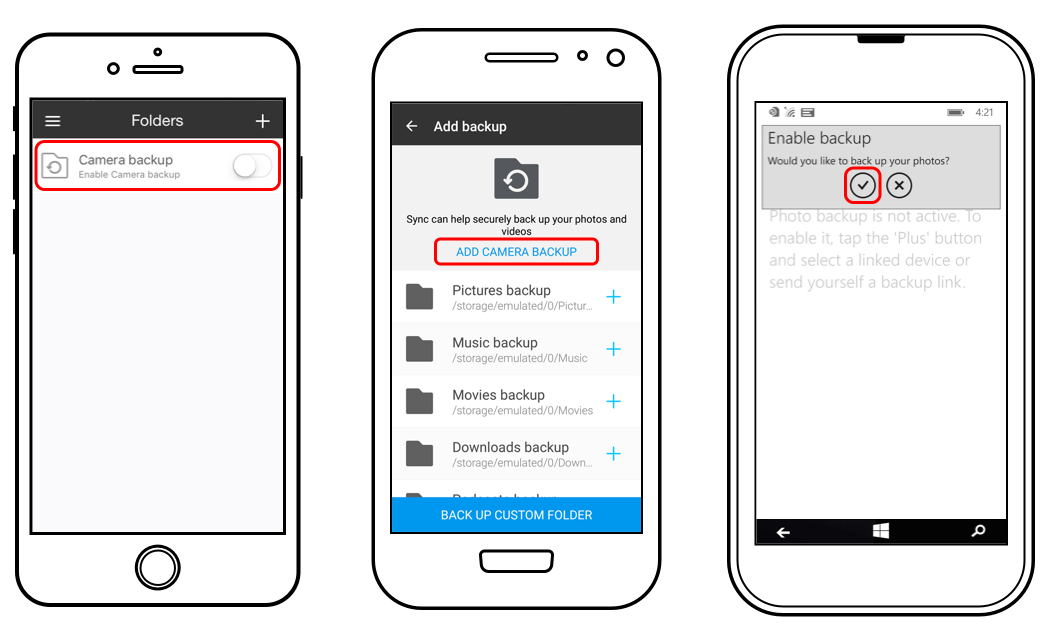
Knowing that we treasure the value of being able to document anything we want by having cameras on our phones is wonderful, and as such, we should always do our part in taking care of our Android devices as well as their camera applications, that way we can continue snapping away as we enjoy the lives we live.
With a few steps and lessons learned on how to fix our android phone cameras and take care of its functionalities, we will be able to get by without too much difficulty.
As a final call, use what your android phone has given you to help you take better pictures, after all, a picture tells a thousand words.
Leave a Comment
Comment

iPhone/Android Devices’ Maintenance Expert
Staying home, listening to music, writing tech articles
Many people asked me to repair their mobile phones so I have a lot of experience in mobile phone repair, and I know a lot about Android or Apple phones.
Android Toolkit
Recover deleted files from your Android phone and tablet.
Free Download Free DownloadHot Articles
 /
/
INTERESTINGDULL
/
SIMPLEDIFFICULT
Thank you! Here' re your choices:
Excellent
Rating: 4.5 / 5 (based on 88 ratings)
