
By Gina Barrow, Last updated: April 28, 2019
Importing photos from your iPhone to Mac is a good way to save space on your device. If you want to edit your photos, it is easier when done on a bigger screen along with the useful tools that allow you to utilize a wide array of editing options. If you want to learn how to import all photos from iPhone to Mac, there are several options to choose from.
People Also ReadHow to Backup iPhone Contacts to GoogleHow to Fix iCloud Backup Taking Forever?
What You Need To Know Before Moving iPhone Photos to MacQuick Tip When Using FoneDog iOS Data Backup & RestoreIdeal Methods on How to Import All Photos from iPhone to Mac
Although your Mac has more storage space than your iPhone, it is not limitless. It is recommended to avoid transferring many unnecessary photos to your Mac.
If you have multiple, blurred or duplicate photos or long-forgotten shots, they can eat up a few GB of space. Prior to transferring your photos, make sure that these are not included.
Once you decide to import your photos to Mac using one of the methods on how to import all photos from iPhone to Mac but accidentally deleted them or was lost due to some unexpected error or mishap, you need a tool to recover your files.
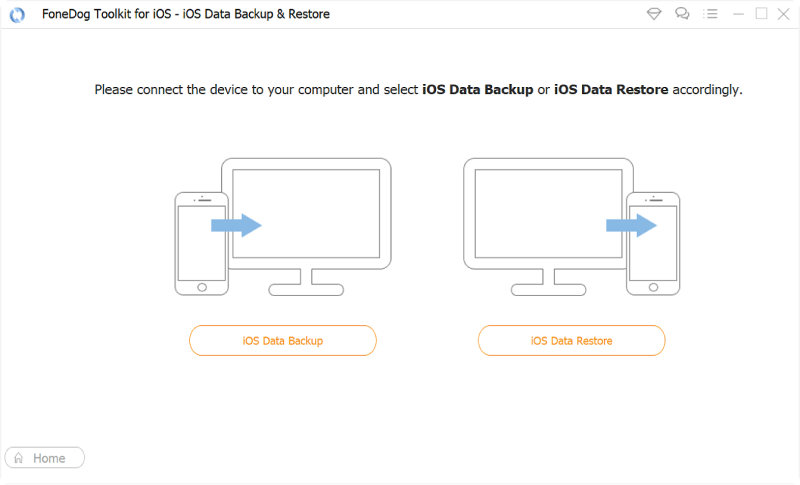
A recommended solution to restore your photos is to use FoneDog iOS Data Backup & Restore. With this tool, it can efficiently recover deleted data including photos from your iPhone. The tool presents you with 3 methods to recover your data – directly from your iOS device, iTunes backup, and iCloud backup.
You can click on the “Backup Mode” option if you still have other files to backup. If you want to transfer data to your Mac or other iOS devices, tap on “Restore iOS Data”.

Before you decide to import photos from your iPhone to Mac, you need this tool to efficiently back up your data just to stay on the safe side. In case an unforeseeable error or mishap occurs, you are at ease knowing that you can easily restore your data in a fast and hassle-free process.
Since iPhone and Mac are part of the Apple system, there are several ways to connect them and move content. These methods have been proven to be simple and relatively straightforward.

One way on how to import all photos from iPhone to Mac in a quick manner is using the Lightning-to-USB cable. This is the cable that you use to charge your iPhone via one of the USB ports of your Mac.
When you connect your iPhone, the Photos app in your Mac will open automatically and will suggest importing your photos. You can start the import process by following these steps:
When the import process is completed, you can ask the Photos apps to delete automatically the photos on your iPhone. This provides you with free space to take more photos.
Remember that some of the iPhone photos might already be present in the Photos app on Mac since they were imported earlier. In case two images are identical, the app will ask whether you want to import the duplicate. If the copy on your Mac was renamed or edited, it will not be detected.
Another approach on how to import all photos from iPhone to Mac is to use iCloud. The iCloud Photo Library or iCloud Photos can deal with this task. Nevertheless, in case you have around 5GB or more of photos and videos combined, it is best to upgrade your storage plan that can range from $0.99 monthly for 50GB or even up to $9.99 for 2TB of cloud storage space.
iCloud Photos is the online photo storage service of Apple. If you activate iCloud Photos, all the photos on your iPhone are stored in iCloud.
All images that are stored in iCloud are downloaded automatically to other iCloud devices that you are using, including iPad and Mac. This process is generally labeled as syncing. When you synchronize iCloud Photos on your iPhone and Mac, the same images are present on both devices.
Today, iCloud Photos is a highly convenient and long-term solution if you want to transfer photos on your iPhone to Mac. Remember that iCloud Photos is different than the iCloud Photo Sharing feature. For those who want to share photos with others, the iCloud Photo Sharing feature is the best option.

If you want a simple and hassle-free approach on how to import all photos from iPhone to Mac using iCloud, simply follow these steps:
The next move is to configure it on your Mac:
Once you have followed both steps and both devices you are using have the identical Apple ID, all your images and videos will sync automatically between iPhone and Mac.
If the iCloud Photo Library is turned on, any changes that you make on the photos on one device will sync automatically to the other. Essentially, if you want to remove them on your iPhone and retain them on your Mac, simply turn off the sync once you have moved everything.
The AirDrop feature of Apple allows you to transfer photos wirelessly between nearby Apple devices.
Generally, AirDrop does not instantly transfer images in the same manner as iCloud photos. The difference is that you will choose the photos you want to copy. Furthermore, the photos are moved directly to the hard drive of your Mac, not in the Photos app on your computer.
AirDrop is an easy and quick way to move photos from your iPhone to a folder on your Mac. Overall, it is the ideal option if you only have a few photos to copy.
If you want to use AirDrop to transfer images on your iPhone to your Mac, there are steps that you should follow:

Start the process by turning on the AirDrop feature on your iPhone.
The next move is to turn on the AirDrop feature on your Mac.
At this point, you can transfer photos from your iPhone to your Mac using AirDrop with the following steps:
In some cases which are based on the settings on Mac, you might be asked where you want to save the photos. Once the transfer is done, you can turn off AirDrop on both iPhone and Mac.
Regardless of the approach that you will utilize, Apple makes it a simple and hassle-free process to transfer photos and videos from iPhone to Mac. Just make sure that you will choose the photos or videos you will transfer to minimize any unnecessary clutter.
Another way on how to import all photos from iPhone to Mac is to use the charger cable.
Connect your iPhone to your Mac using the charger cable. The next step is to open the Photos app on your Mac. In the left sidebar of the interface, tap on iPhone. If needed, you must unlock your iPhone.
All the photos from your iPhone will be presented in the main part of the window. If you want to import all the photos or videos on your iPhone, tap on “Import All New Photos” at the right upper part. This will import all the photos or videos taken since your last import.
In case you only want to copy specific images, choose the “Import Selected” option at the upper part of the screen.
Once the photos are imported, you will find the images in the “Last Import” album on the sidebar on the left. If you want to view all the photos that you have transferred, access the “Imports” album.
Leave a Comment
Comment
iOS Data Backup & Restore
Back up your data to PC and selectively restore iOS data from backups.
Free Download Free DownloadHot Articles
/
INTERESTINGDULL
/
SIMPLEDIFFICULT
Thank you! Here' re your choices:
Excellent
Rating: 0 / 5 (based on 0 ratings)