FoneDog Screen Recorder FoneDog Screen Recorder
Special Offer Special Offer
Only Only
$4.49 $4.49
to get a ONE-month license to get a ONE-month license
Sale ends in xx days Sale ends in xx days
Buy Now
sale

iTunes: Delete Backup Files And Save More Space! [2022 Updated]

By Nathan E. Malpass, Last updated: July 14, 2022

iTunes was developed by Apple in order to manage your library on iOS and iPadOS devices. As such, it offers ways to back up your devices to make sure you don’t lose your data. This can take up a lot of space, so you may want to go about the iTunes delete backup process.

Removing the old iTunes backup files will help you save more space on your iPhone, including your computer. Thus, we will discuss how you go about the iTunes delete backup process to help you retrieve more space and use it for other files.

How to Delete iTunes Backups

Part #1: The Conventional iTunes Delete Backup ProcessPart #2: The Best Way to Implement The iTunes Delete Backup ProcessPart #3: Conclusion

Part #1: The Conventional iTunes Delete Backup Process

How to Locate The Backup Folder within Mac Computers

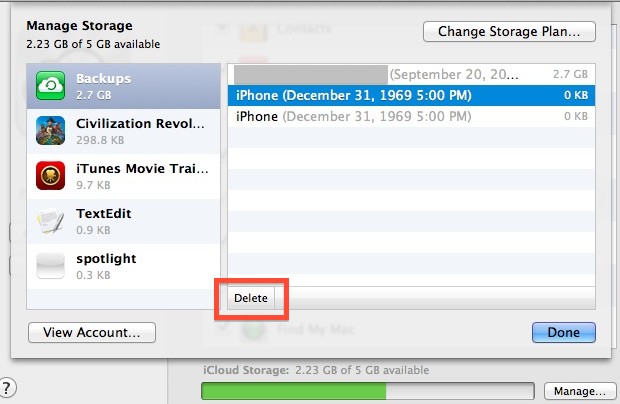
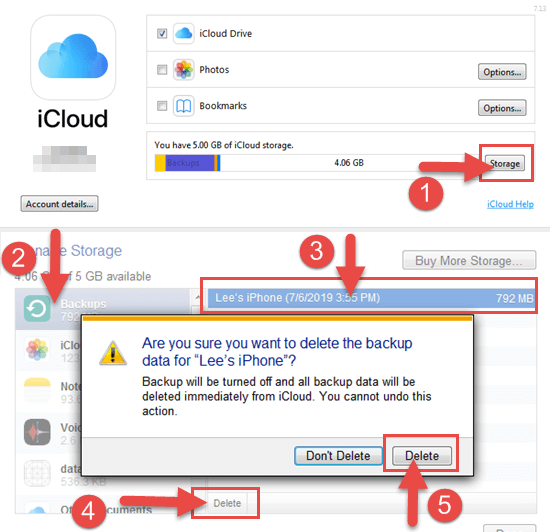
To find your backup within Mac computers, you can use the following process:

  1. Within your Mac’s menu bar, click the icon for magnifier.
  2. Paste the following directory within the search bar: ~/Library/Application Support/MobileSync/Backup/.
  3. After that, click the Return
  4. The main Folder menu will show up. Within that menu, select the particular Backup folder to locate all your iTunes backup files.

How to Locate The Backup Folder on Windows 10

  1. Click the search bar on your Windows 10 computer. This is located right next to the Windows button.
  2. On the search box, type the following: %appdata%. If the backups don’t show up, type our %USERPROFILE%.
  3. After that, click the Enter
  4. Now, you can double-click the following folders to locate the backup files. These folders include Apple or Apple Computer. If you’re going for the Apple Computer folder, visit the MobileSync subfolder and then the Backup folder within it.

How to Finish iTunes Delete Backup Process on Mac Computers

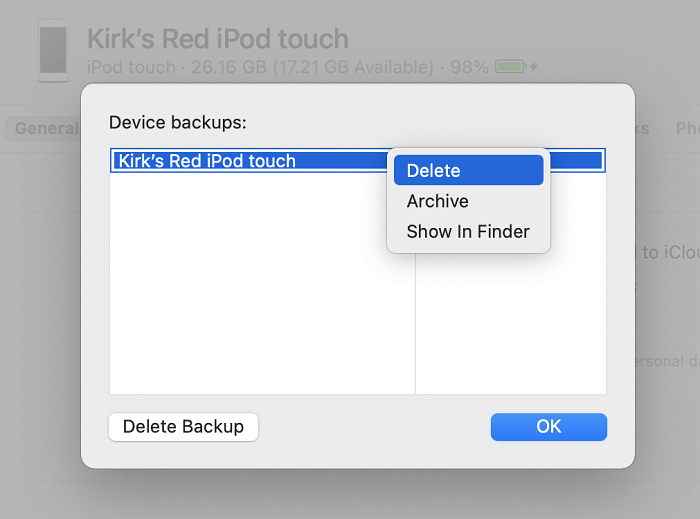
These are the following steps you should follow if you want to delete backup files within Mac computers that have macOS Catalina and later versions of the operating system:

  1. Launch your Finder window. After that, press the device you wish to delete the backup files of.
  2. On the tab labeled General, click the option that says Manage Backups. After that, right-click the particular backup file you wish to delete.
  3. You can choose the option to Delete or Archive.
  4. After that, confirm the process by pressing the Delete

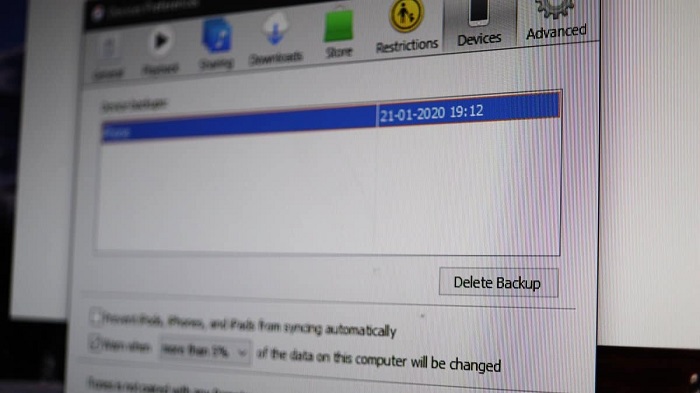
If you have a Mac computer with the operating system version of Mojave or earlier versions, do the following to complete the iTunes delete backup process:

  1. Launch iTunes within the computer.
  2. After that, press the device you wish to delete the backups of.
  3. Select the Preferences menu and then choose Devices.
  4. After that, right-click the specific backup you wish to delete.
  5. Select the option to Delete or Archive.
  6. Once done, click OK.
  7. After that, click the option that says Delete Backup.
  8. Once done, you can simply confirm the process.

How to Delete iTunes Backups on Mac Computers

How to Delete iTunes Backups on iCloud

Using iPod Touch, iPad, And iPhone:

  1. Visit the Settings Then, click [DEVICE OR YOUR NAME].
  2. After that, visit iCloud.
  3. Go to the option labeled Manage Storage.
  4. Then, visit the Backups
  5. Press a particular backup.
  6. After that, delete it.

How to Delete iTunes Backups on iCloud

Using Mac Computers

  1. Visit the Apple menu on your computer.
  2. After that, click System Preferences.
  3. Once done, press your Apple ID and then choose iCloud.
  4. Choose the option to Manage the iCloud account.
  5. Then, choose Backups.
  6. On the list of backups that show up, you can delete the particular backup you want.

How to Delete iTunes Backups Using Mac Computers

Using Windows PCs:

  1. Launch iCloud for Windows computers.
  2. After that, press the Storage
  3. Choose the backup you wish to delete and then delete it.

How to Delete iTunes Backups Using Windows PCs

Part #2: The Best Way to Implement The iTunes Delete Backup Process

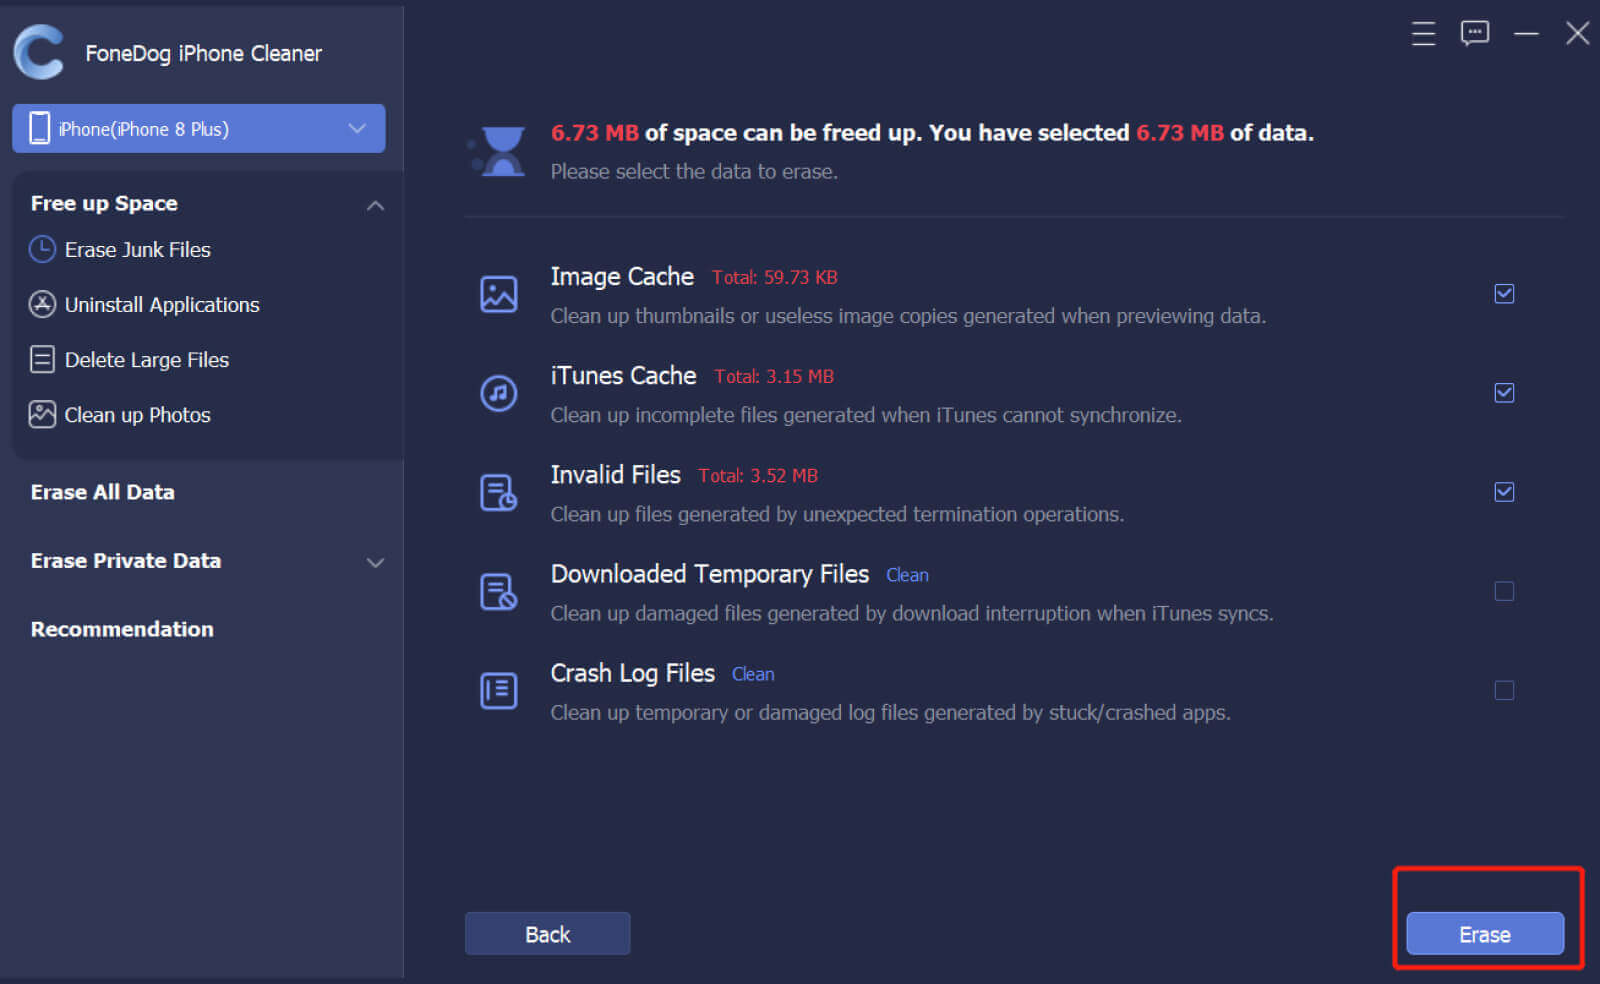
The best way to implement iTunes delete backup files process is through a tool called FoneDog iPhone Cleaner. This tool detects all the unnecessary junk files within your iPhone, iPad, and iPod Touch devices. Apart from junk files, it can detect all the iTunes backup files. In this way, you can select which ones to delete and which ones to keep.

Free Download Free Download

Some of its features and tools include the ones you can find below:

  • Uninstallation Utilities. You can use FoneDog iPhone Cleaner to locate every app installed on your device. After that, you can choose the apps you don’t need and uninstall them. A complete uninstallation process is done, meaning no leftover data are kept.
  • Junk File Removal Tools. You can use it to remove junk files within your iOS devices. Some of these junk files include iTunes caches, photo caches, temporary files, and more.
  • Photo Compression And Exporting Tools. FoneDog iPhone Cleaner enables users to compress their photos so it won’t reclaim a lot of space within the device. Easy transfer of images to computers is also possible with its export features.
  • Large File Deletion. The tool can detect all the large files that take up a lot of space on your iOS device. Once detected, you can select which files to delete and which ones to keep.
  • Privacy Protection. It helps to delete private and sensitive information in apps, including browsers, to help you protect your privacy and security.

Here’s how to use it to delete unnecessary iTunes files:

  1. Download the tool from FoneDog.com and install it on your computer.
  2. Once installed, you can launch the tool on your Windows or Mac computer.
  3. After that, connect the iOS device to the computer.
  4. On the main interface of FoneDog iPhone Cleaner, click Trust. Then, place your iOS device passcode to enable a stable connection.
  5. On the left panel, click the option for Free Up Space. Four different mini utilities will show up.
  6. For the purposes of this article, we will choose Erase Junk Files.
  7. After that, you have to click the Erase button for the scanning process to begin.
  8. Then, select the iTunes junk files(and other unnecessary files) you wish to delete. After that, click Erase.

Implement The iTunes Delete Backup Process Using FoneDog iPhone Cleaner

People Also ReadThe Proper Way on How to Clean iPad Charging PortA Good to Know Fact: Is CleanMyMac X Safe to Use?

Part #3: Conclusion

This guide has given you the best way to implement the iTunes delete backup process. We have given you the top ways to locate your iTunes backup files and give you the methods on how to delete them using different types of devices.

Finally, we have given you the best tool to reclaim more space on your computer or iOS devices. This is through the use of FoneDog iPhone Cleaner. It will help you delete iTunes backup files and other unnecessary data within your system, so you’ll have more space in the future. Get the tool today at FoneDog.com/iPhone-Cleaner/ and you won’t have to worry about a slow or malfunctioning iOS device!

Leave a Comment

Comment

Comment ()
author image

Nathan E. Malpass

iPhone/Android Devices’ Maintenance Expert

Staying home, listening to music, writing tech articles

Many people asked me to repair their mobile phones so I have a lot of experience in mobile phone repair, and I know a lot about Android or Apple phones.

iPhone Cleaner logo

iPhone Cleaner

Easily Free up Storage & Speed up Your iPhone

Free Download Free Download

How Do You Like This Article?

Check icon/ Check icon

INTERESTINGDULL

Check icon/ Check icon

SIMPLEDIFFICULT

Thank you! Here' re your choices:

Rate This Article: Excellent

Rating: 4.7 / 5 (based on 102 ratings)

iPhone Cleaner logo

iPhone Cleaner

Easily Free up Storage & Speed up Your iPhone

Free Download Free Download

FoneDog uses cookies to ensure you get the best experience on our website. Click here to learn more.