FoneDog Screen Recorder
FoneDog Screen Recorder
Special Offer
Special Offer


By Adela D. Louie, Last updated: September 20, 2019
Because iPhone devices come with a great camera feature, users tend to take a lot of photos that have high-quality. This goes especially to those newly released model of iPhone such as the iPhone XS which comes with a 12-megapixel dual camera and a portrait mode. However, photos are considered one of the biggest space-eater that you can have on your iPhone device. And with that, you will find it more efficient for you if you can transfer photos from iPhone to PC.
And when it comes to the process of transferring photos from the iPhone device to your computer such as Windows, you can make use of some certain programs such as the Windows Explorer, Windows Photos, iCloud, or any other tool that you can use for you to transfer photos from iPhone to PC.
So in this article, we are going to show you different ways on how to transfer photos from iPhone to PC. These are the best and the most efficient ways for you to get the job done.
Part 1. How to Transfer Photos from iPhone to PC Using Phone TransferPart 2: How to Transfer Photos from iPhone to PC Using Photos AppPart 3: How to Transfer Photos from iPhone to PC Using AutoPlayPart 4: How to Transfer Photos from iPhone to PC Using Windows ExplorerPart 5: How to Transfer Photos from iPhone to PC Using iCloud PhotosPart 6: Conclusion
People Also Read2 Ways On Transferring Photos From iPhone To AndroidHow to Register FoneDog Phone Transfer
One of the easiest and the most efficient way for you to transfer your photos from your iPhone device to your PC is by using a photo transfer tool. And with that, the best tool that can do the trick is the FoneDog Phone Transfer.
The FoneDog Phone Transfer can have your photos be easily transferred among any other iOS device, Android device, and to a computer as well. It can help you in transferring not just your photos but also some other data on your iPhone device such as your Messages, Contacts, Videos, and Music. All this you can do without worrying about losing any other data on your iPhone device.
You can transfer your photos from your iPhone device’s camera roll between some other devices such as another iOS device or to an Android device and your computer. Also, you can make use of its additional feature which is you can convert your HEIC photos into a PNG or JPG format.
So with that, let us show you some quick way on how to use the FoneDog Phone Transfer for you to move your photos from your iPhone device to your computer.
Get the FoneDog Phone Transfer software from the FoneDog website and install it on your PC. You can download the program for free.
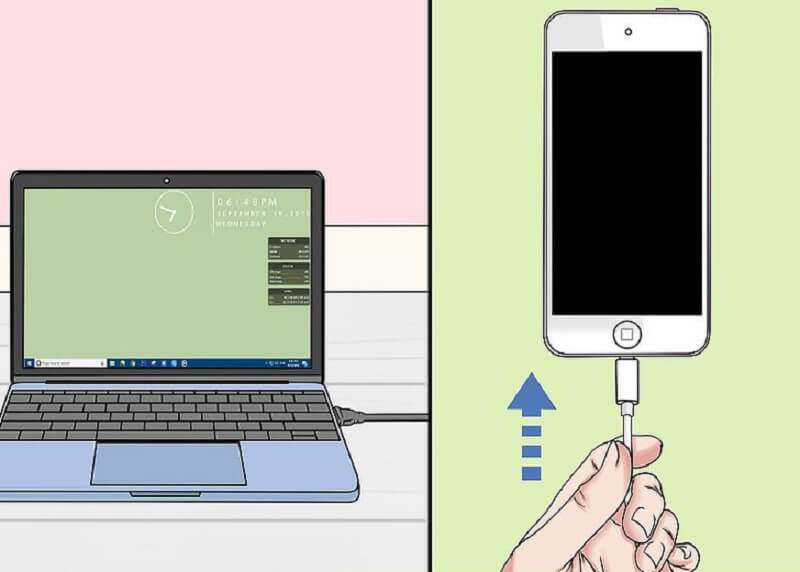
After successfully downloading and installing the FoneDog Phone Transfer, go ahead and launch it on your computer. Then have your iPhone device connected to your PC by using a working USB Cable. Allow the FoneDog Phone Transfer to fully detect your iPhone device. And once it does, the FoneDog Phone Transfer will show you some detailed information on your screen about your iPhone device.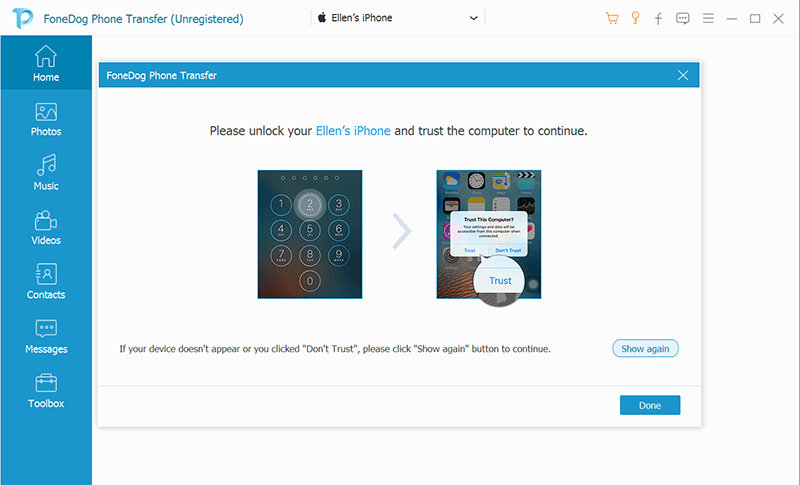
Now, looking at the side of your screen, there are different files that you can choose from that the FoneDog Phone Transfer supports. From there, all you have to choose is the file type Photos for you to choose your photos.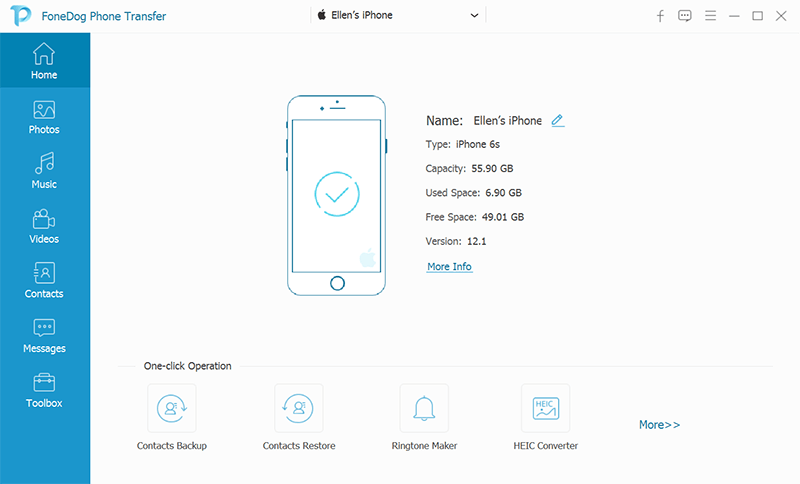
After that, all the photos that you have on the camera roll of your iPhone device will show up on your screen. So from there, all you need to do is to choose all the photos that you would like to transfer from your iPhone device to your PC. You can choose the photos you like by clicking on them one by one.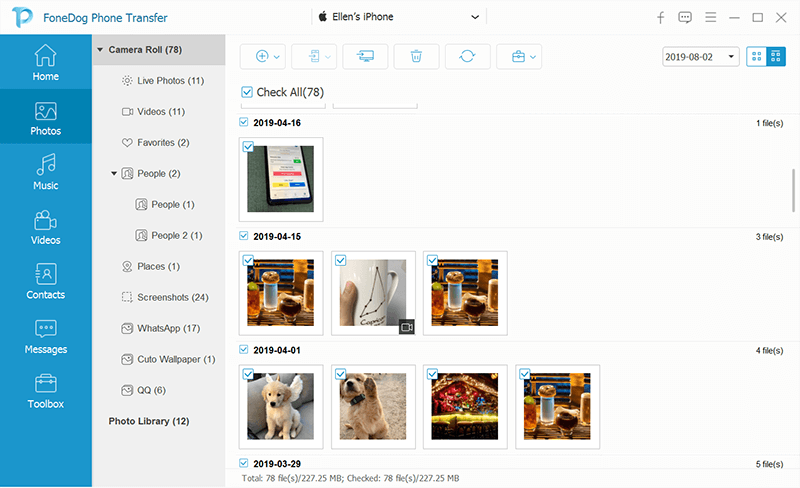
Once that you are done choosing all of the photos that you would like to transfer from your iPhone device to your PC, then all you have to do now is to do the last step. You can now click on the Export to PC button from the top of your screen for you to process the transfer of photos from your iPhone device to your PC. Then wait for the whole process to complete.
Aside from the fact that you can transfer photos from iPhone to PC using the FoneDog Phone Transfer, you can also make use of it to backup and restore your contacts, make your very own ringtones, and convert your HEIC photos to PNG or JPG format as well.
Same with the Photos App that you have on a Mac computer, Windows 10 computer also has its very own Photos App. This will let you transfer your photos from the camera roll of your iPhone device to your computer if you are using a Windows 10 operating system. If so, then here are the steps that you will be needing to follow.
Step 1: Simply download the latest version of the iTunes program on your PC. This way, it will help your computer in recognizing your iPhone device.
Step 2: After that, connect your iPhone device to your PC using your USB cable.
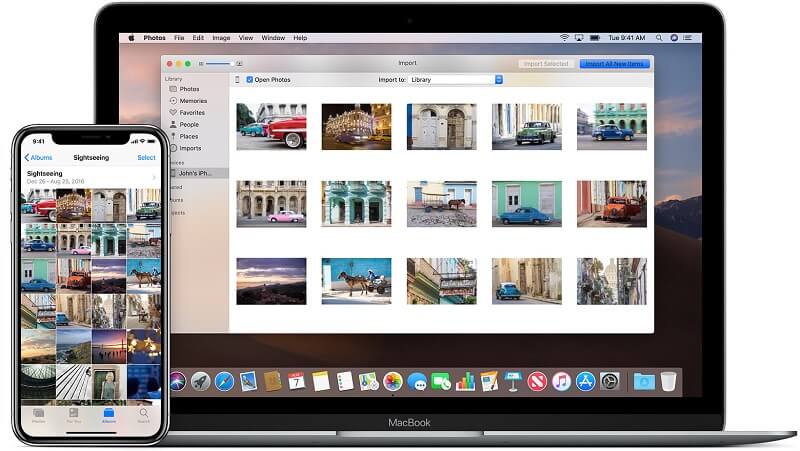
Step 3: And then, start the Photos App on your computer and then choose the Import button which is located at the upper-right hand corner of your screen.
Step 4: Then, simply choose all of the photos that you would like to transfer from your iPhone to your computer. After that, go ahead and hit on the Continue button. After that, all of the photos that you have chosen earlier will then be transferred to your computer.
If you are using a Windows 7 or Windows 8 computer and you want to transfer photos from iPhone to PC, then what you need to use is the AutoPlay. However, this can only allow you to transfer your photos from your iPhone device’s camera roll. The photos that you have under the Photo Library or Photo Stream folder is not supported.
So, for you to know how to use this program, here is a quick guide you can follow.
Step 1: Simply have your iPhone device connected to your computer using your USB cable. Then once that the AutoPlay app shows up on your screen, go ahead and click on “Import Pictures and Videos using Windows” option.
Step 2: After that, go ahead and choose on Import Settings link. Then on the next window that shows up on your screen, you will then be able to change the folder wherein you are going to get the photos that you are going to transfer from iPhone to your PC.
Step 3: Once that you are all set up, simply click on the OK button and then close the tag if you wish to do so.
Step 1: Connect your iPhone device by using its designated USB cable to your computer. Then wait for your computer to fully detect your iPhone device.
Step 2: Then on your screen, there is a chance that you may see a notification message regarding Trust options. So from there, all you have to do is to tap on the Trust button for you to proceed.
Step 3: Then go ahead and launch “The PC” and then right-click on your iPhone device. From there, simply choose Import pictures and videos option.
Step 4: Then after that, go ahead and choose on the option “Review, organize, and group items to import”. Do this if this is the first time that you are going to transfer your photos from your iPhone device to your computer. Then hit on the Next button.
Step 5: Then go ahead and choose on “More Option” for you to be able to select the folder where you want to save your photos from your iPhone device.
Step 6: Once done, go ahead and choose on the group of images that you would like to transfer. Then click on the Import button.
Windows computer considers iPhone devices as one digital camera. That is why you can transfer your photos from your iPhone device to your computer using the Windows Explorer. And using this program, you can only transfer photos from your iPhone device ‘s camera roll folder.
Now, for you to transfer your photos from your iPhone device to your computer using Windows Explorer, here are the steps that you need to follow.
Step 1: Go ahead and connect your iPhone device to your computer.
Step 2: And then, simply go ahead and open up My Computer. From there, look for your iPhone device which can be found from Portable Devices Sections.
Step 3: Then, once that you see your iPhone device, go ahead and double-click on it. Then go ahead and open up the Internal Storage.
Step 4: Then, you will be able to see the DCIM folder on your screen wherein it contains the photos that you have on your Camera Roll. From there, simply open the folder and then choose all of the photos that you would like to transfer from your iPhone device to your computer. You can select them by copying them. Then once you are done, simply paste the photos that you copied on your desired folder on your computer.
Another way that you can transfer your photos from your iPhone to your computer is by using your iCloud account. iCloud is the main cloud storage for any data that you have on your iPhone device such as your photos. And with that, here are the steps that you need to follow.
Step 1: The first thing that you need to do is to make sure that you have turned on your iCloud photos or your iCloud Photos Library on your iPhone device. For you to do this, here are the steps.
From here, all of the photos that you have on your iPhone device will then be automatically uploaded on your iCloud account through your Wi-Fi connection.
Step 2: Then, go ahead and download application iCloud for Windows and have it installed on your computer.
Step 3: Once complete with the download and installation process, go ahead and open the application and then sign in your Apple ID and password that you have on your iPhone device.
Step 4: After that, go ahead and look for your Photos. After that, you can just simply choose Download photos and videos to PC. And once that you are finished, go ahead and click on the Done button and hit on Apply.
Step 5: Then, for you to be able to get your photos, go ahead and open your web browser on your computer using Windows Explorer if you are using Windows 7 PC, or File Explorer if you are using a Windows 8 and Windows 10 PC.
Step 6: After that, go ahead and choose on “This PC” located on the left panel of your screen. Then double-click on the iCloud Photos.
Step 7: Once that you are done, simply click on the Download button.
So, when it comes to transferring photos from your iPhone device to your computer, there are a lot of ways on how you can do so. And this will depend on the operating system of your computer for the process. However, if you would like to transfer photos from iPhone to PC, then what we highly recommend is for you to use the FoneDog Phone Transfer.
By the help of the FoneDog Phone Transfer, you will be able to transfer photos from iPhone to PC without being worried about what can happen. This is the easiest and the most efficient way for you to have your photos transferred from iPhone to a computer.
Leave a Comment
Comment

Tech Website Writing /Content Optimization
Singing, smiling, surprising every day!
So as a technical writer, it is my duty to gather effective and reliable solutions to answer questions on how to deal with the issues they are having with their devices.
Phone Transfer
Transfer data from iPhone, Android, iOS, and Computer to Anywhere without any loss with FoneDog Phone Transfer. Such as photo, messages, contacts, music, etc.
Free DownloadHot Articles
 /
/
INTERESTINGDULL
/
SIMPLEDIFFICULT
Thank you! Here' re your choices:
Excellent
Rating: 4.5 / 5 (based on 94 ratings)
