FoneDog Screen Recorder
FoneDog Screen Recorder
Special Offer
Special Offer


By Adela D. Louie, Last updated: June 6, 2025
One of the most common skills that is a must to learn as someone who mostly uses Windows is taking a screenshot. Maybe it is a full screenshot, or partial, it is used to share certain information being shared on your screen (for instance, chatting with friends or taking pictures of homework). However, have you ever wondered how to take a partial screenshot on Windows and not opt to taking a full screenshot and editing it onwards? This article shows you four easy ways.
Part 1. Take a Partial Screenshot Using FoneDog Screen RecorderPart 2. Take a Partial Screenshot Using Windows HotkeysPart 3. Take a Partial Screenshot Using Snipping ToolsPart 4. Take a Partial Screenshot Using Xbox Game BarConclusion:
How to take a partial screenshot on Windows? One of the easiest and most convenient ways to take a partial screenshot on your device running Windows is by using FoneDog Screen Recorder. This allows you to do a quick screenshot and can be managed by editing it afterwards before sharing it with everyone. Also, it produces high-quality, no-watermark, and lag-free screenshots.
Not just that, the software also offers different purposes that will surely elevate your recording experience. This has a video recording feature that can be utilized to record screen; an audio recorder that can be maximized in doing your voice reporting; and webcam recording, which significantly defies your ability to record a video of yourself.
But for now, here is the complete step-by-step procedure on how to take a partial screenshot using this free screen recorder with no watermark.
![]() Free Download
For Windows
Free Download
For Windows
![]() Free Download
For normal Macs
Free Download
For normal Macs
![]() Free Download
For M1, M2, M3
Free Download
For M1, M2, M3
Download the FoneDog Screen Recorder from the official website, and install based on the version of Windows and feature of your device. Then, install it and open it. At the main interface, click “Screen Capture” right next to “Audio Recorder”
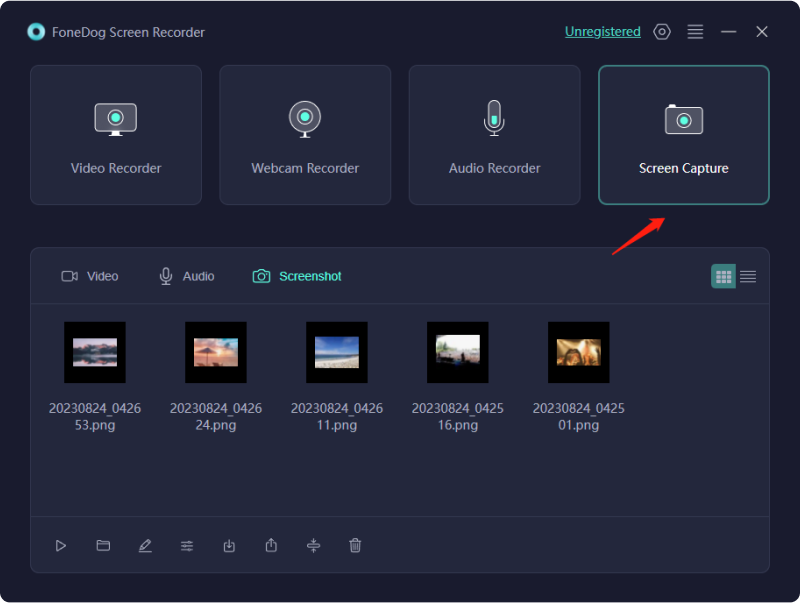
Select an area where you want to take a screenshot by just clicking the “Custom Size” > hold and drag the cursor to select the area > and release > leading to the editing toolbar popping up.
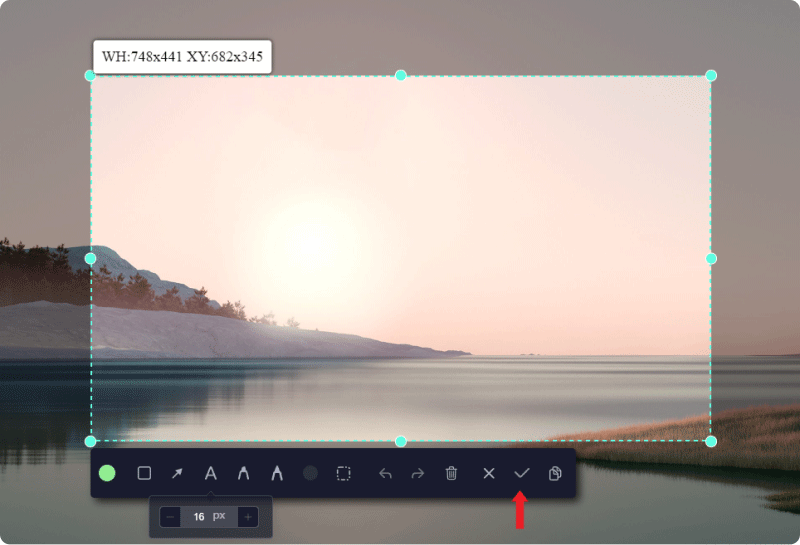
In the floating toolbar available, just click the check button, and then it will be automatically saved on the computer.
The floating toolbar also allows you to edit your taken partial screenshot with the availability of editing tools such as annotations, lines, brushes, and many more. Undo, redo, and clean buttons are also available.
Note: You can also maximize the shortcut keys provided by the FoneDog Screen Recorder. Just go to “Settings” > “Keyboard Shortcuts” > Edit your preferred shortcut buttons in doing a partial screenshot more quick and easy.
Another way on how to take a partial screenshot on your Windows device is by using Windows Hotkeys. This allows you to take part of your screen in a free or rectangular form, and paste it in an editing application to save it. This might be seen as an inconvenience in taking screenshots for opening editing software for it to be saved up to the work.
However, if that is not the case, here is the step-by-step procedure on how to do it.
To take a partial screenshot, just click “Win” + “Shift” + “S” and this will allow you to select a part of your screen. Just hold and drag it to the preferred area.
Since the application does not allow you to save the screenshot taken, you can paste it in an editing application, which could allow you to save it as an image form.
If this finds you as additional work, then you might try the next method.
Snipping Tool is a built-in Windows software that could be used primarily in screen capturing and editing snips. This allows you to annotate or draw in your captured screen and let you take a partial screenshot, preferably on Windows.
Without further ado, here is how to take a partial screenshot on Windows with the help of Snipping Tools.
Since it is already available on your computer or laptop run by Windows, simply search for it in the search bar and open the program. Click “Mode” in the main interface > from the drop-down option, choose any of the modes available: Window Snip, Rectangular Snip, and Free-form Snip.
Click “New” and then select the area to be captured by dragging the mouse and releasing it.
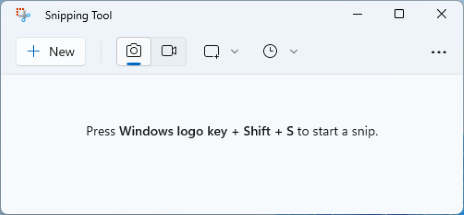
Since the Snipping Tool allows you to edit, various of functions were available—maximizing your editing experience. After that, just click “Save Snip” > select an output folder for you to save the file > click “Save”.
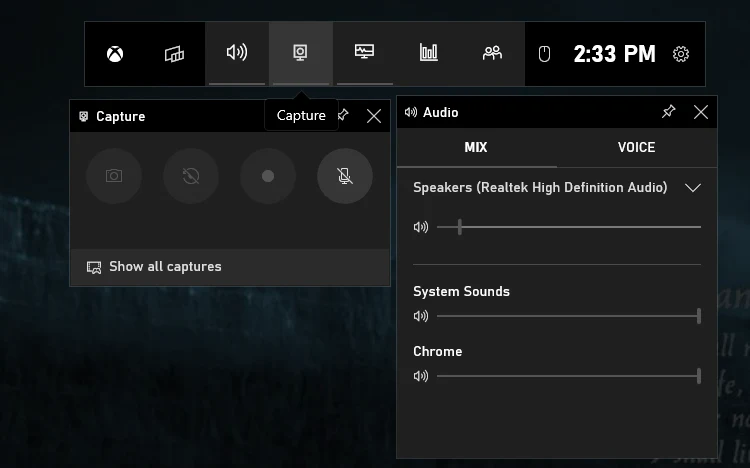
Since Windows has an Xbox Game Bar, it can also be utilized to take a screenshot by just summoning its floating toolbar with a few clicks.
In utilizing the Xbox Game Bar in Windows, here is a tutorial on how to take a partial screenshot on Windows using it.
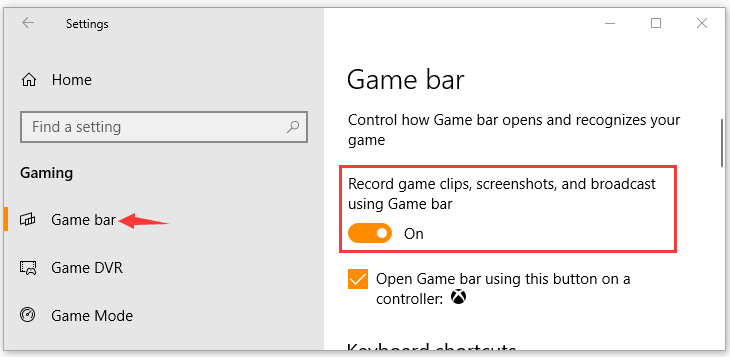
Press Win + G to open the Game Bar. Click the camera icon to take a simple screenshot or click the Start Recording button to capture your screen activity.
Taking various screenshots is an easy task to do and a necessary knowledge one must have, especially for those who utilize Windows devices. The various tools presented above aid the question of how to take a partial screenshot on Windows, thus making your life at ease.
Try the apps and see for yourself their functionality and convenience, depending on your need. But if you are looking for the best, try FoneDog Screen Recorder, which allows you a variety of functions and performs screenshots in a user-friendly way.
Leave a Comment
Comment

Tech Website Writing /Content Optimization
Singing, smiling, surprising every day!
So as a technical writer, it is my duty to gather effective and reliable solutions to answer questions on how to deal with the issues they are having with their devices.
Screen Recorder
Powerful screen recording software to capture your screen with webcam and audio.
Hot Articles
 /
/
INTERESTINGDULL
/
SIMPLEDIFFICULT
Thank you! Here' re your choices:
Excellent
Rating: 4.8 / 5 (based on 82 ratings)
