FoneDog Screen Recorder
FoneDog Screen Recorder
Special Offer
Special Offer


By Nathan E. Malpass, Last updated: October 10, 2018
I have a lot of photos on my Android smartphone. I take pictures all the time and I capture videos too. Now, I want to backup Android photos located on my Android phone. But I don’t know how to do it. Can you tell me how to?
~Android Smartphone User
TIPS:
Part I: Why People Need to Backup Android Photos?Part II: Using A Tool Called FoneDog’s Android Data Backup & RestorePart III: Other Methods of How to Backup Android PhototsPart IV: Video Guide: How to Backup Andoird Photos
Some people are a fanatic of pictures. They capture every moment and make sure these are saved to their devices. These people would want to cherish every captured moment and ensure that the photos are not deleted mistakenly.
People like these might be you. You simply want to make sure that all your photos are backed up on a secondary storage device such as cloud storage or an external hard disk drive. The secondary storage device might even be your laptop or your computer.
Whatever the secondary storage may be, you are in the right place if you’re looking for ways of how to backup photos on Android devices. This article will tell you exactly how to do it. Let’s get started.
One thing you can do is to use FoneDog’s Android Data Backup & Restore tool in order to back up your photos and put them on your laptop. The said tool is an application that allows you to create a backup of different types of data including photos.You can also restore the said backup to that of your PC or another Android device. It is very simple to use and has an understandable interface.
Here are the advantages and the steps to use the tool:
Here’s how to use it step by step:
Step 01 - Downloads the FoneDog toolkit from their official website. It’s up to you if you want the free trial or if you want to purchase it immediately.
Step 02 - Launch the FoneDog toolkit on your computer device.
Step 03 - Ensure that no other backup tool is operating alongside with FoneDog.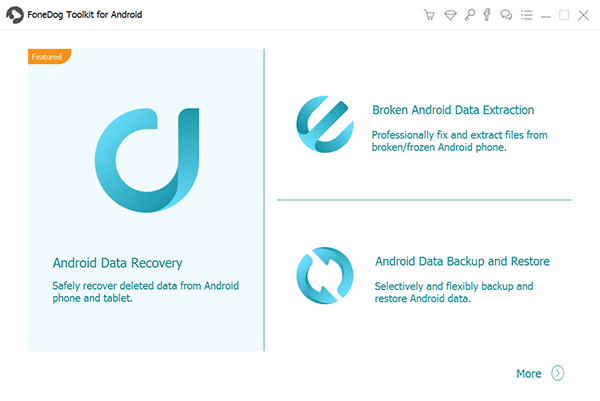
Step 04 - Choose Android Data Backup & Restore.
Step 05 - Connect the Android device towards the computer device by utilizing the USB cable. Ensure that debugging mode is activated on your Android device. If you have a version of Android 4.0 and higher, a pop-up window will appear and confirm if you wish to accept USB Debugging Mode. Press OK.
Step 06 - Now, FoneDog should have detected your phone. If this is the case, press the button labeled Device Data Backup. Usually, FoneDog is set by default to scan all types of flies for you. However, you still have the option to select which type of data you wish to backup.
Step 07 - After you have chosen various data types, press Start. This will start the process of backing up your Android device. Do not disconnect the Android device. Do not use your device during the process or even transfer or delete data while it is happening.
Step 08 - Once the entire backup process is completed, click the button labeled OK. You will now be able to view the content of your backup file. Or, you can wish to restore it to another device.

Now, you have backed up your data using FoneDog’s Android Data Backup & Restore. Here’s how to restore it to another device.
Step 09 - Select Android Data Backup & Restore.
Step 10 - Select Device Data Restore.
Step 11 - FoneDog will display backup files. You can choose a specific backup file to restore.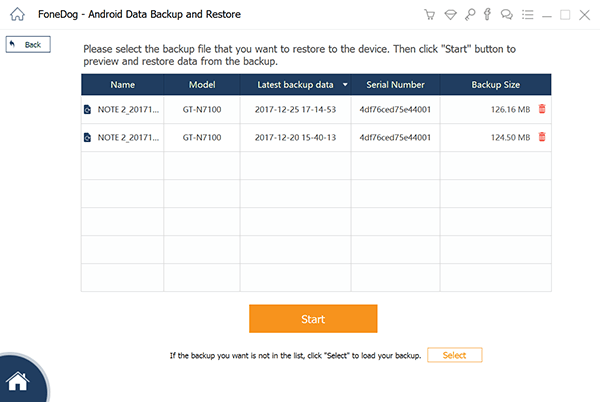
Step 12 - Select the type of data you wish to restore. After which, choose the files you wish to restore.
Step 13 - Press Restore to start the process.
Step 14 - Confirm the process in order for it to start by pressing OK.
Step 15 - Wait for the process to finish. Do not disconnect your Android device or open any phone management tool for Android. Once it is finished, FoneDog will give you a notification of the completion of the process.
The basic premise of this is to simply connect your Android device to that of your PC. In this way, you can simply copy and paste the image files from your Android device to that of your PC. The same is true if your images are located within that of your SD card (memory card). You can simply connect your device and copy and paste. Let’s get started on the steps on how to do this:
Step 01 - Plug your Android device to that of the PC using the USB cable.
Step 02 - Unlock the android device (e.g. smartphone) that you just plugged in.
Step 03 - Open the computer’s My Computer folder. This can be found within the Desktop or the start menu.
Step 04 - On the list of devices, open your Android device.
Step 05 - Select the location of the images. This can either be the internal storage or the memory card (SD card). Double click this in order to open.
Step 06 - Locate the file you wish to transfer to the computer.
Step 07 - Copy and paste the file or files you wish to copy to your computer.
If you wish to automatically restore your data, you can follow the steps listed below:
Step 01 - Turn on the Android device.
Step 02 - Tap the Menu in order to open the list of applications.
Step 03 - Choose Photos.
Step 04 - Launch Google+.
Step 05 - Choose the Menu icon. This is located on the corner at the upper left.
Step 06 - Press Setting. This is located in the drop-down menu.
Step 07 - Press Auto Backup. After this, you will be able to see that the backup process of your photos will start automatically.
Are you worried that you will lose data because the physical storage unit that contains the photos will be damaged? Well, you can opt for cloud storage such as Dropbox. The said cloud storage platform has settings for camera uploads. Plus, it can directly back up and then store the pictures and videos taken within your Android device to that of the Dropbox folder. In this way, videos and images are put into storage within the cloud automatically.
Here are the steps you can follow in order to utilize Camera Upload within a specific Android device:
Step 01 - Downloads and then install Dropbox’ most recent versions for Android devices. This can be found within the Google Play Store.
Step 02 - After you have installed Dropbox for the first time, it will prompt you to set up its settings. Create your own Dropbox account. Or, you can press Sign Up. If you have an account ready, you can press Sign In.
Step 03 - Camera Uploads can be enabled by creating a new folder and naming it to that of Camera Uploads within Dropbox. In this way, all photos and videos taken through your camera will be saved to Dropbox. Or, when you are signed in currently, press the icon labeled Photos. After which, press the button named Turn On in order to activate the backing up of the pictures.
Remember that we only get 2GB worth of space within your Dropbox account. You can purchase more space if you wish to. It doesn’t delete any data or file without your permission.
First, you have to open the app called Google+. Then, you should open its menu. Press Settings. This is located in the corner on the right. Press Camera and Photos Afterwards. Now, choose Auto Backup. An error might happen when you do the steps stated. However, this can be solved by giving Google+ access to that of the user’s photos.
Google+ allows you to create automatic backups of your photos. It makes sure that these image files are secured as well. If you activate the Auto Backup feature, videos and photos will be automatically backed up and stored within Google+.
Step 01 - First, you have to go to the Google Play Store.
Step 02 - Next, download and install the Google+ application.
Step 03 - Create your own account.
Step 04 - Press Sign In in order to log into your account. Put in your account details and password.
Step 05 - Press Settings.
Step 06 - Turn the option named Backup & Sync.
Step 07 - Press Choose Folder To Backup. This will display all the image files stored within your phone. Select the photos you wish to backup. The process of backing up your images will now start.
Step 08 - Check all the backups of your images. You can do this with your Android device by signing into Google Photos.
Backing up your photos from your Android device is actually easy. You can back it up on Dropbox, Google+, and even your computer. The best thing about it is you can use a tool by FoneDog.This tool is called Android Data Backup & Restore. It can help you backup Android Photos and other data types on your Android device and restore it to any Android device or PC as well.
Leave a Comment
Comment

iPhone/Android Devices’ Maintenance Expert
Staying home, listening to music, writing tech articles
Many people asked me to repair their mobile phones so I have a lot of experience in mobile phone repair, and I know a lot about Android or Apple phones.
Android Data Backup & Restore
Back up your Android data and selectively restore to Android
Free Download Free DownloadHot Articles
 /
/
INTERESTINGDULL
/
SIMPLEDIFFICULT
Thank you! Here' re your choices:
Excellent
Rating: 4.6 / 5 (based on 81 ratings)
