FoneDog Screen Recorder
FoneDog Screen Recorder
Special Offer
Special Offer


By Vernon Roderick, Last updated: August 20, 2019
How to Erase all data on Android Device permanently and safely? You may ask after you buy a new mobile phone or before you donate it.
Part 1. Reasons For Why You Need to Erase DataPart 2. Precautions: Before You Erase Data...Part 3. Common Solution: Encrypting and Performing a Factory Data Reset on your AndroidPart 4. The Easy and Securely Way to Erase Your Android DataPart 5. Video Guide: How to Erase All Data Permanently and Safely in Your Android
Android smartphones and tablets are so popular these days, and manufacturers are constantly adding, updating and upgrading features and capacities of these devices. Are you thinking of trading in, reselling or donating your current Android smartphone or tablet for a newer or better model? Before you do, don’t forget to erase the data on your device!
Why is it important to erase all your data from your Android device? Well, think about this: you have probably used your smartphone or tablet not only to send text messages and make or receive calls, right? You have also probably used it to download games and applications, access your e-mail accounts, browse your social media, do online banking, and shop at different online stores, among other things. Therefore, you have probably let your device gain access to very, very private information that is at risk for falling into the wrong hands.
Remember the study that Avast, a security software vendor, made back in 2014 (If you don’t, here’s a refresher: Avast bought 20 used Android smartphones on eBay and was able to recover photos, e-mails, and text messages, contacts and other sensitive information from the phones’ previous owners!)? Alternatively, you can think about this: if you used your credit card or your bank to purchase something using your smartphone or tablet, software developers might just be able to recover that information too!
While we don’t want to feed your paranoia on data theft, we do abide by the saying that goes: “It is better to be safe than sorry”. So what can you do to make sure that your previously saved and entered data into your Android device will not be recovered? Luckily, we have the best solution for you!
But before we give the best solution for android data erasure away, make sure you do the following first:
If you have already done these first three things, then you are left with your smartphone or tablet’s internal storage. The most widely known solution is, of course, the Encryption + Factory Data Reset method.
Most developers would recommend encrypting the phone first before performing a factory data reset. Why is this so? Encryption stores information in a scrambled format and this is typically unreadable by computers or people without a key (which only you, the device owner, will have). Encryption will require you to set up a PIN or password which your device will use to decrypt your data or to make your data understandable. If someone apart from your attempts to access your data but they don’t have your PIN or password, they wouldn’t be able to do so. Please note, though, that encryption on Android 5.1 will not require a PIN or password, but this would mean that encryption would be less effective. Make sure you still opt to set a PIN or password for your encryption.
Before beginning your encryption, make sure you remember to do the following first:
Once you’re done with your encryption, it’s now time to perform your factory data reset. On most smartphones and tablets, you will find it under your “Settings” menu and “Backup and Storage”, where you will see “Factory Data Reset”.

However, the Encryption + Factory Data Reset method, though it is the most widely known method of erasing data on Android smartphones and tablets, is NOT the best method of android data erasure. Again, remember the software that Avast used to recover data from the 20 Android phones they bought from Ebay? There is much software being developed and sold in the technology market to recover data from Android devices. If you really, really want to make sure that your smartphone or tablet would be unreadable, un-hackable, completely safe and seemingly brand new, then the FoneDog Toolkit – Android Data Eraser is the answer to your android data erasure needs!
The FoneDog Toolkit – Android Data Eraser is a software that will allow you to fully erase everything on your Android device and help you protect your privacy! It involves a series of processes that are easy to follow, and a user-friendly interface that will allow you to erase photos, contacts, messages, call logs, and all other private data. Once it erases the information, there will be no recovering from them using any tool! And what’s more, it supports all Android devices available in the market!
After downloading FoneDog Toolkit for Android, simply follow the steps below to erase your Android data:
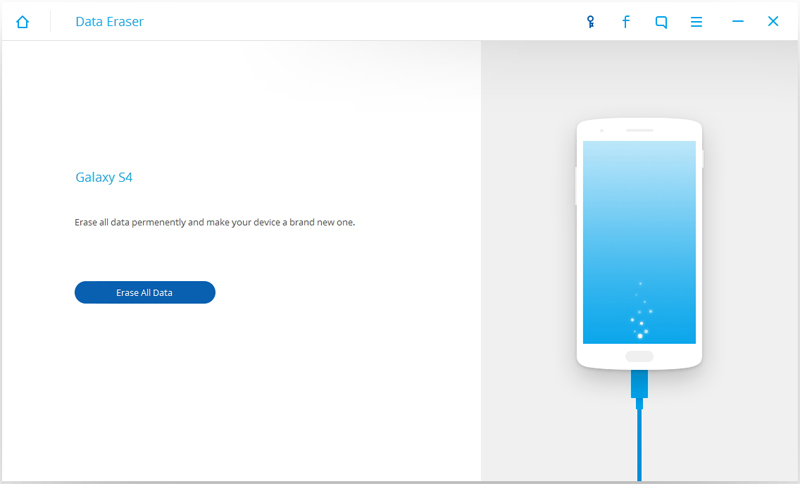
Step 1. Launch FoneDog Toolkit for Android and click on Data Eraser at the upper right-hand corner of the menu.
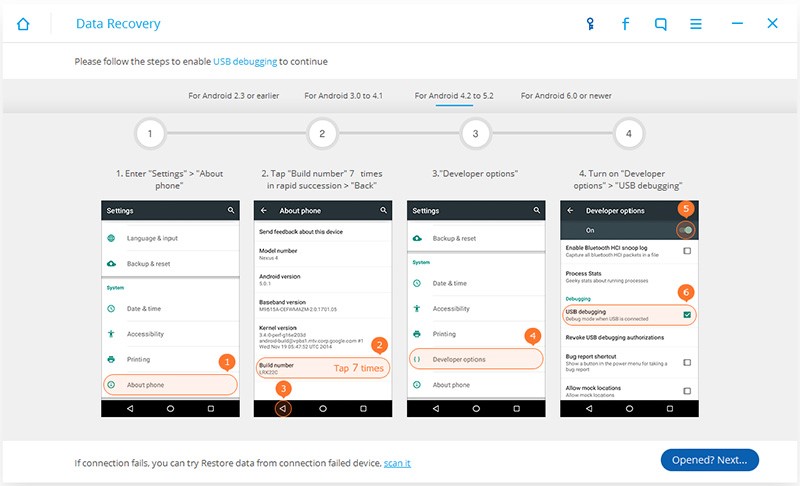
Close all applications on your device. Then, using a USB cable, connect your Android device to your PC or laptop. Make sure that USB debugging is enabled on your device.
Note: If your device doesn’t automatically have a pop-up message which will allow you to enable USB debugging, you can do the following:
For most Android versions (4.2 and up)
For Android versions 3.0 to 4.1, go to “Settings” > “Developer options” > “USB debugging”.
For Android versions 2.3 or earlier, go to "Settings" > "Applications" > "Development" > "USB debugging".
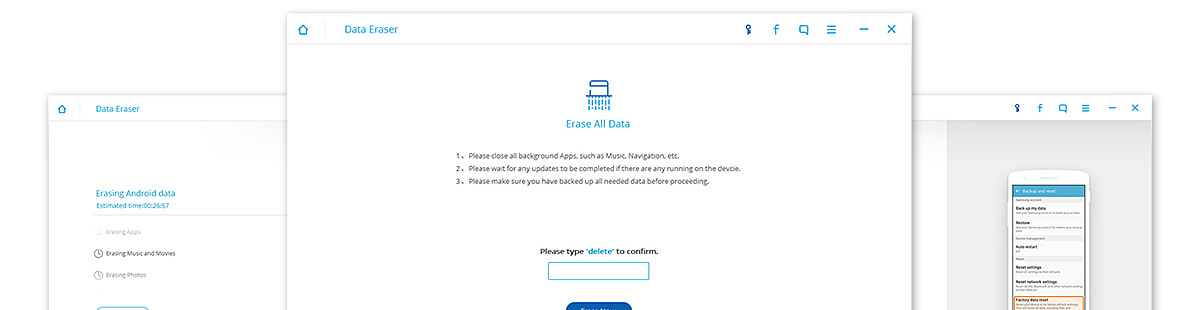
After connecting your device to your PC or laptop, FoneDog Toolkit will automatically recognize your Android device. It will then prompt you to erase all your data on the device. Click on “Erase All Data”.
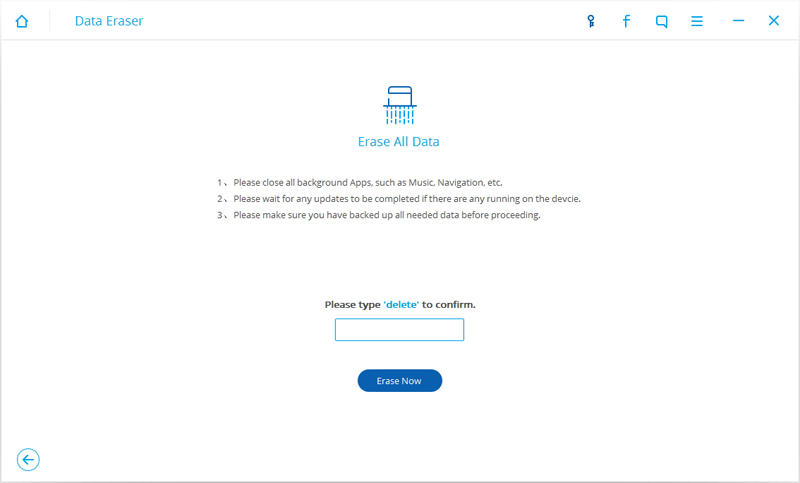
Before the operation will begin, however, the Toolkit will allow you to close all open applications, wait for any updates on the device to finish, and back up all of your data. Take note that all data that will be erased by the Toolkit cannot be recovered. If you have already done all these, key in “Delete” in the box to start erasing all data on your device.
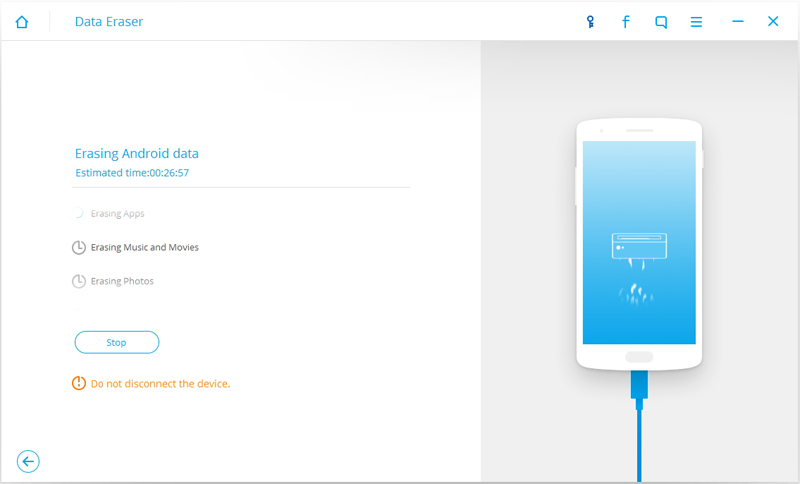
FoneDog Toolkit for Android will then begin erasing all the data on your Android device. This process will take a few minutes. To make sure that the process will proceed smoothly, make sure that you don’t disconnect your phone or perform any other tasks on your PC or laptop at this point.
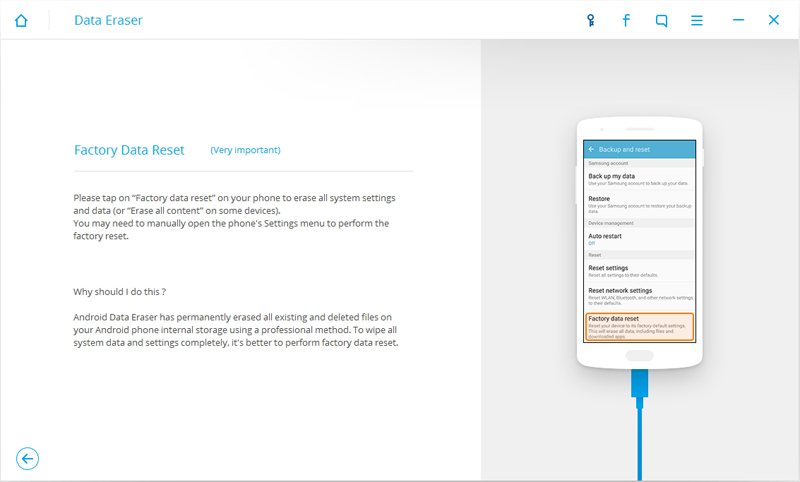
After the erasure process by the program, FoneDog Toolkit will prompt you to perform a factory data reset on your device. While it may differ across different Android devices, it is usually found by going to the “Settings” menu, clicking on the “Backup and reset” option, and looking for “Factory data reset”. This process will make sure that all settings on the device are erased.
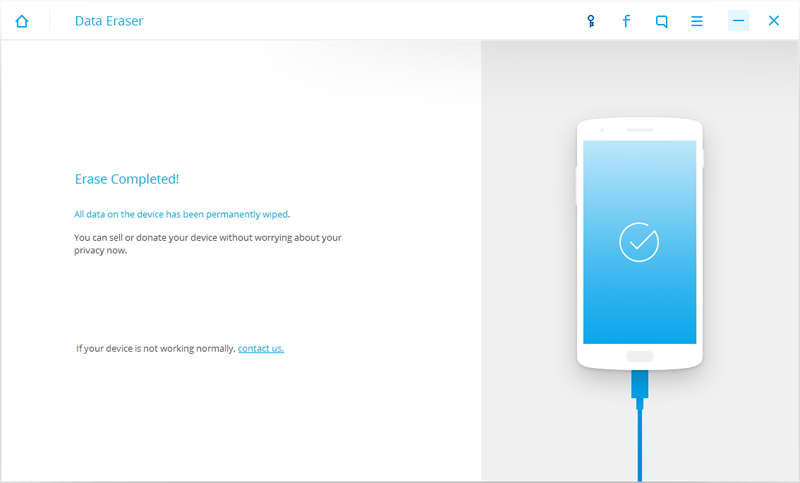
After performing the Factory Data Reset, All data on the device has been permanently wiped.
Now your Android phone has been completely wiped and it's like a brand new one.
You can sell or donate your device without worrying about your privacy now.
Leave a Comment
Comment

Technical Expertise for PC/Website Optimization
One of my passion is to develop software of my own
I write articles to share knowledge about IT technology and some experience in developing my own software, and developing my own software is one of my passions for work.
Android Data Recovery
Recover deleted files from Android phone or tablets.
Free Download Free DownloadHot Articles
 /
/
INTERESTINGDULL
/
SIMPLEDIFFICULT
Thank you! Here' re your choices:
Excellent
Rating: 4.5 / 5 (based on 71 ratings)
