FoneDog Screen Recorder
FoneDog Screen Recorder
Special Offer
Special Offer


By Adela D. Louie, Last updated: June 8, 2020
Worrying about some data that you have on your Android phone memory that had been lost for some reason? Do you want to know if it is possible for you to do a phone memory recovery for Android devices so that you can get back those deleted data back?
Then, this post is for you and if you are going to read through it, you will then be able to know how you can do a phone memory recovery for Android phones.
Most Android user’s question is that will it possible for them to recover any lost data from their phone memory. Nowadays, it is very common for every Android user to have an internal memory of up to 256GB on their Android devices. And because of this, a lot of them as well no longer use an SD card for them to extend their external storage.
However, there are some users who are still wondering, what if they lost some of their data from the internal memory of their Android device. Will they still be able to get back those deleted data from their phone memory?
Well, the answer to this question is, of course, you still can. And that is what we are going to show you in this post. We are going to show you how you can do a phone memory recovery for Android devices.
Part 1: Can I Do A Phone Memory Recovery for Android?Part 2: The Easiest Way to Do A Phone Memory Recovery for AndroidPart 3: How to Do A Phone Memory Recovery for Android in an Advanced WayPart 4: Conclusion
The internal memory of an Android device can sound a little scarier than doing a recovery on an SD card. But you do not have to worry because you can do this the easy way. All you need to have is the right phone memory recovery tool for your Android device and everything will be fine.
When you delete certain data from your internal memory of your Android device, then the system of your Android device will not be able to locate it which means that you can no longer have access to them.
But do not worry because those deleted data are still there on your Android device and because of that, you can still have them recovered.
But there are some precautions that you might want to look at for you to avoid any permanent deletion of your data.
Now, if what you are looking for is the easiest way on how to do a phone memory recovery for Android, then we have the perfect solution for you and that is by using the FoneDog Android Data Recovery.
The FoneDog Android Data Recovery is the most effective tool that you can use in order for you to perform a phone memory recovery for Android. By using this, you can recover any lost data from your Android phone such as your text messages, call logs, photos, audios, videos, contacts, and so much more.
Android Data Recovery
Recover deleted messages, photos, contacts, videos, WhatsApp and so on.
Quickly Find Lost and deleted data on Android with or without root.
Compatible with 6000+ Android devices.
Free Download
Free Download

In addition to that, using the FoneDog Android Data Recovery is also very easy and safe. This means that you do not need to worry about your existing data because they will not be overwritten by the program. Also, you can make use of the FoneDog Android Data Recovery for you to recover from your tablet, SD card, and even from the internal memory of your Android phone.
And, to show you how easy this program is, here is a quick and simple guide that you can easily follow. Just go ahead and download and install the FoneDog Android Data Recovery on your computer and let us start to do a phone memory recovery for Android devices.
After successfully downloading and installing the FoneDog Android Data Recovery software on your computer, go ahead and double-click on it so you can run the program. And then, simply have your Android phone connected to your computer by using its USB cable.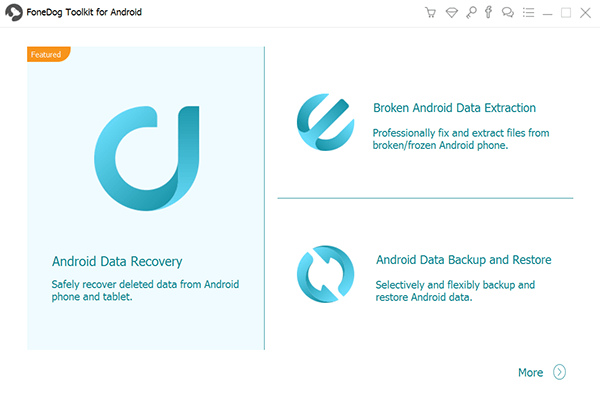
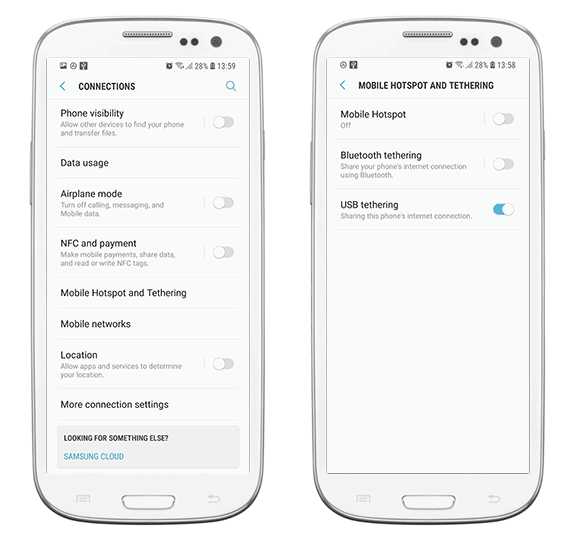
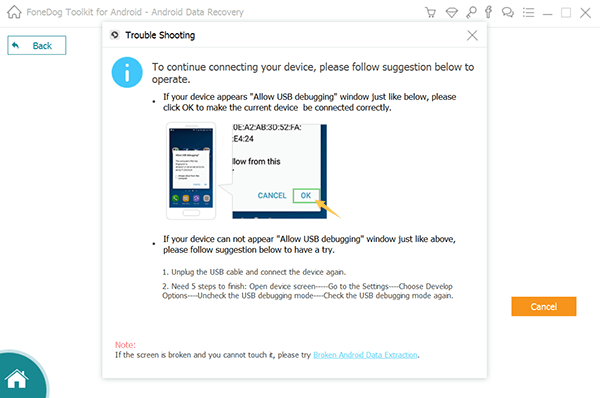
And after you have connected your Android phone to your computer, the FoneDog Android Data Recovery will then ask you to turn on the USB debugging on your Android device. So, if in case you were not able to do this before, here are the things that you need to do to turn it on depending on the version of your Android phone.
After you have successfully turned on the USB debugging on your Android device, the FoneDog Android Data Recovery will then show you all of the data types that it can support to recover. So, from there, go ahead and choose those data types that you want to scan from the list on your screen.
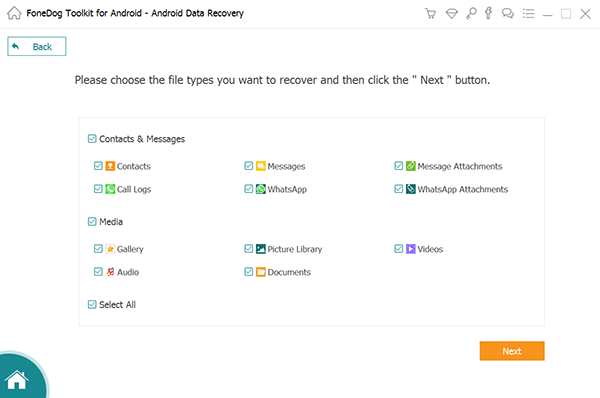
After choosing all of the file types that you want to recover from your Android phone memory, you can now go ahead and click on the Next button. This will then start the program to scan your chosen files. So, from here, all you need to do is to wait for the scanning process to finish.

After the scanning process, the FoneDog Android Data Recovery will then start to show you all of the items that contain the file types that you have chosen earlier. So, from here, all you need to do now is to preview all of its content and then choose those that you want to recover. You can do this by simply clicking on the items one by one.
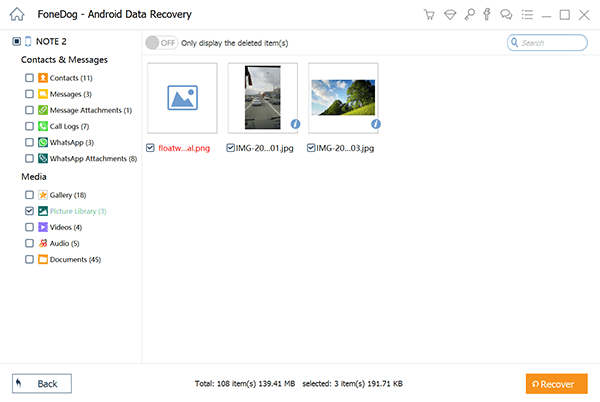
And after choosing all of the deleted data that you want to get back, then it is now time for you to start the process. Here, all you need to do is to click on the Recover button located at the bottom-right corner of your screen. Then the FoneDog Android Data Recovery will then begin to recover your chosen data. So, now, you just have to wait until the process is finished.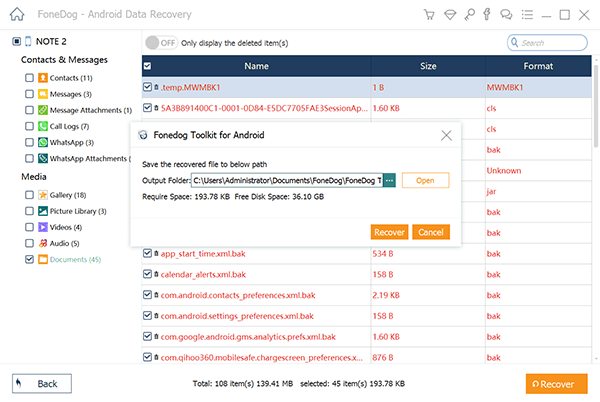
Another way that you can do a phone memory recovery for Android is when your Android device is rooted. However, the process if this method is a bit complicated than the first one that we have shown you above.
And before you do this method, you must first need to have a copy of the internal memory of your Android and save it as a RAW file. Then, you will be needing to convert it to a VHD format. And when your hard disk is already mounted on your computer, then you will be able to have it scanned with the help of a certain tool. And to be more specific about this method, we have included the steps below.
Find /dev/block/platform/ -name ‘MMC*’ -exe Fdisk -|{} \;> /sdcard/list_of_partitions.txt
adb shell. su. dd if=/dev/block/mmcblk0p27 of=/cache/myfifo.
And once that you have already converted the file into VHD, go ahead and copy it on another folder. And then, go ahead and open up your console and then enter the following command: cd C:/cygwin64/000/ VhdTool.exe /convert mmcblk0p27.raw
And once that you are completely done with all of the steps that we have shown you above, you can now go ahead and do a phone memory recovery for Android phones easily. This will then only take you a few minutes of your time depending on the size of the data you are trying to recover.
Android Data Recovery
Recover deleted messages, photos, contacts, videos, WhatsApp and so on.
Quickly Find Lost and deleted data on Android with or without root.
Compatible with 6000+ Android devices.
Free Download
Free Download
So, whenever you need to do s phone memory recovery for Android, all you need to do is to come to this post, and then you will be certain that you will be able to recover any data that you have lost from the internal memory of your Android phone.
Leave a Comment
Comment

Tech Website Writing /Content Optimization
Singing, smiling, surprising every day!
So as a technical writer, it is my duty to gather effective and reliable solutions to answer questions on how to deal with the issues they are having with their devices.
Android Data Recovery
Recover deleted files from Android phone or tablets.
Free Download Free DownloadHot Articles
 /
/
INTERESTINGDULL
/
SIMPLEDIFFICULT
Thank you! Here' re your choices:
Excellent
Rating: 4.6 / 5 (based on 79 ratings)
