FoneDog Screen Recorder
FoneDog Screen Recorder
Special Offer
Special Offer


By Adela D. Louie, Last updated: April 18, 2019
Many Android users were talking about getting more freedom for them to be able to gain access to the services that are restricted to Android devices. However, there is actually a way for you to do this. And this by rooting your Android device.
Same applies to those people who use Google Pixel. They would want to have more apps that were commonly restricted for their device. That is why we are going to show you what you need to do to make your Google Pixel root.
TIPS:
Part 1: What Is Rooting?Part 2: Risks of Rooting Your Android DevicePart 3: Backup Your Google Pixel Before RootingPart 4: How to Root Google Pixel The Easiest WayPart 5: Conclusion
Rooting is known to be a process that will be able to let you get any root access to your Android device’s operating system. Rooting your Android device will give you the privilege for you to have your Android device’s software modified and you can also install another software which you cannot do if your device is not rooted. Aside from this, you will be able to get more perks when you try to let your Android device rooted as the following:
As obvious as it sounds, if there are some advantages that you can get one that you have rooted your Android device, there are also some risks that you have to make at your own expense. Here are some of the things that you may consider to be a disadvantage on rooting your Android device.
Once that you have messed up the rooting process on your Android device, then that means that your mode modifications and also your Android device’s software might get damaged and you will not be able to use your Android device anymore.
Rooting your Android device is legal. However, once you root your Android device, it will automatically be out of warranty.
Once that you root your Android device, then that means that you are also quite letting any security restrictions take place. This means that viruses, worms, spyware, and Trojan can easily get into your Android device’s software. This will happen once that your device is not protected by any antivirus for Android devices.
These are some of the things that you should be considering before you root your Android device. Now if you are still decided to do root your Google Pixel device, then go ahead and keep reading this article.
Rooting your Google Pixel device will not actually delete the data that you have. However, as what we have mentioned earlier, if you are not successful in rooting it, then your Google Pixel device can be bricked and that you will not be able to use it anymore as it will become as useless as a brick.
Backing up your data from your Google Pixel device is making sure that you will not lose any of your data if something happens to your Google Pixel device. And for you to do so, we highly recommend you to use a certain tool that is a safe and very effective tool that you can use. This is the FoneDog Toolkit – Android Data Backup and Restore.
The FoneDog Toolkit – Android Data Backup and Restore have the ability to back up any of your data from your Android device to your PC with One Click. You can also backup all of your Apps and as well as your Apps data. You will also be able to view and restore any backup file that you have to any other Android device that you have as the FoneDog Toolkit – Android Data Backup and Restore can support more than 8,000 Android devices. Here is how to use the FoneDog Toolkit – Android Data Backup and Restore.
Go ahead and download the FoneDog Toolkit from our official website and then install it on your PC. You will be able to choose to get the free trial version and use it for 30-days for you to see how amazing this tool is.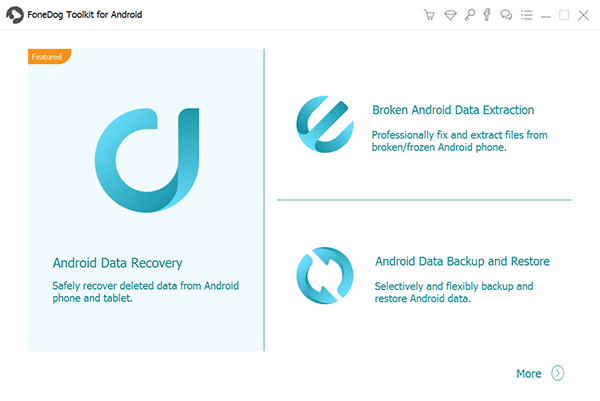
Once that you have successfully installed the FoneDog Toolkit on your PC, go ahead and run the program. See to it that there is no other backup program running in the background aside from the FoneDog Toolkit.
Once that the FoneDog Toolkit is up and running, go ahead and connect your Google Pixel device to your PC using your USB cable. Make sure that you have enabled USB debugging on your device. If your device is running in a 4.0 operating system then you will be able to see a pop-up window on your device’s screen asking for your authorization to turn on USB debugging. All you have to do is to click on the “OK” button.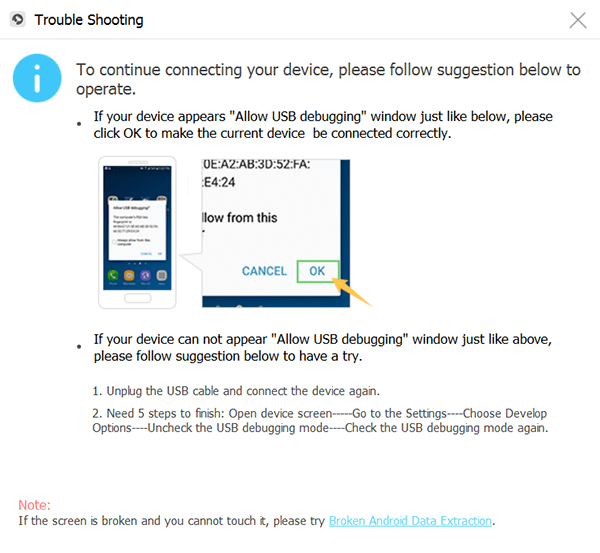
Then on the main interface of the program, go ahead and click on the “Android Data Backup and Restore” option.
Once that the FoneDog Toolkit – Android Data Backup and Restore was able to detect your Android device, go ahead and choose the “Device Data Backup”. Then the program will show you all the file types that it supports to backup to your PC.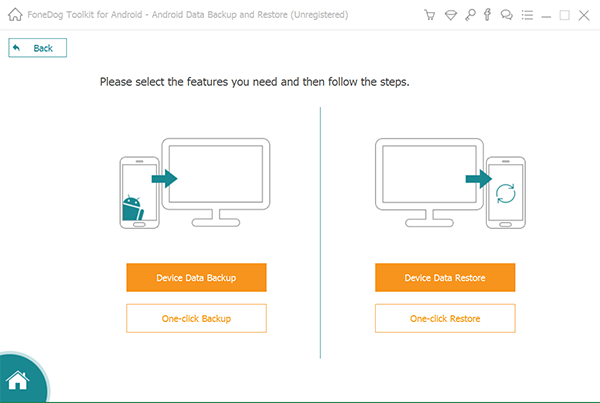
From the list of file types shown on your screen, all you have to do is to choose which data you want to back up from your Android device. You can choose from Contacts, Messages, Call Logs, Photos, Videos, and more.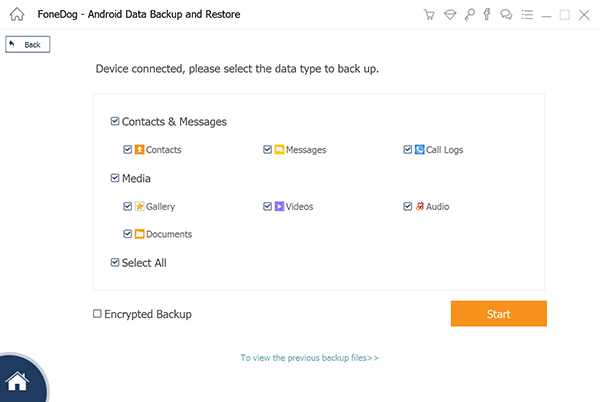
Once that you have chosen all the data that you want to back up from your Google Pixel device, go ahead and click on the “Start” button. This will then start the backup process. It may also take some time depending on the size of the files that you are backing up.
Also, you have to make sure that you do not disconnect your Google Pixel device to your PC. Do not use the device while the process is still on.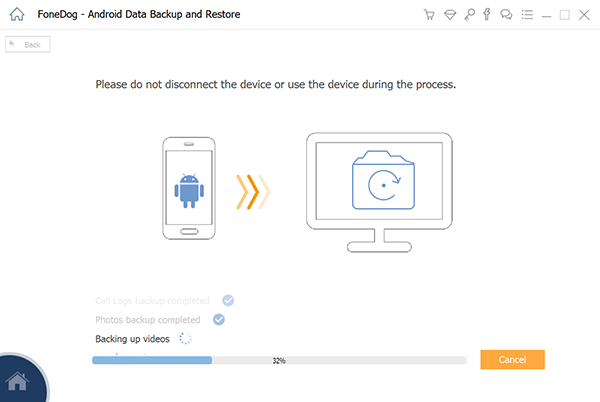
Once that the backup process is done, go ahead and click on the “OK” button on your screen. From there, you will be able to view all the data that you have backed up from your Google Pixel device to your PC.
And in the latter part, if you would wish to get back the backup that you made, you can still do using the FoneDog Toolkit – Android Data Backup and Restore. Here is how to do it.
Go ahead and launch the FoneDog Toolkit – Android Data Backup and Restore on your PC. Again, you have to make sure that there are no other applications aside from the FoneDog Toolkit – Android Data Backup and Restore.
After that, go ahead and connect your Google Pixel device to your PC using your USB cable. Make sure that you have enabled USB debugging on your Android device.
And then, once that the FoneDog Toolkit had detected your Android device, go ahead and click on the “Device Data Restore” option.
After that, the program will then show you a list of backup file that you have. From there, go ahead and choose a backup file according to the time and the date that it was made.
Once that you have chosen a backup file that you want, go ahead and click on the “Start” button. This will then let the FoneDog Toolkit – Android Data Backup and Restore to scan all the items that your backup file contains.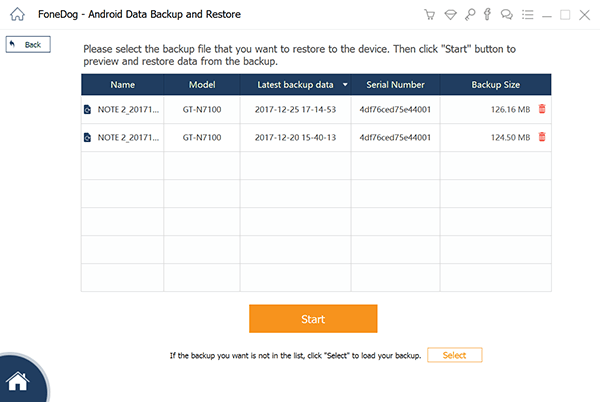
Then, once that the scanning process is complete, go ahead and choose all the data that you want to restore. You can do this by choosing from the file types located on the left side of your screen. Then, go ahead and click on the “Restore” button and confirm the action by clicking on the “OK” button.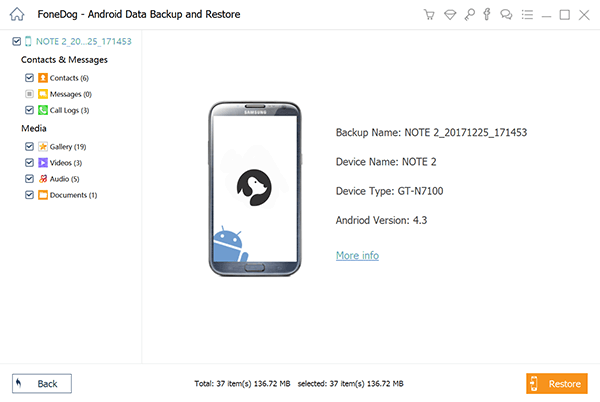
Once that the scanning process is done, then you will be able to view all the items that you have restored. And you’re done.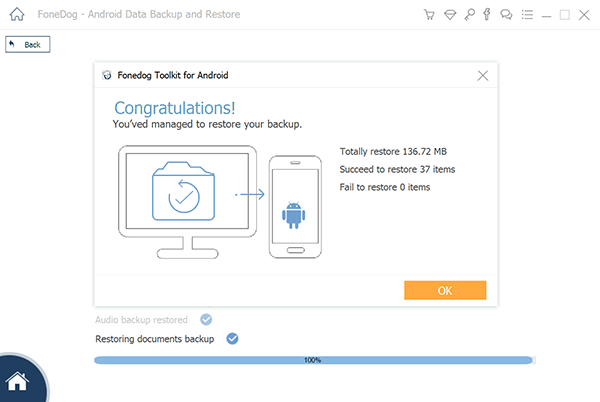
Here, you must first need to unlock the bootloader. And for you to be able to do so, follow the guide below.
The Hard Part is Over
After doing all these steps, your Google Pixel will then be rooted.
Rooting your Google Pixel may take some time especially if you are not that techy enough to do this step. It is best that you let someone familiar with rooting phones does the whole process. This way, you will not be able to damage your Google Pixel device.
And, of course, before doing anything else on your Google Pixel device, always make sure that you have backed up your data using the FoneDog Toolkit – Android Data Backup and Restore.
Leave a Comment
Comment

Tech Website Writing /Content Optimization
Singing, smiling, surprising every day!
So as a technical writer, it is my duty to gather effective and reliable solutions to answer questions on how to deal with the issues they are having with their devices.
Android Toolkit
Recover deleted files from your Android phone and tablet.
Free Download Free DownloadHot Articles
 /
/
INTERESTINGDULL
/
SIMPLEDIFFICULT
Thank you! Here' re your choices:
Excellent
Rating: 4.5 / 5 (based on 108 ratings)
