FoneDog Screen Recorder
FoneDog Screen Recorder
Special Offer
Special Offer


By Vernon Roderick, Last updated: March 12, 2020
Every maintenance-minded user of Mac devices would think of learning how to create Mac recovery disk. After all, it can help you in various ways such as when you want to reinstall the operating system or restore it from a backup.
However, it’s not going to be as easy as you think. Years ago, it might be, but now with the latest version of Mac, it is more complicated than before.
Though before we go deeper into that, you should know first what this Mac recovery disk really is as we answer the most frequently asked questions about it.
FAQs on Mac Recovery DiskHow to Create Mac Recovery DiskAn Alternative to Mac Recovery DiskConclusion
There are tons of questions regarding the Mac recovery disk, from what the term refers to what the prerequisites are to create Mac recovery disk. Let’s start with the first question.
First off, a Mac recovery disk is a storage drive that contains all the necessary files to restart your Mac in case a disaster strikes the device. It is usually a hidden storage drive that can be accessed only through special means. There is a separate function for when you want to create Mac recovery disk and when you want to restore from it. Restoring from a Mac recovery disk usually solves most issues on a Mac operating system.
Since the update of OS X Lion for Mac, Recovery HD volumes were introduced. Thus, the first thing you need is an OS X Lion version of Mac or later. You will also need a storage drive to serve as the Mac recovery disk. This can be a pen drive, external drive, or even a compact disk, as long as it can be used for storage.
Mac issues can happen to all of us, even for those that have only recently bought their Mac devices. Different issues call for different methods, and fortunately, there are numerous methods for you to use. It can be through the Debug Menu or the Terminal. They differ in the steps to follow as well as the Mac version to use.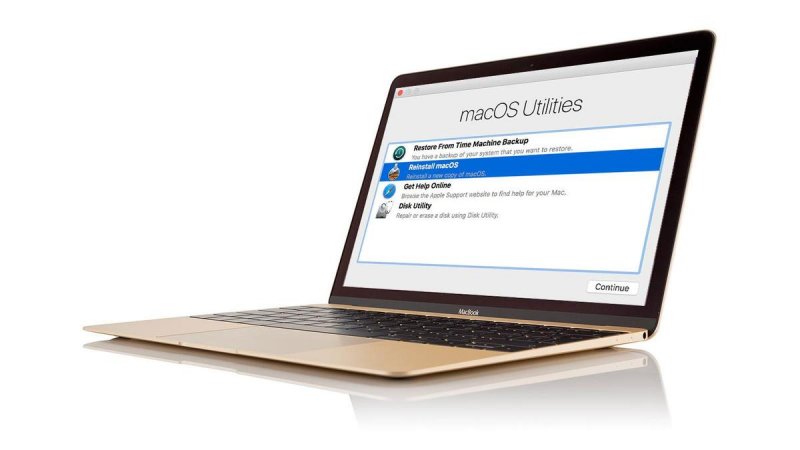
The last question involves the tool to use when trying to create Mac recovery disk. To start with, there is a tool that you will be using and it is the OS X Recovery Disk Assistant. It is capable of creating a copy of a recovery HD then transfer it to a removable disk, thus, creating the Mac recovery disk. Unfortunately, you will have to install this tool first before you try learning how to create Mac recovery disk.
With a little bit of time, not only will you learn everything about the Mac recovery disk, you will also learn how to create Mac recovery disk as you desire. Now let’s start with the actual steps.
Now that you know a bit more about a Mac recovery disk, now might be the time to turn our attention to how you can actually create Mac recovery disk. As we’ve said before, there are two ways to do this. Let’s begin with the first method.
Since Recovery HD volumes are hidden, you won’t be seeing them on your desktop anytime soon. Thus, in order to create Mac recovery disk, you will have to ensure that the recovery volume is visible first so we can work with it.
To make the volumes visible, we will be using a hidden function of the Disk Utility which is the Debug Menu exclusive to the OS X Yosemite Mac version.
Though it may not be familiar to you, it is actually very helpful for users. As you might already know, Disk Utility allows for the management of disks on your operating system, similar to what the Disk Management utility does.
The Debug Menu is a component of this Disk Utility that has the capability of creating a recovery volume partition which is the first step to create Mac recovery disk. Here’s how you can do this:
Note: Make sure you selected the right volumes since each will encounter changes that you may not be able to undo.
That’s pretty much everything you need to know in order to use the Debug menu to create Mac recovery disk. It won’t automatically hide the volume, so it should appear on your desktop immediately. If you don’t want that to happen, you can follow these steps: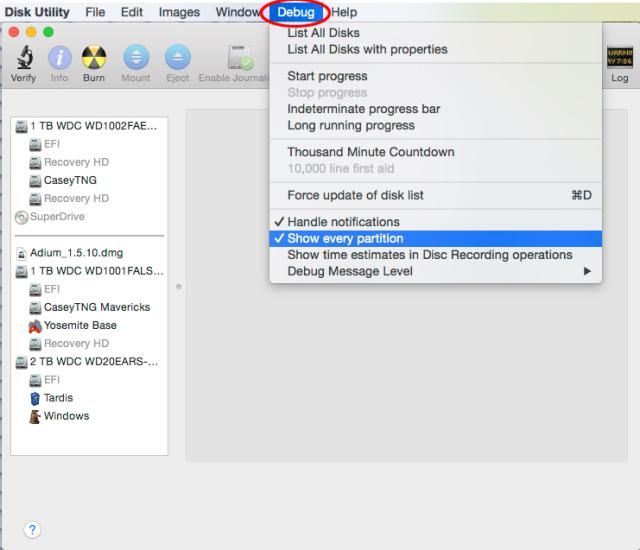
Remember that you can always do this so you can create Mac recovery disk in a batch. This is very convenient since you can pick one that is most suitable for your situation.
That’s how you can create Mac recovery disk using the Debug Menu on the Mac OS X Yosemite. Now let’s head to the second and last method.
This time, we will be using the Terminal, which is like Mac’s version of the Command Prompt. It is a built-in command-line utility tool on Mac and it is accessible to all of its users.
We will be using it this time since the Debug Menu was removed on the OS X El Capitan version of Mac, or any of its successors.
However, it should be a bit familiar to create Mac recovery disk using Terminal since we’re using disk util which is related to the Disk Utility. Your first task is to create the disk image then make the volumes visible instead of hidden, and here’s how you can do this:
sudo hdiutil create ~/Desktop/Recovery\ HD.dmg –srcdevice /dev/Identifier
At this point, the disk image would already be on your Mac desktop. Now there are two things left to do, and that is to create a partition then clone the disk image into that partition. Let’s start with how you can create a partition:
Creating a partition is simple enough, but cloning the disk image to the partition is not. With that said, here are the steps you’ll need to follow to clone the disk image and ultimately create Mac recovery disk: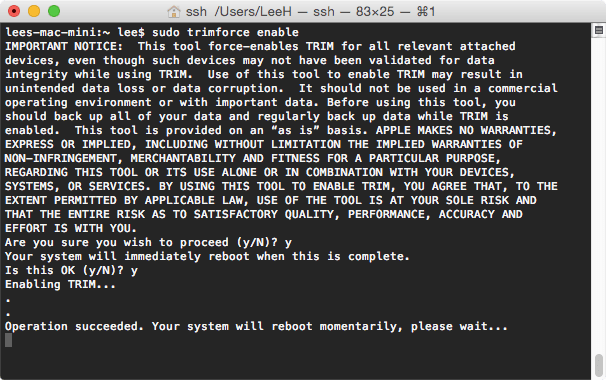
You now learned how to create Mac recovery disk. You created a disk image, a partition, then used both of them to create Mac recovery disk.
Although that’s essentially what you need to know, you can also choose to hide the recovery volume for more security. You can do this by following these steps:
sudo asr adjust --target /dev/Identifier -settype Apple_Boot
That’s pretty much it. You now have a Mac recovery disk that you can use anytime you encounter emergency issues.
Now, what if you weren’t able to create Mac recovery disk and disaster has already happened? Fortunately, we still have a solution for you.
We create Mac recovery disk because disaster might strike any minute. However, it does not always go as we planned. A great example of this is if you have already encountered an issue before you can even create Mac recovery disk. When that happens, we suggest FoneDog Data Recovery.
FoneDog Data Recovery is a software designed to help users recover their files on different occasions. It is available on Windows and most importantly, on Mac.
Simply put, it can be considered as an alternative for when you failed to create Mac recovery disk, or if you don’t even want to create Mac recovery disk.
You don’t have to experience issues on Mac to know that it is devastating. It can lead to lots of problems if not solved at once, especially if the issue is progressive. That’s why this article discussed all Mac recovery disks and how to create Mac recovery disk.
Even if this helped you, you should always keep in mind to have more than one solution when trying to fix your problems. After all, prevention might be better than cure, but it’s best to have both.
Leave a Comment
Comment

Technical Expertise for PC/Website Optimization
One of my passion is to develop software of my own
I write articles to share knowledge about IT technology and some experience in developing my own software, and developing my own software is one of my passions for work.
Data Recovery
FoneDog Data Recovery recovers the deleted photos, videos, audios, emails, and more from your Windows, Mac, hard drive, memory card, flash drive, etc.
Free Download Free DownloadHot Articles
 /
/
INTERESTINGDULL
/
SIMPLEDIFFICULT
Thank you! Here' re your choices:
Excellent
Rating: 4.7 / 5 (based on 63 ratings)
