FoneDog Screen Recorder
FoneDog Screen Recorder
Special Offer
Special Offer


By Gina Barrow, Last updated: November 30, 2019
One of the best ways to stay organized is through the use of Notes. By jotting down important details, we can be reminded and keep track of special and important events or data in our life. Having Notes as a feature is one of the best things about Mac that users really appreciate.
Having Notes in our daily life is a valuable asset. However, sometimes we accidentally delete or lose Notes data because of technical reasons. And so we wonder how to recover deleted notes on Mac.life can be all too easy when you have Notes to back you up and to refer to for important details. It is a particularly helpful app as it is easily accessible and available.
If you are lost and don’t know what to do with your Mac’s Notes to guide you through. Here are some of the best methods you can practice to ensure that you are always guided accordingly and you can recover the deleted notes you have on your Mac.
Method 1 - How to Recover Deleted Notes on Mac Using Data RecoveryMethod 2 - Using the Recently Deleted Folder to Recover Deleted Notes on MacMethod 3 - Using iCloud to Recover Erased NotesMethod 4 - Using Time Machine Backup to Recover Deleted Notes
One of the best allies you can depend on to recover deleted files on your Mac is by the use of FoneDog Data Recovery. Regardless of the source of data, FoneDog Data Recovery is available and compatible for use for many data. What makes sit even special is its high success rate in data recovery. It is safe and convenient to use. No need to worry about losing your most crucial notes in Mac, use FoneDog Data Recovery and you’ll recover in no time. Here’s how:
Look for the software FoneDog Data Recovery and download it. After downloading, install the software and launch it on your computer.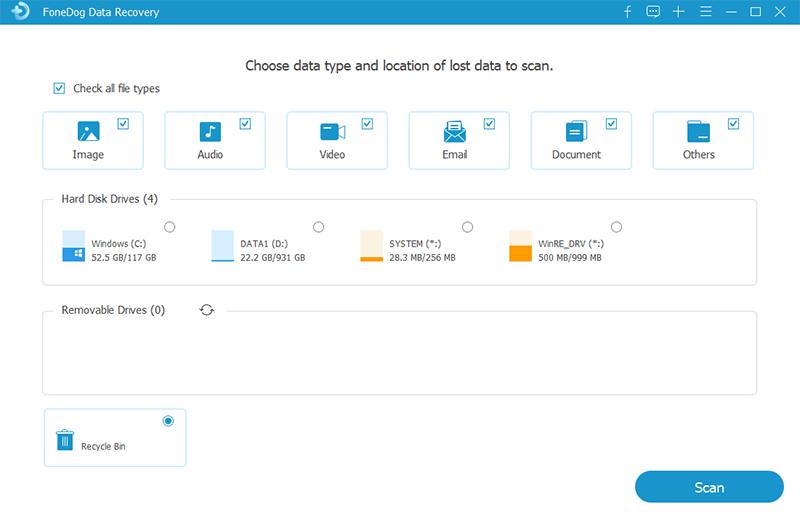
It does not matter how you deleted your file, with FoneDog Data Recovery, it can revive the data back in no time and with no alterations. Check the list and look for the source and the type of file you need to recover and select it. Start scanning the deleted files.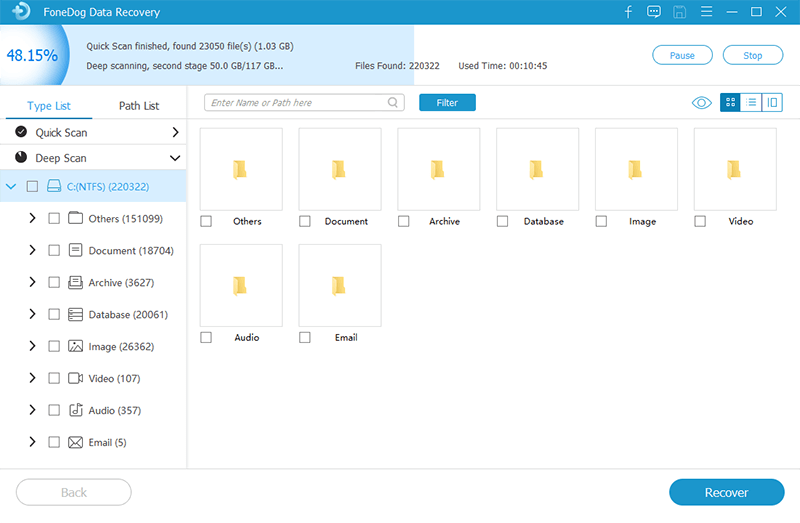
After the delete file scan, a list will display. Review the list of deleted files and go for what you need to revive. Click “Recover” to begin the recovery process. Wait until the process ends.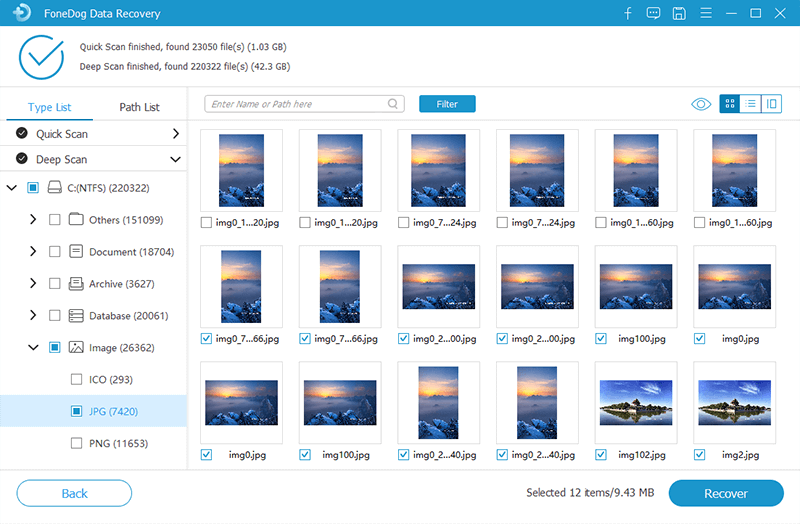
If you want the best in recovering deleted notes on your Mac, FoneDog Data Recovery is the ultimate choice for you! It is simple, easy, and safe. Not all software works as they are advertised. With FoneDog Data Recovery, you get a free trial and a 30-day money-back guarantee. You can see and experience for yourself the difference FoneDog Data Recovery makes. Try it now and discover it for yourself!
The key way to recover deleted notes is awareness. If you can easily find out you have accidentally deleted an important note, you can revive it fast. With Mac, all deleted notes can simply be restored using the Recently Deleted Folder. Just follow these steps:
Step 01: Using your Mac, launch the Notes App and tick on Recently Deleted.
Step 02: You can find All deleted notes in this folder. Through dragging and dropping, you can effortlessly recover deleted notes. Just drag the deleted notes from the folder of Recently Deleted notes and drop it any folder on the sidebar.
Recovering deleted notes is fairly easy using the Recently Deleted folder. It is a good enough fall back if your deleted notes unpurposely. This is a simple method you can practice you want to revive notes that were deleted not too long ago. Note though that this program can only keep notes up to only 3 days after deleted. After that, they are good as gone.
The wonders that the cloud can make! ICloud is a feature that Apple users enjoy. By using iCloud, you can sync data on all your Apple devices. Notes may start to disappear and get deleted due to upgrades or other technical issues. When this happens, do the following:
Step 01: Disable access to the Internet by going to System Preferences>iCloud and uncheck the box beside Notes. Doing this will stop the syncing with iCloud that may probably delete the notes you want to recover.
Step 02: Use your Apple ID and password and log in to iCloud.com.
Step 03: Choose the Notes you want to revive and save the in a folder on your computer.
ICloud is a great gift of technology. It is very dependable and reliable when it comes to situations such as this. The thing about these features is that you have to always make sure that the option is turned on to guarantee that syncing of data happens. After recovering the note you need, remember to enable the sync function of the iCloud again. Otherwise, you will not have a copy of the deleted notes for the next time it happens.
Regular backup is essential if you want to recover your deleted notes via Time Machine Backup. This feature is made as a backup software application for the Apple OS X operating system. You can perform the recovery with these steps:
Step 01: Select Finder>System References>Time Machine.
Step 02: In the Menu Bar, click the box beside Show Time Machine and tick Enter Time Machine from the Time Machine menu.
Step 03: Find the Notes storage folder that has the previous version before the deletion happened. You can decide by checking on the timeline available on the screen’s edge.
Step 04: Once you find the deleted note you need, hit Restore and that note should reappear once the Notes app is launched again.
The Time Machine is of no use if your files are not backed up. Also, the Time Machine is only applicable to restore deleted notes that occur before deletion (provided that you perform a regular backup.)
Deleting notes on Mac may be accidental, due to a mistake or technical issues. No matter what the cause is, the note is deleted. Don’t panic if you face this scenario. FoneDog Data Recovery is your best bet to recover deleted notes easily, securely, and quickly!
Leave a Comment
Comment

Technical/Creative Writer
Kitchen, my safe space; black, my favorite color
Was a Technical Specialist for a while, troubleshooting Smartphone and Software-related issues until a writing stint caught my attention.
Data Recovery
FoneDog Data Recovery recovers the deleted photos, videos, audios, emails, and more from your Windows, Mac, hard drive, memory card, flash drive, etc.
Free Download Free DownloadHot Articles
 /
/
INTERESTINGDULL
/
SIMPLEDIFFICULT
Thank you! Here' re your choices:
Excellent
Rating: 4.7 / 5 (based on 64 ratings)
