FoneDog Screen Recorder
FoneDog Screen Recorder
Special Offer
Special Offer


By Gina Barrow, Last updated: February 11, 2020
Many Mac users often find themselves in dilemma after they have lost certain files without creating any backups. Often, they think that their Macs don’t need to be backed up since no one else is using it, and they haven’t done anything that can cause data loss.
However, there are uncommon situations such as virus attacks or corrupted system files that can trigger and cause data loss. There are many options on how to backup your Mac and the easiest is to use the iCloud service.
In this article, we will learn how to backup Mac to iCloud plus other methods on how to secure your personal files and information.
Having spent some years writing programs for computers, we have created a powerful tool that every user can rely on.
Check this tip: Download FoneDog Data Recovery to retrieve your data when you lost data because of improper backups. For you to backup your Mac to iCloud, we have collected some useful information and basic solutions below.
Data Recovery
Recover deleted image, document, audio and more files.
Get deleted data back from computer (including Recycle Bin) and hard drives.
Recover loss data caused by disk accident, operation system crushes and other reasons.
Free Download
Free Download

Part 1. How to Backup Mac to iCloudPart 2. Use Time Machine as Your Backup on MacPart 3. How to Retrieve Lost or Deleted Files from MacPart 4. Summary
Apple provides free 5 GB of iCloud storage to every Apple ID registered where you can use it as your backup option. This storage space is upgradeable at anytime you wish to add more space.
One of the best features of iCloud is the ability to sync across all your iOS devices including your iPhone, iPad, iPod Touch, and Mac. It only requires one Apple ID on all these devices and you are free to utilize all the iCloud features.
Apart from that, you can access your data anytime as long as you are connected to the internet.
Follow this guide on how to backup Mac to iCloud and never lose any of your files again:
That’s it! You have just setup and learned how to backup your Mac to iCloud. You are now confident that you can easily retrieve your information from iCloud in case something happens on your Mac.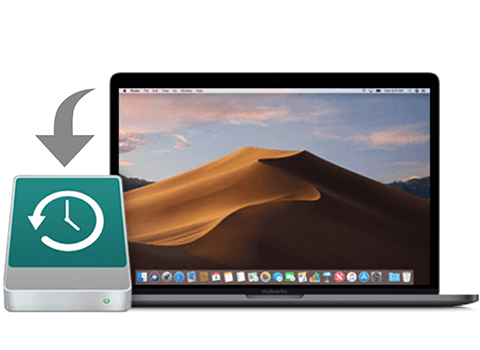
Most of the time, iOS users are actually more concerned of their iCloud space storage than their files due to the limited amount of free space. However, you have options to manage your iCloud storage so you can maximize the 5 GB allotted space or you can buy more.
Because iCloud syncs across your devices, it is normal that it will consume the free space quickly. However, you always have the option to decide which devices need backup to save more iCloud space.
Follow this step to turn off iCloud backup on multiple devices:
By doing turning off the iCloud backup on the given device, it will no longer sync with your iCloud account.
Apart from the iCloud service, Apple also offers a default backup option called the Time Machine. It works by providing backup to all your files like apps, photos, documents, system files, and more on your Mac.
Unlike the iCloud service that saves your files online, Time Machine backups are stored externally and can be restored externally as well. Time Machine on the other hand, uses external storage devices such as a FireWire drive, Airport Time Capsule, USB or external hard drives.
Here is the complete guide on how to use Time Machine as your Backup on Mac:
Your first backup with Time Machine will take a while depending on the files you have set for backup. However, you can also enjoy the convenience of auto-backup with Time Machine. Time Machine will only add the files recently changed from the previous backup.
Data loss is a common problem especially with Mac users who have not taken proper backups. Most of the time, users tend to endure data loss and shrug this annoying incident without knowing that they can still recover them.
FoneDog Data Recovery is a third-party wizard that every Mac user can rely on. It provides data recovery of all file types and from any devices.
You can recover any of the following files such as:
Data Recovery
Recover deleted image, document, audio and more files.
Get deleted data back from computer (including Recycle Bin) and hard drives.
Recover loss data caused by disk accident, operation system crushes and other reasons.
Free Download
Free Download
It doesn’t matter what device or storage you are using, FoneDog Data Recovery can retrieve it from various options like:
Many users have already experienced the excellent features of FoneDog Data Recovery; you too can experience its wonders by downloading it for free.
The steps on how to backup Mac to iCloud are pretty simple and upfront; you don’t have to do a lot of complicated steps just to save and store your important files.
Apart from iCloud, you can also use the Time Machine backup feature on Mac to store your personal files externally. Safeguard your data at any time using these two free methods.
If you are too late and already lost or deleted important files, don’t worry; FoneDog Data Recovery will save you from all the heartaches. It’s a genius recovery tool that can retrieve all types of files from any storage devices.
Leave a Comment
Comment

gg2024-01-05 21:46:56
thanks a lot! 감사합니다!! 도움되었습니다

Technical/Creative Writer
Kitchen, my safe space; black, my favorite color
Was a Technical Specialist for a while, troubleshooting Smartphone and Software-related issues until a writing stint caught my attention.
Data Recovery
FoneDog Data Recovery recovers the deleted photos, videos, audios, emails, and more from your Windows, Mac, hard drive, memory card, flash drive, etc.
Free Download Free DownloadHot Articles
 /
/
INTERESTINGDULL
/
SIMPLEDIFFICULT
Thank you! Here' re your choices:
Excellent
Rating: 4.6 / 5 (based on 72 ratings)
