FoneDog Screen Recorder
FoneDog Screen Recorder
Special Offer
Special Offer


By Nathan E. Malpass, Last updated: October 12, 2019
Typically, it’s very easy to empty your Trash on the Mac computer. The process is quick and painless. You simply open the Trash folder and then press the button labeled “Empty” located in the upper-right section of the window.
But there are certain situations that call for more difficult measures. This is because Trash doesn’t allow you to delete specific files permanently. There are various reasons for this. In this guide, we’ll teach you how to force empty Trash (Mac) and help you deal with difficult-to-delete files. Let’s get started.
But First, Recover Your Lost DataWhen Specific Files Are Being Used, How to Force Empty Trash (Mac)My File Are Locked Off! How Do I Force Empty Trash (Mac)?Another Method on How to Force Empty Trash (Mac)To Wrap It All Up
Before we delve into the topic of how to force empty Trash (Mac), let’s get into the details of how to recover your data in case you mistakenly did “empty the Trash.” For this, you have to use FoneDog Data Recovery.
The said tool is a professional wizard allowing you to restore various data types such as images, videos, email, music, documents, and more. It works on both Mac computers and Windows PCs. Here are the steps on how to use it:
Step 01 - Download, install and launch FoneDog Data Recovery on your computer.
Step 02 - Choose the device where you want to retrieve the deleted files.
Step 03 - Click “Scan” and wait for the process to be complete.
Step 04 - Preview the data and select the files you wish to restore.
Step 05 - Click Recover.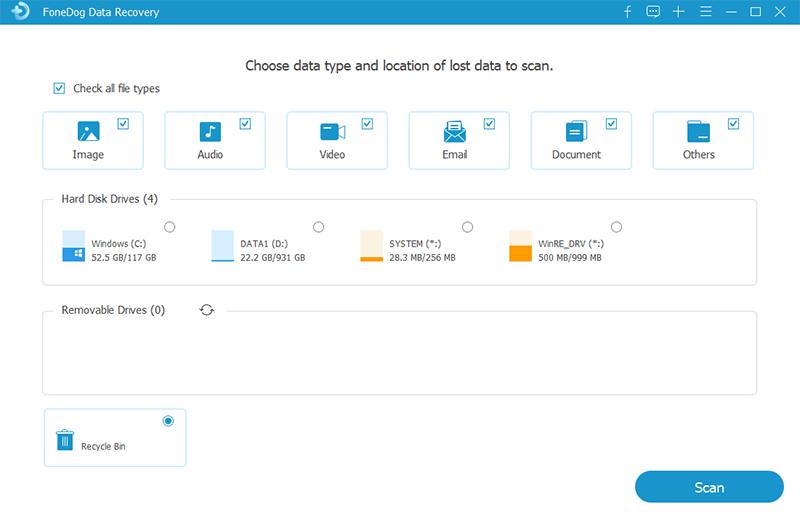
Sometimes, the Trash folder on your Mac can’t empty itself because some of the files located in it are still being used. It might be because of another application or a background system process. This is what happens when Mac says the item is actually “in use.” Thus, you need to close the said file in order to permanently delete it. If you know where the file is being used, you can close it instantly.
However, sometimes, you can’t identify the exact app or background system that’s using the file. Usually, if this is the case, a background process is the one using it. In order to make sure of it, restart the Mac computer. Then, try to delete the said file one more time. By this time, you may be able to delete the file and force empty Trash (Mac). This will happen if the file is, in actuality, used by a background process.
There are times when the file you want to force delete is used by a login item or startup file. Thus, in order to permanently delete it, you have to open the Mac computer within Safe Mode. The said mode will stop particular software or app from automatically booting up.
Here’s how to boot the Mac computer within Safe Mode to be able to empty Trash:
Step 01 - Shut down the Mac computer.
Step 02 - Turn the Mac computer and then immediately press and hold the Shift key.
Step 03 - Once within Safe Mode, try to empty Trash. Do this by opening Trash and pressing the button labeled “Empty.”
This option will allow you to permanently delete files if it is being used by a startup application. If you can’t empty Trash using this method, you should try an alternative -- Terminal. Here are the steps on how to use it:
Step 01 - Launch Trash.
Step 02 - Press COMMAND + Space in order to launch Spotlight.
Step 03 - Type in the word “Terminal” and then hit the Return key.
Step 04 - Type the word “If” and then press the key for Space. Now, this command is used to display all open files. It will also display which processes are using the said open files.
Step 05 - Go to Trash back again. Drag the file you wish to delete from the Trash towards the Terminal.
Step 06 - Press the key for “Return” in order to run the process for the command. Now, a list of various applications that use the file will show up.
Step 07 - Close all of these applications. 
There are times when the file might actually be locked. You can fix this problem by visiting Trash and then unlocking the said files. Here are the steps on how to do it:
Step 01 - Launch Trash.
Step 02 - Right-click on the specific file you wish to delete.
Step 03 - Press “Get Info.”
Step 04 - Uncheck the box that says “Locked.”
The file will now be unlocked and you have the ability to delete it. You can simply do this by pressing the upper-right corner button called “Empty.” Or, you can simply right-click the problematic file and then press “Delete Immediately.”
There are multiple methods you can implement in order to force empty trash (Mac). When a file is actually locked and you have exhausted all ways to unlock it but failed to do so, you can simply remove it by pressing the Option key (and holding this press) while actually deleting the file. For instance, you can press the button labeled “Empty” and hold the Option key simultaneously.
Another option would be to use a command within Terminal in order to force empty trash on your Mac computer. This overrides a lot of issues when it comes to emptying the Trash -- files that are currently being used, locked files, other errors.
Here are the steps on how to do it:
Step 01 - Launch Spotlight.
Step 02 - Type out “Terminal” and then open it by pressing “Return.”
Step 03 - Type out “Sudo rm -R” and then hit the Space key.
Step 04 - Visit the Trash. Drag specific files you wish to delete from the Trash towards your Terminal window.
Step 05 - Hit the “Return” key.
Step 06 - Enter the admin password for the Mac in order to authorize the particular command.
Step 07 - Hit “Return” in order to confirm it and then run the process for the command.
We have given you ways to force empty Trash (Mac) and work your way around files that cannot be deleted permanently. In addition, we’ve suggested FoneDog Data Recovery help you restore mistakenly-deleted files especially if you have emptied your Trash.
What’s your take on our article? How do you force empty the Trash on your Mac computer? Let us know by sending in your comments below.
Leave a Comment
Comment

iPhone/Android Devices’ Maintenance Expert
Staying home, listening to music, writing tech articles
Many people asked me to repair their mobile phones so I have a lot of experience in mobile phone repair, and I know a lot about Android or Apple phones.
Data Recovery
FoneDog Data Recovery recovers the deleted photos, videos, audios, emails, and more from your Windows, Mac, hard drive, memory card, flash drive, etc.
Free Download Free DownloadHot Articles
 /
/
INTERESTINGDULL
/
SIMPLEDIFFICULT
Thank you! Here' re your choices:
Excellent
Rating: 4.7 / 5 (based on 75 ratings)
