FoneDog Screen Recorder
FoneDog Screen Recorder
Special Offer
Special Offer


By Adela D. Louie, Last updated: June 29, 2021
PhotoRec is known to be very effective when recovering data that is lost from other devices such as a digital camera and that it can work with those common file systems. Now, for you to have an idea of how to use PhotoRec, then just keep on reading this post. This article also introduces the best alternative of photorec, FoneDog Data Recovery, which can also help you recover any type of data, such as perform EXCEL documents.
Part 1. How To Use PhotoRecPart 2. The Best Alternative For PhotoRec – How To Use PhotoRec Alternative
PhotoRec is very easy to use. And to show you how here is a quick tutorial that you can follow.
Step 1: Download and Then Install PhotoRec
The first thing that you need to do is to download and then install the PhotoRec tool on your computer. After that, go ahead and Run the PhotoRec as administrator.
Step 2: Use Keys To Navigate
After that, make use of the arrow up and down keys for you to navigate the program. From there, you can use it to select the disk that you would like to work on. And then after choosing the disk you want, go ahead and hit on the Enter button.
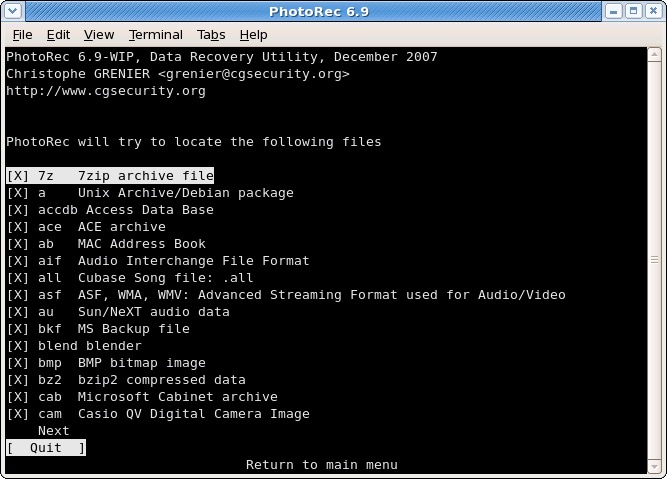
Step 3: Select an Option
Now on the next page, you will be seen three options that you can choose from. You will see there “Search”, “Options”, and then “File Opt”. So if you want to recover data, just go ahead and choose on Search for you to continue.
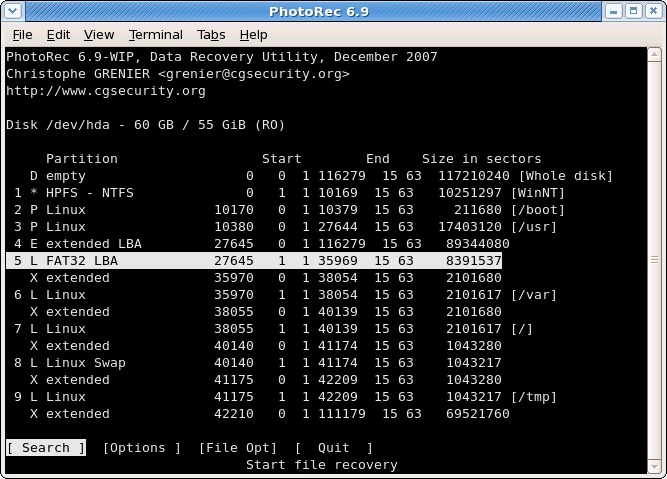
Step 4: Choose A Partition
After that, simply choose on a Partition of the hard drive wherein you wanted to make a scan for your deleted data or files. And then, the information on the file system will be necessary. So from there, all you have to do is to choose Other not unless if your file is an ext2, ext3, or ext4. Continue to learn how to use photorec.
Step 5: Select Another Option
After you have chosen a certain Partition from your hard drive, you have another two options that you can choose from. One is Free, and the other is Whole. From there, all you have to do is to choose Free for you to recover those deleted files on your partition.
NOTE: If you want to have the file system is corrupted, then you can choose the Whole option.
Step 6: Select A Folder
Then the next thing you should do is to select a certain folder or a directory where the file is located. You can make use of the Up and Down button on your keyboard for you to navigate and then choose the folder that you want.
Step 7: Proceed With The Restoration Process
After you have chosen a folder, then the process of restoring your lost file will start. So all you have to do from here is to wait for the process to complete.
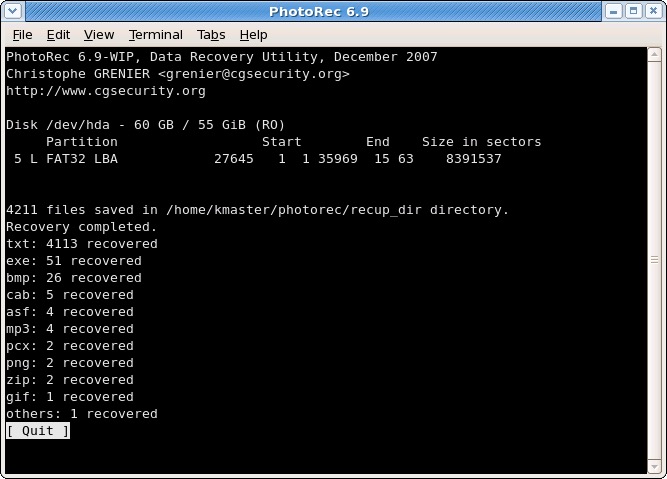
Step 8: See Result Of Restoring Process
Once that the restoration process is done, you will then be able to see the result. For you to be sure that the file you have restored is safe, then you can have it scanned by your antivirus on your computer because there is a tendency that the PhotoRec tool may have also restored some Trojans.
The above eight steps are about how to use photorec.
Now, if in case that you might have a hard time using the PhotoRec tool, then we have here the easiest tool that you can use for to recover your lost or deleted data from your computer.
The best alternative for how to use PhotoRec is the FoneDog Data Recovery tool. This tool can easily and effectively restore any deleted data or files from your Windows computer, Mac, or your hard drive, memory card, or from your flash drive. And through the FoneDog Data Recovery, you will be able to recover those deleted files, videos, audios, emails, documents, photos, and so much more.
Another thing about FoneDog Data Recovery is that it is very safe to use. You will not be able to get any Trojans from recovering your deleted or lost files. This is the most effective, safe, and very efficient tool that you can use.
And to show you how the FoneDog Data Recovery is easy to use, here is a quick tutorial that you can follow.
Step 1: Choose The Data Your Want And Location Of The Data
Once that you have downloaded and installed the FoneDog Data Recovery on your computer, go ahead and run the program. And from the main page of the FoneDog Data Recovery, you can then be able to choose which data type you needed to restore and the location of the data type.
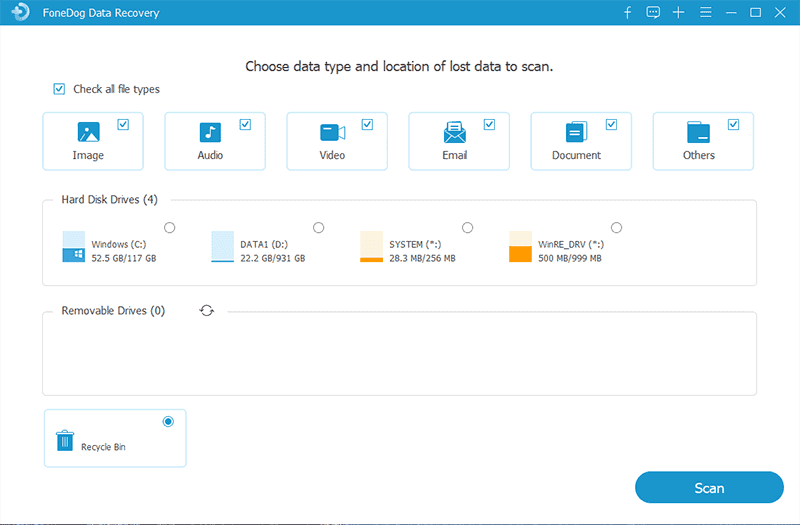
NOTE: If you are going to recover lost data from a removable drive, then you have to make sure that the connection between your external hard drive and your computer is stable.
Step 2: Scan Your Data
Once that you have chosen the data type and the location where the data you want to recover is, then the next step you should do is to Scan your data. You can do this by simply clicking on the Scan button below.
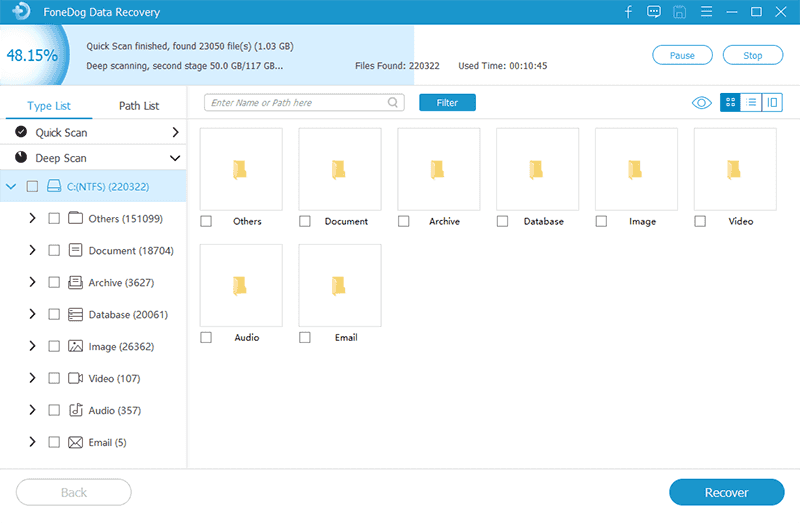
Here, you have two options on how you would like to make the scanning process. One is the Quick Scan and the other one is the Deep Scan. And if you are going to choose the Deep Scan process, then you have to be patient in waiting for the process to complete as it may take a longer time than the Quick Scan process.
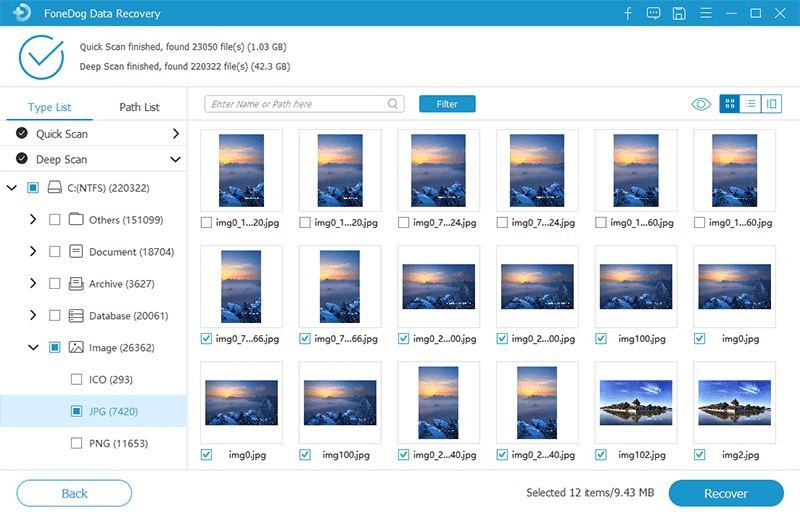
Step 3: Preview The Data
Then, once that the scanning process is complete, you will now be able to preview the result of the scanning process. From here, you can be sure that you are going to get the right data you want to recover.
Step 4: Choose The Files or Data to Recover
Then, you can click on the files or data that you would like to recover. Or, if you have any specific file you want to get back, then you can make use of the search bar for you to find the data faster.
Step 5: Start Recovering Your Data
And once that you are done with choosing the data that you want to recover, then all you have to do now is to click on that Recover button located at the lower right-hand corner of your screen. Then the process of restoring your data will start so all you have to do is to wait for it to complete.
People Also ReadThe VMware Data Recovery And Its Ultimate AlternativeAsoftech Photo Recovery Reviews: Full Feature Review
And that is it! Now, you know how to use PhotoRec to recover those deleted files or data from your computer or from your external hard drive. But, if you want to get only the best results, then you can also make use of the FoneDog Data Recovery. It is a lot easier to use and more effective as well.
Leave a Comment
Comment

Tech Website Writing /Content Optimization
Singing, smiling, surprising every day!
So as a technical writer, it is my duty to gather effective and reliable solutions to answer questions on how to deal with the issues they are having with their devices.
Data Recovery
FoneDog Data Recovery recovers the deleted photos, videos, audios, emails, and more from your Windows, Mac, hard drive, memory card, flash drive, etc.
Free Download Free DownloadHot Articles
 /
/
INTERESTINGDULL
/
SIMPLEDIFFICULT
Thank you! Here' re your choices:
Excellent
Rating: 4.8 / 5 (based on 80 ratings)
