FoneDog Screen Recorder
FoneDog Screen Recorder
Special Offer
Special Offer


By Vernon Roderick, Last updated: January 15, 2020
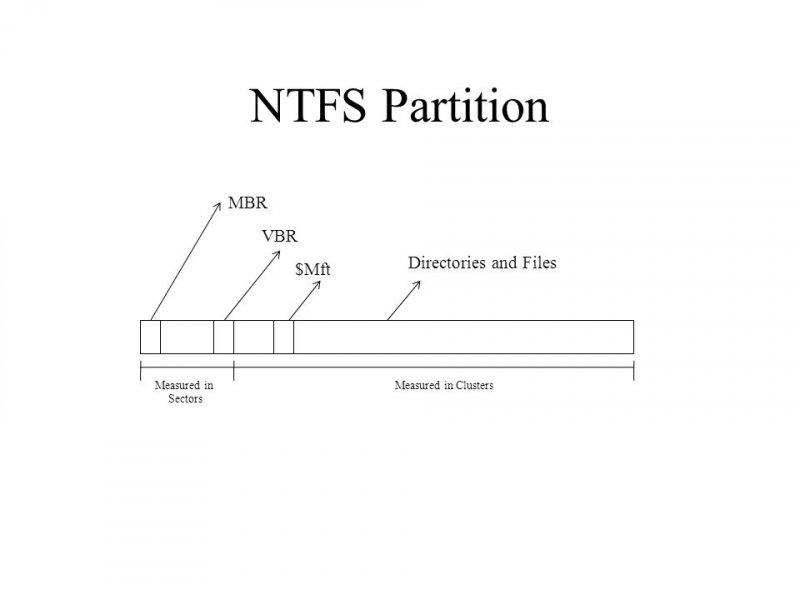
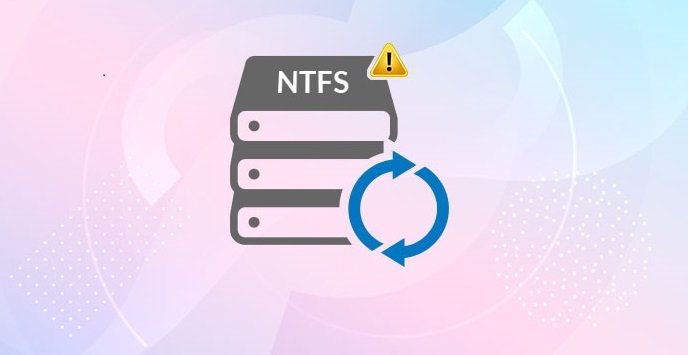
NTFS stands for New Technology File System. It is a primary file system developed by Microsoft to be used for the Windows NT operating system for storing files on the computer. This type of file system supports large file sizes and hard drives to a maximum of 1TB. It has security over local and network, supports compression, file encryption, and auto repair versus the other FAT system. Partitioning is a way of organizing the space in your hard drives. During the partitioning, it will ask you to select a type of file system for the new volume of your drive, say the NTFS file system.
NTFS Partition is not foolproof over issues that may arise within your computer system. Problems such as system crash, partitioned drive failures and corruption, malicious software or accidental formatting will cause a damaged, corrupted or deleted NTFS partition. With that, there are several methods that are presented here to help you solve the issue by doing NTFS Partition recovery.
Part 1: Common Reasons for NTFS Partition IssuesPart 2: Important Tips for NTFS Partition RecoveryPart 3: NTFS Partition Recovery Using FoneDog Data RecoveryPart 4: NTFS Partition Recovery via Check Disk ToolPart 5: NTFS Partition Recovery via Bad Sector RemovalPart 6: NTFS Partition Recovery via SFC ScanPart 7: NTFS Partition Recovery via Windows Backup and RestorePart 8: In Summary
There are times that bad situations happen to your computer’s NTFS Partition drives. These situations are caused by different factors such as accidental formatting of your disk partitioned drives, bad sectors, corrupted drives, system crash, system errors; NTFS partition table, boot sector or NTFS file system partition get corrupted; when you reinstalled another version of the operating system, changing the file system of the drive, malicious software such as virus or malware that attacks the system, or human error such as selecting a wrong drive to fix or format. With these issues, it is recommended to do NTFS partition recovery to restore data to your system. Several methods are discussed in detail on how to do NTFS partition recovery.
To successfully do the NTFS partition recovery, make sure that you follow these important tips. When your system experiences the partition drive issues, stop doing any operation on your computer drives. Do not do anything that will overwrite any data on your computer. Next, if possible get the necessary data backups from your drives and store them in another external device. Then, perform the recovery of your partitioned drives using the methods introduced in this guide. A more convenient and reliable tool for NTFS partition recovery is the FoneDog Data Recovery program which is explained more in Part 3: NTFS Partition Recovery Using FoneDog Data Recovery.
Fret no more. No matter what problematic situation you are in with your computer system, a reliable and professional data recovery program will help you solve the issue. FoneDog Data Recovery is a simple and convenient to use tool that will allow recovery of any type of data on any of your devices maybe it in situations such as partition recovery, crashed Windows or Mac recovery, file recovery, hard drive recovery, memory card recovery, or flash drive recovery.
The tool has a simple wizard feature that will allow you to perform both quick and deep scans of your devices, lets you preview the results after the scan, and filter the search results. It works both for Windows and Mac OS. FoneDog Data Recovery is available to download for a free trial and provides a 30-day money-back guarantee for purchases. You are assured that no data is lost during the recovery process and your data remains secure. The data recovery program achieves a high success rate of data recovery.
Start the FoneDog Data Recovery application after you have downloaded and installed it on your computer available for both Windows and Mac operating systems. Access the program via the Start programs list or the shortcut icon on the taskbar and desktop.
Data Recovery
Recover deleted image, document, audio and more files.
Get deleted data back from computer (including Recycle Bin) and hard drives.
Recover loss data caused by disk accident, operation system crushes and other reasons.
Free Download
Free Download

On the main page of FoneDog Data Recovery, choose the file types and the drives (hard disk or removable) that you wish to restore. Next, click the Scan button to start scanning the drives. Various data types can be recovered such as photo, audio, video, email, document, archive and other files from different storage devices.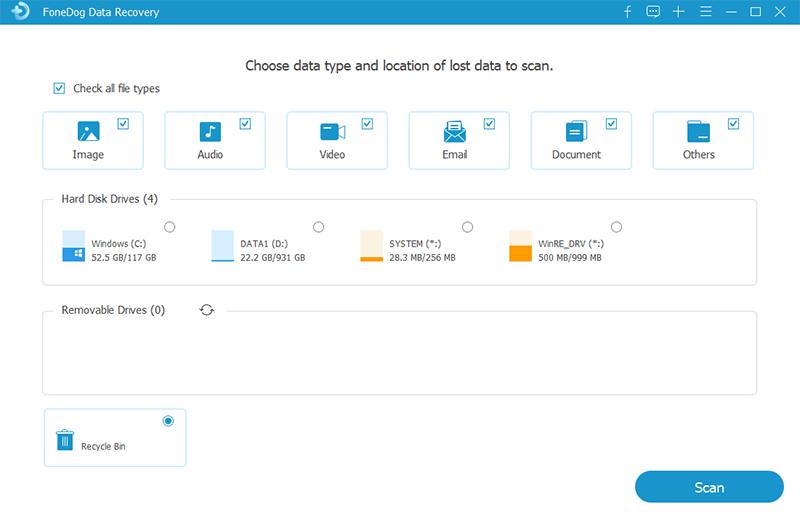
Two scan modes: Quick Scan or Deep Scan. It is recommended you do a deep scan for the partition recovery. Quick scan will work at a faster speed while a deep scan will display more contents and will take a longer time to complete. The results will be shown after the data scan. While scanning the data, make sure to establish a good connection between your computer and devices.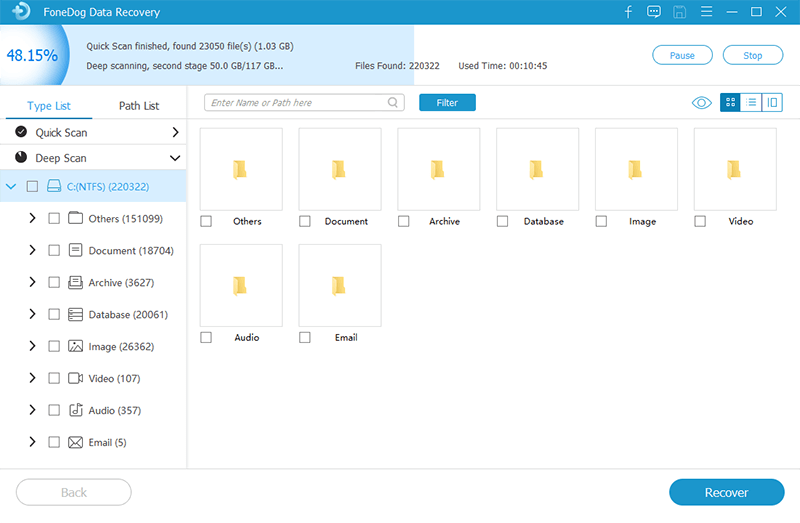
Scan results will be displayed by type or by the path. You can filter the results by entering the name or path in the filter box. You can choose to preview the files to check the correctness of the files. Select the data files afterward and when you are ready, click the Recover button to start the data recovery process. Never shut down or restart your computer until told to do so. Wait until the process is done.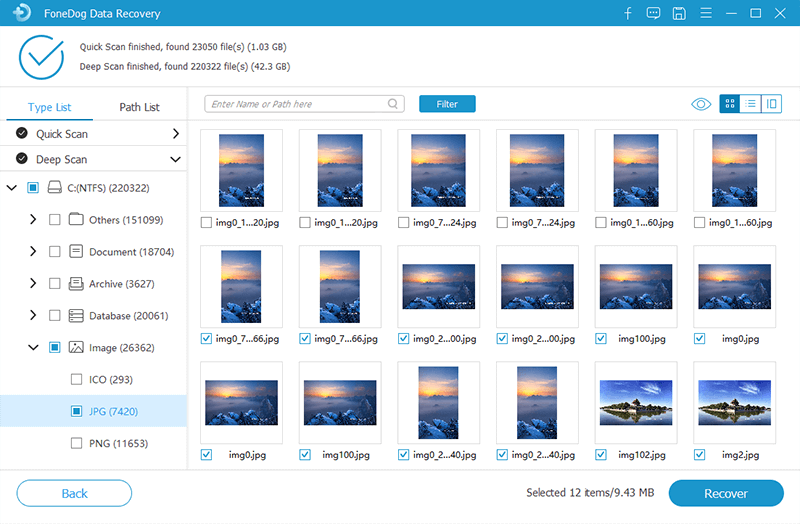
This section will provide you a simple process to teach you how to do NTFS partition recovery using the Windows Check Disk tool. It will scan your disk drive and provide the needed fix for the problem.
This process provides steps on how to remove bad sectors in your SD card in Windows. The data in your drive is stored in different sectors and when some sectors become unusable, these are known as bad sectors. These are categorized as Logical and Physical bad sectors. Logical (soft) bad sectors are caused by software issues while physical (hard) bad sectors are caused by physical damage in your SD card.
To remove the bad sectors using Windows Explorer:
The first option will immediately start the repair process and do a reboot of your computer during or after the process while the second option will let you schedule the repair process until the next restart of your computer.
SFC or System File Checker is a Windows utility that will scan your drive and replace the corrupted files with a cached copy from the system. It will restore and fix the damaged or missing system files.
This section will teach you how to do NTFS Partition Recovery using the Backup and Restore feature in Windows. The backup utility will create a backup and store it as a restore point which you can save in another external media. With this backup, you can restore it by connecting the external device of your backup to your computer.
Make sure to enable the backup feature by following these steps:
To restore the created backup, connect the external media to your computer:
Data Recovery
Recover deleted image, document, audio and more files.
Get deleted data back from computer (including Recycle Bin) and hard drives.
Recover loss data caused by disk accident, operation system crushes and other reasons.
Free Download
Free Download
NTFS is a secured file system that can handle a large volume of files and hard drives. It is more secured which supports file encryption and security over the local and the network. NTFS partitioning is a way of organizing the space in your hard drives with the new volume using the NTFS file system. However, problems may happen with your partitioned drives that may lead to data loss. Deleted, damaged or corrupted drives can be caused by several factors.
That is why this tutorial guide provides information on how to do NTFS partition recovery using several methods in Windows and a more convenient and reliable tool such as the FoneDog Data Recovery program. It will allow data recovery of any sort of data, from any device and drives. It can do recovery from any problematic situation such as partition recovery. You do not have to worry as FoneDog Data Recovery has a simple wizard and help feature to do the NTFS partition recovery.
Leave a Comment
Comment

Technical Expertise for PC/Website Optimization
One of my passion is to develop software of my own
I write articles to share knowledge about IT technology and some experience in developing my own software, and developing my own software is one of my passions for work.
Data Recovery
FoneDog Data Recovery recovers the deleted photos, videos, audios, emails, and more from your Windows, Mac, hard drive, memory card, flash drive, etc.
Free Download Free DownloadHot Articles
 /
/
INTERESTINGDULL
/
SIMPLEDIFFICULT
Thank you! Here' re your choices:
Excellent
Rating: 4.7 / 5 (based on 59 ratings)
