FoneDog Screen Recorder
FoneDog Screen Recorder
Special Offer
Special Offer


By Vernon Roderick, Last updated: September 21, 2020
If you’ve been using Outlook for quite some time, you should have already heard the term “OST files”. After all, such files are what make up the Outlook platform. Without them, you won’t even be able to do what you’ve been doing in the platform up until now.
This is precisely why many users are wondering why they are facing some serious issues with the Outlook platform. They don’t know how OST files work. This article will show you how such files work and different ways of repairing OST file. Let’s start by finding out more about such files.
Part 1: When Should You Try Repairing OST File?Part 2: Repairing OST File for FreePart 3: Conclusion
OST stands for Offline Storage Table. OST files are basically what makes it possible for users to use the Outlook platform without requiring the internet. This is made possible by synchronizing the changes that happen within the server into the local files the next time the user connects to the internet. As such, although OST is for offline operations, you need to connect to the internet every once in a while.
When this is not done regularly, there may come a time when you see some issues occurring frequently. This is when you should try repairing OST file. To get you to understand this better, here are the scenarios wherein repairing OST files necessary:
If your scenario belongs to one of these, then I suggest repairing OST file immediately. There are a couple of ways to do this, but I will discuss how you can use a third-party tool to fix the issue first.
Although some users are skeptical as to how they can repair OST files with a third-party tool, it is actually quite common, and that is because sometimes, your OST files aren’t damaged but simply lost. For that reason, I recommend FoneDog Data Recovery.
Data Recovery
Recover deleted image, document, audio and more files.
Get deleted data back from computer (including Recycle Bin) and hard drives.
Recover loss data caused by disk accident, operation system crushes and other reasons.
Free Download
Free Download

FoneDog Data Recovery is a recovery tool that supports both Windows and Mac. It can recover all kinds of files and have been tried to recover OST files, of which it was mostly successful. Additionally, it can recover files from most storage drives. Simply put, it is the best tool for repairing OST file. Now here are the steps on how you can use this:
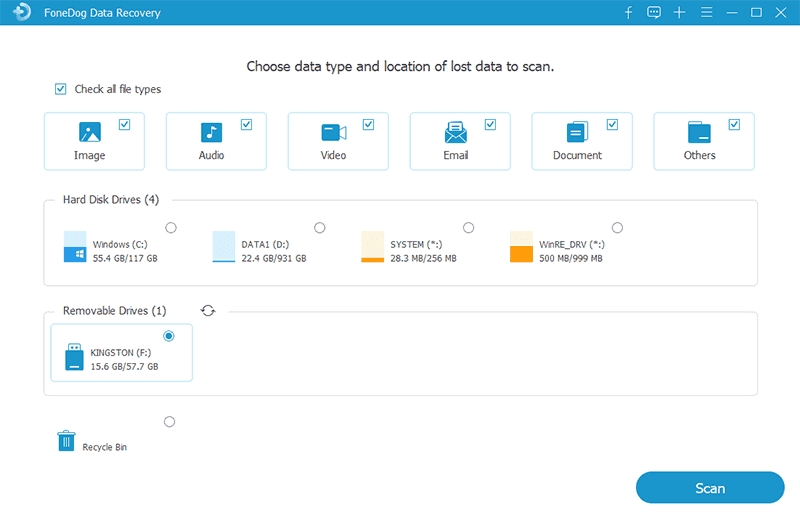
Launch the FoneDog Data Recovery on your computer after download and installation. Now on the main interface of the tool, there will be a list of file types on the top area and storage drives under. Select Others for File Type and as for the storage drive, select Windows (C:).
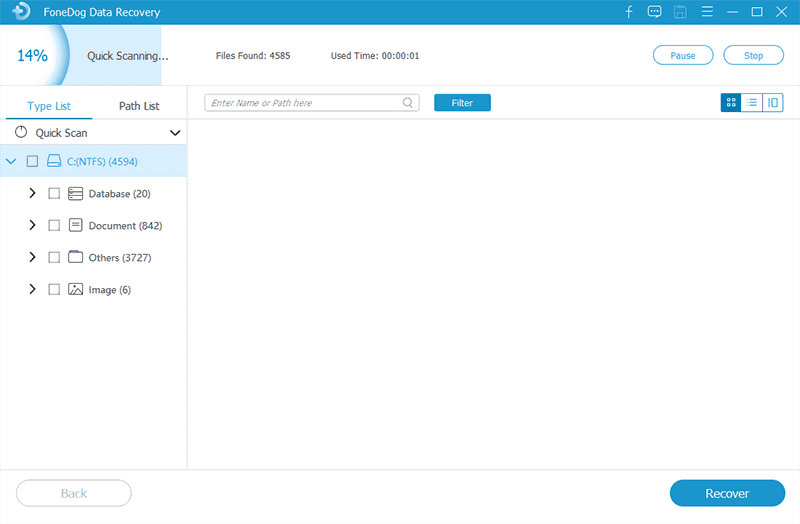
The next step would be to scan the files that you have nitpicked through the file types. Simply click on Scan to do this. This will initiate the Quick Scan by default. After that, you can continue to Deep Scan for more accurate results, or not, it is up to you.
Once the scan is finished, you will get a list of files. Simply select the OST files that you think would be important by clicking on their corresponding boxes. Click on Recover once you are finished with the selection. That is all there is to repair the OST file with a specialized tool. However, it will be a lot harder if you are to rely on built-in functions. Nevertheless, it is given that built-in tools would be more reliable than a tool you don’t know of.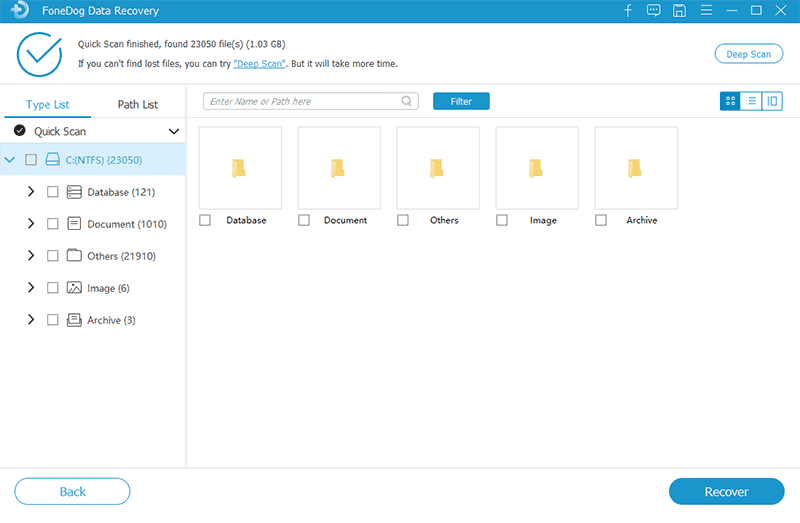
If you’re looking for an alternative tool besides the one we already discussed, the Inbox Repair Tool would be your best bet.
Inbox Repair Tool is a built-in tool in all operating systems that has Outlook installed. As the name suggests, it specializes in repairing files that can be considered as part of Outlook. This tool, when accessed, is named SCANPST.exe, so it’s another way to call it. Alas, it’s not very easy to use Inbox Repair Tool for repairing the OST file. So make sure to follow these steps carefully:
The Outlook platform should be scanning and repairing the select OST file by now. Once it finishes, you might be able to see a folder named Recovered Personal Folders on your Outlook folder.
Simply go here and find the items you may be looking for, though it may not be necessary anymore once you have finished repairing OST file. Nevertheless, you now have two options for repairing OST file. Let’s proceed to add some more options at your disposal.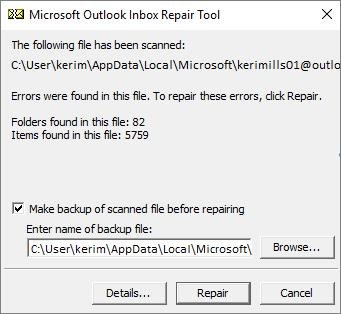
In case you still can’t figure out why your OST files are acting strangely, you can always try recovering from a backup. Basically, if you recover a backup, you will go back to the point when the issue is still non-existent. So, there’s a high chance the issue will disappear. However, trying to recover from a backup is not possible if you don’t have a backup in the first place. In other words, this is only accessible to some users. Here are the steps for repairing OST file with a backup:
Once you have done this, all the files that were contained within that backup file will replace what you currently have. In other words, the issues would be gone and you will go back to where you were before. The only downside of this method of repairing OST file would be the fact that you are risking your current files.
Sometimes, users tend to overreact to things. This is particular to issues regarding computers especially if they don’t know how it works. Now in the case of repairing the OST file, there is a high chance that you are thinking too much of this. Perhaps you are facing the underlying problem because the OST file you were using isn’t where it was supposed to be.
As such, it will do you good if you know how to locate the OST file manually, instead of relying on the platform for everything. Here’s how you can do this:
Once you are here, open the OST files that you need. It should be easy enough at this point since a list of OST files as well as PST files will be here. It’s not exactly a way of repairing OST file, but it should be able to show you what you need without any issues.
Now if you already located the OST file but still it’s not responding normally, then perhaps the location is the problem here. As such, it might be a good idea for repairing OST fileto change the location to somewhere else. You can do that by following these steps:
This will update the folder where the OST file is located. Hopefully, this will fix any issues that have been occurring up until now. If the errors persist, you might have to stoop to extreme measures for repairing OST file.
Similar to how Windows has a Safe Mode, Outlook can also run on Safe Mode. They have the same purpose, to fix any issues that are currently happening within the system. This is done by automatically disabling add-ins or any extensions that are installed within Outlook.
Also, just like how you would reboot Windows to run it in Safe Mode, you will also have to restart Outlook. Not only that, but you will also have to follow these steps:
Now that should launch the Outlook platform in safe mode. It should run smoothly this way and some issues will be removed automatically. With that said, you shouldn’t think of this as repairing OST file, but simply a way to avoid the issues altogether.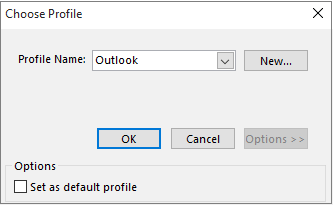
In case none of the previously mentioned options worked, try disabling your security software. This ranges from your firewall, anti-virus, or other applications that have something to do with your security. This is because there is a chance that that software was programmed to detect and disable the functions of Outlook.
Also, remember that it is not necessary to completely uninstall the software. You only have to disable them temporarily and turn them back on once you’re done with repairing OST file. Sure, it might be a bit risky on your side, but this is just your last resort for repairing OST file. Once you have disabled the security software, try the six methods again.
Without a doubt, Outlook is still one of the most commonly-used platforms for email communication out there. However, as it has a rather small user base, not every issue has its own respective solution. That is why it is important to know ways of repairing OST file. That way, you can solve just about any issue that will occur on the Outlook platform.
Leave a Comment
Comment

Technical Expertise for PC/Website Optimization
One of my passion is to develop software of my own
I write articles to share knowledge about IT technology and some experience in developing my own software, and developing my own software is one of my passions for work.
Data Recovery
FoneDog Data Recovery recovers the deleted photos, videos, audios, emails, and more from your Windows, Mac, hard drive, memory card, flash drive, etc.
Free Download Free DownloadHot Articles
 /
/
INTERESTINGDULL
/
SIMPLEDIFFICULT
Thank you! Here' re your choices:
Excellent
Rating: 4.8 / 5 (based on 80 ratings)
