FoneDog Screen Recorder
FoneDog Screen Recorder
Special Offer
Special Offer


By Nathan E. Malpass, Last updated: August 28, 2018
I have an iPhone and I use it to take photos and videos. And most of the time, I back up my files to make sure they are not lost. But I noticed that these backups take up much space. Now, I have already restored everything I want from my backups and I’m ready to delete these backup files. That's because they take up so much space. How to delete iPhone backup on Mac device? And how do I do it without causing trouble to my device’s system? Please teach me how to delete iPhone backup on Mac.
Although deleting iPhone backup on Mac is just easy, it can get a little tricky looking for those files. This post will help you with that. We’ll also recommend a tool for you to use if you want to delete numerous files in just a matter of clicks.
Part 1. Why do you want to delete iPhone backup on Mac?Part 2. The easy way to backup and restore your dataVideo Guide : How to use FoneDog's Toolkit - iOS Data Backup & RestorePart 3. Delete iTunes backup on your Mac devicePart 4. Remove iCloud backup on Mac and iPhone / iPadPart 5. Conclusion
People Also ReadHow to Backup iPhone/iPad to an External DriveiPhone Screen is Broken, how to Backup Data
Backup files are very important. They make sure your data is secure. You can use these backup files to restore certain data you want on your Mac device or any other Apple device. This is a great feature given by Apple to its users. It comes in handy in times of need.
However, users are not wary of the fact that backup files take up the much-needed storage space on your computer. Whether it's a Mac computer or a Windows PC, backup files still take up space. And if your backup files are so huge, it might cause your computer to slow down.
So, how do you fix this? Well, what you have to do is to delete iPhone backup on your Mac. This gives you more space which, in turn, gives your device more breathing space. More space leads to a faster Mac since it’s not clogged up.
So, how to delete iPhone backup on Mac? Find it out with the guide below.
You can actually back up and restore your data with a tool. This tool is called FoneDog’s iOS Data Backup & Restore. The said application has the following features and advantages:01 - It is 100% secure. You won’t get any viruses or malware from the FoneDog Toolkit.
02 - The iPhone Restore feature will not overwrite any of your data. Thus, your data is kept safe and secure and will not be lost due to the processes the tool operate.
03 - During the restore process, no data loss occurs on any device you use.
04 - It allows you to back up any file (or even the whole iOS device) to your computer.
05 - It gives you the ability to preview the items you want to backup or restore. You are in control of these items.
06 - You can instantly restore the files you want from the specific backup to your device.
07 - You can also restore specific files you want from a backup to the computer itself.
08 - You are given a 30-day money-back guarantee. If you are not satisfied with your purchase, even after using it, you can ask for a full refund.
09 - You are given a free trial of the tool before purchasing it. In this way, you don’t have to shell out money before actually using the tool. You can check out all the features without having to pay for it first.Here’s how to use FoneDog’s iOS Data Backup & Restore tool step-by-step:
First, you have to backup your iPhone. Here’s how to do it step-by-step:
Simply connect the iOS device to your Windows PC or Mac device. Both types of devices are actually supported. Do this by using the USB connector that goes with the iOS device when you purchased it.
Install the software named FoneDog Toolkit - iOS Toolkit on your computer.
Launch the FoneDog Toolkit - iOS Toolkit on your computer. The software will instantly recognize the connected iOS device.
Look at the main interface and select iOS Data Backup & Restore.

In this part, you have to choose iOS Data Backup in order to backup your files. After which, continue to follow the next steps.

You can either choose Standard Backup or Encrypted Backup. The second one allows you to protect your backup with a password. This is to ensure private information or any sensitive information is kept secure.
After you have chosen your preferred backup mode, press the Start button in order to continue.
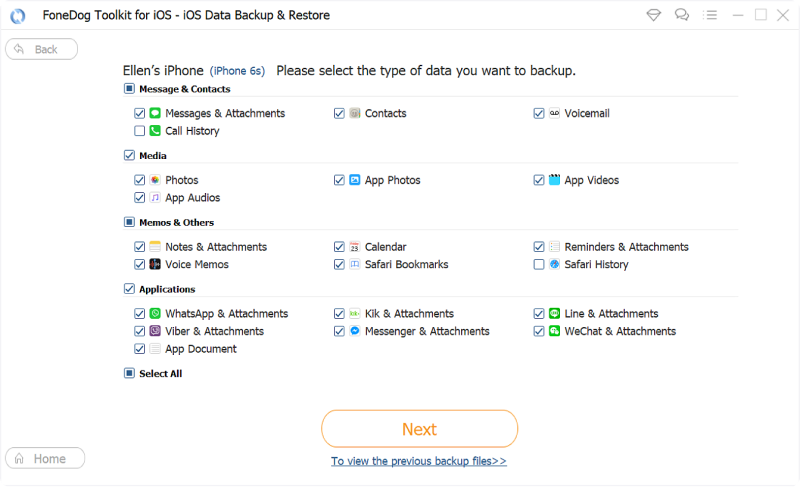
The software will now show you the different files located on your iOS device. It will display the various categories on the screen. These categories include Photos, App Videos, Messages & Attachments, Notes & Attachments, Calendar, Voice Memos, and Reminders, among others.
Select the type of data you want to back up.
Click Next to back up your selected data types.
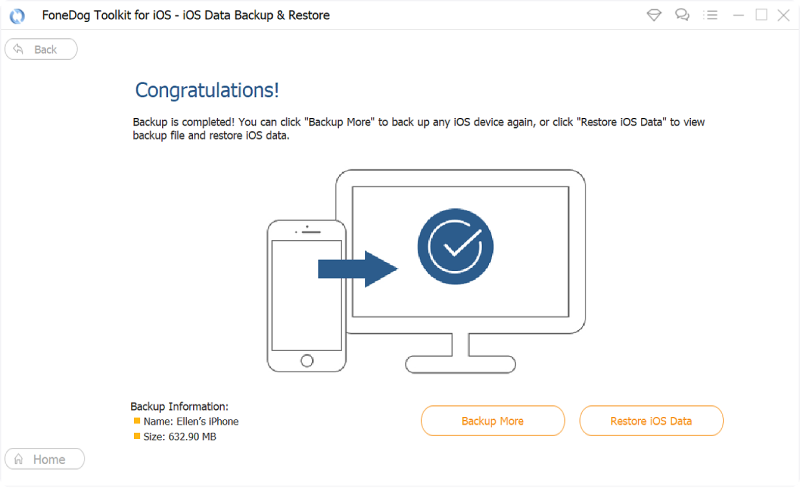
Wait for FoneDog Toolkit - iOS Toolkit to finish backing up your data. When it is complete, the name and the actual size of the backup file will be displayed. You can either backup more data by choosing Backup More.
Or you can also click Restore iOS Data to be able to restore the files you want from a backup file.
Connect the iOS device to your computer. Do this by using a USB connector.
Open the FoneDog Toolkit - iOS Toolkit on your device. The said tool will easily recognize the iOS device you connected to your computer.
Look at the main interface. Select iOS Data Backup & Restore.
Select iOS Data Restore afterward.
After you have clicked iOS Data Restore, FoneDog Toolkit will show you all the backups you have. You will be able to see Name, iOS Version, Latest Backup Data, Serial Number, and Backup Size.
Select the backup file you want to preview.
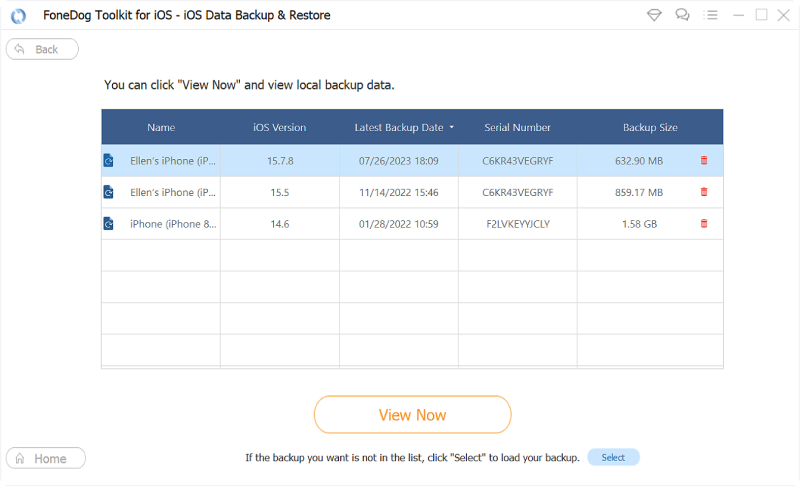
Press the View Now button to preview the selected backup. FoneDog will start scanning the backup to check out the files contained within it. The progress of the scanning process will be displayed.
You can either press the Pause button to pause the process. Or, you can click the Stop button to finish the entire scanning process.
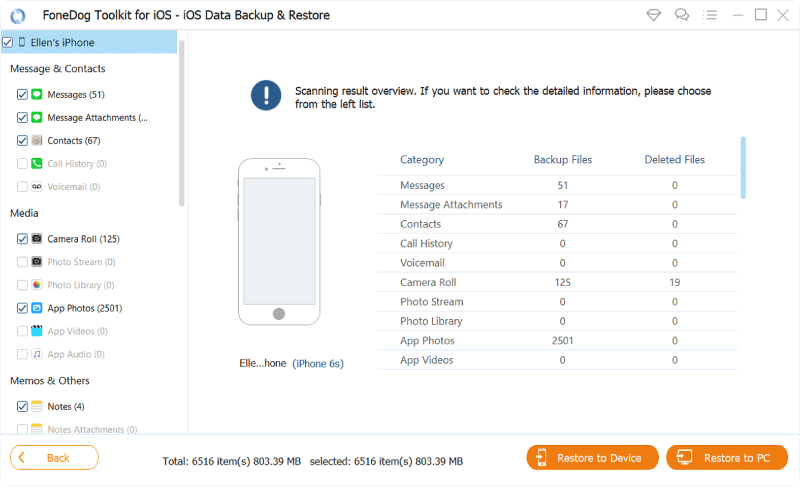
After the scanning process is complete, the files contained within the selected backup will be shown to you. You can preview all the files in it. From the left side of the screen, it will show various categories or classification.
Select a specific classification.
Select the files you want to be restored from a particular classification. You can preview each also.

Click Restore To Device to restore your files to the Apple device. Or, you can click Restore To PC to restore the files you selected to the Mac device.
You can click on this video to see more detailed steps.
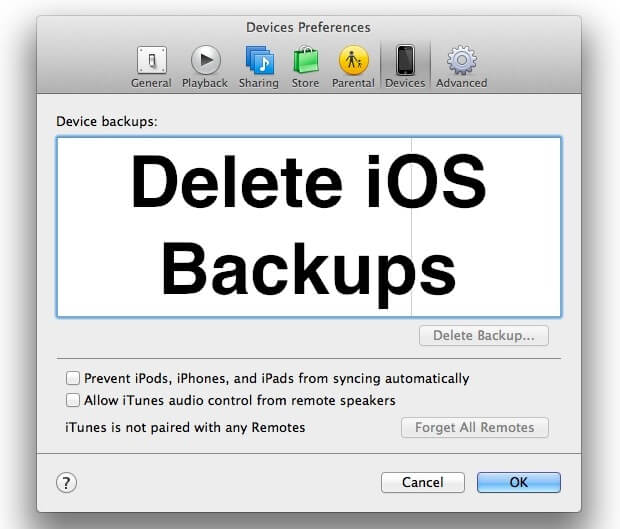
Here’s how to delete your backup in iTunes:
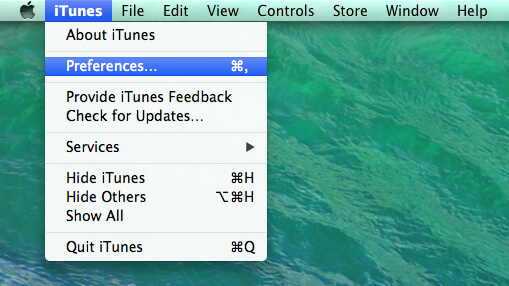
Step 1 - Open the iTunes application on your Mac device.
Step 2 - Check out the menu bar.
Step 3 - Click the iTunes menu option.
Step 4 - Select Preferences.
Step 5 - Go to the tab named Devices.
Step 6 - Once you go there, you will see a list of different backup files.
Step 7 - Select the specific backup file you want to remove from your device.
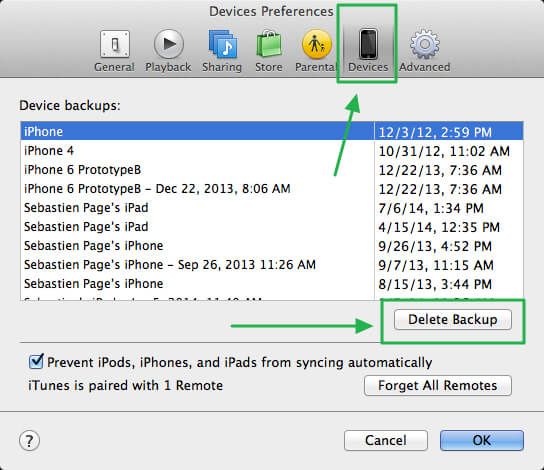
Step 8 - Click the Delete button.
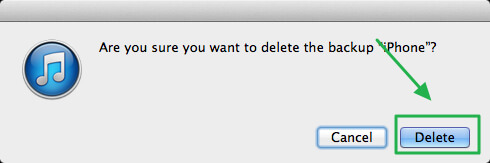
Step 9 - Click Delete again to confirm the deletion.
You can also find the backup location of your iPhone backup files in this folder in your Mac device: ~/Library/Application Support/MobileSync/Backup/Once you visit this folder, you can directly delete the backup files that you want.
There are different steps involved in the process. Let’s start with the first one.
Step 1 - Visit System Preferences.
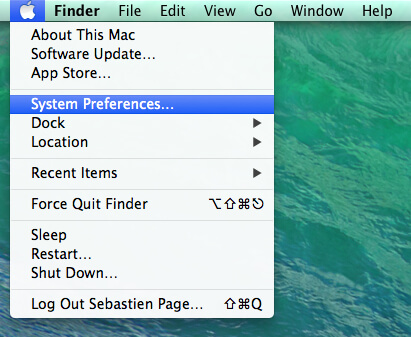
Step 2 - Select the icon of iCloud.
Step 3 - Your iCloud preferences will show up. Press the Manage button located at the window’s bottom-right corner.
Step 4 - Located at the top of the list that will be displayed, choose the tab named Backups. The different backups from all your Apple devices connected to your iTunes account will show up.
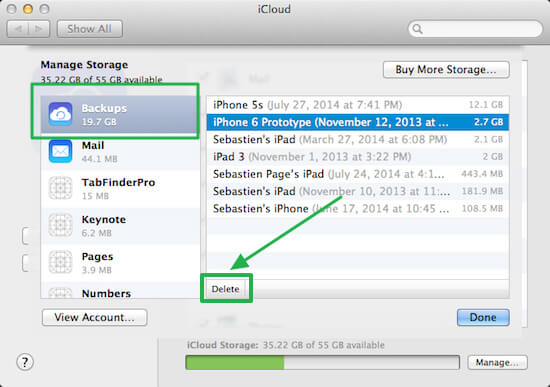
Step 5 - Hit the Delete button.
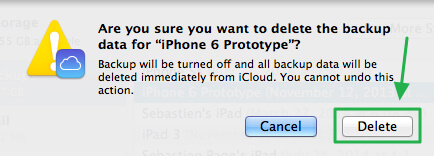
Step 6 - Press Delete again to confirm the process.
If you want to directly delete backup files on your iPhone or iPad devices, you can check out the steps listed below:Step 1 - Visit Settings.
Step 2 - Scroll down the window and select iCloud.
Step 3 - Visit Storage.
Step 4 - Select Manage Storage.
Step 5 - On the screen that will be displayed, you can select or deselect some data types. These include Photo Library, Facebook, WhatsApp messages, etc. Once you deselect these data, they will be removed from your iCloud storage.
Backup files can be helpful if you have deleted your most important data. You can simply restore the file using the backup. However, they can take up much space on your computer and your iCloud storage. Thus, it is best to delete the backup files to free yourself of more space. You can delete backup files manually through different applications. One is through iTunes and another is through iCloud. Just follow this guide to help you through the steps. Finally, if you need to create a newer version of your backup, you can simply use FoneDog’s iOS Data Backup & Restore Tool.
Leave a Comment
Comment

iPhone/Android Devices’ Maintenance Expert
Staying home, listening to music, writing tech articles
Many people asked me to repair their mobile phones so I have a lot of experience in mobile phone repair, and I know a lot about Android or Apple phones.
iOS Data Backup & Restore
Back up your data to PC and selectively restore iOS data from backups.
Free Download Free DownloadHot Articles
 /
/
INTERESTINGDULL
/
SIMPLEDIFFICULT
Thank you! Here' re your choices:
Excellent
Rating: 4.6 / 5 (based on 63 ratings)
