FoneDog Screen Recorder
FoneDog Screen Recorder
Special Offer
Special Offer


By Nathan E. Malpass, Last updated: March 30, 2018
Do you know how to authorize or deauthorize a computer on iTunes? “I purchased a lot of music and movies from iTunes Store, and I heard you can allow other computers to access your iTunes’ contents. That’s great news because I want to share them with my husband and daughter. Can you teach me how to do that?”

Authorize a computer on iTunes
Part 1. Why Authorize Your Computer on iTunesPart 2. How to Authorize Your Computer on iTunesPart 3. How to Deauthorize a Computer on iTunesPart 4. RecommendationsVideo Guide: How to Fix Trouble Issue you Can't Authorize a Computer on iTunes
Why authorize your PC on iTunes???
iTunes Store is a one-stop shop for all forms of digital entertainment ranging from music to movies and books. Apple allows users to authorize computers that can access their purchased contents, with a limit of up to 5 computers at a time. This comes especially useful if you own more than one computer.
You can also easily share your content with your family. As long as you authorize all of your PC and link them to your Apple ID, contents are automatically synced across multiple computers. You can then play music, watch movies, and read e-books from any computer you’re using.
This move protects your purchased content from unauthorized access. Apple’s licensing system keeps you from transferring purchased content from one computer to another, so this feature fills the gap.It is important to know that you can only authorize a computer using iTunes installed on that specific computer.
You may not give permission to a computer that you have no access to. You cannot use your iPhone, iPad or iPod Touch to perform the action as well.Now that you have a clear idea of what authorizing a computer on iTunes means, let’s get started with the actual process.
How Authorize Your Computer on iTunes?
Before you start authorizing your computer, make sure that you have the latest version of iTunes installed. If you don’t have it yet, download it from the Apple website. The steps below work on both Mac and Windows computers.
In the future, you may be asked to authorize the same computer again. You can do the same steps without using a new authorization.
People Also ReadTwo Solutions about How to Remove Forget Password on iPad
Authorize Your Computer
As mentioned earlier, you are allowed to authorize up to 5 computers only. You can better manage the authorizations if you know how many computers have been granted one.Check how many PC you are authorized and to get that information, refer to the guide below.
Check How Many PC You’ve Authorized
Take note that the page won’t disclose the details of the authorized computers. If you think there are more authorized computers than you know of, it’s a good idea to deauthorize them. We’ll discuss that in detail in Part 3.
Deauthorize a Computer on iTunes
There are cases when you must deauthorize a computer. Examples are:
You re-installed Windows on your computer or upgraded major components in the system. iTunes may not recognize your computer and use up more than one authorization. It is ideal that you deauthorize your computer first before sending it out for the upgrade.
It a smart move to deauthorize a computer, so only you and authorized persons can enjoy your purchased content. Deauthorizing won’t delete any of your contents. The same rule applies if you deauthorize all computers. You will just not have access to your purchased content until you reauthorize at least one computer.
You may only perform these steps if you are using the computer that you wish to deauthorize.
Deauthorize One Computer--Option1
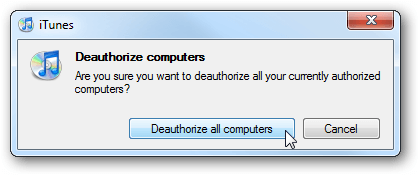
If you can no longer access the computer that you plan to deauthorize, you have no choice but to deauthorize all computers. These steps will help you out. This method works great, too, if you want to deauthorize 3 or more computers.
Head to Apple ID Summary and look for Computer Authorizations. You will see a Deauthorize All button at the right. Click on it.
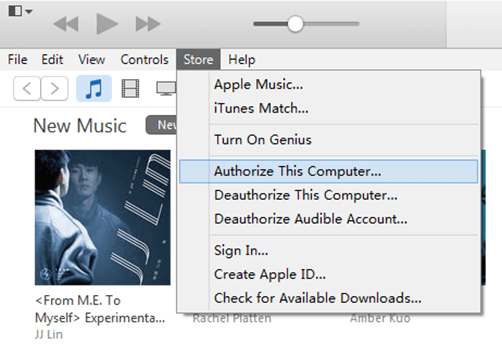
If you wish to reauthorize your other computers, the steps for authorizing a computer applies. You simply have to open iTunes > Account > Authorizations > Authorize This Computer. Again, you must be using the computer that you wish to reauthorize.
Now that you know how to authorize a computer on iTunes, you and your loved ones can enjoy your music and movie as much as you want. Remember to deauthorize computers, when needed, to keep your data secure.
Just in case you have any trouble with your iPhone, iPad or iPod Touch, you can use FoneDog iOS System Recovery. The software can easily repair common iOS device issues. These include your device going into recovery mode, black and white screen, frozen screen, and boot loop.
You can just DOWNLOAD my official product - iOS System Recovery by FoneDog to fix other issues include your device ENTER into recovery mode, red and white screen, a frozen screen on any iOS device.
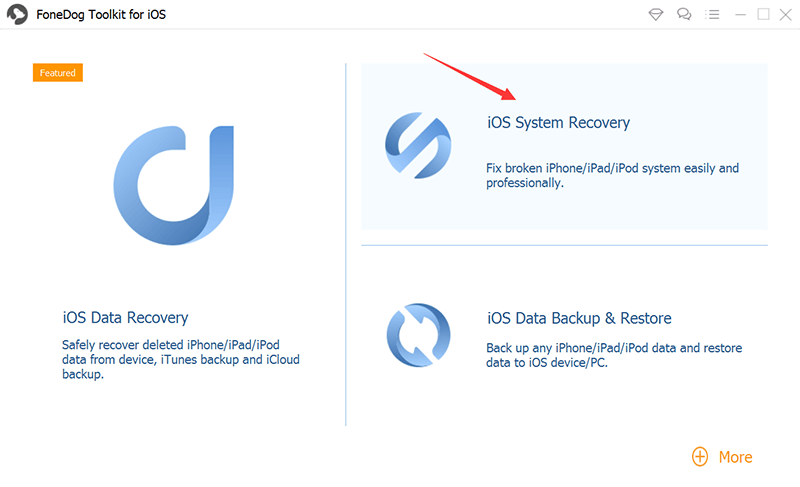
FoneDog toolkit fix the iOS device issues
If you need any more help, you can leave a comment below or read more of our tutorials. The last part of this article is a video guide, you can learn how to fix trouble problem that you can't authorize a computer on iTunes, you can watch and have a try FoneDog toolkit.
Leave a Comment
Comment

iPhone/Android Devices’ Maintenance Expert
Staying home, listening to music, writing tech articles
Many people asked me to repair their mobile phones so I have a lot of experience in mobile phone repair, and I know a lot about Android or Apple phones.
iOS System Recovery
Repair various iOS system errors back to normal status.
Free Download Free DownloadHot Articles
 /
/
INTERESTINGDULL
/
SIMPLEDIFFICULT
Thank you! Here' re your choices:
Excellent
Rating: 4.6 / 5 (based on 65 ratings)
