FoneDog Screen Recorder
FoneDog Screen Recorder
Special Offer
Special Offer


By Nathan E. Malpass, Last updated: April 28, 2017
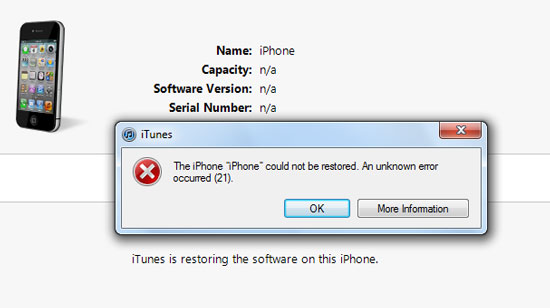
The iPhone "iPhone" could not be restored. An unknown error occurred(21). How to fix this iTunes Error 21 (iPhone Error 21)?
When using your iPhone or iOS device you may have encountered bothersome problems which may have soured your day. This can range from accidental physical damage, a software issue, or a hardware malfunction.
As with all devices, no matter who the manufacturer is, unfortunate errors may occur out of the blue. Apple iOS devices are no exception and are not exactly flawless in their design. However, all the blame cannot be placed on the manufacturer.
The mishandling of an iOS device by the consumer will also potentially bring out problems. It is, therefore, important to always take care of your gadgets.With that said, today we will cover a software error that may occur in your iOS device through being mishandled or through pure software malfunctions.
This common error is the iTunes Error 21.Let us look deeper into what this error contains and discover ways on how we can fix it.
Part 1: What Is iPhone Error 21 on iTunes?Part 2: What Causes Error 21 Happen When Using iTunes? Part 3: 7 Common Solutions to Fix iTunes Error 21Part 4: The Easiest and Most Efficient Solution to Solve iPhone Error 21Part 5: Watch Video Guide to Fix iTunes Error 21
Having spent some years on writing software for iOS devices, we have developed an iOS tool that is easy to use and will quickly solve your problems.
Here is a tip for you: Download FoneDog iOS System Recovery to easily repair iTunes error 21 and any other system errors on iOS devices. It's 100% safe and easy to use. It does not require any technical skills. Only one click and the error will be fixed in minutes. It protects your data from data loss during the whole repair process. Free try the software by pressing the button below to fix the error now!
iOS System Recovery
Fix with various iOS system issues like recovery mode, DFU mode, white screen looping on start, etc.
Fix your iOS device to normal from white Apple logo, black screen, blue screen, red screen.
Only fix your iOS to normal, no data loss at all.
Fix iTunes Error 3600, Error 9, Error 14 and various iPhone Error codes
Unfrozen your iPhone, iPad and iPod touch.
Free Download
Free Download

If you don't feel like help from third-party software and want to fix it on your own, we have also collected some common solutions below.
Error 21 is an error which you may encounter when you are attempting to restore or update an iOS device such as the iPhone, iPad or iPod. This is pinged and pops up when you have connected your iOS device to iTunes.
To be a bit more detailed, iTunes is in the process of checking the authenticity of the firmware file (extension ending with .IPSW) but ‘something’ caused it to go awry.
Symptoms of Error 21 That Have Been Recognized
1. The “iTunes Error 21” notification box is displayed.
2. After its appearance, the program crashes.Your Mac or PC may crash altogether.
3. Your Mac or PC may perform slower and be unresponsive or lags during mouse and keyboard inputs.
4. Your Mac or PC experience constant short freezes unexpectedly.
*Take note of any of these symptoms and EXACTLY when they occur.
*Your Mac or Windows PC may or may not be subject to these symptoms but always be aware and ready to use the methods that will be presented later.
The most common reason for iTunes Error 21 is that your iTunes is trying to download the restore files (.ipsw) but is unfortunately being blocked from authentication. This may be due to a hardware error, or maybe there is a communication failure between your device and the servers. some several possible reasons why iTunes Error 21 occurs are as follow:
While there may be more reasons as to why the error appears, the above mentioned are the most common.
The question probably posed now is, “What do I do?”
Don’t panic, just relax and read on as we will now show you the several common ways on how to fix this issue.
Now that we are on to fixing the error, please note that there are numerous ways to troubleshoot this problem. As previously mentioned, there are several causes to why the error appears, so do not be discouraged if one method does not work, simply try the others! Here are the steps to fix the iPhone error 21.
At times, the fix required can be as simple as this. Due to corrupted files which may have stemmed from computer lag or if the connection between your iOS device and computer was interrupted, a simple restart is perhaps needed.
Go ahead disconnect your iOS device, shut down your iTunes and restart it. Reconnect your iOS device to your Mac or Windows PC and attempt to update or restore again.
Related Article: How to Fix iTunes Errors When Updating or Restoring
If that worked, then it may have been a simple computer fault. If not, please read on to the next method.

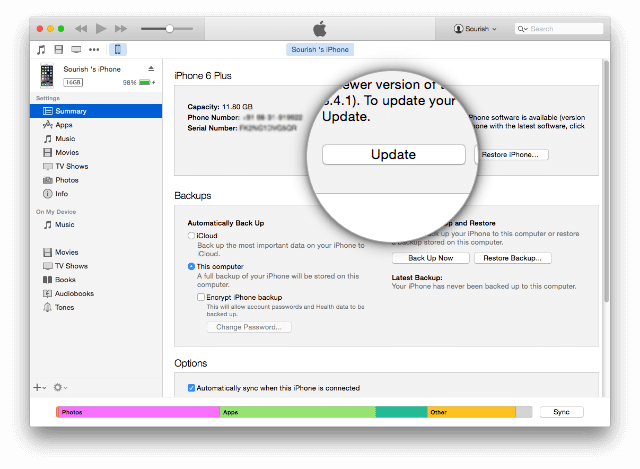
Sometimes the error occurs due to iTunes being way outdated. If Method 1 didn’t work then this would be the next logical step.
Simply have iTunes open and go to the ‘Help’ tab. From there click on ‘Check for Updates’.
Another way is to uninstall iTunes and search online for the latest version to download.
If this still did not work - continue on.
While turning off your anti-virus is a risk, it may be what is needed to get the pesky error to disappear. Anti-Virus programs do a good job, but sometimes they tend to block programs despite them being flagged as safe.
Attempt to do the following:
Hopefully, through having to take these risks, the error should be long gone.

In some cases, it may be that your host file is blocking iTunes from communicating with Apple’s server in order to update.
This method requires a bit more effort on your part as you would need some knowledge in accessing servers. Also, this may or may not be the solution, but if you are willing to go through with it, we will provide you the details here.
If you prefer an easier way to fix iTunes Error 21 quickly, you can always try iOS - System Recovery to repair your iPhone. It helps automatically detect the error and fix it in minutes.
If you want to try your best to check the host file, here are the steps:
For Mac Users
1. Launch ‘Applications’ and click on the ‘Utilities’ folder.
2.Open ‘Terminal’
3. Type the command: sudo nano /private/etc/hosts
*Note that there is a space between nano and the ‘/’.
4. If prompted to input your password, use your Mac password and press the ‘Return’ key.
5. The terminal that you have entered will now display the host files related to what you have typed. Scroll down until you see an entry that contains.
If this entry isn’t found then there is no communication blockage.
If the entry does exist, delete the entire command line that contains.
6. If you had to delete the line, check with iTunes if the error still occurs by updating or restoring.
For Windows Users
1. Go to ‘Run’. The easiest way is to press the Windows Key + R.
2.Type in: C:\Windows\System32\drivers\etc\hosts
3. Your computer may ask you on how you would like to open the file, find and select ‘Notepad’.
4. You should now get a list with hashtags and addresses.
5. Look through to find any lines that contain.
If this entry isn’t found then there is no communication blockage.
If the entry does exist, BACK UP by saving a copy then delete the entire command line that contains.6. If you had to delete the line, check with iTunes if the error still occurs by updating or restoring.
If iTunes finally started to behave after this process, then you are all set. However if not, you know the drill - continue on.
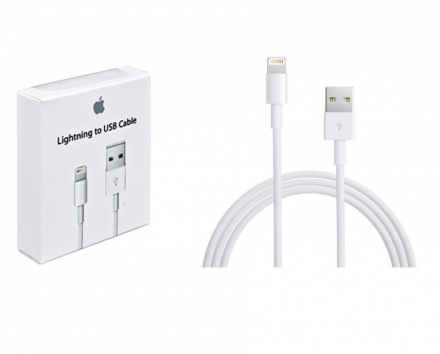
Sometimes a computer may be confused if so many USB devices are plugged into the ports. Go ahead and unplug everything else except your iOS device and check to see if it helped.
Moving back to something more difficult, if not the most difficult method on this list, it may be the fix required if everything else failed.
If you don’t know how to tinker with devices we suggest to leave this to someone who can.
If you do know, however, here is what you need to do.
*Prepare hardware tweezers or something that can firmly grab small items.
1. Open your iOS device.
2. Remove the screw which holds the battery in place.
3. Look for a device cable and disconnect it then reconnect it.
4. Done!
While it may not be as hard as it seemed, make sure that everything was perfectly done in reverse.
Hopefully, this had done its job, but once again if not... Then prepare for the second to the last method.
In this method, the iPhone would need to enter DFU Mode. This mode is the deepest type of recovery available and should be able to make Error 21 vanish forever. Only try this method if all other options have ended up not producing results.
Preparation
Precautions
If you tried Method 6, make sure you did not damage any components.
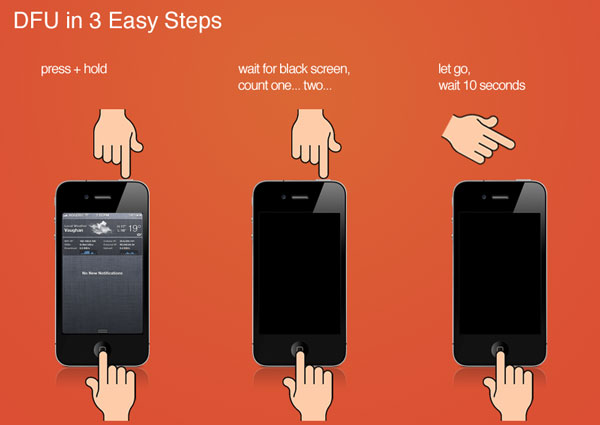
On your Mac or Windows computer, a screen should pop up indicating that it has detected a device in DFU Mode. (It may say “recovery mode” - but as long as the screen is black you are officially in DFU Mode).
*This process may take a few tries to succeed. Timing is important so proper counting or a timer is recommended.
If iTunes is open, it will alert you that a device has been detected in recovery mode. If your device displays a screen prompting you to connect to iTunes, try these steps again.
Now that you have gone through the whole process, this should have fixed the issue.
While DFU Mode is the utmost final option available wouldn’t it be better if there was an easier, hassle-free option? The answer is YES, there is such option you can take advantage of!
iOS System Recovery
Fix with various iOS system issues like recovery mode, DFU mode, white screen looping on start, etc.
Fix your iOS device to normal from white Apple logo, black screen, blue screen, red screen.
Only fix your iOS to normal, no data loss at all.
Fix iTunes Error 3600, Error 9, Error 14 and various iPhone Error codes
Unfrozen your iPhone, iPad and iPod touch.
Free Download
Free Download
This is where FoneDog - iOS System Recovery becomes a total no-brainer to use.
Here are the steps for eradicating iTunes Error 21 forever:
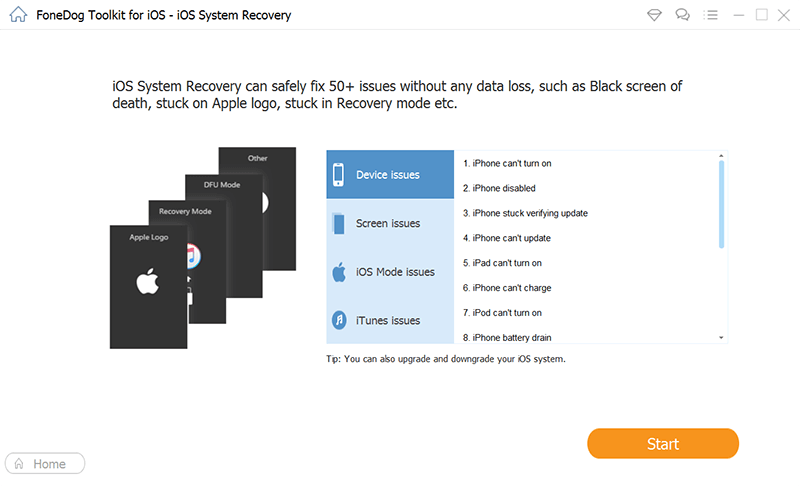
1. Download, install and launch FoneDog toolkit. Once you have launched the program, verify that our easy-to-use interface is visible on your screen.
2. Plug in your iOS device to the computer via USB cable. Confirm that FoneDog toolkit was able to detect your device.
3. In the main menu, click on ‘iOS System Recovery’. You will now notice several other options such as ‘iOS Data Backup & Restore’, “iOS Data Recovery” and the like. These are for anything else you need repairs for.
4. Click ‘Start’.
5. Your iOS device will once again be automatically detected. Its firmware can be updated by clicking on ‘Repair’.
6. Recovery will begin immediately. As you may have noticed, all errors are gone as it undergoes restoration!
7. Finished!
As you can see, with FoneDog all the work is done for you. You would not need to go through the long processes anymore.
It does everything from a complete system recovery to getting your precious data back to fixing those annoying restarts. All you need is a computer or a laptop.
Keep in mind that you never again would have to bring your iOS device to a repair shop where your data may potentially be at risk from prying eyes as well as having to pay huge fees. Your data is only accessible by you and you alone - as it should be.Click on The Button to Download The Free Trial Version:
After using FoneDog - iOS System Recovery your iOS device is ready to go but it does not just end there.
If you have forgotten to backup your data, worry not because of the FoneDog - iOS Data Recovery has you covered. As easy as all of our software, it is always good to have a one-stop program that does everything efficiently for you.
So give our products as shot with a free trial to start off. With our user-friendly interface, immediately you will see what it is capable of and why it is well loved and received amongst our satisfied customers. We stand proudly by our product and so will you. Go on and give it a try. It is as easy as 1, 2, 3!
People Also ReadHow to Selective Restore Data from iTunes to iPhone?How to Recover Deleted Data from iPhone X/8/7/6/5/4?
Leave a Comment
Comment

iPhone/Android Devices’ Maintenance Expert
Staying home, listening to music, writing tech articles
Many people asked me to repair their mobile phones so I have a lot of experience in mobile phone repair, and I know a lot about Android or Apple phones.
iOS System Recovery
Repair various iOS system errors back to normal status.
Free Download Free DownloadHot Articles
 /
/
INTERESTINGDULL
/
SIMPLEDIFFICULT
Thank you! Here' re your choices:
Excellent
Rating: 4.5 / 5 (based on 84 ratings)
