FoneDog Screen Recorder
FoneDog Screen Recorder
Special Offer
Special Offer


By Nathan E. Malpass, Last updated: October 20, 2025
In the age of ever-expanding digital photo libraries, finding the most efficient and secure ways to manage your precious memories is paramount. If you're an iPhone user looking to free up space or create a backup of your photos, transferring them to a SanDisk Flash Drive is a practical solution. In this comprehensive guide, we'll walk you through the step-by-step process of how to transfer photos from iPhone to SanDisk Flash Drive. Say goodbye to storage constraints and gain the peace of mind that comes with safeguarding your memories. Let's dive into the world of hassle-free photo transfers.
Part 1. Is it Possible to Transfer Photos from iPhone to SanDisk Drives?Part 2. Methods to Transfer Photos from iPhone to SanDisk Flash DrivePart 3. Best Solution to Transfer Photos from iPhone to SanDiskPart 4. FAQs
In a world dominated by technological innovation, the seamless integration of devices has become a priority for users seeking convenience and flexibility. If you've ever wondered whether it's possible to transfer photos from your iPhone to a SanDisk Flash Drive, the answer is a resounding yes. Thanks to the compatibility between iPhones and external storage devices like SanDisk drives, you can easily implement a straightforward process to move your cherished photos with just a few simple steps.
Both iPhones and SanDisk Flash Drives operate on industry-standard protocols, making them compatible for data exchange. The key lies in understanding the mechanisms and tools available to bridge the gap between these two devices. In the following sections, we'll delve into the specifics, providing you with a comprehensive guide on how to effortlessly transfer your photos from your iPhone to a SanDisk Flash Drive. So, rest assured that the possibility is not only real but also practical, and by the end of this guide, you'll be equipped with the knowledge to execute the transfer seamlessly.
The Files app on your iPhone serves as a versatile tool for managing and transferring data. When it comes to moving photos from your iPhone to a SanDisk Flash Drive, this method leverages the inherent file management capabilities of iOS. It's a straightforward process that doesn't require additional apps, making it accessible to users with varying levels of technical expertise.
How to transfer photos from iPhone to SanDisk? Go through the following steps carefully.
Steps:
Utilizing the Files app for transferring photos from your iPhone to a SanDisk Flash Drive is a convenient and efficient method. This approach capitalizes on the familiar iOS file management system, offering a user-friendly experience. Whether you're freeing up space on your iPhone or creating a backup of your cherished memories, this method ensures that the transfer process is both accessible and straightforward. In the next sections, we'll explore alternative methods for transferring photos, providing you with a comprehensive toolkit to suit your preferences.
The SanDisk iXpand Drive App is a dedicated application designed to streamline the process of transferring and managing files between your iPhone and SanDisk Flash Drive. This method offers a user-friendly interface and additional features, making it an excellent choice for those who prefer a specialized solution.
Steps:
The SanDisk iXpand Drive App offers a tailored solution for transferring photos from your iPhone to a SanDisk Flash Drive. By combining the convenience of a dedicated app with the reliability of SanDisk technology, this method ensures a smooth and efficient transfer process. Whether you're a tech enthusiast or a casual user, the iXpand Drive App simplifies the task of managing and safeguarding your precious memories. As we explore further methods, you'll find a range of options to suit your preferences and specific requirements.
Transferring photos from your iPhone to a SanDisk Flash Drive via a computer provides a versatile and widely-used approach. By utilizing the connection between your iPhone and computer, you gain access to efficient file management tools, enabling a seamless transfer process.
Here's how to transfer photos from iPhone to SanDisk:
Steps:
Using a computer as an intermediary for transferring photos provides a robust and familiar method. Whether you are on a Windows or Mac system, the process involves leveraging established software tools to manage your photo library efficiently. This method is particularly useful for users who prefer the larger screen and advanced file management capabilities offered by computers. As we explore additional methods, you'll find diverse options to suit various preferences and technical comfort levels.
iCloud offers a cloud-based solution for managing and transferring photos between your iPhone and other devices, including a SanDisk Flash Drive. This method is particularly useful if you prefer a wireless approach and want to leverage the convenience of cloud storage.
How to transfer photos from iPhone to SanDisk? Following steps:
Steps:
Using iCloud for photo transfer provides a wireless and convenient option for users who want to avoid physical connections. This method leverages Apple's cloud infrastructure to seamlessly download photos to your computer, from where you can easily copy them to a SanDisk Flash Drive. As we explore more methods, you'll find a diverse range of options to suit your preferences and specific needs.
FoneDog Phone Transfer is an iPhone supported, third-party software solution designed to simplify the process of transferring data between smartphones, including iPhones, and external storage devices like SanDisk Flash Drives. This method offers a comprehensive and user-friendly approach, making it an excellent choice for those who seek an efficient and versatile transfer solution.
Phone Transfer
Transfer files among iOS, Android and Windows PC.
Transfer and backup text messages, contacts, photos, video, music on computer easily.
Fully compatible with the latest iOS and Android.
Free Download

Features:
Steps:
How to transfer photos from iPhone to SanDisk? Here are steps with this best file-transferring tool:
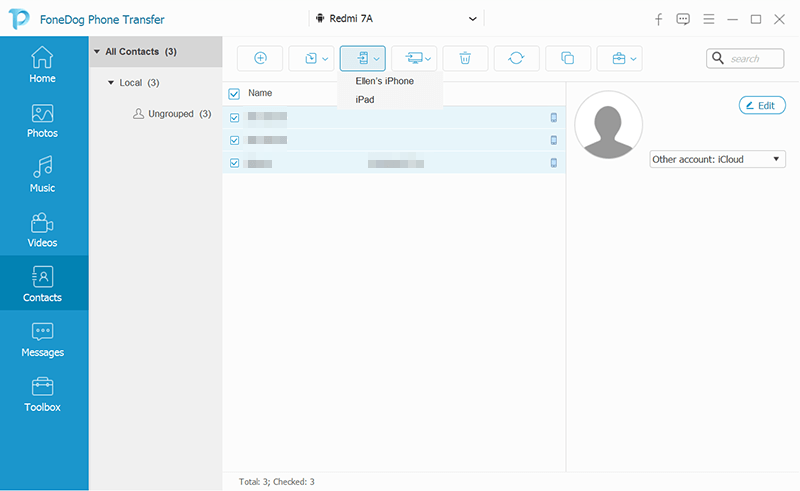
FoneDog Phone Transfer provides a streamlined and efficient solution for transferring photos from your iPhone to a SanDisk Flash Drive. With its user-friendly interface and versatile features, this third-party software simplifies the process, making it accessible to users with varying levels of technical expertise. As we explore different methods, FoneDog Phone Transfer stands out as a reliable option for those seeking a comprehensive and hassle-free data transfer experience.
Q1: Can I directly connect my SanDisk Flash Drive to my iPhone?
No, iPhones typically don't have USB-A or USB-C ports for direct connections. You'll need a compatible adapter, such as a Lightning to USB adapter, to connect your SanDisk Flash Drive to your iPhone.
Q2: Are there any compatibility issues I should be aware of?
Ensure that your SanDisk Flash Drive is compatible with your iPhone model and iOS version. Check for any firmware updates for your SanDisk drive to ensure optimal performance.
Q3: Can I transfer photos wirelessly to a SanDisk Flash Drive?
Yes, some methods, like using iCloud, allow wireless photo transfers. However, for a direct connection, you may need an adapter or a dedicated app like the SanDisk iXpand Drive App.
Q4: Will transferring photos to a SanDisk Flash Drive affect their quality?
No, the transfer process itself does not affect the quality of your photos. They will be copied as they are from your iPhone to the SanDisk Flash Drive.
Q5: What should I do if my SanDisk Flash Drive is not recognized by my iPhone?
Try reconnecting the devices, ensuring a secure connection. If the issue persists, check for compatibility issues and consider updating the firmware of your SanDisk Flash Drive.
Q6: Can I transfer other data types, like videos or contacts, using the same methods?
Yes, most methods mentioned can transfer various data types. When using apps or software like FoneDog Phone Transfer, you can select specific types of data for transfer.
Q7: Is it necessary to eject the SanDisk Flash Drive safely after the transfer?
Yes, always eject the SanDisk Flash Drive safely to avoid potential data corruption. This ensures that all data transfers are complete before removing the drive.
Q8: Are there alternatives to SanDisk Flash Drives for iPhone photo storage?
Yes, other brands offer similar external storage solutions. Ensure compatibility and consider factors like storage capacity and device integration when choosing an alternative.
Q9: Can I transfer photos from my iPhone to multiple SanDisk Flash Drives simultaneously?
Typically, you can transfer photos to one external storage device at a time. If you need to copy photos to multiple drives, complete the transfer to one drive and then repeat the process for the others.
Q10: What's the best method for beginners to transfer photos?
For beginners, using the Files app or a dedicated app like the SanDisk iXpand Drive App provides a straightforward and user-friendly experience. Follow the step-by-step instructions for a hassle-free transfer.
Leave a Comment
Comment

iPhone/Android Devices’ Maintenance Expert
Staying home, listening to music, writing tech articles
Many people asked me to repair their mobile phones so I have a lot of experience in mobile phone repair, and I know a lot about Android or Apple phones.
Phone Transfer
Transfer data from iPhone, Android, iOS, and Computer to Anywhere without any loss with FoneDog Phone Transfer. Such as photo, messages, contacts, music, etc.
Free DownloadHot Articles
 /
/
INTERESTINGDULL
/
SIMPLEDIFFICULT
Thank you! Here' re your choices:
Excellent
Rating: 4.7 / 5 (based on 63 ratings)
