FoneDog Screen Recorder
FoneDog Screen Recorder
Special Offer
Special Offer


By Adela D. Louie, Last updated: January 27, 2024
Have you recently discovered yourself in the middle of an inspirational Zoom presentation and wished you could press that replay button? So, suppose what? You could! Throughout this post, we're going to talk about how to record a Zoom session for future use.
Perhaps you're a learner watching virtual classes, or just know how to capture Google Meet and feel not enough for yourself, learning the skill of how to record a Zoom presentation makes your life easier. Prepare to learn recording and pre-audio techniques.
Part #1: Best Way for Recording A Zoom Presentation – FoneDog Screen RecorderPart #2: Runner-Up Methods on How to Record A Zoom PresentationPart #3: FAQsConclusion
FoneDog Screen Recorder stands out as the easiest solution for recording Zoom presentations. This user-friendly software captures every detail of your virtual sessions with ease. With FoneDog, you can record high-quality video, and crisp audio, and even capture webcam feeds during Zoom presentations.
![]() Free Download
For Windows
Free Download
For Windows
![]() Free Download
For normal Macs
Free Download
For normal Macs
![]() Free Download
For M1, M2, M3
Free Download
For M1, M2, M3
The tool offers flexible output options, allowing you to save recordings where you want. Its efficient functionality, coupled with a variety of editing features, ensures a smooth process from recording to saving, making FoneDog Screen Recorder the best way to record your Zoom presentations.
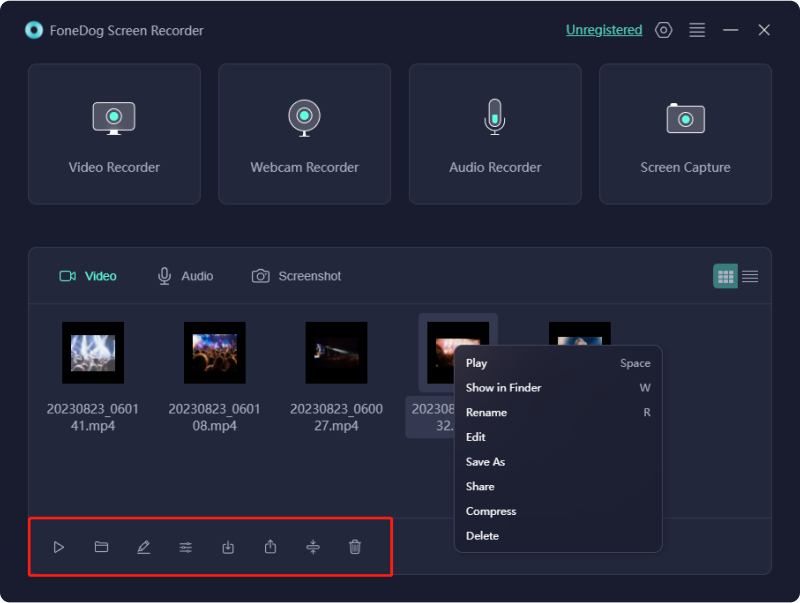
Here’s how to record a Zoom presentation Using FoneDog Screen Recorder:
1. Go to the official FoneDog website or click the download button above to download the application. Follow the installation instructions to set up the software on your computer.
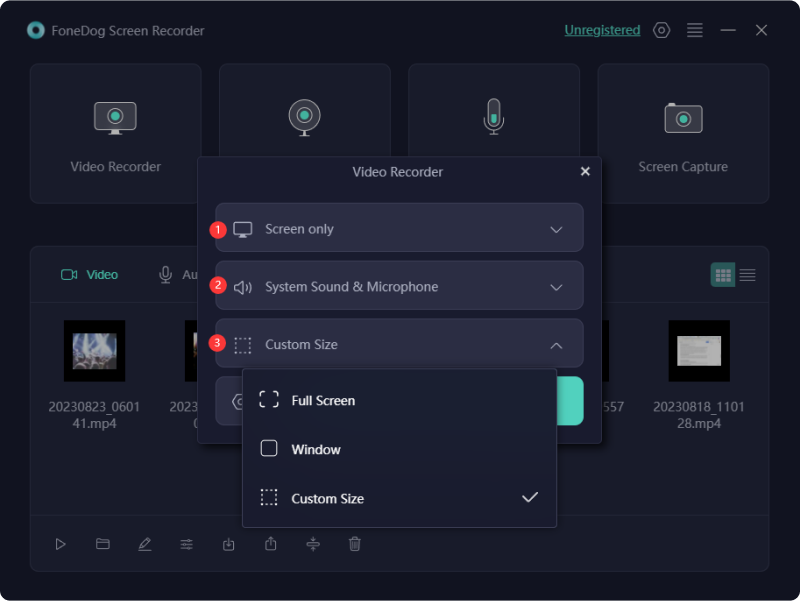
2. Once the installation wraps up, launch it and then you'll be prompted to define the recording area, whether the entire screen or a specific region, catering to your preferences.
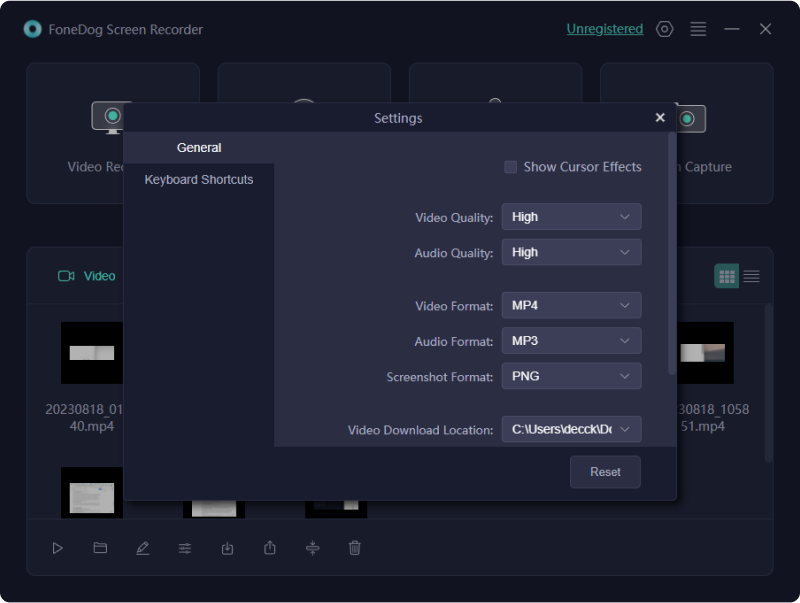
3. For customization of recording settings, click the gear icon within the application. This menu allows adjustment of recording parameters, including video format, quality, and audio source. Activate the microphone option if you intend to capture audio with your video.
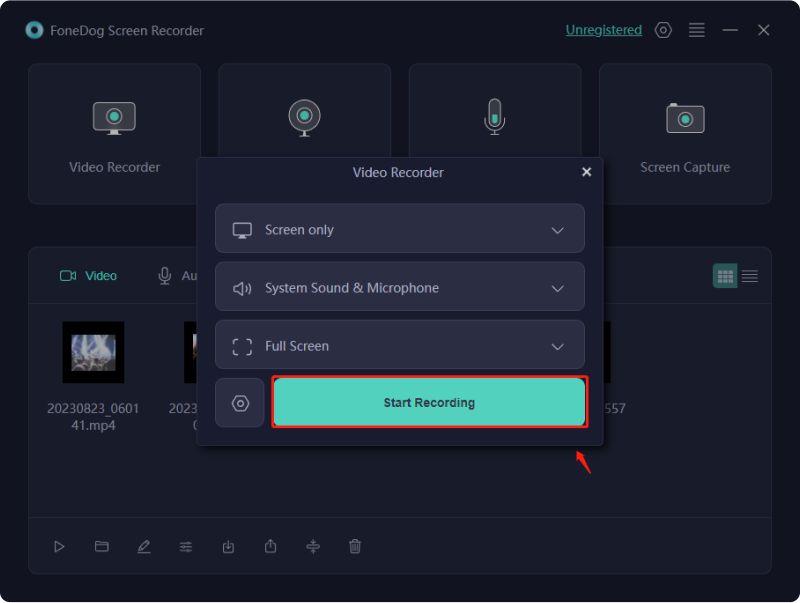
4. Return to the application and hit the "Start Recording" (Record) button to initiate the recording. The actual recording will start after a brief countdown.
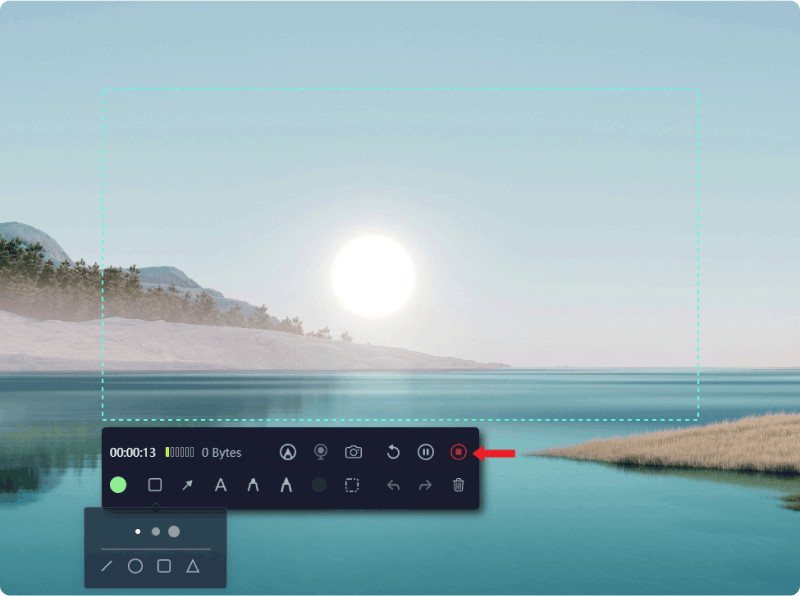
5. Conclude your Zoom meeting, and within the application, click the "Stop" button to halt the recording.
6. Upon stopping, the files will be automatically saved to the location you set(or the default location if you didn't change the location from Settings). You can view them easily from the recording history on the interface of the program.
Explore a compilation of practical options on how to record a Zoom presentation, both individually and within a group setting, and some bonus methods you can indeed make use of. Uncover the steps outlined below to discover the process.
Creating a recording of your Zoom presentation becomes a breeze when you're well-versed in the process. As the presenter, you can swiftly and effortlessly configure the recording settings right from the Zoom application. To commence your Zoom presentation recording journey, adhere to these straightforward guidelines.
In general, the recording capabilities integrated into Zoom empower hosts to capture the meeting. If your desire is to record a Zoom presentation while participating as a caller, securing consent from the call host is imperative. Alternatively, you can become an invited alternative host. Subsequently, you gain access to the application's conventional recording features.
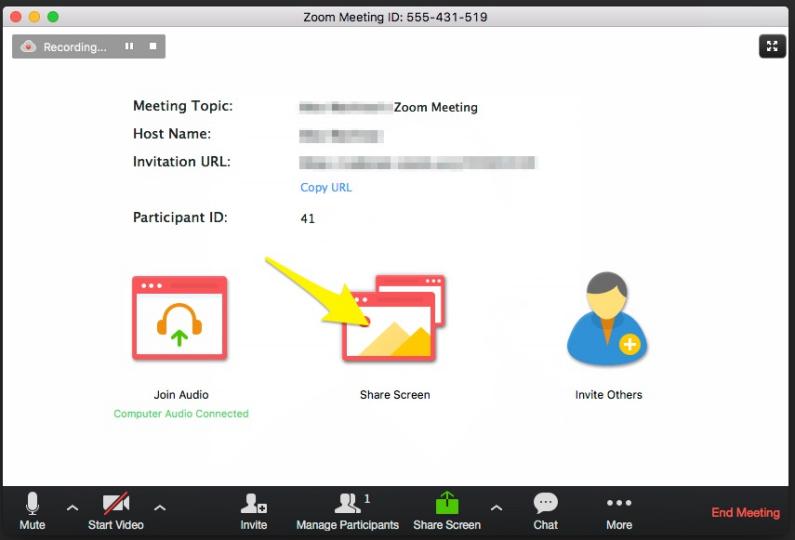
As a regular Zoom attendee, regrettably, the ability to record content is not at your disposal. In such instances, it is recommended to request the call host to undertake the recording on your behalf. Another viable option involves utilizing external video recording software. To capture your Zoom presentation through an external screen recording tool, adhere to these steps:
Looking to capture your group presentation? Look no further, we've got the solution for you!
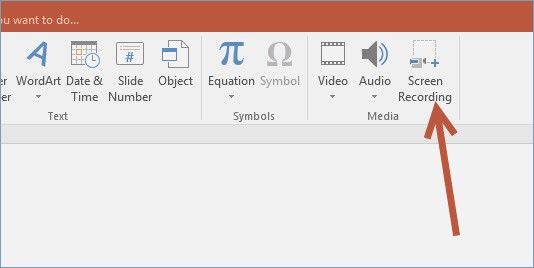
Within Microsoft PowerPoint, there exists an integrated function for capturing such presentations in video format, coupled with the simultaneous recording of audio. Below are the steps for utilizing this tool:
People Also Read[2024] How Can You Screen Record FaceTime with Audio?How to Use QuickTime Screen Recording with Audio in 2024?
In mastering the steps on how to record a Zoom presentation, seize control of your virtual narratives with precision. Whether for educational pursuits, professional endeavors, or creative expression, the seamless fusion of technology and technique empowers you to transform fleeting moments into enduring showcases. Elevate your virtual presence with confidence and flair.
Leave a Comment
Comment

Tech Website Writing /Content Optimization
Singing, smiling, surprising every day!
So as a technical writer, it is my duty to gather effective and reliable solutions to answer questions on how to deal with the issues they are having with their devices.
Screen Recorder
Powerful screen recording software to capture your screen with webcam and audio.
Hot Articles
 /
/
INTERESTINGDULL
/
SIMPLEDIFFICULT
Thank you! Here' re your choices:
Excellent
Rating: 4.7 / 5 (based on 69 ratings)
