FoneDog Screen Recorder FoneDog Screen Recorder
Special Offer Special Offer
Only Only
$4.49 $4.49
to get a ONE-month license to get a ONE-month license
Sale ends in xx days Sale ends in xx days
Buy Now
sale

Comprehensive Guide: How Mac Screen Record GIF 2024 [5 Tools]

By Adela D. Louie, Last updated: December 19, 2023

In today's digital age, where attention spans are short and visuals reign supreme, learn how to seamlessly capture your Mac screen's action and transform it into engaging GIFs. Whether you're a content creator, educator, or simply want to spice up your online communication, this article serves as your go-to guide on how Mac screen record GIF.

Thinking of recording a live stream on your Mac computer of your favorite streamer, make that footages to GIF, that would be a huge fun. Join us on this journey to elevate your content creation game and make your message pop with animated visuals!

Part #1: The Methods: How Mac Sreen Record GIFPart #2: Screen Record GIF on Mac Using the Best Tool - FoneDog Screen RecorderConclusion

Part #1: The Methods: How Mac Sreen Record GIF

There are a few methods available to record your Mac screen and create GIFs from those recordings. Here are a few methods along with steps to achieve Mac screen record GIF:

Method #1: Using Built-in Mac Tools And Conversion Software

Steps for Screen Recording on Mac:

Using QuickTime Player:

  1. To initiate the process, locate and open the QuickTime Player application residing within your Applications folder.
  2. Within the QuickTime Player interface, navigate to the top menu bar and click on the "File" option.
  3. From the dropdown menu that appears, select the "New Screen Recording" feature.
  4. Upon selecting this option, a new screen recording window will emerge, presenting a red record button within its interface.
  5. To commence the recording, click on this red button. Subsequently, define and designate the specific area or portion of your screen that you intend to capture. This involves using your cursor to select the desired screen region for recording purposes.
  6. Once you've designated the area and initiated the recording process, carry out the actions or tasks you wish to capture.
  7. Upon completing the recording, conclude the process by navigating to the menu bar and clicking on the stop button, thereby halting the ongoing screen recording session.

Using macOS Screenshot Toolbar (for shorter recordings):

  1. To initiate the screenshot toolbar on your Mac, use the keyboard shortcut "Command + Shift + 5". This command prompts the appearance of the toolbar interface.
  2. Once the toolbar is visible, locate and click on the recording icon among the available options.
  3. Upon selecting the recording function, you'll have the flexibility to define the specific area or window you intend to capture in your recording.
  4. After specifying your recording area, initiate the recording process by clicking the "Record" button within the toolbar.
  5. To conclude the recording session, locate and click on the stop button situated in the menu bar, thus finalizing and concluding the screen recording process.

Steps to Convert Screen Recording to GIF:

Utilizing dedicated conversion software such as GIPHY Capture or CloudConvert involves several sequential steps for transforming your recorded screen video into a GIF format:

  1. Exporting the Recorded Screen Video: Initially, export or save your recorded screen video in a widely supported format like MP4. This ensures compatibility and ease of use with the conversion tool.
  2. Uploading the Video File to the GIF Conversion Tool: Subsequently, proceed to upload the saved video file to the chosen GIF conversion software, be it GIPHY Capture or CloudConvert. These platforms specialize in transforming various video formats into GIFs.
  3. Following the Conversion Tool's Instructions: Once the video is uploaded, follow the step-by-step instructions provided by the conversion tool to initiate the transformation process. These instructions typically guide you through the necessary settings and options required for conversion.
  4. Adjusting Settings for Optimization: Tailor the settings according to your preferences or specific requirements. This might involve modifying parameters like frame rate, dimensions, quality, or any other available customization options offered by the tool to refine the resulting GIF.
  5. Saving or Downloading the Converted GIF: After finalizing the adjustments, proceed to save or download the newly converted GIF file to your computer. This step concludes the process, providing you with the GIF version of your originally recorded screen video for use in various applications or sharing across platforms.

By following these comprehensive steps within the selected conversion software, users can efficiently convert their recorded screen videos into visually engaging GIFs, ready for versatile utilization.

Method #2: Online Conversion Tools

Steps to Convert Existing Video to GIF Online:

Utilizing online conversion platforms such as EZGIF or Online UniConverter involves a series of steps to convert your pre-recorded screen video into a GIF format. Here's how:

  1. Accessing the Online Converter Platform: Begin by accessing an online conversion platform like EZGIF or Online UniConverter through your web browser.
  2. Uploading Your Recorded Video: On the chosen platform, locate the option to upload files. Select your previously recorded screen video file (usually in MP4 or any compatible format) from your computer's storage.
  3. Following Conversion Instructions: Once the video file is uploaded, follow the platform's instructions to initiate the conversion process. These instructions typically involve selecting the desired output format, which, in this case, would be GIF.
  4. Adjusting Conversion Settings (if available): Depending on the platform, there might be settings available for customization. You can typically adjust settings like the size of the GIF, its duration, or the quality of the final output.
  5. Initiating the Conversion: After configuring the settings, proceed with the conversion process by clicking on the appropriate button or option provided by the platform.
  6. Downloading the Generated GIF: Once the conversion is completed, the platform will generate the GIF file from your uploaded video according to the specified settings. Look for the download option or link provided by the platform to save the resulting GIF file to your computer's storage.
  7. Finalizing the Process: Ensure the downloaded GIF file meets your requirements and is ready for use in your intended applications or for sharing on various platforms.

Part #2: Screen Record GIF on Mac Using the Best Tool - FoneDog Screen Recorder

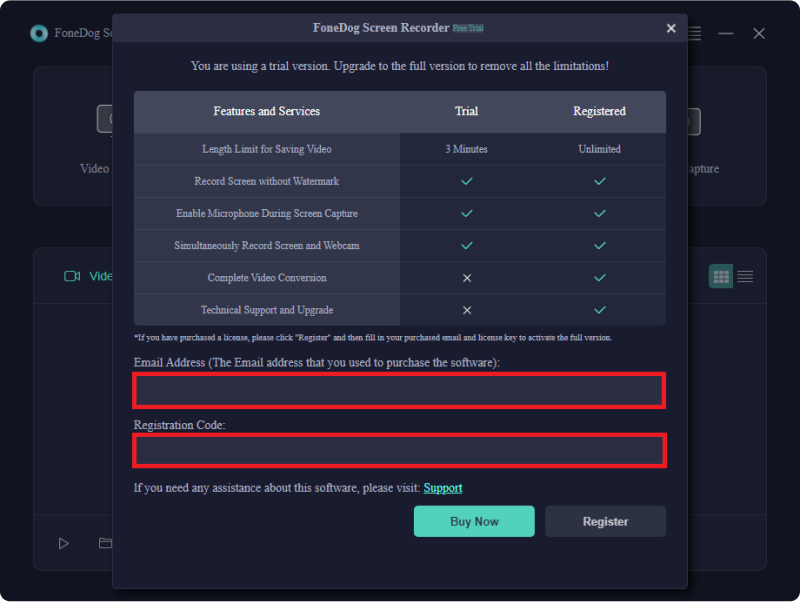
FoneDog Screen Recorder is a versatile software tool designed specifically for Mac users, offering an easy and efficient way to capture screen activities and convert them into various formats, including GIFs. This screen recording software stands out for its user-friendly interface, robust features, and the capability to create high-quality GIFs from recorded content.

windows Free Download For Windows mac Free Download For normal Macs mac Free Download For M1, M2, M3

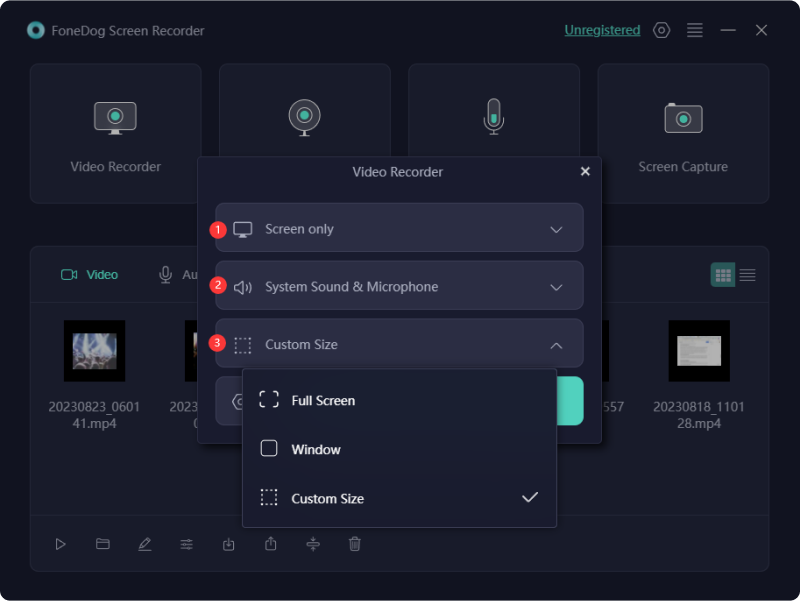
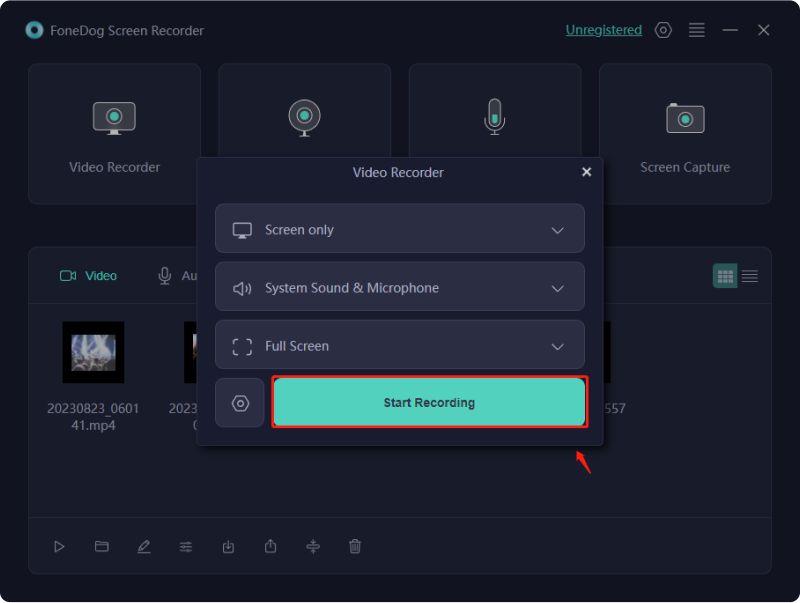
Here's how to make use of this top GIF recorder for Mac screen record GIF:

Step #1: Visit the FoneDog website and download the Screen Recorder software for Mac. Install the software by following the on-screen instructions.

Step #2: Open the FoneDog Screen Recorder application on your Mac.

Mac Screen Record GIF - FoneDog Screen Recorder: Register the App

Step #3: Adjust settings such as recording area (full screen, custom area, or specific window), audio input source, frame rate, and quality according to your preferences.

Mac Screen Record GIF - FoneDog Screen Recorder: Recording Area

Step #4: Click on the "REC" button to start recording the screen activity. Once done, click the Stop button to end the recording. Review the recorded video and make necessary edits or trims if required.

Mac Screen Record GIF - FoneDog Screen Recorder: Start Recording

Step #5: Save the recorded video in a compatible format (e.g., MP4)Within the FoneDog Screen Recorder software, navigate to the "Toolkit" or "Convert" section.

Step #6: Choose the option to convert the recorded video file to GIF format. Adjust settings such as duration, size, frame rate, and quality for the GIF conversion.

Step #7: Initiate the conversion process. Once the conversion is completed, save the resulting GIF file to your preferred location on your Mac.

People Also ReadUnlock Your Gaming Potential: Guide on How to Record GameCapturing Conversations: Full Guide to Google Meet Recording

Conclusion

In conclusion, Mac screen recording and GIF creation offer a dynamic means to communicate ideas effectively. Harnessing these tools empowers you to share engaging content, whether for tutorials, presentations, or social media.

Start crafting your Mac screen record GIF as well as embrace the immense potential of GIFs in modern communication, enriching messages, evoking emotions, and leaving lasting impressions in just a few animated loops. That;s all, have a wonderful day!

Leave a Comment

Comment

Comment ()
author image

Adela D. Louie

Tech Website Writing /Content Optimization

Singing, smiling, surprising every day!

So as a technical writer, it is my duty to gather effective and reliable solutions to answer questions on how to deal with the issues they are having with their devices.

Screen Recorder logo

Screen Recorder

Powerful screen recording software to capture your screen with webcam and audio.

How Do You Like This Article?

Check icon/ Check icon

INTERESTINGDULL

Check icon/ Check icon

SIMPLEDIFFICULT

Thank you! Here' re your choices:

Rate This Article: Excellent

Rating: 4.7 / 5 (based on 93 ratings)

Screen Recorder logo

Screen Recorder

Powerful screen recording software to capture your screen with webcam and audio.

FoneDog uses cookies to ensure you get the best experience on our website. Click here to learn more.