FoneDog Screen Recorder
FoneDog Screen Recorder
Special Offer
Special Offer


By Adela D. Louie, Last updated: December 15, 2023
Doing a screen recording on a Mac usually utilizes QuickTime. In this article, we're diving into the exciting world of QuickTime screen recording with audio, unlocking a world of possibilities for content creators, educators, and tech enthusiasts alike.
Whether you're a gamer looking to share epic moments, a teacher creating engaging online lessons, or a professional seeking to produce top-notch tutorials, our comprehensive guide will walk you through the entire process.
Part #1: Best Tool to Screen Record with Audio – FoneDog Screen RecorderPart #2: Ways to Make Use Of QuickTime Screen Recording with AudioConclusion
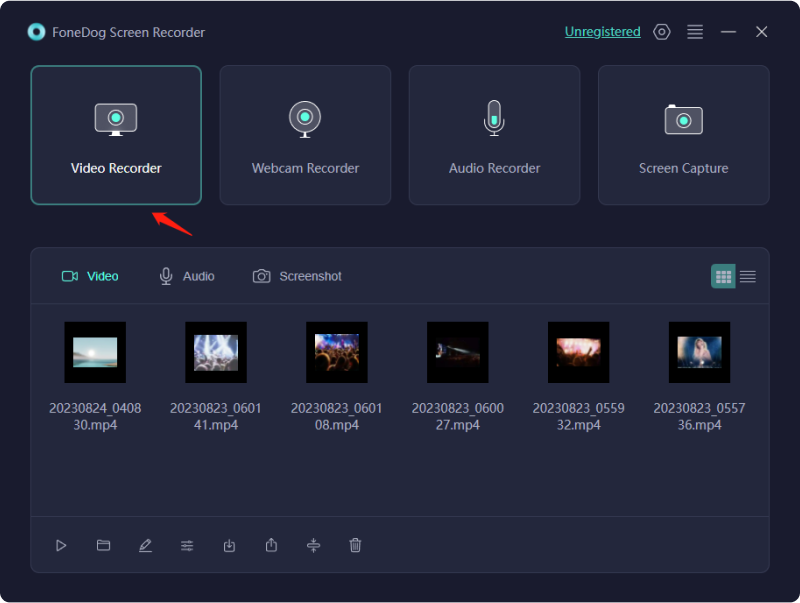
FoneDog Screen Recorder is a powerful and versatile screen recording software designed to capture your screen activities with exceptional precision and clarity. Whether you're a content creator, educator, or professional, this tool offers an array of amazing screen recording capabilities with audio to help you bring your projects to life.
![]() Free Download
For Windows
Free Download
For Windows
![]() Free Download
For normal Macs
Free Download
For normal Macs
![]() Free Download
For M1, M2, M3
Free Download
For M1, M2, M3
To make use of FoneDog Screen Recorder for QuickTime screen recording with audio, follow these steps:
Screen Recording:
Step #1: To commence, initiate the process by acquiring and installing the FoneDog Screen Recorder software onto your computer. It is imperative to ascertain that this software is harmonious with your computer's operating system.
Step #2: Upon successful installation, proceed to initiate the software by accessing it through your computer's application menu. At this point, a range of recording options will become visible, and among these, you should select the "Screen Recorder" mode.
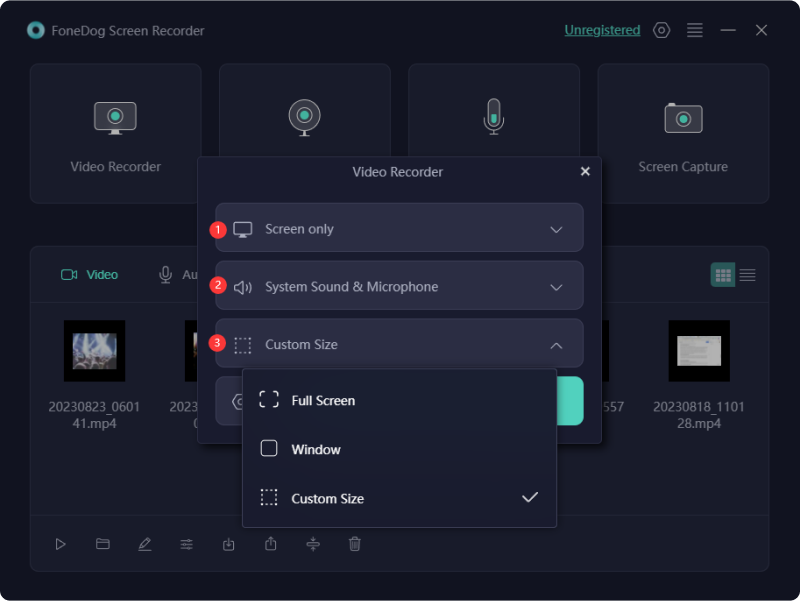
Step #3: Prior to the commencement of your recording endeavor, it is crucial to fine-tune your preferences. This involves making several critical decisions, such as choosing the specific screen area to capture (whether it be the entire screen, a designated region, or a particular application window), defining the desired recording quality, and establishing the frame rate settings.
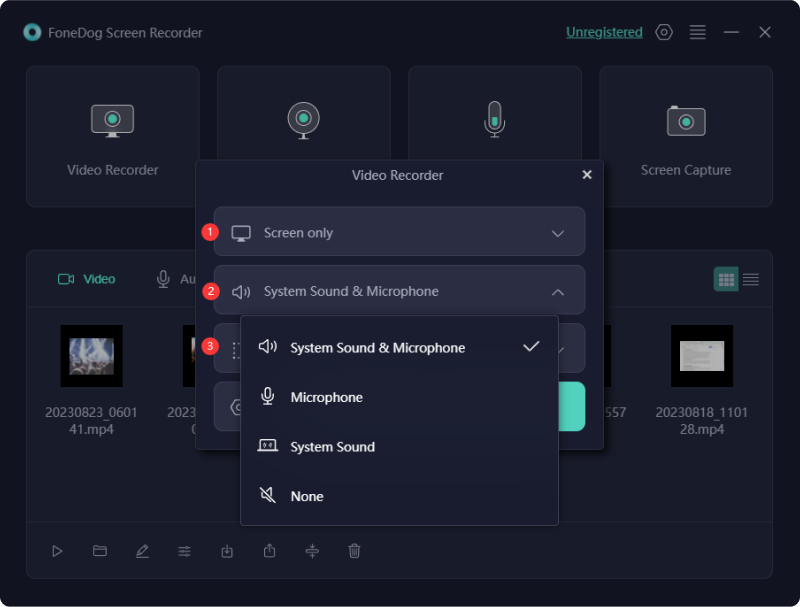
Step #4: Within the software's settings menu, it is paramount to ensure the selection of your preferred audio sources for recording. This encompasses the ability to record both the audio emanating from your computer system and any external audio inputs, such as that from an external microphone.
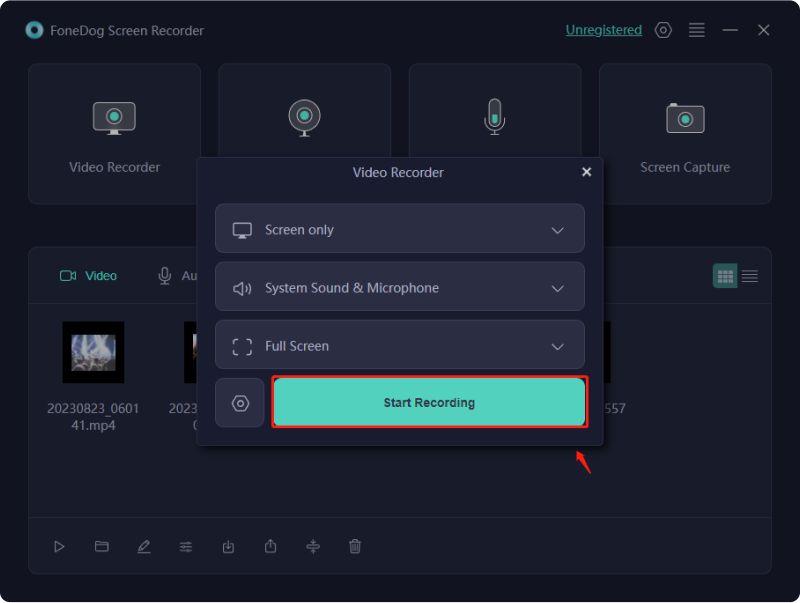
Step #5: When you find yourself prepared to initiate the recording process, take action by clicking the "REC" button, thereby commencing the simultaneous recording of both your screen activities and audio. At this juncture, a countdown timer will make its presence felt, and a recording toolbar will make an appearance on your screen.
Step #6: Execute the actions or procedures that you aim to capture on your screen while the recording is in progress. At any point during this process, you retain the flexibility to pause or halt the recording by utilizing the appropriate buttons available on the toolbar.
Step #7: Following the conclusion of your recording session, the FoneDog Screen Recorder will offer you the opportunity to preview and make modifications to your recording. This may encompass tasks such as trimming, adding annotations, and implementing any necessary adjustments to enhance the overall quality of your recording.
Step #8: Upon achieving a level of satisfaction with the final recording, proceed by clicking either the "Save" or "Export" option, thus preserving the video in your preferred format and saving it to your chosen storage location.
Audio Recording:
Step #1: Initiate the software in the same manner as you would when preparing for screen recording.
Step #2: Navigate to the available options and after that look into the options for the "Audio Recorder" mode.
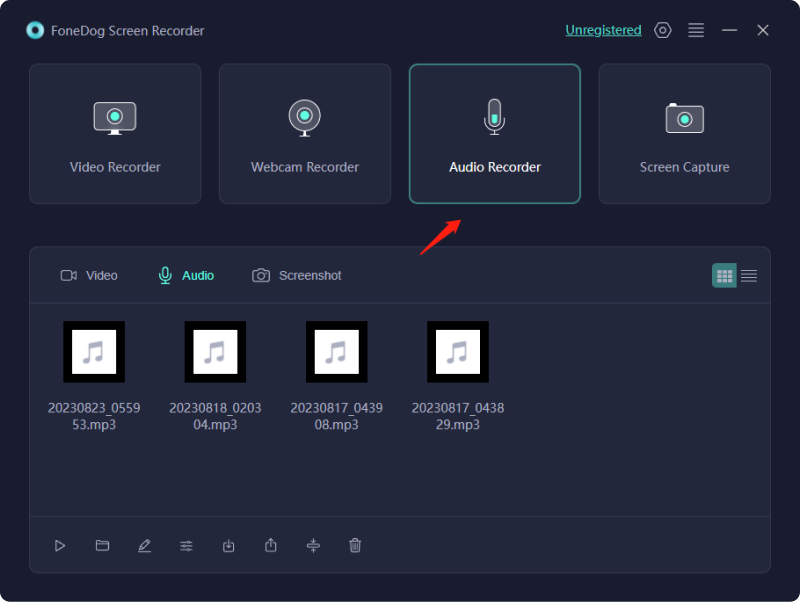
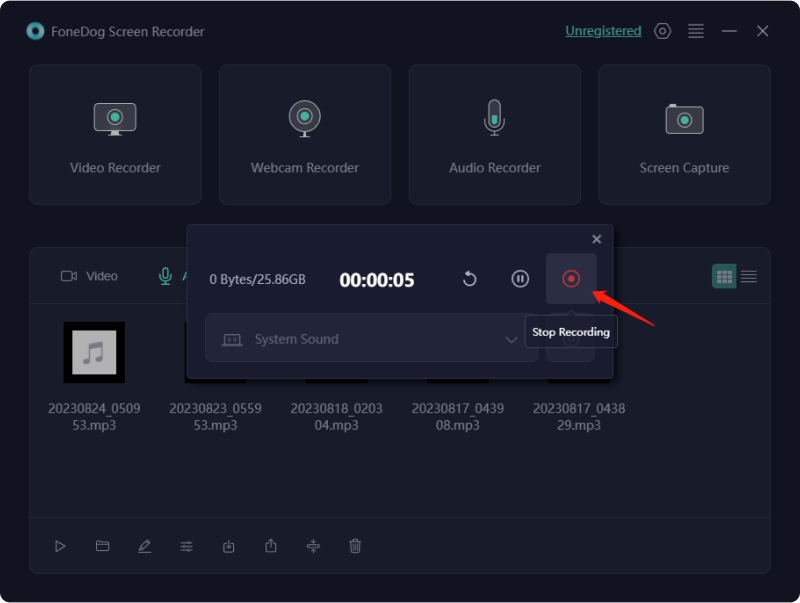
Step #3: Within the software settings, make sure to specify your audio input source, typically your microphone, and configure the desired recording quality.
Step #4: When ready to commence audio recording, click the "REC" button. Feel free to speak or engage in any audio-related activities you wish to preserve.

Step #5: Upon completing your recording, click the "Stop" button. Subsequently, the software will prompt you to save the audio recording.
Step #6: Should the need arise, you can also take advantage of the software's capabilities to edit and export the audio recording.
FoneDog Screen Recorder is a top-tier screen recording solution that goes beyond the basics. Its incredible screen recording capabilities with audio, and video editing tools, and webcam integration make it a valuable resource for creating professional content, educational materials, and engaging presentations. Whether you're a beginner or an experienced user, FoneDog Screen Recorder has the features you need to capture and share your screen activities effectively.
QuickTime is a versatile tool for screen recording with audio on macOS. There are various ways to use QuickTime for this purpose, each suited to different scenarios. Here are the different ways to make use of QuickTime Screen Recording with Audio:
Suitable Scenarios: This method is perfect for recording comprehensive full-screen presentations, creating software tutorials, or preserving all on-screen activities alongside system audio.
As for when to utilize this method, it's particularly handy when you need to capture designated sections of your screen, like a singular application window or a specific region, while also including system audio.
This approach proves valuable when there's a necessity to incorporate voice narration or commentary into your screen recording, effectively capturing both screen content and audio from an external microphone.
Appropriate scenarios for this approach: This method is beneficial when aiming to craft multimedia content that seamlessly integrates your webcam, screen, and audio elements, as in the case of vlogs, video presentations, or webinars.
When to utilize this: This method becomes invaluable when you have a specific event or activity scheduled for a later time, enabling you to preconfigure your recording for advanced setup.
Each of these techniques provides distinctive features and applications, granting you the adaptability to employ QuickTime screen recording with audio across a spectrum of scenarios.
People Also ReadComplete Guide on How to Record A Live Stream on PCAll-in Guide: Get And Grab Free Screen Recorder No Watermark
In conclusion, QuickTime is a versatile and user-friendly solution for screen recording with audio on macOS. Whether you're capturing full-screen presentations, narrated tutorials, or combining webcam footage with your screen recording, QuickTime offers a range of methods to suit your needs. We encourage you to explore the power of QuickTime screen recording with audio in bringing your content to life.
For those seeking an alternative and powerful screen recording tool, consider FoneDog Screen Recorder. With its intuitive interface, advanced features, and superior audio and video quality, FoneDog Screen Recorder is the perfect companion for all your recording and content creation needs. Give it a try and elevate your screen recording experience today!
Leave a Comment
Comment

Tech Website Writing /Content Optimization
Singing, smiling, surprising every day!
So as a technical writer, it is my duty to gather effective and reliable solutions to answer questions on how to deal with the issues they are having with their devices.
Screen Recorder
Powerful screen recording software to capture your screen with webcam and audio.
Hot Articles
 /
/
INTERESTINGDULL
/
SIMPLEDIFFICULT
Thank you! Here' re your choices:
Excellent
Rating: 4.7 / 5 (based on 70 ratings)
