FoneDog Screen Recorder
FoneDog Screen Recorder
Special Offer
Special Offer


By Adela D. Louie, Last updated: January 6, 2024
Are you tired of being unable to capture the mesmerizing sounds playing on your Mac? Whether it's the pristine notes of a digital composition, the immersive ambiance of a game, or the crisp dialogue from a video, unlocking the ability to record internal audio on your Mac is a game-changer.
In this definitive guide, we're diving into the depths of how to record internal audio on Mac to reveal the secrets behind capturing those elusive internal sounds. From exploring built-in methods to utilizing third-party tools, this article is your roadmap to seamlessly record the audio playing on your Mac.
Part #1: Best Way for Recording Internal Audio on Mac – FoneDog Screen RecorderPart #2: Other Ways on How to Record Internal Audio on MacConclusion
FoneDog Screen Recorder stands out as the ultimate solution for capturing internal audio on Mac systems seamlessly. Unlike many other recording tools, FoneDog Screen Recorder offers an all-in-one package, specifically designed to record not only the screen but also internal system sounds with exceptional ease and clarity.
![]() Free Download
For Windows
Free Download
For Windows
![]() Free Download
For normal Macs
Free Download
For normal Macs
![]() Free Download
For M1, M2, M3
Free Download
For M1, M2, M3
This software is renowned for its user-friendly interface and comprehensive functionality, allowing users to effortlessly capture their screen activities while concurrently recording the internal audio playing on their Mac. Whether you're looking to document online lectures, record gaming sessions, or create captivating content, FoneDog Screen Recorder is your go-to tool, ensuring every sound and visual detail is meticulously preserved.
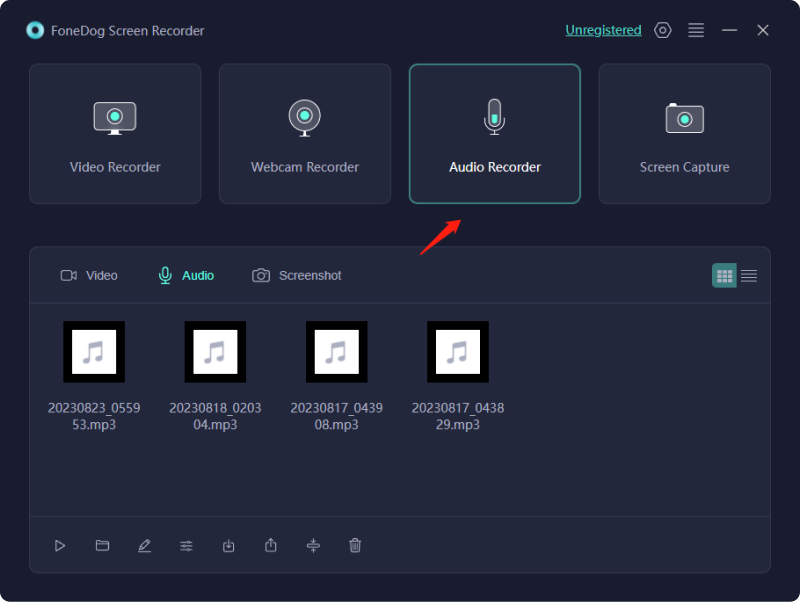
How to record internal audio on Mac using this app:
1. The program provides various recording modes. Following that, opt for the "Audio Recorder" feature to specifically target audio capture.
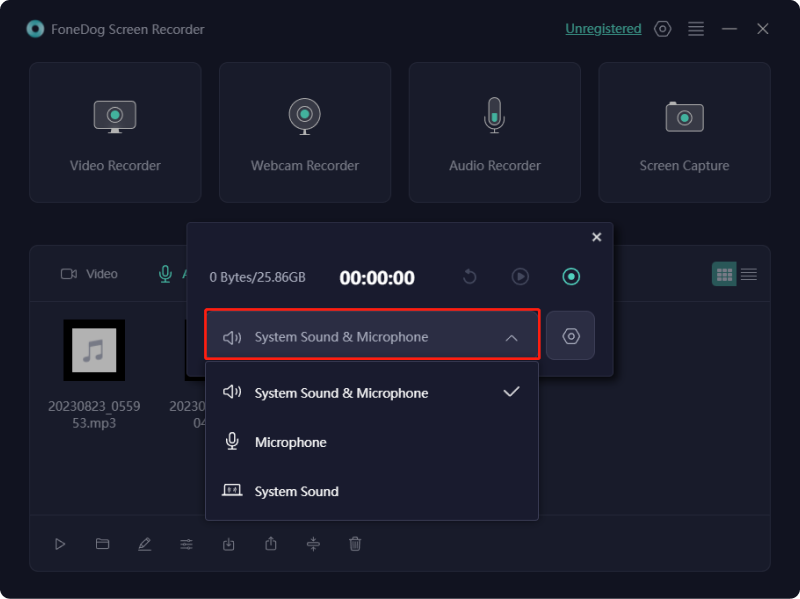
2. Ahead of recording, customize audio parameters like selecting the input source (microphone or system sound) and adjusting audio quality.
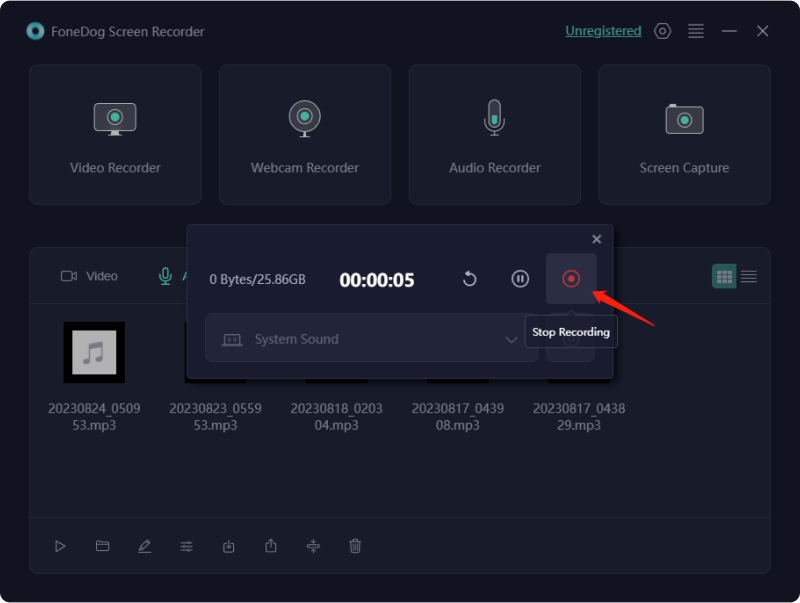
3. Subsequently, activate the audio recording by clicking the "REC" button. The software will capture the chosen audio input.

4. While recording, pause or resume audio capture as required using the respective buttons. FoneDog Screen Recorder allows editing and trimming of the audio recording to eliminate unwanted segments.
5. Once you've captured the desired audio, click "Stop" to terminate the recording.
6. Save the audio recording to your preferred location on your computer or directly share it across multiple platforms.
Recording internal audio on a Mac is pivotal for archiving moments, fueling creativity, and boosting efficiency. It captures vital audio from diverse sources like lectures, virtual meetings, or gaming, aiding information retention and content creation.
For creators, it's a tool to capture high-quality compositions and discussions independently. This capability enhances tutorials, content creation, and workflow efficiency, offering precision and clarity. So, here we outlined the ways for you to know how to record internal audio on Mac with these tools available:
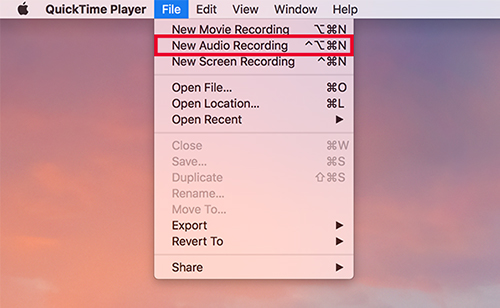
QuickTime Player is a built-in application on Mac that allows basic audio recording. However, it doesn't support direct internal audio recording without additional software or workarounds. To attempt internal audio recording using QuickTime Player:
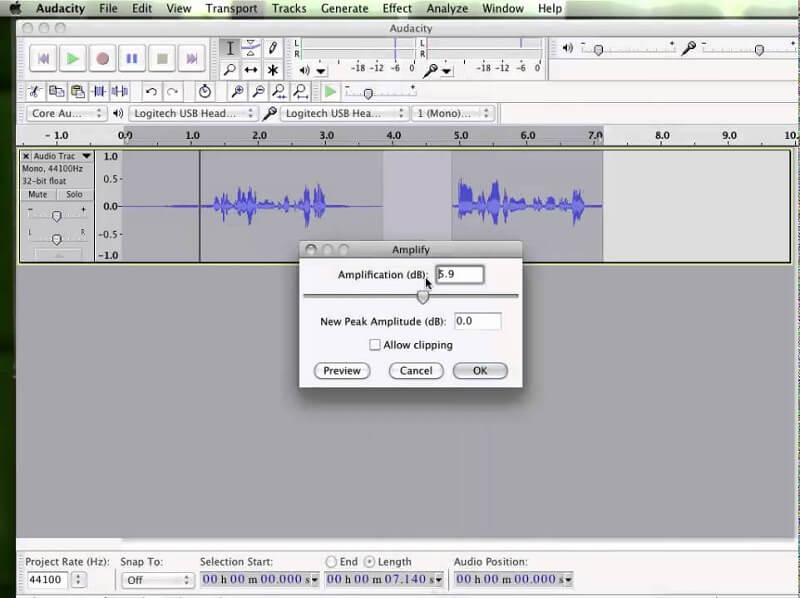
Audacity is a versatile audio editing software that can capture internal audio on a Mac. Audacity supports multiple audio formats and allows users to manipulate audio easily with its range of tools. It's a popular choice for both beginners and experienced users due to its simplicity and robust capabilities in audio editing and recording. Follow these steps to record internal audio using Audacity:
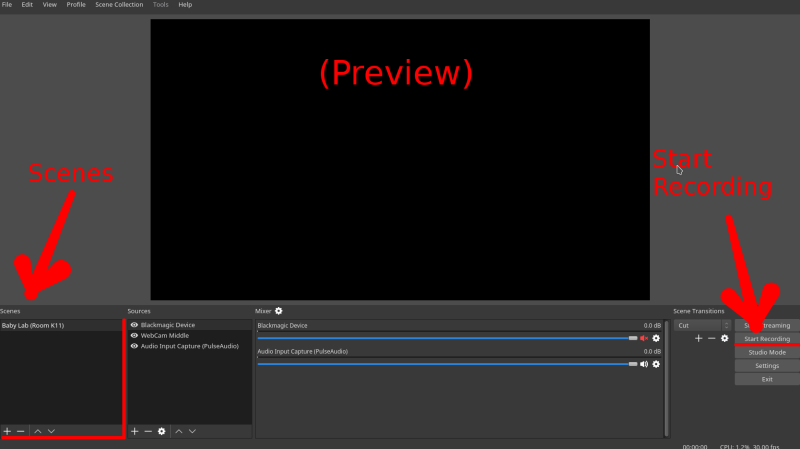
OBS is a free non-watermark screen recording software used primarily for live streaming and recording. It offers an intuitive interface with robust features, including scene composition, multiple audio sources, and customizable layouts. Here are steps to record internal audio using OBS:
Screenflick is known for its intuitive interface and robust recording capabilities. It offers various customization options for screen capture, enabling users to select specific areas, adjust frame rates, and record audio from multiple sources. Additionally, its ability to capture internal audio directly from the system makes it a preferred choice for those wanting to record system sounds along with their screen activity. To record internal audio using Screenflick, follow these steps:
Recordit serves as a straightforward screen video and audio capturing utility compatible with Mac and Windows systems. Its usage comes at no cost and is adeptly for capturing screencasts encompassing presentations, videos, and lectures. Additionally, it facilitates GIF creation and proves beneficial in capturing brief Mac screen snippets, convertible to GIFs for online sharing, typically for instructional objectives.
Nevertheless, its free use is confined to a maximum of five-minute durations and exclusively combines screen and audio recording, precluding sole audio capture. Here are the steps you must take:
People Also ReadHow to Record Audio from YouTube in 2024? [7 Methods]3 Easy Ways: How to Record Voice on Google Slides
Embrace exploration and experimentation with diverse recording ways on how to record internal audio on Mac, uncovering the best fit for your needs. By doing so, you'll uncover a treasure trove of possibilities. Revel in the newfound prowess to capture and savor the symphony of your Mac's internal sounds, unlocking a world of creativity and innovation at your fingertips. Happy Reading!
Leave a Comment
Comment

Tech Website Writing /Content Optimization
Singing, smiling, surprising every day!
So as a technical writer, it is my duty to gather effective and reliable solutions to answer questions on how to deal with the issues they are having with their devices.
Screen Recorder
Powerful screen recording software to capture your screen with webcam and audio.
Hot Articles
 /
/
INTERESTINGDULL
/
SIMPLEDIFFICULT
Thank you! Here' re your choices:
Excellent
Rating: 4.7 / 5 (based on 68 ratings)
