FoneDog Screen Recorder
FoneDog Screen Recorder
Special Offer
Special Offer


By Adela D. Louie, Last updated: March 29, 2024
Ever wished you could preserve that incredible gaming moment or capture an essential tutorial on your ThinkPad? Screen recording opens a gateway to saving those fleeting digital experiences, and this guide is your key to unlocking that power.
Whether you're a seasoned professional or just starting, this article is your go-to resource for mastering how to screen record on ThinkPad. Follow along step by step as we demystify the process, sharing expert tips and tricks to ensure you're seamlessly capturing your screen on your PC. Join us on this journey to empower your ThinkPad experience and immortalize those moments with ease.
Part 1. How to Screen Record on ThinkPad (Built-In Apps on Lenovo)Part 2. Software Available for Screen Recording on ThinkPadPart 3. Best ThinkPad Screen Recorder (with Sound)Conclusion
Here’s are the built-in app that you may use on knowing how to screen record on ThinkPad, head over below to know the steps:
If the idea of avoiding third-party tools for screen capture appeals to you, harness the built-in screen recorder on your Lenovo ThinkPad the Game Bar.
The Game Bar offers a simple yet versatile screen recording solution for Lenovo Windows’s laptops, boasting various features for capturing top-notch footage. However, its capabilities are limited, catering to basic recording needs, and it exclusively functions on Windows 10.
Using Game Bar, you have the flexibility to record either a specific portion or the entire screen, all achieved through a straightforward process. Additionally, it doubles up as a snapshot tool for grabbing screenshots.
Win + G to activate the Xbox Game Bar specifically on your Lenovo ThinkPad.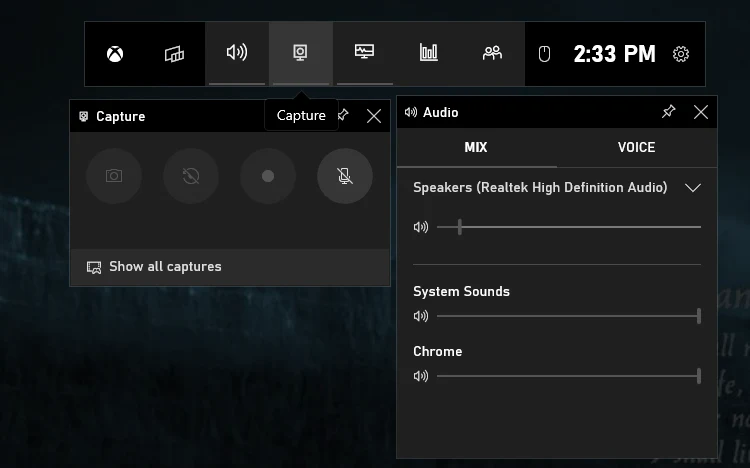
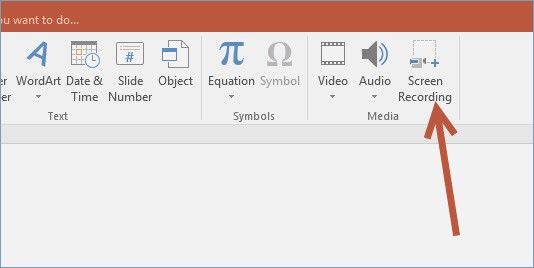
Starting with Microsoft PowerPoint can expedite your computer's screen recording or screenshot processes swiftly. Surprisingly, within the Microsoft PowerPoint software lies an often overlooked gem: the screen recording option.
Curious about how to screen record on ThinkPad? You'll need third-party software for this task. With a plethora of screen recorders out there, pinpointing the best one can be challenging. To simplify your search, we've unearthed the top-notch screen recorders suitable for Lenovo ThinkPad, encompassing:
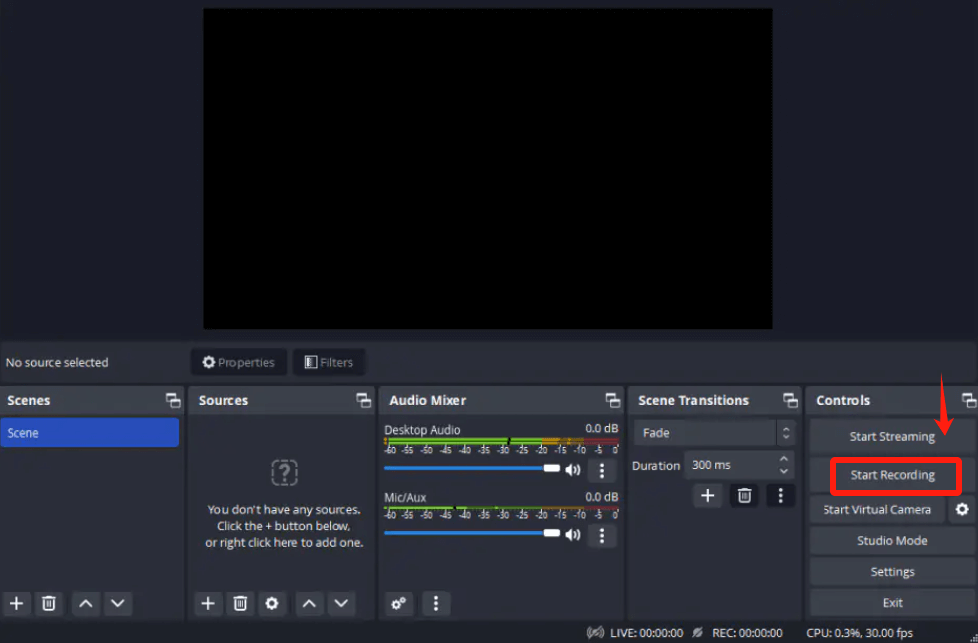
Most individuals opt for an open-source screen recorder when embarking on screen recording endeavors. That's where OBS Studio comes into play. This no-cost software seamlessly operates on Lenovo laptops and computers, simplifying video recording and live streaming. Utilizing this application, you can effortlessly capture streaming videos, high-definition gameplays, and diverse online conferences with just a few clicks.
It even facilitates recording multiple screens simultaneously. While it excels in professional screen recording, its intricate user interface might pose a challenge for beginners. Therefore, if you're a first-time user, perusing some tutorials could prove beneficial.
Similar to OBS Studio, ShareX presents itself as an open-source solution for screen capturing. This no-cost video recording software empowers users to seize any activity displayed on their Lenovo computer screens effortlessly. Using this nimble screen capture tool doesn't involve any convoluted processes.
Beyond its screen recording capabilities, ShareX extends support to managing photos and screenshots. Operating with ShareX allows you the flexibility to determine whether to capture the cursor, set timers, and even utilize the OCR function to recognize text within your images. To commence using ShareX:
You have the option of using Screencast-O-Matic to capture your computer screen. Every action you take gets documented in this recording, which can be either a video or audio containing solely your commentary. This online tool, Screencast-O-Matic, is free and serves as a screen capture solution.
It captures specific parts of your screen along with audio and camera inputs. Utilize this software to record narrated lectures or demos, converting them into course videos. It stands out as one of the most efficient apps for screen recording, ideal for crafting YouTube presentations and lessons.
The latest screen recording application available for Lenovo laptops is Movavi Screen Recorder. This software empowers you to seize your screen and effortlessly incorporate your microphone, webcam, and system audio.
Regarding its screen capture functionality, it permits you to establish time constraints for your captures, configure the display of your cursor in the recording, and annotate your video in real-time throughout the recording process. Following your recording session, utilize the editing suite to refine your captured moments.

FoneDog Screen Recorder stands out as a top-notch screen recording tool for ThinkPad devices due to its user-friendly interface and robust functionality. This software offers a seamless experience for capturing the screen activities on your Lenovo ThinkPad.
To utilize FoneDog Screen Recorder effectively on your ThinkPad for screen recording, follow these steps:
![]() Free Download
For Windows
Free Download
For Windows
![]() Free Download
For normal Macs
Free Download
For normal Macs
![]() Free Download
For M1, M2, M3
Free Download
For M1, M2, M3

People Also ReadFull Guide 2024: How to Record Screen on Windows 11Top Free Screen Recorder: Capturing Your Screen for Free
In conclusion, mastering screen recording on your ThinkPad is now within reach. Whether preserving memorable moments or creating instructional content, the featured tools like FoneDog Screen Recorder provide a user-friendly experience. Empower your ThinkPad usage by effortlessly capturing and sharing your screen activities with confidence. Happy recording!
Leave a Comment
Comment

Tech Website Writing /Content Optimization
Singing, smiling, surprising every day!
So as a technical writer, it is my duty to gather effective and reliable solutions to answer questions on how to deal with the issues they are having with their devices.
Screen Recorder
Powerful screen recording software to capture your screen with webcam and audio.
Hot Articles
 /
/
INTERESTINGDULL
/
SIMPLEDIFFICULT
Thank you! Here' re your choices:
Excellent
Rating: 4.6 / 5 (based on 79 ratings)
