FoneDog Screen Recorder
FoneDog Screen Recorder
Special Offer
Special Offer


By Nathan E. Malpass, Last updated: October 20, 2018
I use Snapchat almost every day. I use it to post videos of my work and my personal life. I also use it to communicate with other people and post snaps. Now, I’ve learned that there’s a thing called Snapchat saver. What are these Snapchat Savers? Plus, how do I actually use them to my advantage?
~Snapchat User
Part I: IntroductionPart II: Are There Actual Methods To Save Videos And Images On Snapchat?Part III: Recovering Data From SnapchatPart IV: Conclusion
People Also ReadHow to FaceTime on SnapchatHow to Delete Snapchat MessagesHow to Save Snapchat Videos in 2018
Snapchat has been one of the go-to social media platforms in this generation. And it has become one of the most popular in the entire world.
A lot of its competitors (e.g. other social media networks) copied some of the features of Snapchat.
One of the copied features we’re talking about is the part where Snapchat has disappearing images. Facebook and Instagram have these ones already.
However, there are times when you actually want to save those disappearing images. But, there’s no feature in Snapchat that allows you to do so.
One solution to this is to screenshot the said snap. But, you have to be really fast. These images disappear really quick. So, what do you have to d
As stated before, you can actually get a copy of the snap by taking a screenshot. But there’s a downside to this, people will know that you actually took a screenshot of their snap. Snapchat will notify them of this.
You might not want this to happen for multiple reasons. And again, you have to do it quickly before the snap actually expires.
If you don’t want the sender of the snap that you actually took a screenshot of it, you can try out a few methods we will outline below:
Method 1: Using Flight Mode
This is done by putting your phone in Airplane Mode before actually taking a screenshot. By putting it in Airplane Mode, the network won’t get dets that you actually took a screenshot. Here’s how to do it step-by-step:
Step 01 - When Snapchat sends you a notification, put your phone in Airplane mode.
Step 02 - Tap the notification of Snapchat.
Step 03 - Check out the snap and take a screenshot.
Step 04 - Log out of the Snapchat application. Do this on the Settings menu.
Step 05 - Close the Snapchat application.
Step 06 - Disable Flight Mode
Step 07 - Launch Snapchat again and then log in.
Method 2: Record The Phone Screen
If you don’t want to use Airplane Mode, you can try to record the screen. Usually, this feature is built into the phone whether it’s an iPhone or an Android smartphone. Here’s how you can do it for iPhone:
Recording The Screen For iOS 11 And Higher
Step 01 - Open the Control Center by swiping up.
Step 02 - Press the icon with the two circles to record the screen.
Step 03 - Open Snapchat and check out the snap you want to record for a few seconds.
Step 04 - Close Snapchat.
Step 05 - Go to the Home screen again.
Step 06 - Open Control Center again.
Step 07 - Stop recording of the screen.
Step 08 - Go to the Camera Roll and check out the video you have just recorded.
Step 09 - Pause it at the moment you actually checked out the snap.
Step 10 - Take a screenshot.
Recording The Screen For Android 5.0 (Lollipop And Higher)
We will use the application DU Recorder for this. Here’s how to do it step-by-step:
Step 01 - Download and install the DU Recorder application.
Step 02 - Launch the app and follow the steps to record the screen.
Step 03 - Open the video you have just captured.
Step 04 - Take your screenshot.
Step 05 - You will see the snap’s screenshot inside the Gallery.
You can also use Google Play for recording the screen.
Step 01 - Launch Google Play Games.
Step 02 - Find the Record Gameplay feature.
Step 03 - Tap this option.
Step 04 - Select the resolution you want.
Step 05 - Press Launch.
Step 06 - Find the bubble located at the bottom left-hand side of the interface. There is a Start button here. Don’t do anything with it yet.
Step 07 - Launch Snapchat and visit the inbox.
Step 08 - Now it’s time to press the Start button.
Step 09 - Stop the recording after you have gone through the snaps. A notification will be sent to your device stating that the video has already been saved.
Step 10 - Launch the video you have recorded.
Step 11 - Pause it at the moment you want.
Step 12 - Take a screenshot.
Step 13 - Check out the snap screenshot on your Gallery.
Method 3: Utilizing Snapchat Savers
There are applications you can use called Snapchat Savers to save the snaps you check out. These are available for both iPhones and Android phones. These are our recommended applications:
*SnapSave
*Casper
*SnapCrack
*SnapBox
*SnapKeep
You can simply download and install these Snapchat Savers on your iPhone or Android smartphone. Follow the steps they provide and you’re on your way to saving snaps.
There are tools you can use to recover data from Snapchat. We recommend FoneDog’s iOS Data Recovery Tool AND Android Data Recovery tool for iOS and Android phones, respectively.
Let’s check out FoneDog’s iOS Data Recovery first:
01 - It helps you recover various files such as photos, videos, documents, messages, etc.
02 - It helps you recover data from iTunes, iPhone, and iCloud.
03 - Compatible with the latest model of iPhones. Compatible with other iPhone models as well.
04 - It is 100% secure. It doesn’t contain any malware or viruses that can bring trouble to your device.
05 - It has one of the world’s best success rate.
06 - A preview is made available. You can preview the files before actually restoring it.
07 - Data is kept very safe. No data will be overwritten during the process of using the tool.
08 - It gives you a 30-day free trial. You don’t have to shell out money before actually purchasing it.
Here’s how to use it on your device:
Step 01 - Download FoneDog Toolkit on its official website. Make sure you have the latest version of iTunes downloaded and installed. Do not open iTunes when you are currently using FoneDog on your device. This is to prevent automatic sync. You can also deactivate the automatic sync feature on iTunes. Go to Preferences and then Devices. After which check out the box that says “Preven iPods, iPhones, and iPads from syncing automatically.”
Step 02 - Launch FoneDog Toolkit on your device.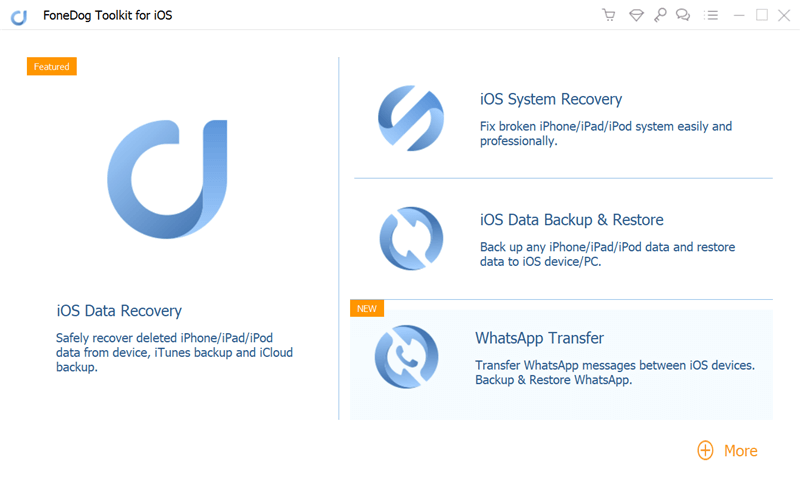
Step 03 - Connect your Apple device to your computer using a cable that comes with it. Select Recover From iOS Device.
Step 04 - Press Start Scan.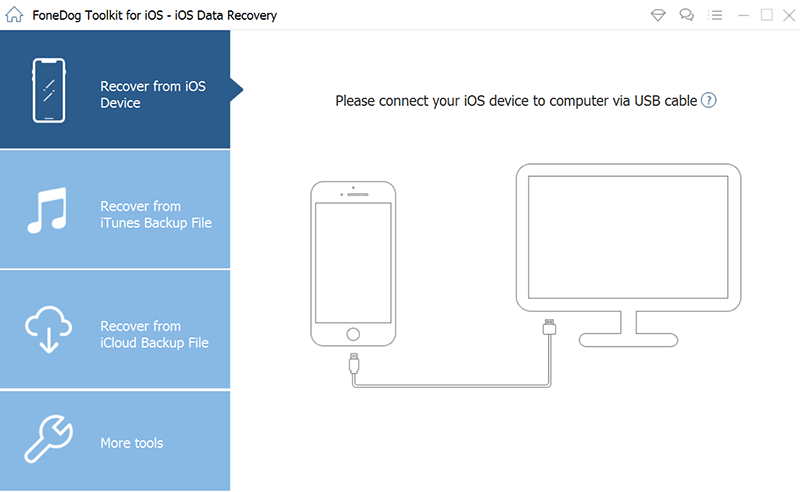
Step 05 - All data category will be listed on the left-hand side of the screen. Select the files you want to restore
Step 06 - Press Recover button.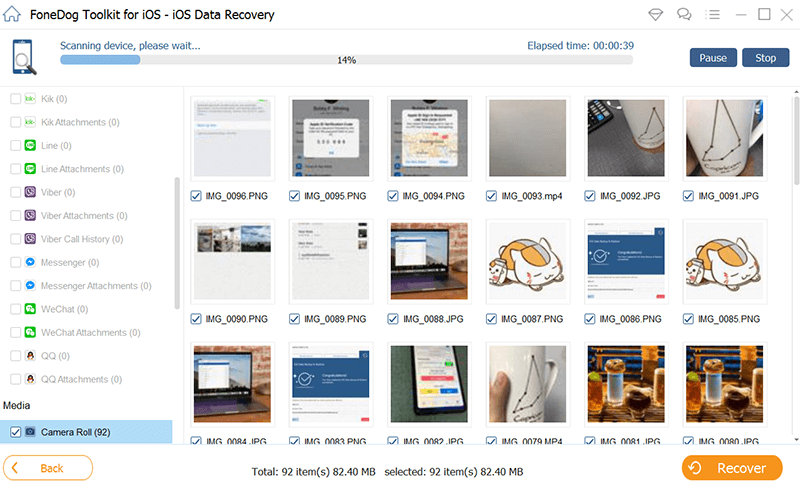
Step 07 - Select a location where you want to save the files.
Step 08 - Press Recover again.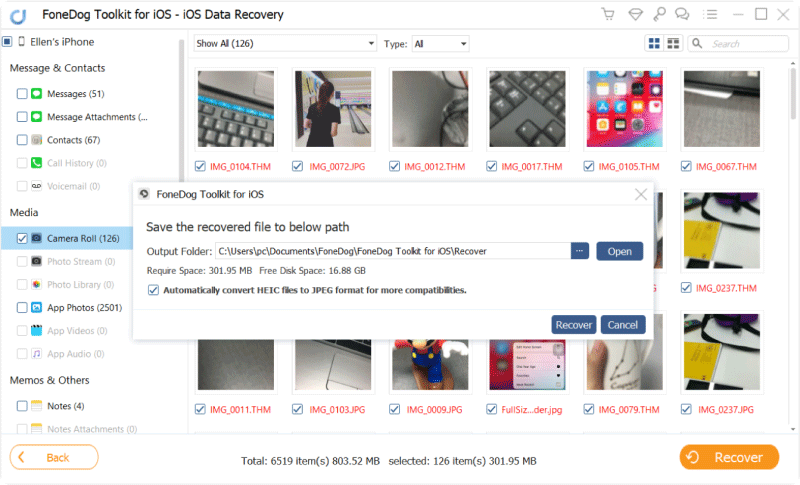
Now, that’s for iOS. How about Android phones. Well, we use FoneDog’s Android Data Recovery. Below are the features and advantage of the said tool:
01 - It helps you recover various files such as photos, videos, documents, messages, etc.
02 - It helps you recover data from various applications.
03 - Compatible with approximately 6000+ Android devices.
04 - It is 100% secure. It doesn’t contain any malware or viruses that can bring trouble to your device.
05 - It has one of the world’s best success rate.
06 - A preview is made available. You can preview the files before actually restoring it.
07 - Data is kept very safe. No data will be overwritten during the process of using the tool.
08 - It gives you a 30-day free trial. You don’t have to shell out money before actually purchasing it.
Here’s how to use it step-by-step:
Step 01 - Download FoneDog Toolkit on its official website.
Step 02 - Launch FoneDog Toolkit on your device.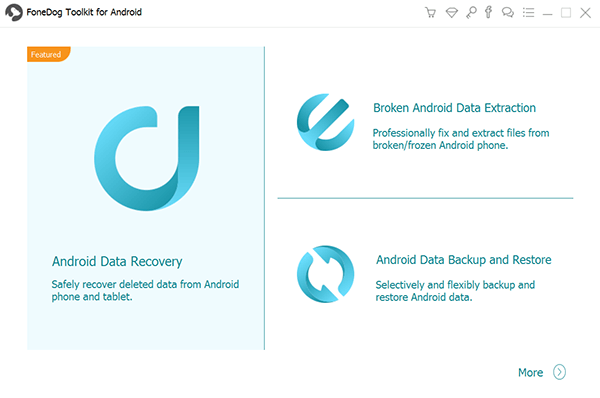
Step 03 - Connect your Android device on your computer.
Step 04 - Activate USB debugging on your Android phone for it to detect the device.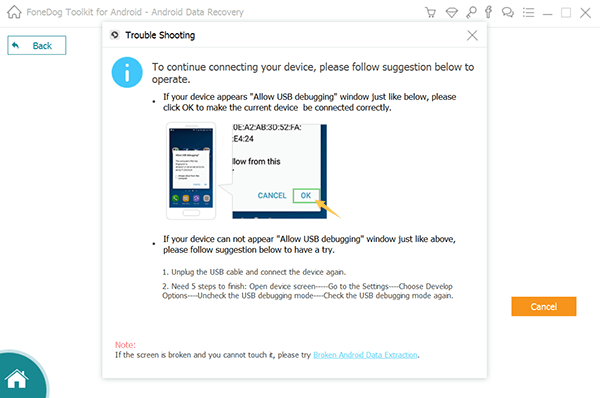
Step 05 - After it has detected the Android phone, check out the data types you want to recover.
Step 06 - Press Next for the scanning process to start.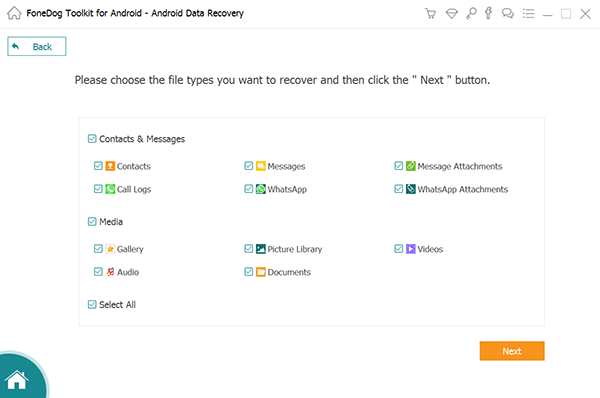
Step 07 - Preview the data one by one. Select the files you want to recover.
Step 08 - Press Recover.
Step 09 - Choose a location you want to save the files to.
Step 10 - Press Recover again.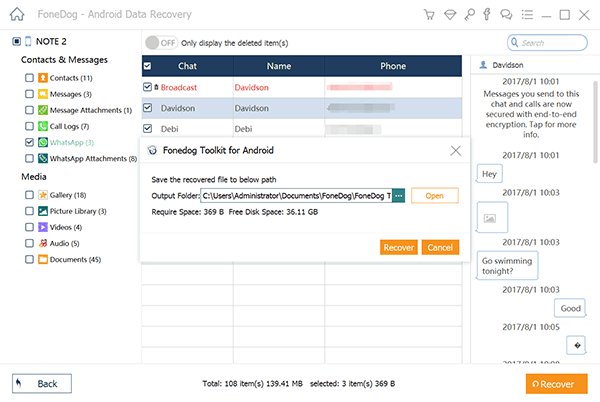
It’s actually easy to save snaps from Snapchat. You can simply follow this guide to do so. You can use a few apps to do it as well.
There are applications for both Android and iOS devices and it’s best to use them to your advantage.
Finally, if you want to recover Snapchat data, you can use iOS Data Recovery and Android Data Recovery by Fonedog.
Leave a Comment
Comment

iPhone/Android Devices’ Maintenance Expert
Staying home, listening to music, writing tech articles
Many people asked me to repair their mobile phones so I have a lot of experience in mobile phone repair, and I know a lot about Android or Apple phones.
Android Data Recovery
Recover deleted files from Android phone or tablets.
Free Download Free DownloadHot Articles
 /
/
INTERESTINGDULL
/
SIMPLEDIFFICULT
Thank you! Here' re your choices:
Excellent
Rating: 4.7 / 5 (based on 67 ratings)
