FoneDog Screen Recorder
FoneDog Screen Recorder
Special Offer
Special Offer


By Nathan E. Malpass, Last updated: August 9, 2018
This article will introduce how to access iCloud from iPhone, keep reading!
The iCloud feature was first released back on October 11, 2012. Since then Apple users have benefited from its storage features. The iCloud software allows users to store and share files among all devices linked to the account.
Also over the years, it has developed the capability to locate lost equipment and link information among all devices so that it can be readily accessible to you when you need it. It is user-friendly that it would allow you to access iCloud directly from your iPhone for you to see what you have on your storage.
Part 1: How to Access Files on iCloud Storage on an iPhone?Part 2: How to Access iCloud Settings on the iPhone?Part 3: How to Access Files on iCloud Drive on the iPhone?Part 4: How to Access More Files Saved on iCloud?Part 5: Conclusion.
Important Note: You would need to have a stable internet connection when attempting to upload files to your iCloud drive. Also, you can store any type of file as long as it is below 5GB because that is the initial storage allowance you would get. If you need more you can purchase additional storage starting at 50GB for $0.99 a month.
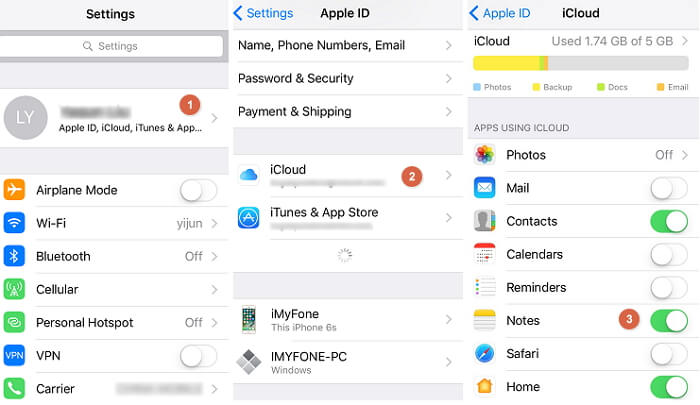
There has been a new development to the iCloud software after the iOS 10 was released. You are now able to access your iCloud drive straight from your iPhone. Take note though that on your iPhone the app should be turned on. To do so follow these steps:

With new iOS versions that came out, there have also been changes to the interface of all Apple devices. This caused a little bit of confusion with iDevice users since they have gotten used to the old format. It may look a bit more complicated to access your iCloud settings on your iPhone but it is actually made easier.
Here's how:
We have to admit that there will be instances that our iPhone memory is not enough hence the benefits of having some of your other files stored via iCloud. But what if the 5GB allotted capacity is not enough for you? Below are the steps to subscribe to additional storage. Take note though that this would incur monthly recurring charges so if you want to save a buck this is not the option for you.
But if you badly need it, read on.
You would then be prompted to log on using your iCloud account to complete the transaction. The change in your storage plan would be reflected immediately once you have confirmed your purchase.
Admittedly the iCloud Drive is pretty useful in storing important files and having easy access to it when you need it. But there are other data that you won't be able to access using your iCloud on your iPhone (i.e. deleted ones). To make this process feasible for you we proudly introduce the FoneDog Toolkit-Data Recovery.
This software would allow you to access all your iCloud Drive contents from your iPhone with ease. It serves as a bridge between your computer and iDevice. It's secure and 100% safe and works even with the latest Apple models i.e. iPhone X, iPhone 8+ and even the new iOS 11.
There are just a few simple steps you need to follow in order for you to recover files that are not initially available on your iCloud. There are three ways to recover your data so read on to learn more about it.
Download and Try this FoneDog iOS Data Recovery before you Buy! Try it by clicking the download button below.
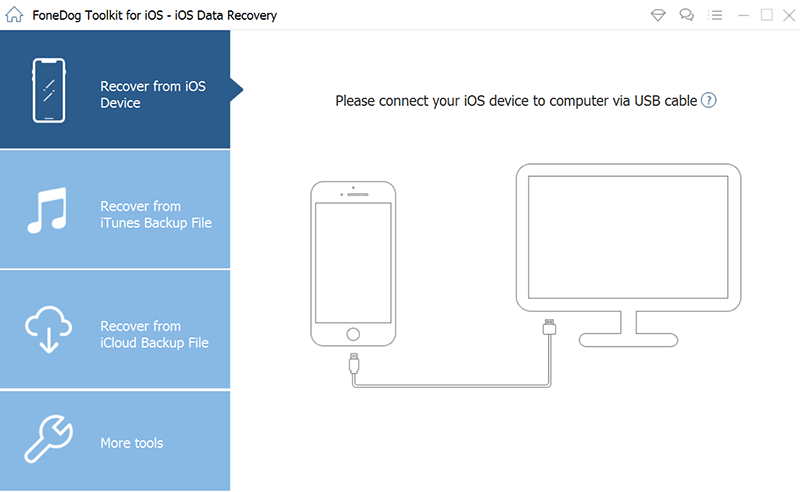
Download and Install the FoneDog iPhone Data Recovery Toolkit. Once the installation is complete launch the software. You can now connect your iPhone (use the original USB cable that came with your device to avoid any errors), once your device is detected go to "Recover from iOS Device" then click on "Start Scan".
Important Note: Make sure that before you launch the FoneDog Toolkit you have already downloaded the latest iTunes version. It is not advisable to run both programs at the same time.
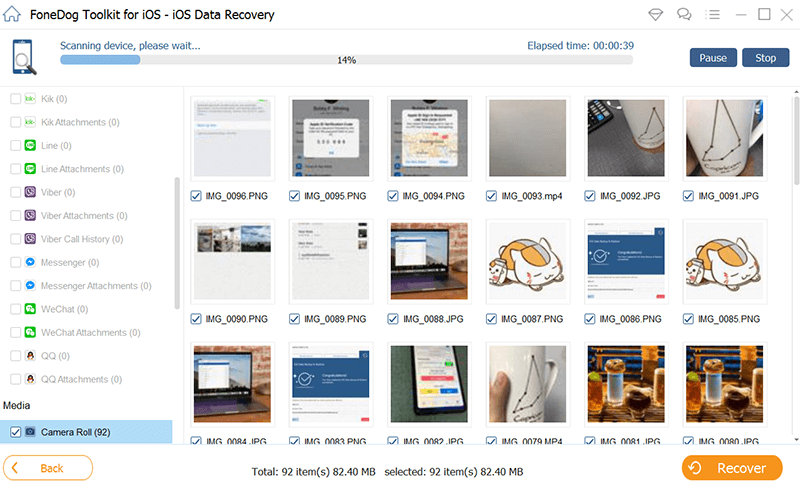
The toolkit will now scan your iPhone for any data that may have been deleted or archived that you could not locate. This would take a couple of minutes depending on the number of files stored on your iPhone. Once the scan is done you will be able to see a list of all found data.
The toolkit also has a progress bar that would allow you what files are being recovered while the process is ongoing so even in the middle of it you can click on "Pause" if you already found what you're looking for.
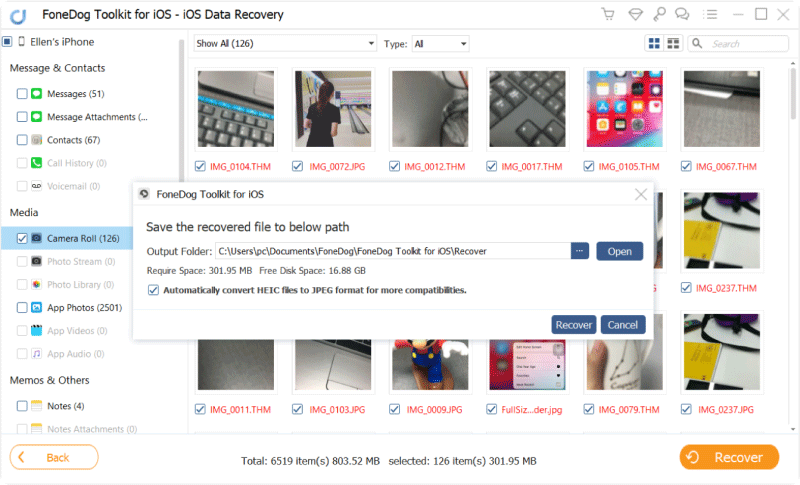
Once you have reviewed and selected which files you would need to retrieve, click on the "Recover" button. This will start the process of saving the files you have chosen. Just make sure you selected which location to save it to on your computer
People Also ReadGuide: Effectively Recover Photos from iCloudSolved! Restore iPhone from iCloud or iTunes Backup
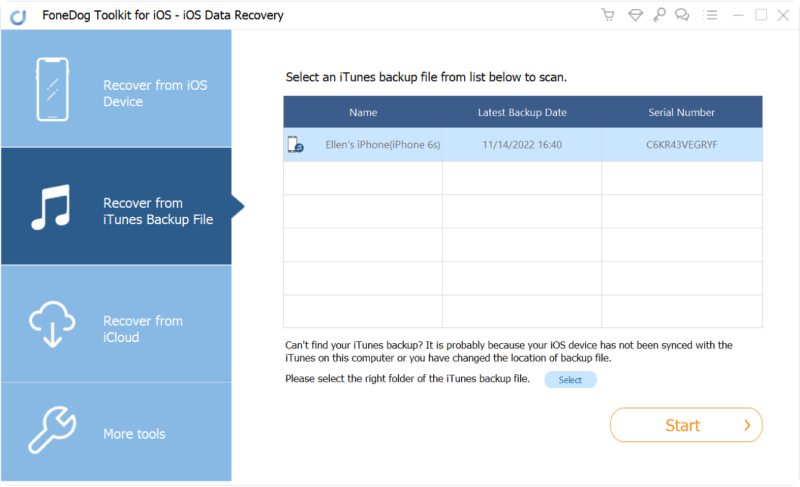
On the main dashboard of the FoneDog Toolkit click on "Recover from iTunes Backup File". If you have several created backups stored on your computer via iTunes you will see a list all you need to do is pick the one you need then select on "Start Scan", the toolkit will now start scanning all the files in it.
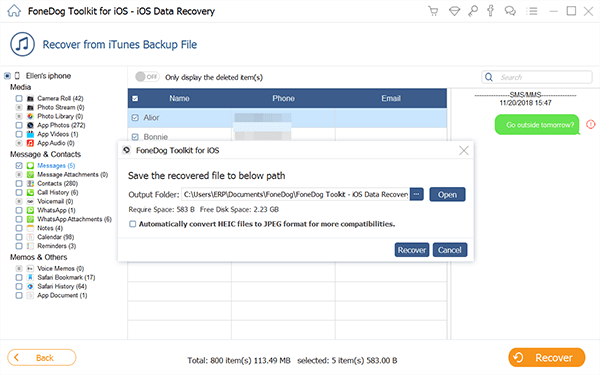
Once the scan is completed you will now be able to view the files that were deleted from your iPhone but have been backed up on iTunes. You would see all are categorized based on the type of file i.e. photos, messages, contacts. Once you have chosen which ones you would need, click on the "Recover" button. This will save them on your chosen path on your computer.
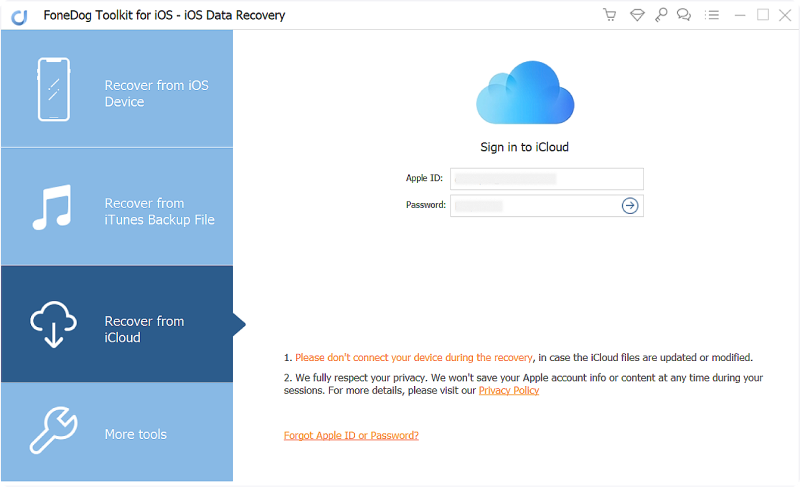
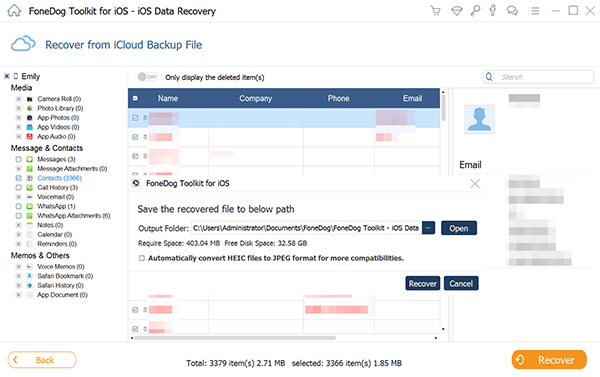
You would need to be on the main dashboard again of the FoneDog Toolkit-iOS Data Recovery so you can now select "Recover from iCloud Backup File". The next prompt would ask you to log in using your iCloud credentials. FoneDog is a secure software that values sensitive information so can put your mind at ease that it won't store your account information.
Once logged in to iCloud you will be able to see all that you have backed up. You can now choose the backup file you want to restore then click on the "Download" button. Then you would need to click on the "Next" button to begin the process of scanning your iCloud data, which would take a few minutes to complete
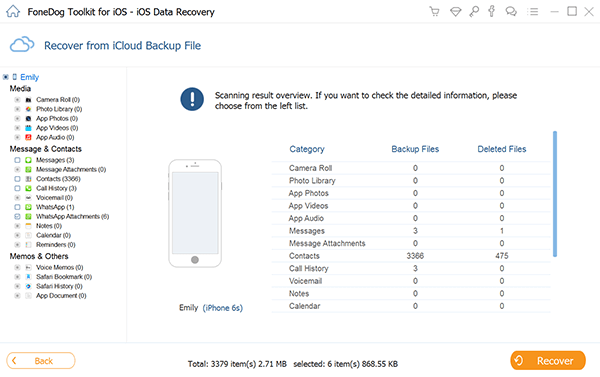
After the scan is completed you will again be able to see all the files categorized on the left side of the window and all can be previewed one by one so you can choose which ones you would need to retrieve. When you have made your selection all you need to do is click on the "Recover" button to save the files to your computer.
Important Note: Since iCloud runs on internet connectivity you won't need to have your iPhone plugged to your computer. Just as long as you have a stable connection it shouldn't encounter any interruptions while the scan and download are ongoing.
It is really a big convenience to iPhone users when the accessibility of iCloud was improved. You can now directly do it from your iPhone and have access to your files stored on iCloud even when using multiple devices. You can share it with anyone as well.
Although if you come to a point where there are some files that may have been lost or deleted you would an alternative way to recover it. That's why the FoneDog Toolkit-iOS Data Recovery was created. To give iDevice and iCloud users the ability to get back what was thought to be lost completely. It works all the time and was designed in a way to function smoothly with backups created either via iTunes or iCloud.
You can recover all types of data not just documents. Download the software now and have complete peace of mind that you have the FoneDog Toolkit to turn to when you find yourself at lost for solutions to problems such as getting access to files from your iCloud.
Leave a Comment
Comment

iPhone/Android Devices’ Maintenance Expert
Staying home, listening to music, writing tech articles
Many people asked me to repair their mobile phones so I have a lot of experience in mobile phone repair, and I know a lot about Android or Apple phones.
iOS Data Recovery
3 Methods to recover your deleted data from iPhone or iPad.
Free Download Free DownloadHot Articles
 /
/
INTERESTINGDULL
/
SIMPLEDIFFICULT
Thank you! Here' re your choices:
Excellent
Rating: 4.6 / 5 (based on 106 ratings)
