FoneDog Screen Recorder
FoneDog Screen Recorder
Special Offer
Special Offer


By Adela D. Louie, Last updated: August 7, 2019
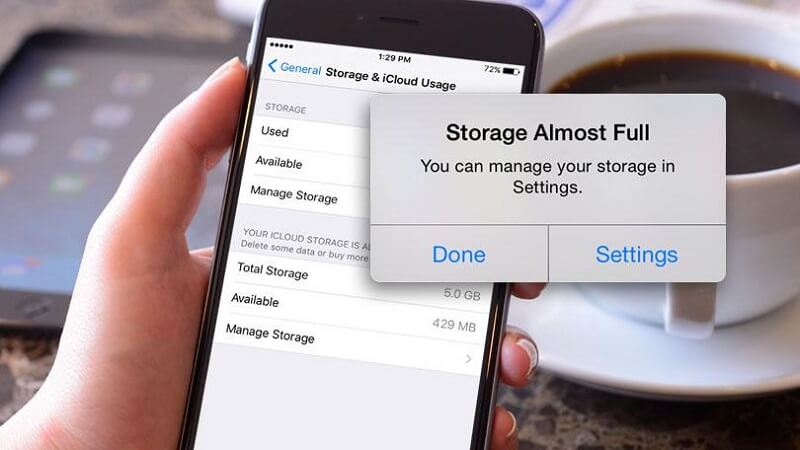
One of the most common issues that every iPhone user experience is that when they receive a pop-up message that says “Storage Almost Full”. Yes, we know that every iPhone devices come with a huge amount of memory that you can use for you to store all of your important data such as your text messages, contacts, and more. However, there are still some data that actually comes with a huge size such as your photos and videos.
Today, we are going to show you on how you can fix iPhone storage full with the most effective tricks that we have come up with based on researches.
Part 1: Backup Your Data on iPhone Before Cleaning it Up – A Must!Part 2: Getting Rid of “iPhone Storage Full”Part 3: Conclusion
People Also ReadiCloud Storage Full, How to Manage?How to Clear iCloud Storage
Before you go ahead and delete some data on your iPhone device, you have to make sure that you have backed-up all of the important ones. You know, just in case that they might get deleted from your iPhone device.
And when it comes to backing up your data on your iPhone device, the FoneDog iOS Data Backup and Restore is the perfect tool that you can use. This program can backup all of your text messages, contacts, photos, videos, and more. And the best thing about the FoneDog iOS Data Backup and Restore is that you can actually selectively choose the data that you want to backup and restore. This means that you choose just the data that you want and not backup those data that you no longer want to backup nor restore on your iPhone device.
Now, to start backing up your data on your iPhone device using the FoneDog iOS Backup and Restore, here is a quick guide that you can easily follow.
Step 1: Start the Program and Claspt your iPhone to PC
After being able to get and installed the FoneDog iOS Data Backup and Restore, then have it run on your PC. Once that the program is running, go ahead and clasp your iPhone to your PC using your USB cable.
And once that the FoneDog iOS Data Backup and Restore detected your iPhone device, go ahead and choose the iOS Data Backup and Restore from it a very main interface. Then, on the next page, go ahead and click on the iOS Data Backup.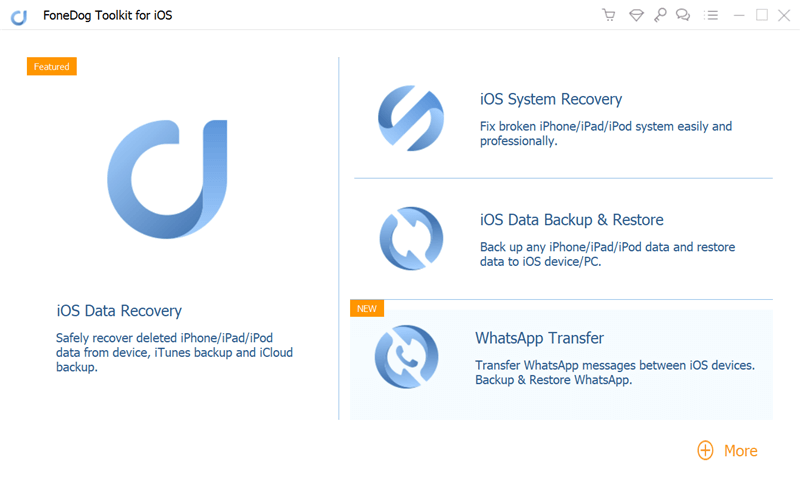
Step 2: Choose Your Preferred Mode
Then on the next page of the program, you will be asked on what type of backup you would want to have. You can choose from the “Standard Backup” – which is the normal way of backing up your data without having any passwords.
And the other one is the “Encrypted Backup” – wherein you can back up your iPhone data with a password that will serve as its protection. That way, only you can access your backup files and that they will be safe.
After choosing the backup mode, go ahead and click on the “Start” button for you to proceed with the next step.
Step 3: Choose the Data You Wish to Backup
On the next page of the program, the FoneDog iOS Data Backup and Restore will then show you all the file types that you can back up like your photos, messages, contacts, call logs, and more. From there, you will be able to selectively choose just the data you want to backup from your iPhone device. And after choosing the files you want to backup, go ahead and click on the Next button.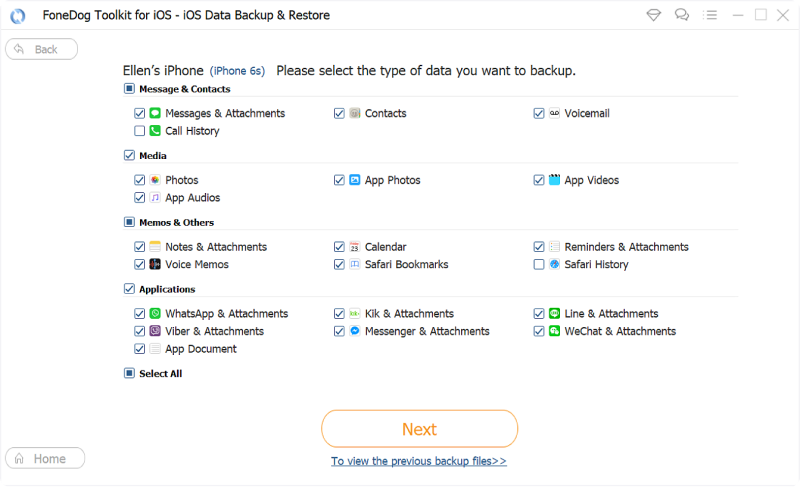
Step 4: Backing Up Your Data
Once that you have clicked on the Next button, the FoneDog iOS Data Backup and Restore will then start to back up all the files that you have chosen earlier. And once that the backup process is complete, you will then be seeing your backup file with the name and the size on it.
You can also click on the “Backup More” button if you wish to back up some more of your data or choose the “Restore iOS Data” if you want to restore them to your iPhone or to another iPhone device.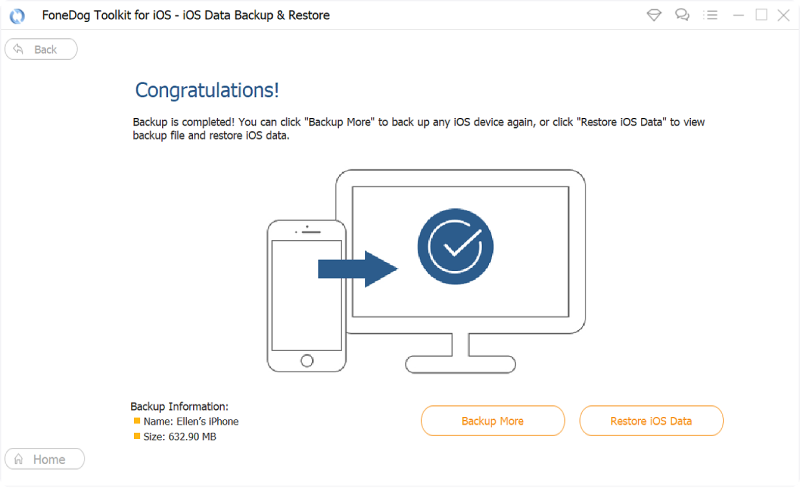
Now, if in case you are done cleaning up your iPhone device to make more room for your storage and want some of your backup data to be restored back to your iPhone device.
Step 1: Go to iOS Data Restore
Go ahead and connect your iPhone device to your PC using via your USB cable. And once your device is detected, go ahead and choose iOS Data Backup and Restore. Then go ahead and select the iOS Data Restore.
Step 2: Choose Your Backup File
Then after that, the FoneDog iOS Data Backup and Restore will show you all of the back-ups that you have. You will be able to identify them by the date and the size of your backup file. From there, go ahead and choose the backup file that you want and then click on “View Now” below your screen.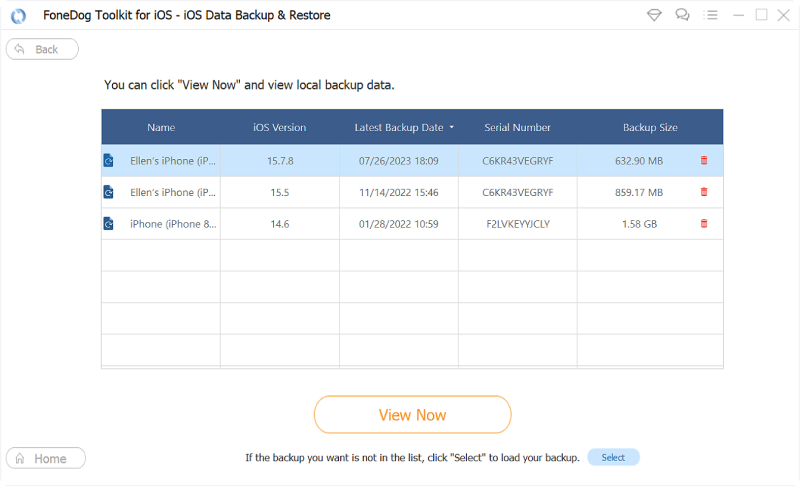
Step 3: Start Scanning Backup File
Once that you click on the View Now button, the FoneDog iOS Data Backup and Restore will then start scanning your backup files. So all you have to do from here is to wait until the process is complete.
Step 4: Restore the Data You Want
Once that the scanning process is complete, the program will then show you all the data that your backup file contains. From there, you can go ahead and preview them for you to be able to choose just the data that you want to restore on your iPhone. Once that you are done choosing the data that you want to restore, you can either restore them to your iPhone or restore them on your PC. Just choose from the two buttons below your screen.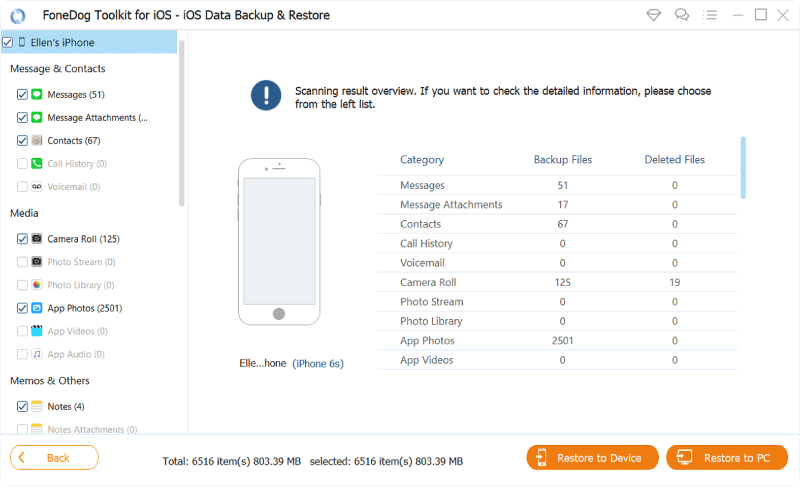
So now, you were able to know how you can easily backup your data from your iPhone device and have them restored as well once that you are done cleaning up your iPhone device. And because of that, it is now time for you to free up space on your iPhone.
So since that you will not be able to easily get away with the iPhone storage full message, then we should go ahead and have this removed from your iPhone. Here are some ways on how you can take care of this issue.
Since most of us love to have a lot of applications on our iPhone device, time will come that you would not even use the past apps that you downloaded. That is why you should consider on removing all the apps that you no longer need.
Photos are one of the biggest data that you can have on your iPhone device that is why you should also consider on deleting those that you do not want anymore. You can remove those screenshots that you do not need anymore or remove any photos or videos that are similar.
Since the Safari browser is one of the default apps that you have on your iPhone and is the best browser that you can use, then most probably you have a lot of caches stored on your iPhone. And for you to clear them up, here is what you need to do.
Once that you are done removing all of your caches from Safari, then go ahead and restart your iPhone device by doing a press and hold at the power button.
Being able to have your iCloud drive on your iPhone is one of the best options for you to keep your data be monitored from other devices that are using the same iCloud account. However, this is also one way as to why your iPhone storage is full. So in order for you to free up some space, just go ahead and disable this feature.
Once that you reset your Settings on your iPhone device will actually not remove any of your data except for your settings and your preferences. So that actually means like other data such as your contacts, text messages, photos, and other data will not be removed from your iPhone device. And for you to reset your Settings, here is what you need to do.
Text messages on our iPhone device can be seemingly harmless, but they are still occupying a lot of space on your device. This also includes if you are receiving tons of photos. So, for you to be able to clear out some space on your iPhone device, just go ahead and read through your old conversation and delete those that you think you no longer need.
Now, in order for you to be able to manage your text messages on your iPhone device, here is what you need to do.
Photo Stream feature on your iPhone device actually lets you keep all of your pictures between all iOS device that you have including your Mac. And because of this, once that you try to take a photo on one iOS device, the Photos Stream feature will also have it uploaded to your iPhone. This is one of the reasons why this feature is also helpful.
But, since you are dealing with fixing full storage issue on your iPhone device, then this might not be a good option for you. So, for you to save more space on your iPhone device, go ahead and have this feature disabled on your iPhone by doing the following steps.
And with that, once that you have disabled this feature, your photos will no longer be synced to any of your iOS or Mac device. But once that you are done dealing with your iPhone storage full problem, then you can go ahead and turn in back on if you want to.
As you can see, there are a lot of ways on how you can deal with the problem iPhone storage full. You just need to know which of your data are no longer needed so you can go ahead and have them removed from your iPhone device. That way, you will be able to clear out more of your space.
Also, keep in mind that before you go ahead and try other things on your iPhone device, you must always have your precious data be backed up. This is for you to have them be restored in case that your data accidentally be deleted on your iPhone.
Leave a Comment
Comment

Tech Website Writing /Content Optimization
Singing, smiling, surprising every day!
So as a technical writer, it is my duty to gather effective and reliable solutions to answer questions on how to deal with the issues they are having with their devices.
Hot Articles
 /
/
INTERESTINGDULL
/
SIMPLEDIFFICULT
Thank you! Here' re your choices:
Excellent
Rating: 5.0 / 5 (based on 1 ratings)
