FoneDog Screen Recorder FoneDog Screen Recorder
Special Offer Special Offer
Only Only
$4.49 $4.49
to get a ONE-month license to get a ONE-month license
Sale ends in xx days Sale ends in xx days
Buy Now
sale

How to Transfer Music from iTunes to iPhone

By Vernon Roderick, Last updated: September 28, 2019

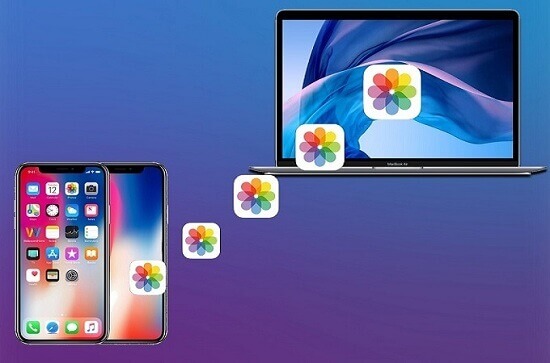
Music soothes the souls, lifts the spirit and puts roses back in our cheeks. As an iPhone or Apple fan, iTunes becomes ineluctable at some point. But your skills will be put to test when you attempt to transfer music from iTunes to iPhone. If you want it to run fast, securely and without distorting the quality of your audio files, you need apt hacks and tricks. Interestingly, you may swap music to iPhone without invoking iTunes. This transforms your iPhone into a music player encapsulating your iTunes library.

Today, we will learn the most favorite and easy ways to sync the iTunes Music Library to an iPhone for an immersive experience on the go.

Part 1: How to Transfer Music from iTunes to iPhone without iTunes Part 2: Manual & Automatic Ways Sync iTunes Music Library to iPhonePart 3: Other PossibilitiesConclusion

Part 1: How to Transfer Music from iTunes to iPhone without iTunes

To transfer music from iTunes to iPhone without iTunes, first of all, you are supposed to check the following points.

  • Get iTunes Updates: You must run an up-to-the-minute iTunes version before attempting to pair your devices. iTunes automatically checks for updates whenever you run it. However, you can upgrade it by hitting the Help menu and select Check for Updates. Once you have updated iTunes, shut it down.
  • Rule of the thumb: iTunes only supports a one-way synchronization to your iOS with no countercurrent transmission. As long as you’ve songs in your iTunes library and not your iPhone, they won’t be deleted.

Now, we are going to introduce a program for the quick transfer here:

As the fastest iPhone transfer, FoneDog offers a free and comprehensive tool to import files from your iTunes library in one click. It’s equipped with an intuitive interface to easily manage media files across a variety of devices. Even better, it provides a one-stop utility suite with a data recovery tool, disk cleaner and free nifty features for Mac OS. FoneDog Phone Transfer is blazing the trail in moving media files across your devices securely without data hemorrhage.
Transfer Music from iTunes to Computer

How to Use FoneDog to Transfer Files

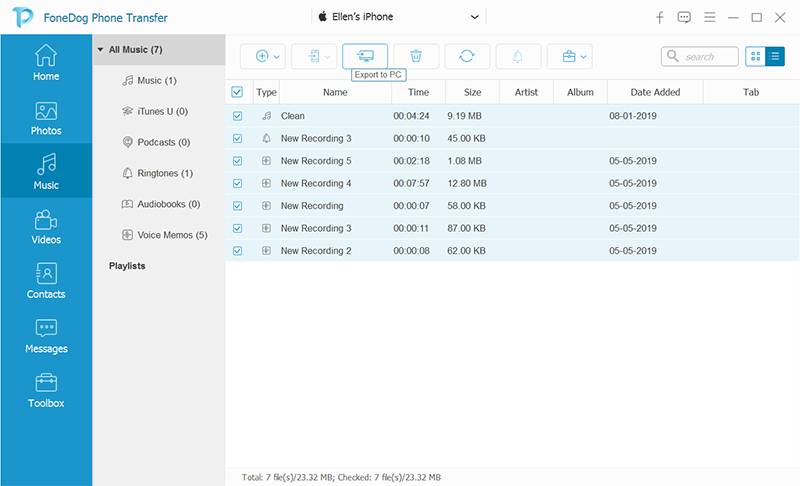
Forget fancy; FoneDog embodies a no-frills program that will do the job with minimal fanfare and efforts. You only need to download and install the tool before pairing your devices.

  1. Open FoneDog Phone Transfer after once you’ve downloaded and installed it.
  2. Pick out your preferred iTunes to iPhone transfer option.
  3. Pair your devices and tap on “Trust this Computer” on your iOS.
  4. Cherry-pick the Data Type you wish to transfer. In this case, select Music and hit Transfer.
  5. Generate or predetermine the destination of your swapped files.

Free Download

Part 2: Manual & Automatic Ways Sync iTunes Music Library to iPhone

Automatic Music Transfer

Syncing music automatically makes it easy to import music to the iPhone in a jiffy.

  1. Launch the iTunes app.
  2. In the top left section of the iTunes window, hit the iPhone icon, on the right of the media options.
  3. On the iTunes window, hit the Music menu tab at the left pane.
  4. To perform a batch files transfer, click on the radio button near the Entire music
  5. If you want to skim off certain songs from iTunes, then hit the radio button adjacent to Selected playlists, albums, genres, and artists. You may want to stipulate the playlists, genres, albums, and artists below-browse down and click on the items you wish to sync.
  6. Finally, to begin syncing files automatically to your iPhone hit Apply.
  7. Allow iTunes and your iPhone to pull it off from there.

Set Up The Manual Transfer Mode

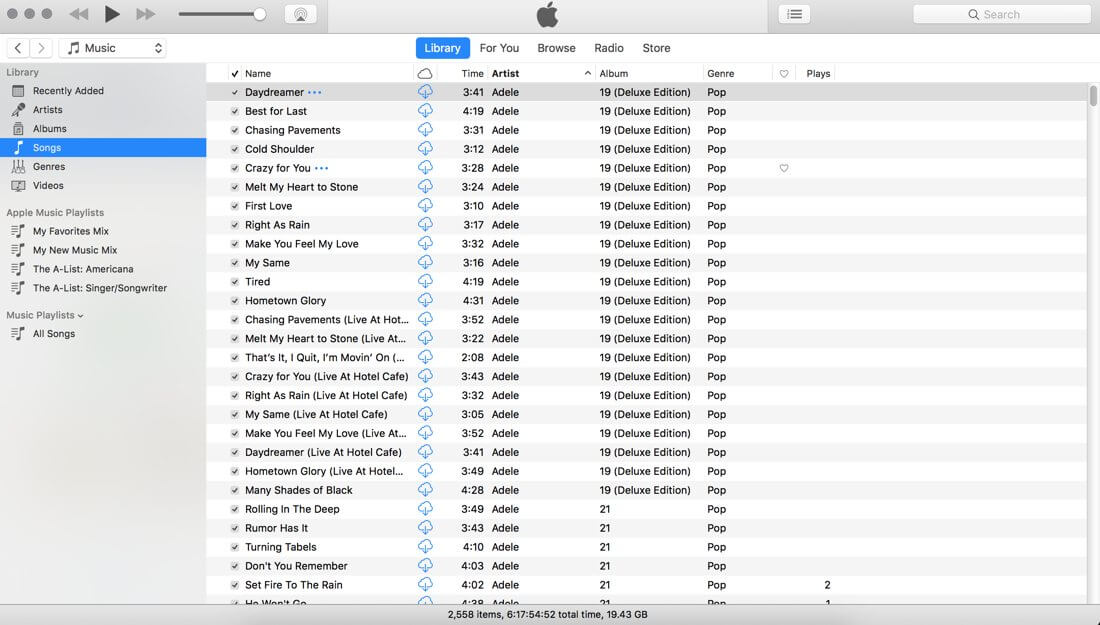
Alternatively, you can reconfigure the program to sync manually. This method translates to better control over iTunes syncing to your iPhone. Ensure you switch from the automatic mode. To do this, navigate to the upper iTunes window, hit the Summary button from the left panel. Click the checkbox neighboring the Manually manage music function to activate this mode. Lastly, click on Apply to save settings. Follow the steps below to perform a manual transfer with a simple selection and dropping onto your iPhone.

  1. Go to the left of iTunes window panel, pinpoint the Library Beneath this, hit the Songs option. Pre-select Albums, Genres or Artists, and then scroll through to home in songs or media files that match.
  2. You can now effortlessly yank and drop songs from the main iTunes screen to your iPhone through its icon in the left panel below Devices. For a quick batch transfer, latch on the command key and pick out your files.

Sync iTunes Music Library to iPhone


Part 3: Other Possibilities

Import Music from iCloud to iPhone

If you have the songs you want to move in the iTunes Store, you can extract them via iDevice directly.

  1. Click on the iTunes Store on your iPhone.
  2. Tap “Purchased” at the foot of the window.
  3. Tap on “Music” and select “Not on This iPhone”.
  4. Select a genre from which you want to import songs.
  5. Then you will access a collection of songs. Sort the listed songs by time, name and artist title.
  6. Spot the songs you want to transfer and hit the download arrow adjacent to the file. Select “Download All” to offload all the media files to your iPhone.

Harvest Music from iCloud to iPhones via iTunes

With iTunes, getting music from iCloud to iPhone is a breeze. First, download the songs from iCloud to iTunes on your PC and then sync the files from iTunes to iPhone.

  1. Launch iTunes and select iTunes Store. Log in the account you purchased the songs from.
  2. Tap “Purchased” and select “Music”.
  3. Tap “Not in My Library” on the top right of the window.
  4. Highlight the songs you wish to transfer and hit the download arrow near each file. Select “Download All” for batch transfer in a click.
  5. Connect your iPhone and hit the Device tab.
  6. Select “Music” in the “Settings” area. Check Sync Music box and select the source of the songs you want to import to your iDevice.
  7. Click on Apply to swap the files from iCloud to iPhone.

Move songs in the iTunes Store


Conclusion

In all, you can easily resolve to solve how to transfer music from iTunes to iPhone. iPhone provides portable benefits as a music player but remains susceptible to data loss, theft, space constraints, and malfunction. Moving files across your devices to back up your wealth of music should no longer beat your brains. Utilize handy tools such as FoneDog iPhone Transfer to kill two birds with one stone. It makes it straightforward, fast and efficient to transfer files without the strains of iTunes and iCloud syncing. FoneDog is readily available while it comes free of charge with all bells and whistles to make things easy in your digital environment.

There you’ve it! Subtle methods you’d need to transfer music from iTunes to iPhone in the shortest space of time.

Leave a Comment

Comment

Comment ()
author image

Vernon Roderick

Technical Expertise for PC/Website Optimization

One of my passion is to develop software of my own

I write articles to share knowledge about IT technology and some experience in developing my own software, and developing my own software is one of my passions for work.

Phone Transfer logo

Phone Transfer

Transfer data from iPhone, Android, iOS, and Computer to Anywhere without any loss with FoneDog Phone Transfer. Such as photo, messages, contacts, music, etc.

Free Download

How Do You Like This Article?

Check icon/ Check icon

INTERESTINGDULL

Check icon/ Check icon

SIMPLEDIFFICULT

Thank you! Here' re your choices:

Rate This Article: Excellent

Rating: 4.8 / 5 (based on 72 ratings)

Phone Transfer logo

Phone Transfer

Transfer data from iPhone, Android, iOS, and Computer to Anywhere without any loss with FoneDog Phone Transfer. Such as photo, messages, contacts, music, etc.

Free Download

FoneDog uses cookies to ensure you get the best experience on our website. Click here to learn more.