FoneDog Screen Recorder
FoneDog Screen Recorder
Special Offer
Special Offer


By Vernon Roderick, Last updated: April 20, 2021
Finding a good ringtone can be equivalent to looking for a needle in a haystack. It is simply very difficult to find one that can actually help you. Most ringtones are either inaudible or just plain boring.
This article will teach you how to transfer iPhone ringtones to iTunes. That way, you won’t have to look for ringtones when you switch devices. This article is about transferring ringtones to iTunes, there is another article about transferring ringtones to iPhone without using iTunes.
Part 1. Transfer iPhone Ringtones To iTunes : Buy The Ringtones From The StorePart 2. Transfer iPhone Ringtones To iTunes : Use Wired TransferPart 3. Transfer iPhone Ringtones To iTunes : Create And Email The Ringtone Via App StorePart 4. Transfer iPhone Ringtones To iTunes : Create A Ringtone Via An AppPart 5. Transfer iPhone Ringtones To iTunes : Share The Ringtone Through AirDropPart 6. Alternative To Transfer iPhone Ringtones To iTunes
Your first option is to buy the ringtone from the store. Of course, this will require you to have money to pay for the ringtone. Given, it requires resources, but as far as I can tell, it’s the simplest and easiest way to obtain a “good” ringtone.
To buy a ringtone from the store, follow these steps:
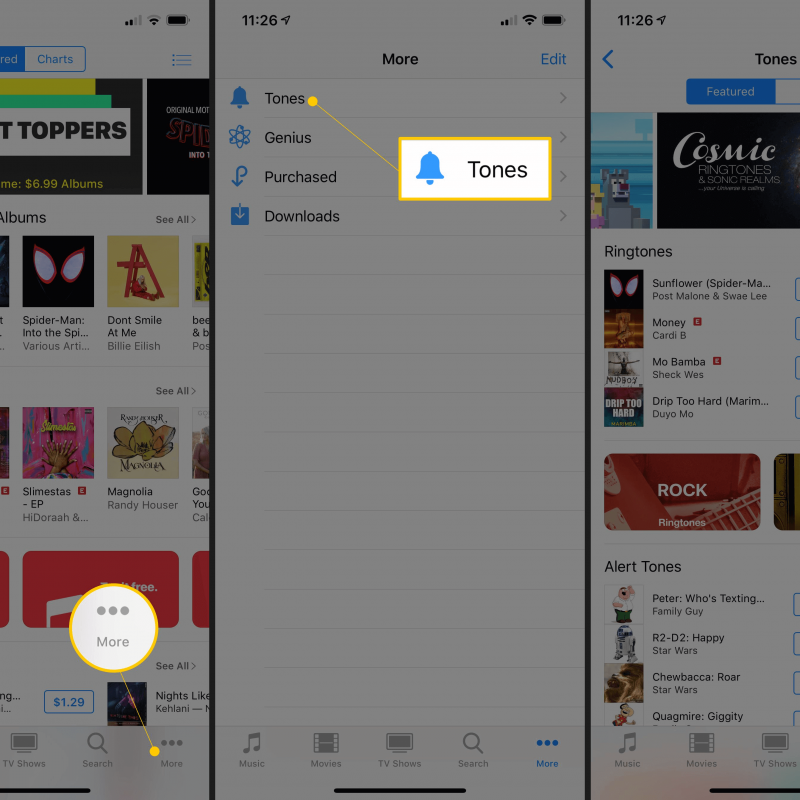
Once the purchase is done, it will automatically be downloaded on your iPhone. Now the tricky part is how you can transfer it to iTunes.
Fortunately, when you purchase anything using your Apple ID, you can easily transfer those purchases into iTunes. Follow these steps if you understand:
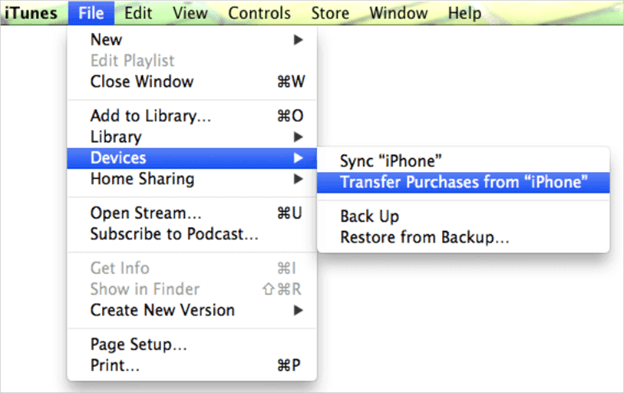
This will prompt iTunes to transfer all the purchases that you’ve made on your iPhone to the library. This includes the ringtone that you’ve just bought.
This will ultimately lead to you being able to transfer iPhone ringtones to iTunes. However, as you might’ve already realized, you need money for this.
Although you can download the ringtone into iTunes directly, it may not work all the time. Thus, there is also the option to download it on your iPhone, and then transfer it later. That will be the concept behind this method.
First, we will discuss the “download” part of the equation. Remember that this is also exclusive to purchased ringtones. Here are the steps you will need to follow:
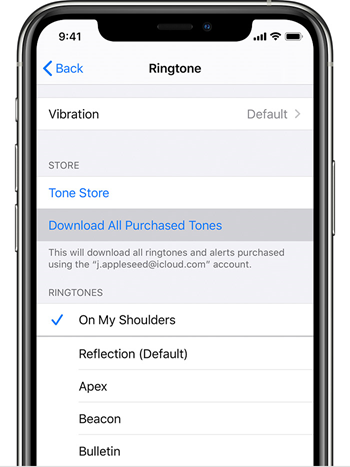
You have now downloaded the ringtone on your iPhone. so let’s proceed to how you can actually transfer iPhone ringtones.
Note: The default format of iPhone ringtones is .m4a or m4r, so you can locate them by searching with these extensions.
This is perhaps the most straightforward way to transfer iPhone ringtones to iTunes. However, there’s no complaining since it’s fairly effective.
It may not be known to many, but there is actually a way to transfer files from one place to another without connecting the two using a USB cable. That would be with the use of email communication.
However, in our case, if we’re hoping to transfer iPhone ringtones to iTunes thru email, we will have to create the ringtone in a specific way. Here are the steps that you will need to follow carefully:
Note: At this point, the ringtone will automatically be downloaded.
With this, you have successfully downloaded the ringtone file. However, the method does not end there. You will still need to transfer iPhone ringtones.
Note: Make sure the email address where you’re sending it to is an address that you can use on your computer.
You may be thinking about it already, but this method is obviously the most complicated. There are tons of steps to follow as well as the need to use the App Store.
However, it’s very rewarding since you can even create a custom ringtone with this method. Speaking of which, our next entry also allows you to create custom ringtones.
Believe it or not, there are actually apps that were built for the sole purpose of creating ringtones. However, they usually don’t have a function that allows you to transfer them to iTunes.
Fortunately, there’s a fix for that. Since there are only a few reliable ringtone apps, I suggest sticking to these three chosen ones if you’re trying to transfer iPhone ringtones to iTunes:


Since they have their own set of procedures, we won’t be going into the steps for creating ringtones. Nevertheless, once you create the ringtone, there are some things that you have to take note of.
First, a custom ringtone usually has a different format than usual. Thus, it is important to convert it. You may transfer the custom ringtone in any way you like. Once you’re done, follow these steps carefully:
This will convert the ringtone into a format that can be used by the system. This allows you to easily manage any ringtone that comes from the ringtone maker apps.
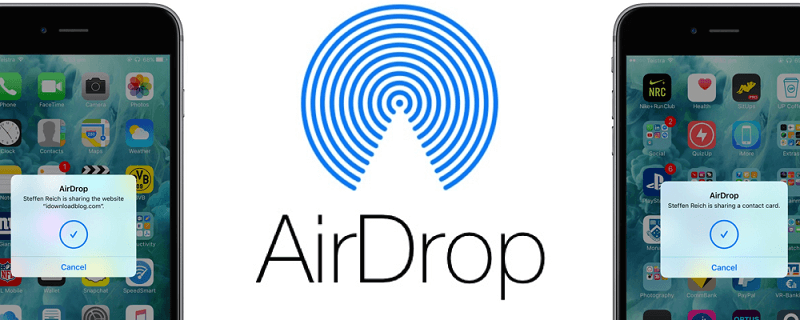
Our last entry involves using AirDrop to transfer iPhone ringtones to iTunes. This is rather very easy, but it has the disadvantage of requiring you to have an updated model of your iPhone. This is mainly because AirDrop is not available on some models.
Either way, once you have determined that you can use AirDrop, it will be as easy as pie. Follow these steps if you are ready:
If you truly want to be successful trying to transfer iPhone ringtones, it’s crucial to have a specialized tool at your disposal. And that is why I recommend using FoneDog Phone Transfer.
Phone Transfer
Transfer files among iOS, Android and Windows PC.
Transfer and backup text messages, contacts, photos, video, music on computer easily.
Fully compatible with the latest iOS and Android.
Free Download

FoneDog Phone Transfer is a tool that specializes in transferring files. This includes the transfer of photos, videos, and most importantly transfer music. Additionally, it supports the latest versions of iOS, Mac, and Windows PC. As such, you can consider it as the best tool for the job.
People Also ReadGuide On How To Transfer Audios From iPhone To Android PhoneWhat To Do When You Can't Drag Music To iPhone
There’s no shame in being picky with ringtones. After all, it’s up to these pieces of audio file whether you will be able to do what you were meant to do. Be it for work, studies, and more, ringtones are crucial parts of one’s lifestyle.
While finding a good ringtone is difficult, transferring them doesn’t have to be. This article should be able to help you learn how to transfer iPhone ringtones to iTunes. That way, you can always use the ringtone that you’ve been using up until now.
Leave a Comment
Comment

Technical Expertise for PC/Website Optimization
One of my passion is to develop software of my own
I write articles to share knowledge about IT technology and some experience in developing my own software, and developing my own software is one of my passions for work.
Phone Transfer
Transfer data from iPhone, Android, iOS, and Computer to Anywhere without any loss with FoneDog Phone Transfer. Such as photo, messages, contacts, music, etc.
Free DownloadHot Articles
 /
/
INTERESTINGDULL
/
SIMPLEDIFFICULT
Thank you! Here' re your choices:
Excellent
Rating: 4.6 / 5 (based on 86 ratings)
