FoneDog Screen Recorder
FoneDog Screen Recorder
Special Offer
Special Offer


By Adela D. Louie, Last updated: July 16, 2020
Do you have some important notes saved on your iPhone? Do you want to know how to export them to another device? If yes, then this is definitely for you. Because we are going to show you in this post how to export notes from iPhone.
Because of our high technology when it comes to mobile devices, smartphones clearly had already made some changes in the way we live. This is also the reason why we no longer need to use our computers every now and then just to manage our files or appointments. By using smartphones, we can now do our tasks every day such as reminding us to attend important meetings, occasions, or calling an important person.
And with that, what most of us use in order to keep our tasks organized is by using the Notes application on your iPhone. And one of the best things about using notes on your iPhone is that you can have it transferred to your computer easily.
And currently, there are a lot of ways on how you can export notes from iPhone to your computer or to your Android device as well. And if you want to know how you can do this, then go ahead and follow the simple methods that we are going to show you below.
Part 1. How to Export Notes from iPhone to Computer EasilyPart 2. How to Export Notes from iPhone to AndroidPart 3. Conclusion
As we have mentioned to you earlier, there are different ways on how to export notes from iPhone to your computer. And with that being said, here are some of the methods that you can apply in order for you to do so.
One of the best ways for you to export or transfer your notes from your iPhone is by using the FoneDog iOS Data Backup and Restore. This may sound a bit odd but it is true. By using this program, you will be able to transfer your note or any other data from your iPhone device to your computer instantly and easily. And, at the same time, you can also have them transferred over to another iPhone device by restoring them using the same program.
iOS Data Backup and Restore
One click to backup the whole iOS device to your computer.
Allow to preview and restore any item from the backup to a device.
Export what you want from the backup to your computer.
No data loss on devices during the restore.
iPhone Restore Won't Overwrite Your Data
Free Download
Free Download

The FoneDog iOS Data Backup and Restore do not only export your notes from your iPhone to your computer. But, it can also work on some other data on your iPhone device such as your photos, videos, contacts, text messages, WhatsApp, call logs, and more. This can happen by simply backing up your notes and storing them on your computer. And one of the reasons why you should opt-in using this tool is because you can keep your data safe even if something happens to your iPhone device.
The FoneDog iOS Data Backup and Restore is a user-friendly tool and very safe to use as well. And to show you how you to export notes from iPhone to a computer using the FoneDog iOS Data Backup and Restore, here is an easy guide that you can follow.
Backup Notes from iPhone to Computer
Once that you have completely installed the FoneDog iOS Toolkit on your computer, go ahead and launch it to start using it. And then connect your iPhone to a computer using your USB cable and wait for the program to detect your iPhone device. And then, from the main page of the FoneDog Toolkit, go ahead and choose iOS Data Backup and Restore.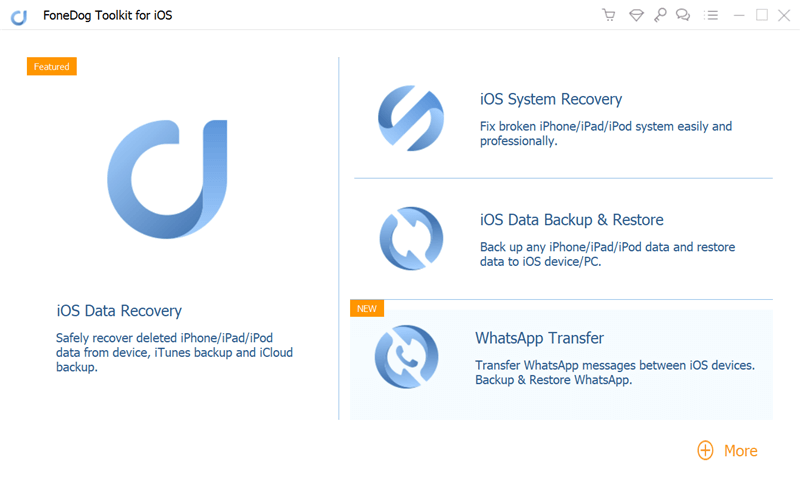
Then, on the next page of the program, go ahead and choose the iOS Data Backup option. Then the FoneDog iOS Data Backup and Restore will show you two types on how you can backup your notes. One is through Standard Backup and the other one is the Encrypted Backup. If you are going to choose the Encrypted Backup, then you will be required to input a password for your backup file. This way, you can have your backup file protected. And once that you are done choosing the backup mode, go ahead and click on the Start button.
After that, the FoneDog iOS Data Backup and Restore will then show you a list of data types that it supports to backup. You will be able to see there data types like Messages, Contacts, Call History, Voicemail, Photos, Videos, and more. So, from that list, go ahead and choose “Notes & Attachments”. And after that, go ahead and click on the Next button below your screen.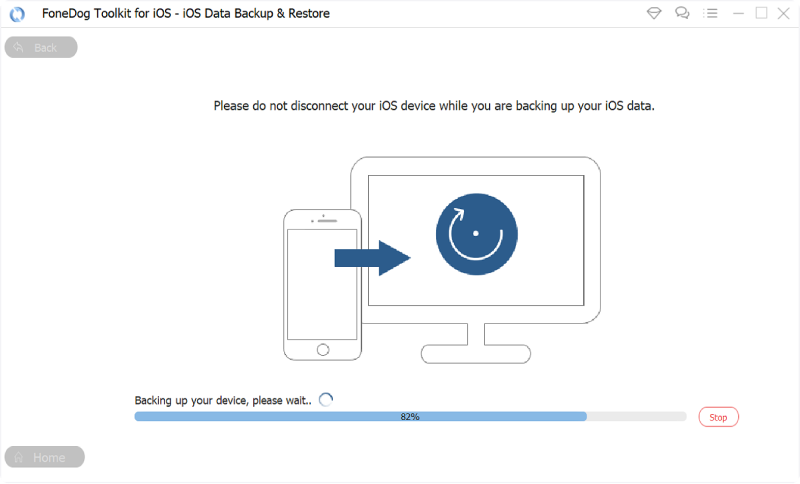
Once that you click on the Next button, the FoneDog iOS Data Backup and Restore will then begin to backup your notes from your iPhone to your computer. And once that the process is complete, the FoneDog iOS Data Backup and Restore will show you the name of your backup file and as well as its size.
Restore Notes from Backup File to Computer
On your computer, go ahead and launch the FoneDog iOS Data Backup and Restore and then connect your iPhone to your computer. Then after that, go ahead and choose the option iOS Data Restore.
After that, the program will then show you a list of the backup file that you have on your computer. So, from that list, go ahead and choose your most recent backup. You can base it according to the date and time the backup file was made. And after choosing the backup file, go ahead and click on the View Now button right below your screen.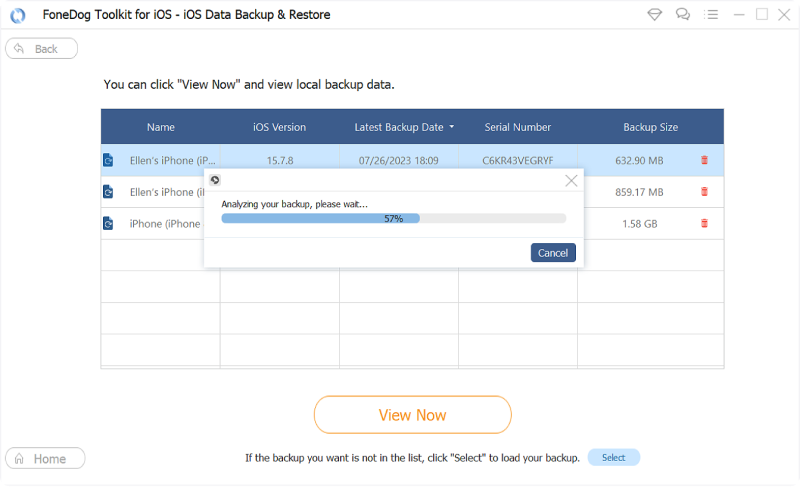
Once that you click on the View Now button, the FoneDog iOS Data Backup and Restore will then start to scan the backup file that you choose earlier. And from there, all you need to do is to wait for the scanning process to complete.

After the scanning process, the program will then show you a list of data types that the backup file contains. So, from there, all you need to do is to select on Notes, and all the items that it contains will appear on the right side of your screen.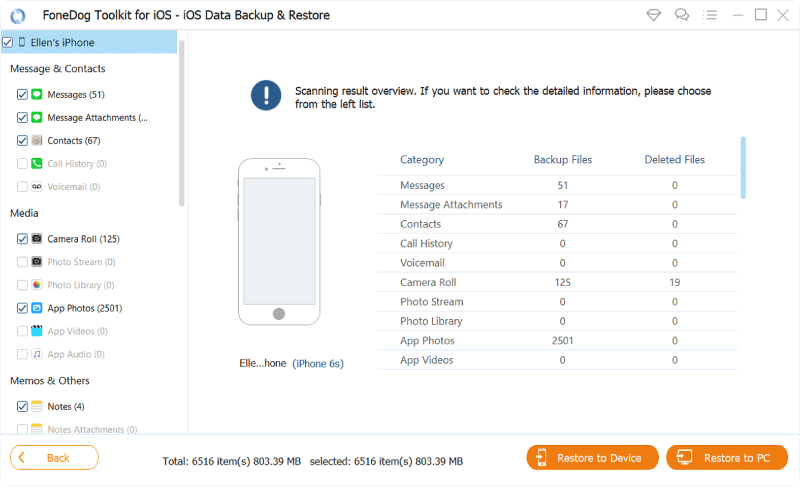
Then, once that you are done choosing all of the notes that you want to export from your iPhone device, go ahead and click on the Restore to PC button located at the lower-right corner of your screen. Then the process of exporting your notes from your iPhone to your computer will start so just go ahead and wait for it to complete.
iOS Data Backup and Restore
One click to backup the whole iOS device to your computer.
Allow to preview and restore any item from the backup to a device.
Export what you want from the backup to your computer.
No data loss on devices during the restore.
iPhone Restore Won't Overwrite Your Data
Free Download
Free Download
iCloud is known to be one of the safest ways for you to save your notes from your iPhone device. And this can work once that you have turned on notes in your iCloud. And with that, here are the steps that you need to follow.
Another way on how to export notes from iPhone to a computer is by using your iTunes program. However, all of your notes can only be stored on your Outlook on your computer. And to know how you can do this, go ahead and follow the steps below.
You can also have your notes exported from your iPhone device to your Android device if you wanted to do so. And with that, here are different methods on how you can do this process.
In case you do not have any Gmail account that you can use, then you can go ahead and make use of your Outlook account. However, if you have tons of notes that you want to export from your iPhone device this is not your option because you will be emailing them one by one to your email account. And with that, here are the steps that need to be done.

How do I export multiple notes from iPhone? There are a lot of Android users who tend to use their Google account for them to sync with their devices. And with that, you can also do the same thing with your iPhone device. So this means that you can export your notes from your iPhone device to your Android with this method. Here is what you need to do.
NOTE: You can do this method if your iPhone device is currently running on an iOS 4 or a higher version.
After you have done with all of the steps above, your notes should be transferred over to your Gmail account. So, with that, you can now go ahead and use the same Gmail account that you use on your iPhone and set it up on your Android phone. And from there, all of your notes from your iPhone device will also show up on your Android device.
As you can, there are a lot of ways on how to export notes from iPhone to different devices such as to your computer or to an Android device. And that is what we have gathered for you above. You can now just choose which methods you are going to use depending on the device where you want to export your notes from your iPhone.
Leave a Comment
Comment

Tech Website Writing /Content Optimization
Singing, smiling, surprising every day!
So as a technical writer, it is my duty to gather effective and reliable solutions to answer questions on how to deal with the issues they are having with their devices.
iOS Data Backup & Restore
Back up your data to PC and selectively restore iOS data from backups.
Free Download Free DownloadHot Articles
 /
/
INTERESTINGDULL
/
SIMPLEDIFFICULT
Thank you! Here' re your choices:
Excellent
Rating: 4.7 / 5 (based on 63 ratings)
