FoneDog Screen Recorder
FoneDog Screen Recorder
Special Offer
Special Offer


By Vernon Roderick, Last updated: September 4, 2019
When the inevitable comes and you decide to get yourself a new iPhone to replace your old one, the first you’ll probably think of is how to move your data. In short, you’ll think of ways to transfer iPhone to iPhone without leaving behind any important data. While there are a number of ways that this can be done, you simply can’t rely on a few ways. After all, most of the time you’ll be finding yourself getting stuck due to unexpected issues with your iPhone. So what you’ll have to do first is make yourself aware of as many ways as possible, but still making sure that all of them are effective so you won’t be wasting time learning about them.
So today, we’re going to talk about what you’ll have to do to transfer iPhone to iPhone, from setting up both phones to completely transferring 100% of your data from one phone to another. However, before anything else, there are some things you need to understand. These are mainly the pre-requisites to transfer iPhone to iPhone so you’ll need to do them regardless of how you’re going to approach the transfer of data.
Before You Transfer iPhone to iPhoneHow to Transfer iPhone to iPhone Without iCloud or iTunesTransfer iPhone to iPhone through iCloudTransfer iPhone to iPhone through iTunesTransfer iPhone to iPhone through New Migration OptionFinal Thoughts on How to Transfer iPhone to iPhone
People Also ReadHow To Transfer From Android To iPhone In 2019?How to Transfer Contacts From Old Phone to New Phone?
Remember that the steps that we’ll be talking about before you transfer iPhone to iPhone should be done before doing anything else. Without further ado, here’s a look at the things you need to take care of first:
If you’ve done these things already, then you no longer have anything to worry about other than the actual process to transfer iPhone to iPhone. Now, let’s proceed to the first option you have.
FoneDog Phone Transfer is a new product by FoneDog that allows for Apple users to transfer iPhone to iPhone without doing much. Plus, there are also not that many pre-requisites for you to pull it off. At most, you’ll just be needing the following things:
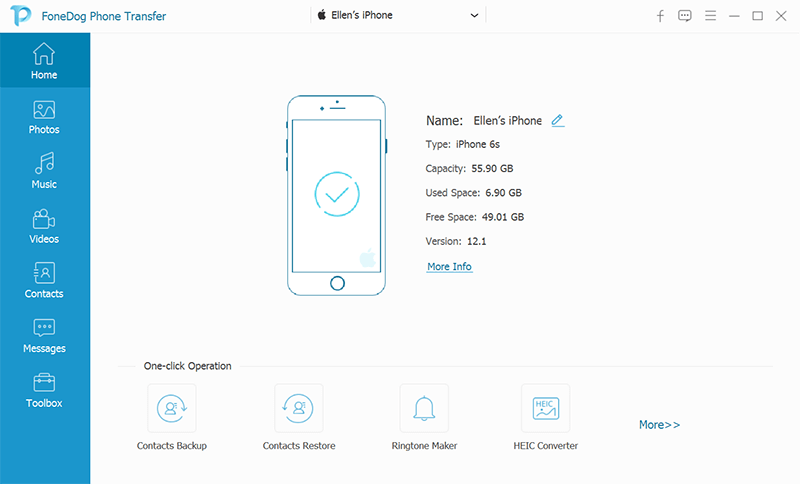
In addition to the very few requirements to run the program and start to transfer iPhone to iPhone, the software is also capable of doing things that are not possible with your iPhones such as:
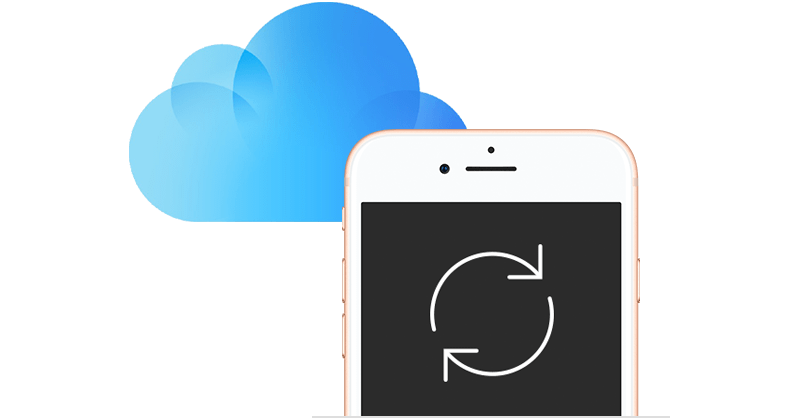
The first option involves the use of iCloud to transfer iPhone to iPhone. iCloud is already known to be a useful way for transferring data from one place to another, and our case today is not an exception.
The process is not that complicated. You just have to follow simple steps. Take note, however, that it’s not going to happen immediately once you start doing it. You’ll have to wait for it.
Here are the instructions that will guide you through each step in using iCloud to transfer iPhone to iPhone.
Wait for a while so that the backup process can be finished. Making a backup of your old iPhone is essential before you can transfer iPhone to iPhone. This is to ensure that you won’t lose important data in case you fail the first time.
Now that you’ve made a backup of your old iPhone, you can ignore it for a while and focus on your new iPhone. This time, there are another set of steps you’ll need to take:
At this point, your new iPhone should already be processing the backup file and you’ll be able to transfer iPhone to iPhone without leaving important data behind.
Another option you have that is awfully similar to iCloud is iTunes. They are both default apps for Apple devices so they are both legitimate ways to transfer iPhone to iPhone.
Since you already know how to transfer iPhone to iPhone using iCloud, this option will become easier for you to understand. So without making this any longer, here are the steps for you to transfer iPhone to iPhone through iTunes:
The backup file should already be processing. You just have to wait for it to finish and you will then be able to proceed to the next set of steps.
The transfer should already start after you enter the password. Make sure your new iPhone is plugged until the transfer gets completed. Remember that it will take a while, so don’t suddenly run out of patience.
Both of the iTunes and iCloud options that allows you to transfer iPhone to iPhone takes a while. So if you don’t like waiting too long, then we’ve got another option for you.
Not so long ago, Apple announced a new migration option made specifically for those who want to transfer their data from their old iPhone to their newly-bought ones.
While we won’t be going into detail about the announcement, we WILL talk about the steps to pull of this new migration option.
So basically, you have to have an iPhone device that has an operating of at least iOS 12.4. If not, then you can either stick to the two previous options or choose to use a third-party software, which we’ll talk about later.
However, it’s worth noting that there is a way to update your device to iOS 12.4 or later.
The process to update your device isn’t complicated. However, it will take long. So unless you already have an iPhone with iOS 12.4 or later, then it would be better to rely on the two previous options since both will take a while.
Before anything else, you should first make sure your device is compatible and able to update to iOS 12.4 After confirming its compatibility, follow these steps to update your device:
With your iPhones updated enough to use the migration tool, you should already have no worries when going through the Quick Start.
Quick Start is what Apple called iPhone’s new migration tool. It allows you to transfer iPhone to iPhone directly.
All you have to have is a stable internet connection or a cable, preferably a USB-C. With these pre-requisites taken care of, you’ll be able to pull it off by following these steps:
You will then be able to transfer iPhone to iPhone without a hitch. Just make sure the connection is stable throughout the process, whether it be through a USB-C or the Wi-Fi.
Sure, this is a great way to transfer iPhone to iPhone since it takes faster than the previous two options, you should have already realized by now that it still requires you to put a lot of effort.
So what if you don’t have time for it? That’s why in our last option, we’ll be talking about an independent third-party software where, after installation, you won’t be doing a lot of things just to transfer iPhone to iPhone .
There are many ways to transfer iPhone to iPhone. What you’ll need to worry about is just how effective each of those ways are. After all, you don’t want to be wasting time with something that you won’t actually benefit from.
As such, we demonstrated to you three of the ways you can transfer iPhone to iPhone with iPhone’s own system. However, that is not enough to have a satisfactory transfer of data. That’s why at the end, we talked about FoneDog Phone Transfer.
FoneDog Phone Transfer allows you to transfer data in an unbelievable rate while still keeping the files as it is. It also offers many features that are not available in your normal iPhones. So if you think you’re tired of the traditional method of transferring data, FoneDog Phone Transfer is definitely for you.
Leave a Comment
Comment

Technical Expertise for PC/Website Optimization
One of my passion is to develop software of my own
I write articles to share knowledge about IT technology and some experience in developing my own software, and developing my own software is one of my passions for work.
Phone Transfer
Transfer data from iPhone, Android, iOS, and Computer to Anywhere without any loss with FoneDog Phone Transfer. Such as photo, messages, contacts, music, etc.
Free DownloadHot Articles
 /
/
INTERESTINGDULL
/
SIMPLEDIFFICULT
Thank you! Here' re your choices:
Excellent
Rating: 4.5 / 5 (based on 79 ratings)
