FoneDog Screen Recorder
FoneDog Screen Recorder
Special Offer
Special Offer


By Nathan E. Malpass, Last updated: November 27, 2023
Portable devices like iPods continue to be a favored choice for enjoying our favorite tunes on the go. If you've spent years curating an enviable music collection in iTunes, the thought of transferring those melodious tracks to your iPod might seem a bit daunting. However, fear not! With the right knowledge and a few simple steps, you can seamlessly transfer iTunes music to iPod and relish your songs wherever life takes you.
In this guide, we'll walk you through the process of transferring your cherished iTunes music to your iPod. Whether you're using the classic iPod, the iPod Touch, or any other variation, the fundamental principles remain largely the same. We'll explore various methods that cater to different user preferences, from using iTunes itself to employing third-party software.
By the end of this article, you'll have all the insights you need to enjoy your beloved tracks on your iPod, reigniting that love for music all over again. So, let's dive into the step-by-step process and get your iPod grooving to the beats of your iTunes library!
Part #1: Methods to Transfer iTunes Music to iPod DevicesPart #2: The Best Tool to Transfer iTunes Music to iPod: FoneDog Phone TransferConclusion
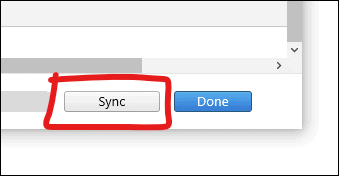
Ever wonder why won't songs sync to your iPod? Perhaps you just use the wrong method. Transferring your iTunes music to your iPod is made easy through the traditional method of syncing using iTunes itself. Follow these steps to transfer iTunes music to iPod with iTunes:
Pro Tips:
By following these simple steps, you can efficiently transfer your iTunes music to your iPod using the native syncing feature in iTunes. This method is ideal for users who want a straightforward and reliable way to enjoy their music on their iPod devices.
However, if you're looking for alternative methods or encounter any roadblocks, stay tuned for the upcoming sections of this guide where we explore additional techniques to accomplish the same task.
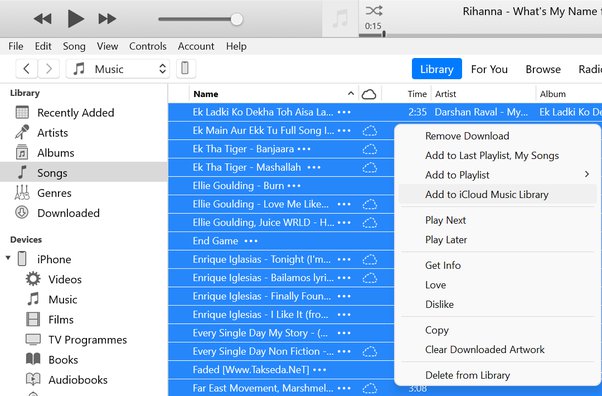
In an era where cloud services have revolutionized the way we access and manage our data, using iCloud to transfer iTunes music to your iPod provides a convenient and wireless alternative. Follow these steps to utilize iCloud storage services to transfer iTunes music to iPod:
Pro Tips:
By leveraging the power of iCloud, you can enjoy your iTunes music on your iPod without the need for a direct physical connection to your computer. This method is particularly useful for those who prefer wireless solutions and want to have their music library accessible across various Apple devices.
However, if you're not subscribed to Apple Music or iTunes Match, don't worry. Our guide will continue to explore more ways to transfer your iTunes music to your iPod, catering to different preferences and scenarios.
While traditional methods like syncing with iTunes or using iCloud offer effective ways to transfer iTunes music to your iPod, there's a third-party tool that simplifies the process and provides additional features. FoneDog Phone Transfer emerges as a versatile and iPhone 15-supported option for seamless music transfer.
Phone Transfer
Transfer files among iOS, Android and Windows PC.
Transfer and backup text messages, contacts, photos, video, music on computer easily.
Fully compatible with the latest iOS and Android.
Free Download

Here's how you can use this top iPod tracks transfer tool to transfer iTunes music to iPod:
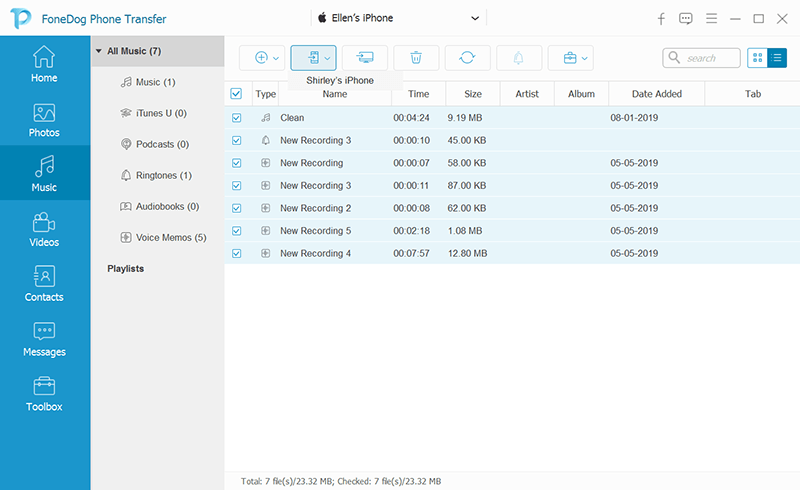
FoneDog Phone Transfer offers a reliable and efficient way to transfer iTunes music to your iPod, with the added advantage of avoiding iTunes' potential limitations or complexities. Whether you're transitioning to a new iPod or simply looking for a seamless transfer experience, FoneDog Phone Transfer is a valuable tool in your arsenal.
People Also ReadMastering the Art on How to Transfer iPod Music to iPod2023 Guide: How to Delete Podcasts from iPod?
Doesn't need to be a complicated task to transfer iTunes music to iPod. In this comprehensive guide, we've explored various methods, each catering to different preferences and scenarios. Each method has its merits, and the choice ultimately depends on your preferences and circumstances. Whether you're a fan of iTunes' familiarity, a cloud aficionado, or seeking a streamlined third-party solution, there's a method that suits your needs.
As technology continues to evolve, remember that these methods might receive updates or enhancements. Always ensure you're using the latest software versions and follow any instructions provided by the respective platforms.
In conclusion, your iTunes music collection can seamlessly find its way to your iPod, enhancing your musical journey wherever you go. Whichever method you choose, the joy of music remains constant, and with this guide, you're well-equipped to keep the melodies alive on your iPod. So, pick the method that resonates with you and let the music play on!
Leave a Comment
Comment

iPhone/Android Devices’ Maintenance Expert
Staying home, listening to music, writing tech articles
Many people asked me to repair their mobile phones so I have a lot of experience in mobile phone repair, and I know a lot about Android or Apple phones.
Phone Transfer
Transfer data from iPhone, Android, iOS, and Computer to Anywhere without any loss with FoneDog Phone Transfer. Such as photo, messages, contacts, music, etc.
Free DownloadHot Articles
 /
/
INTERESTINGDULL
/
SIMPLEDIFFICULT
Thank you! Here' re your choices:
Excellent
Rating: 4.8 / 5 (based on 108 ratings)
